General Tips, FAQ, etc.
https://inselife.com/
Installation and Usage
bit.ly/inseyoutube-n5
Please do not hesitate to contact us whenever
you want, we are always more than happy to
help you!
N5/N5S/N500
N550/N560/N570

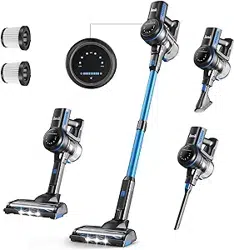
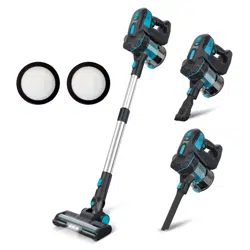
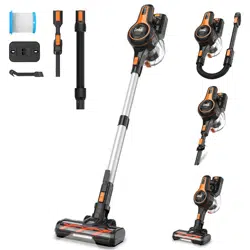
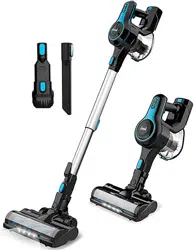
Assembly and Combinations
Product Parts List and Schematic
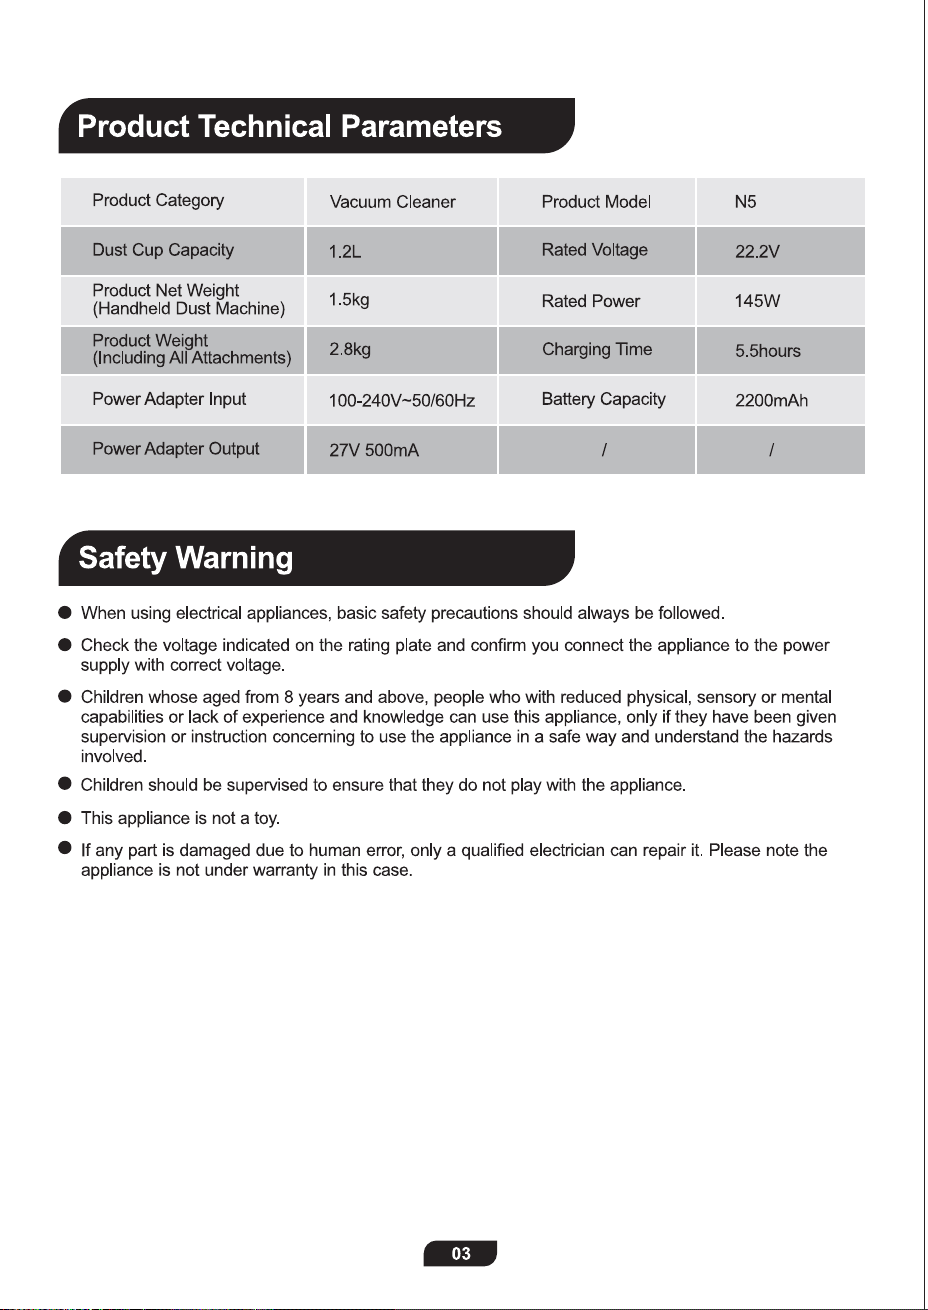
Product Technical Parameters
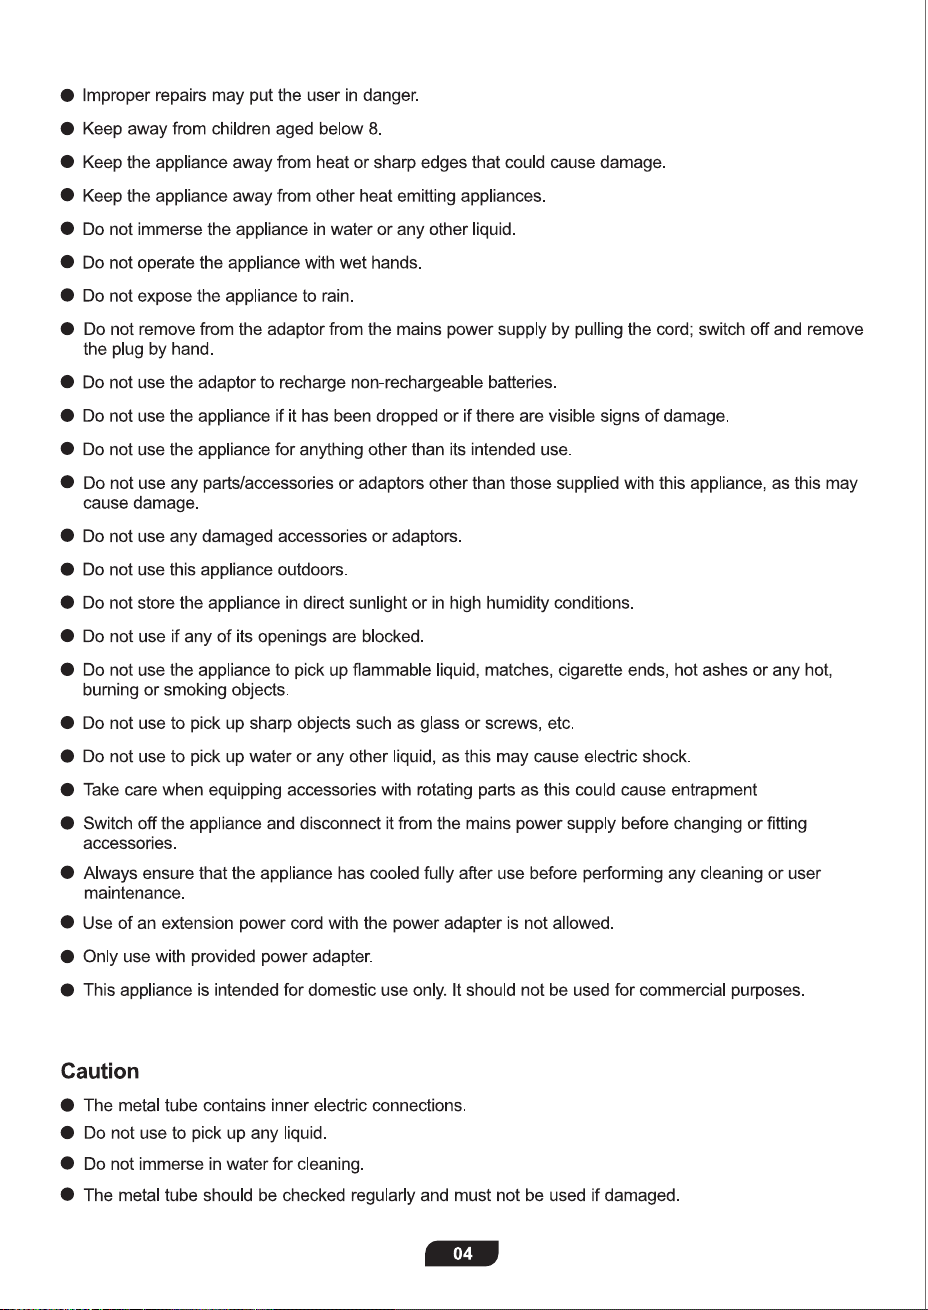
Safety Warning
Charge
Storage
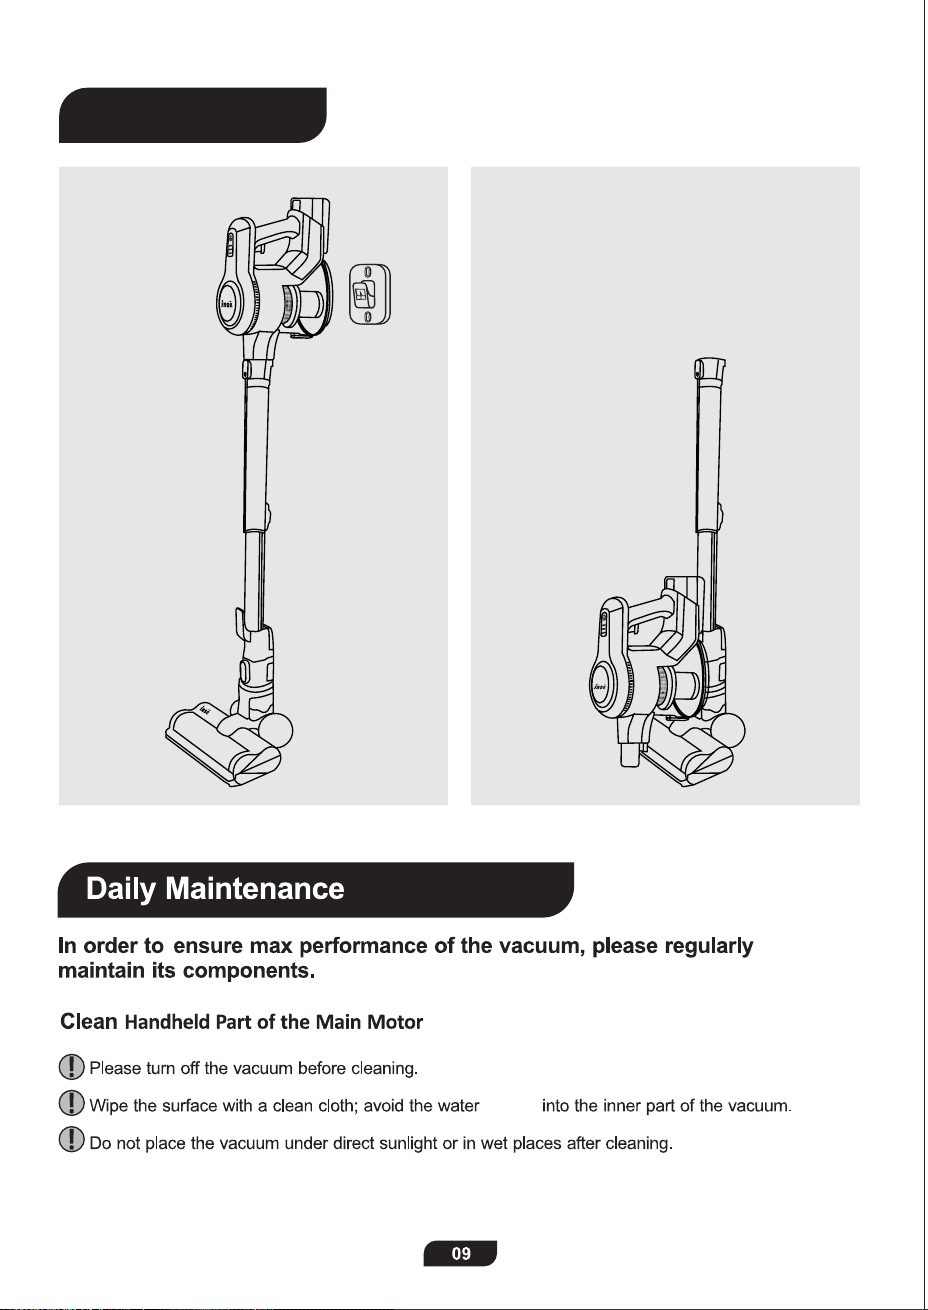
Daily Maintenance
Troubleshooting
Charge Method
Battery Indicators
Clean Handheld Part of the Main Motor
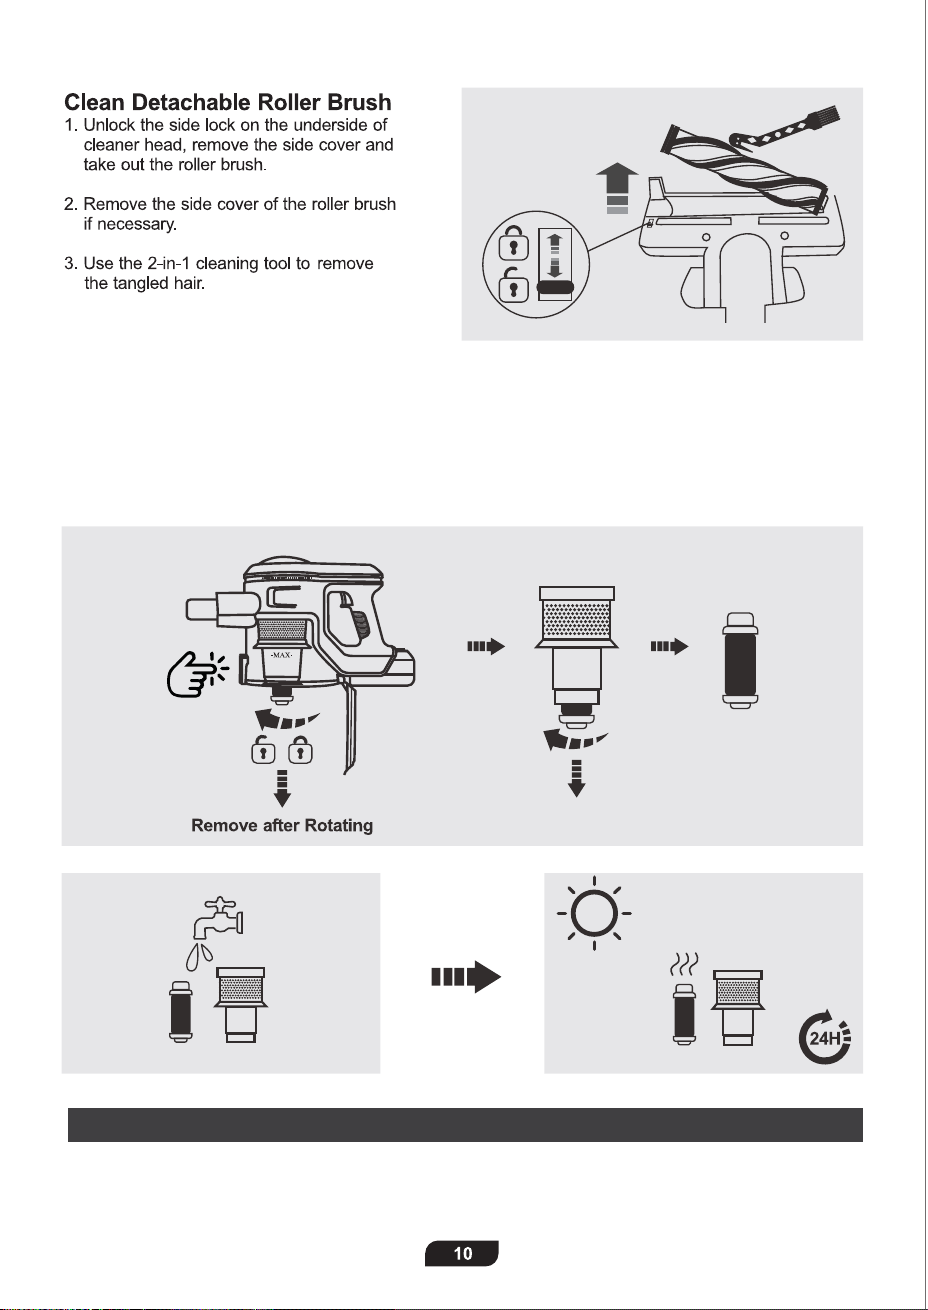
Clean Detachable Roller Brush
Clean Dust Cup & Strainer & Filter
Battery Safety
Warranty
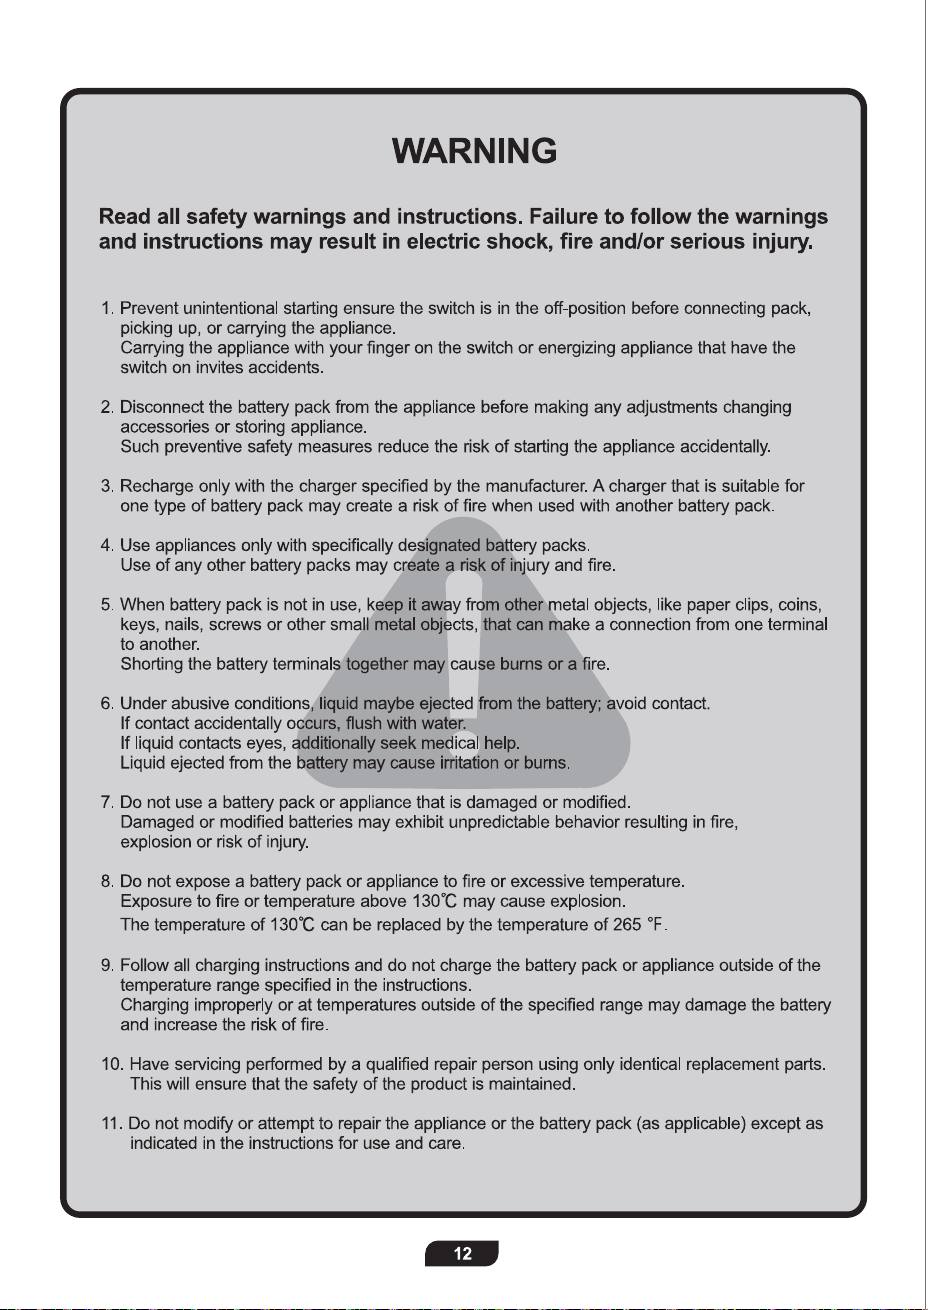
Warning
Ready to Use
01
03
03
05
06
07
09
09
11
11
12
07
07
08
09
10
10

Assembly and Combinations
Product Parts List and Schematic
Product Technical Parameters
Safety Warning
Charge
Storage
Daily Maintenance
Troubleshooting
Charge Method
Battery Indicators
Clean Handheld Part of the Main Motor
Clean Detachable Roller Brush
Clean Dust Cup & Strainer & Filter
Battery Safety
Warranty
Warning
Ready to Use
01
03
03
05
06
07
09
09
11
11
12
07
07
08
09
10
10
INSE Products are eco-friendly. When the machine is worn out or no longer
in use, please contact your local authority for recycling instructions.
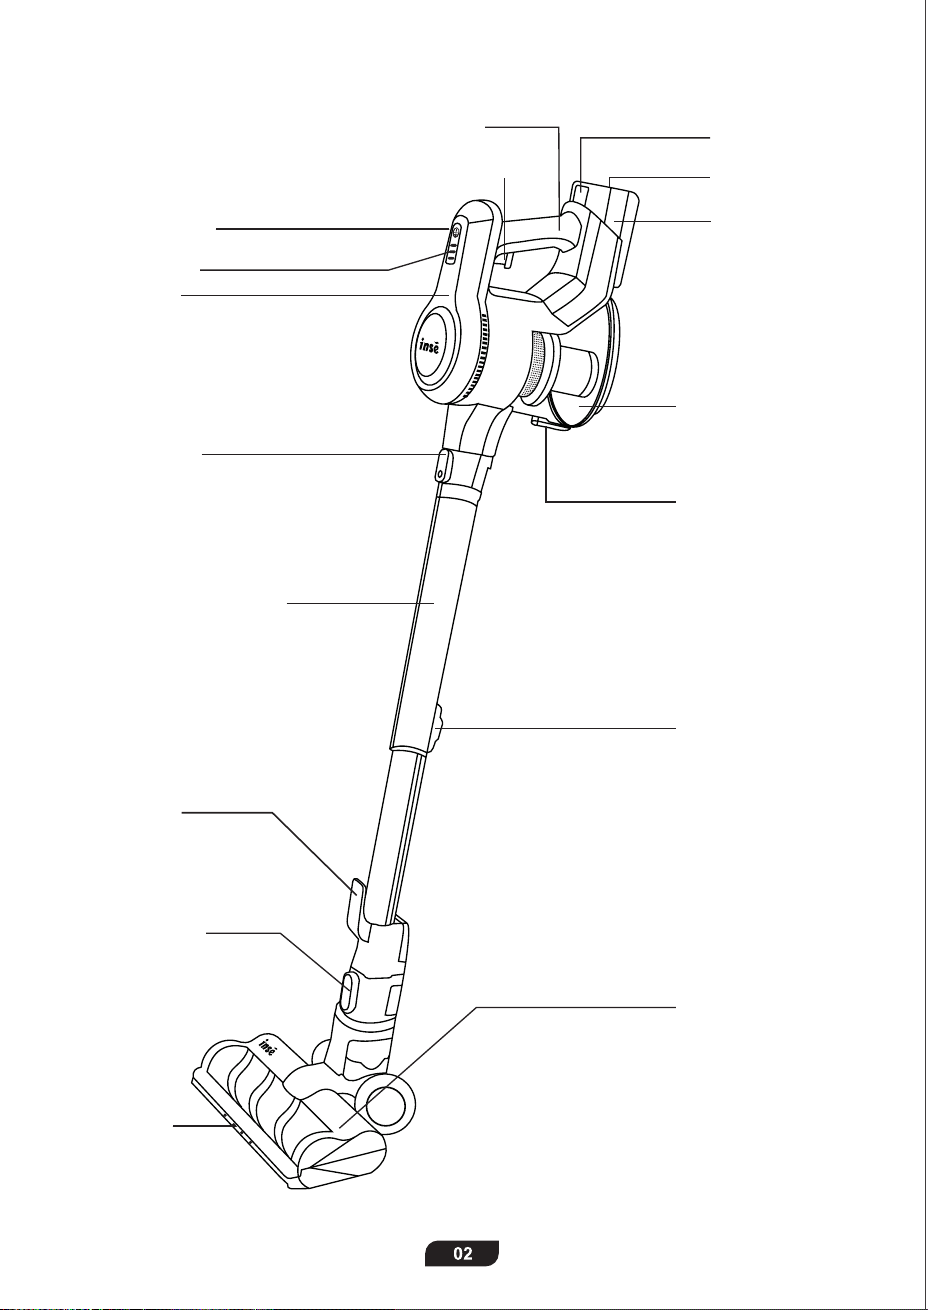
Handle
Power Switch
Main Motor
Metal Tube
Release Button
Dust Cup
Release Button
Retractable button
Retractable Metal Tube
Motorized Cleaner
Head
LED Lights
Cleaner Head
Release Button
Hook for
Main Motor
Input Port
Battery Pack
Release Button
Battery Pack
LED Indicator
+/- Power Mode
Dust Cup
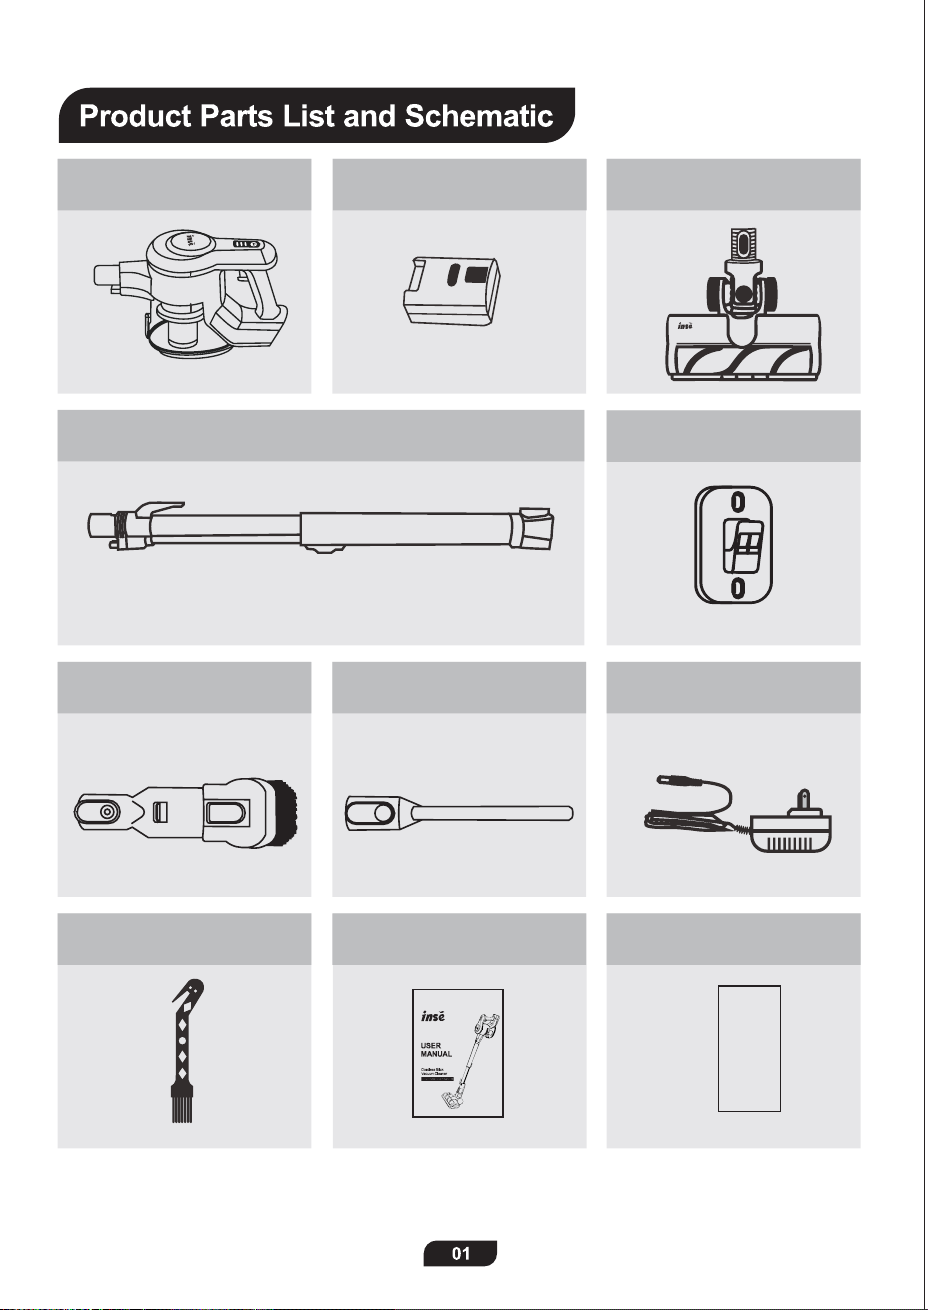
Main Motor X1 Battery Pack X1
Wall Mount X1
Power Adapter X1Long Crevice X12 in 1 Brush X1
User Manual X1 Quick Start Guide X1
Quick Start
Guide
2 in 1 Cleaning Tool X1
Retractable Metal Tube X1
Motorized Cleaner Head X1
(with Roller Brush)
INSE Products are eco-friendly. When the machine is worn out or no longer
in use, please contact your local authority for recycling instructions.
Handle
Power Switch
Main Motor
Metal Tube
Release Button
Dust Cup
Release Button
Retractable button
Retractable Metal Tube
Motorized Cleaner
Head
LED Lights
Cleaner Head
Release Button
Hook for
Main Motor
Input Port
Battery Pack
Release Button
Battery Pack
LED Indicator
+/- Power Mode
Dust Cup
Main Motor X1 Battery Pack X1
Wall Mount X1
Power Adapter X1Long Crevice X12 in 1 Brush X1
User Manual X1 Quick Start Guide X1
Quick Start
Guide
2 in 1 Cleaning Tool X1
Retractable Metal Tube X1
Motorized Cleaner Head X1
(with Roller Brush)
Assembly and Combinations
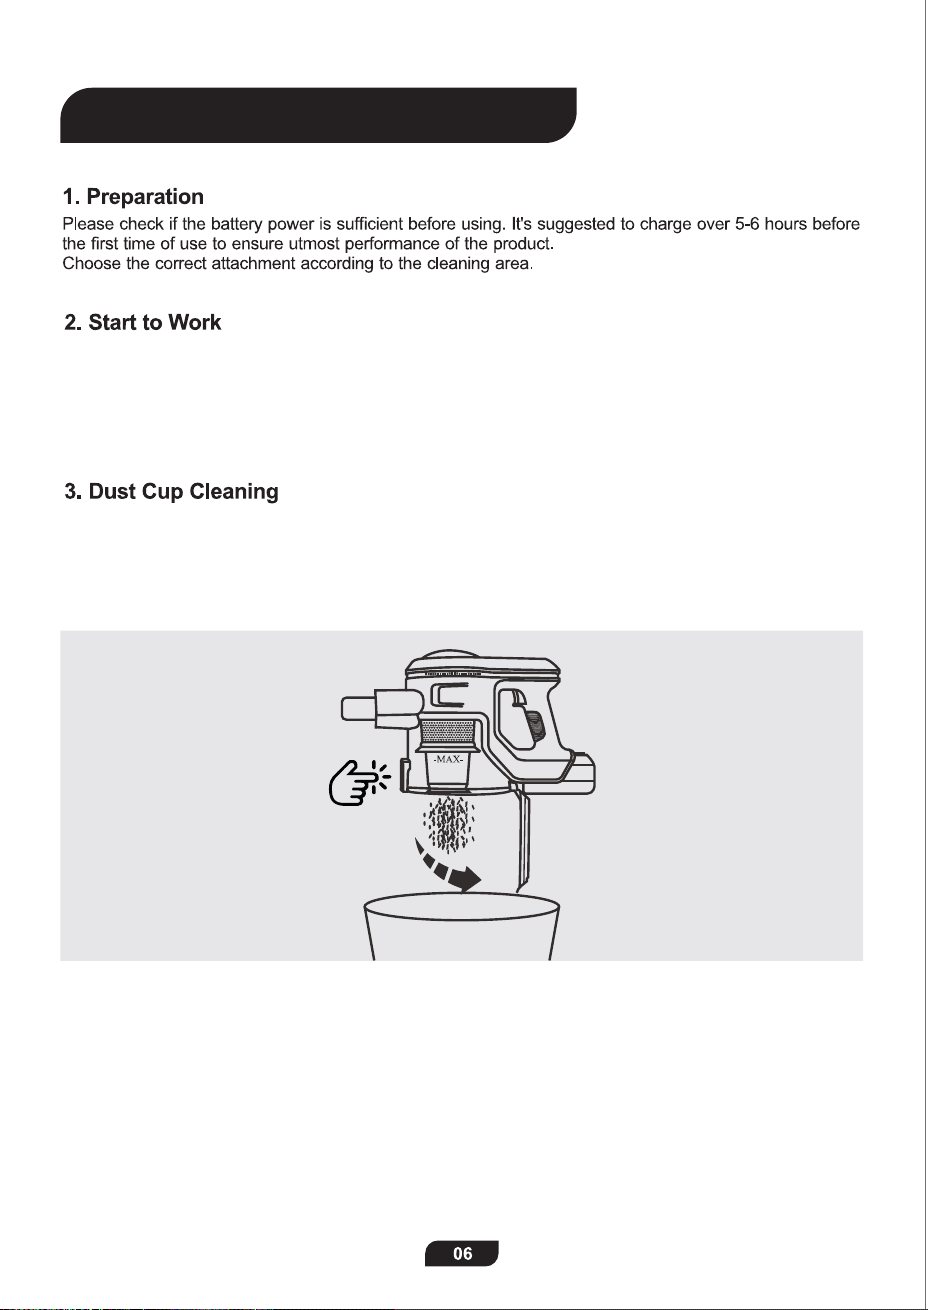
First-press the Power Switch to turn on the vacuum; second-press it to change to high-suction mode;
third-press it to turn it off.
Or you can press the +/- Button to switch between high-suction mode and standard-suction mode.
Please clean the dust cup in time when the -MAX- sign is approached.
Turn off the machine and then press the dust cup open button to empty it.
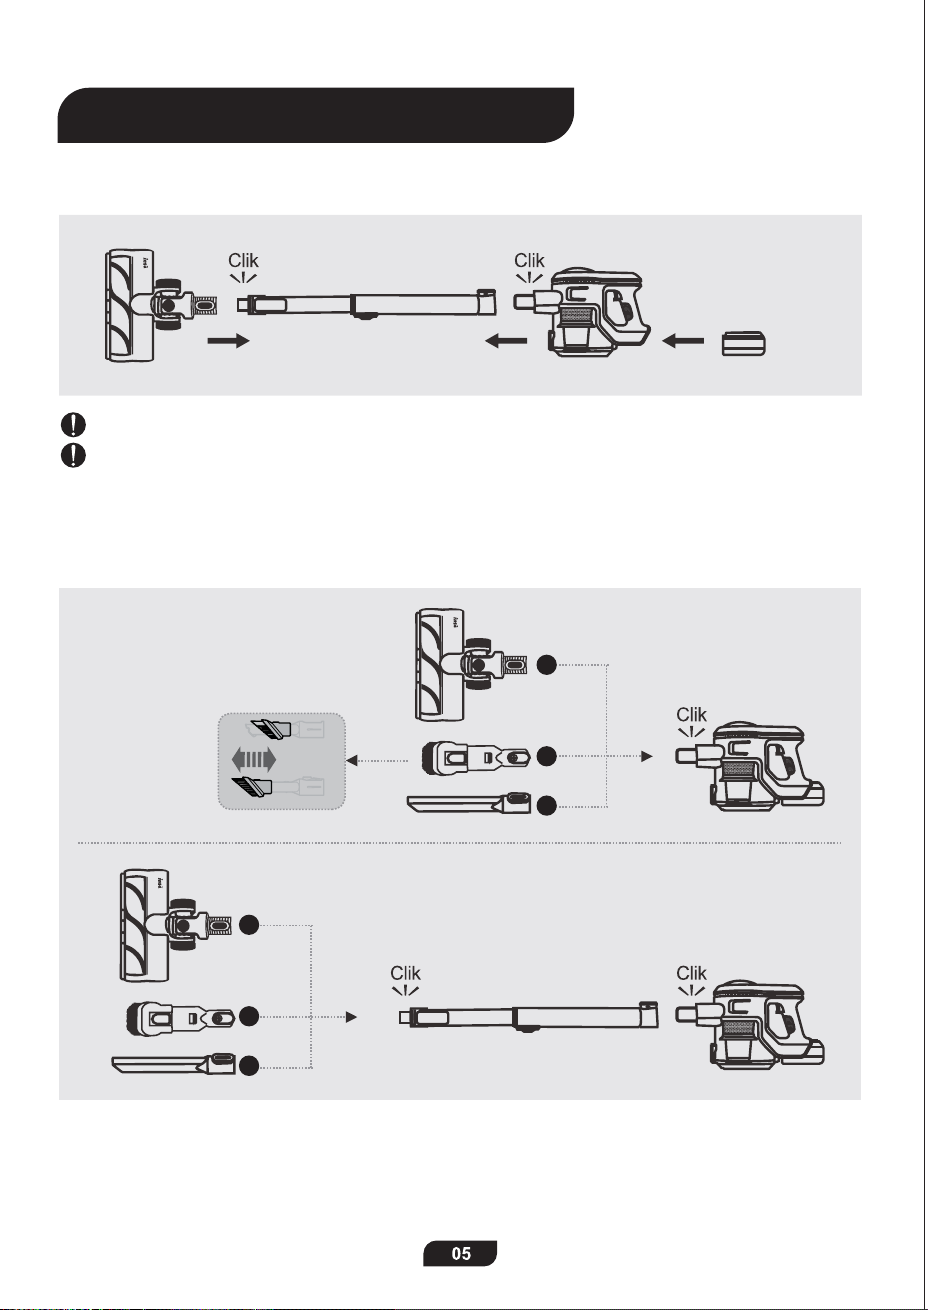
To assemble the powerful cordless stick vacuum cleaner,
please follow the instructions as shown.
Ensure a tight connection of the whole machine by a clear sound of click in each step.
If you want to disassemble the vacuum, just press the release button on each part.
If you want to cinnect it with other attachments and work in different situations,
please follow the COMBINATION instructions below.
1
2
3
4
5
6
Ready to Use
Assembly and Combinations
First-press the Power Switch to turn on the vacuum; second-press it to change to high-suction mode;
third-press it to turn it off.
Or you can press the +/- Button to switch between high-suction mode and standard-suction mode.
Please clean the dust cup in time when the -MAX- sign is approached.
Turn off the machine and then press the dust cup open button to empty it.
To assemble the powerful cordless stick vacuum cleaner,
please follow the instructions as shown.
Ensure a tight connection of the whole machine by a clear sound of click in each step.
If you want to disassemble the vacuum, just press the release button on each part.
If you want to cinnect it with other attachments and work in different situations,
please follow the COMBINATION instructions below.
1
2
3
4
5
6
Ready to Use

Charge

Charge
getting
Clean Dust Cup & Strainer & Filter
* Clean the dust cup when -MAX- sign is approached.
* Clean the strainer when it is dusty.
* Clean the filter regularly, and replace it every 3 months as recommended.
Note: Do not re-assembly the strainer and filter until they are completely dry.
Method 1 Method 2
Storage

NOTE:
THIS WARRANTY TERM GIVES YOU SPECIFIC LEGAL RIGHTS, AND YOU MAY ALSO
HAVE OTHER RIGHTS WHICH VARY FROM STATE TO STATE.
12-month Warranty & Lifetime Customer Support
Only apply to eligible purchases made directly from the INSE authorized distributors.
Warranty coverage applies to the origina
l
owner and to the original product only and is not transferable.
How to Initiate A Warranty Claim
If your appliance operates improperly while in use under normal household conditions within the
warranty period, please contact our customer support
[support@inselife.com]
or visit
www.inselife.com
to fill out the warranty form to initiate a warranty claim.
For more warranty details, please refer to
www.inselife.com.
All rights are reserved by INSE official website.
01
02
03
04
Please contact [email protected] if the solution above doesn’t help.
Troubleshooting
Warranty
NOTE:
THIS WARRANTY TERM GIVES YOU SPECIFIC LEGAL RIGHTS, AND YOU MAY ALSO
HAVE OTHER RIGHTS WHICH VARY FROM STATE TO STATE.
12-month Warranty & Lifetime Customer Support
Only apply to eligible purchases made directly from the INSE authorized distributors.
Warranty coverage applies to the origina
l
owner and to the original product only and is not transferable.
How to Initiate A Warranty Claim
If your appliance operates improperly while in use under normal household conditions within the
warranty period, please contact our customer support
[support@inselife.com]
or visit
www.inselife.com
to fill out the warranty form to initiate a warranty claim.
For more warranty details, please refer to
www.inselife.com.
All rights are reserved by INSE official website.
01
02
03
04
Please contact support@inselife.com if the solution above doesn’t help.
Troubleshooting
Warranty
General Tips, FAQ, etc.
https://inselife.com/
Installation and Usage
bit.ly/inseyoutube-n5
Please do not hesitate to contact us whenever
you want, we are always more than happy to
help you!
N5/N5S/N500
N550/N560/N570