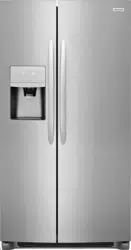
User Manual Frigidaire FGSC2335TF0 side-by-side refrigerator

Documents for Frigidaire FGSC2335TF0

The following documents are available:
User Manual Installation Instruction
  • Installation Instruction - (English) Download
Specification Energy Guide Photos
FGSC2335TF0 photo
TABLE OF CONTENTS
www.frigidaire.com USA 1-800-944-9044 www.frigidaire.ca Canada 1-800-265-8352
All about the
Use & Care
of your Refrigerator
A07201401 (March 2017)
Important Safety Instructions ......................2
Features at a Glance ...................................4
Installation ................................................5
Door Removal Instructions ..........................7
Handle Installation .....................................9
Connecting Water Supply .......................... 10
Controls ...................................................12
Storage Features ...................................... 18
Automatic Ice & Water Dispenser ..............20
Changing the Filter ................................... 23
Normal Operating Sounds and Sights ......... 25
Care and Cleaning ....................................26
Before you Call .........................................28
Major Appliance Warranty .........................32
Loading ...
Loading ...
Loading ...
Specifications

Frigidaire FGSC2335TF0 Questions and Answers


#1 How often should I change my water filter?

In general, you should change your water filter every six months to ensure the highest possible water quality.

On most models, the Water Filter Status on your display will illuminate and prompt you when it’s time to replace the filter. If your refrigerator has not been used for a period of time (during moving for example), it is recommended to change the filter before reinstalling the refrigerator.

To order replacement filters, simply go to our Filter & Parts page. Remember to order the same filter type that is currently in your refrigerator.

#2 My refrigerator was just installed and the ice maker is not working, how do I fix it?

If your refrigerator was just installed, there a few things to keep in mind regarding your Ice Maker.

Check to ensure the ice maker is turned ON – the LED light on your display for the ice maker will be illuminated.Before making ice for the 1st time – be sure to prime the water supply system. Air in the new plumbing lines can result in 2 or 3 empty ice cycles.

Also, if the system is not flushed, the first ice cubes may be discolored or have an odd flavor. Your ice maker is turned on at the factory so it can work as soon as you install your refrigerator.

If you cannot connect a water supply, set the ice maker’s On/Off feature to OFF, otherwise the ice maker’s fill valve may make a loud chattering noise when it attempts to operate without water.

After the refrigerator is installed and has cooled for several hours, the ice maker can produce ice within 24 hours. The ice maker will fill the ice bin from the rear. You must dispense some ice to force the ice forward in the bin. This will allow the ice bin to fill completely.

*For Top-Freezer models, see “How do I use my ice maker in my Top-Freezer refrigerator?”

#3 How do I use the features and functions on my Side-by-Side refrigerator display?

Depending on your model, there are various features and functions available on your Side-by-Side refrigerator. It is always recommended to check out your Owner’s Manual for more descriptions of these features.

Press OPTIONS to illuminate the center of your display – this will show you the available features and functions.

Use the UP or DOWN key to scroll through the menu that appears in the center of your display.

To change a setting to ON or OFF, press the +; then press SET to select. When selection is made, go back and press OPTIONS to save.

#4 Can I adjust the shelves in my Side-by-Side refrigerator to fit my spacing needs?

Most side-by-side refrigerators are equipped with shelves that are supported at the back of the refrigerator.

To adjust your shelves, remove all items from shelf / shelves and lift the front edge up.

Next, pull the shelf out and replace the shelf by inserting the hooks at the rear of the shelf into the wall bracket. Lower the shelf into the desired slot and lock into position. Some models have glass shelves that slide out for easy access.

The shelves slide out independently of their mounting brackets, just pull the front of the shelf forward. Shelves can be extended as far as the stopper will allow but are not removable from their mounting brackets.