MAYTAG GEMINI TMELECTRIC RANGE
Installer:Pleaseleavethis manualwith
this appliance.
Consumer:Please read and keep this
manualfor future reference.Keepsales
receiptand/orcancelledcheckas proofof
purchase.
ModelNumber
SerialNumber
Dateof Purchase
Ifyou have questions,call:
1-888-4MAYTAG(1-888-462-9824)
1-800-688-2080( U.S.TTYfor
hearingor speechimpaired)
(Mon.-Fri.,8 am-8 pm EasternTime)
Internet: http://www,maytag.com
For serviceinformation, seepage 17
_y ............... Pages 1-2
ECOOKING....... Pages 3-5
COOKING........ Pages 6-11
_& CLEANING..... Pages 12-15
_ORE YOUCALL........ Page 16
............ Page 17
DEL'UTILISATEUfl. Page 18
DELUSUARIO....... Page 38
Form No. A/05/01 Part No. 8113P293-60 h t t p : / / w w w m a y t a g. c o m 74005918 Litho USA.
]
Readand follow all instructionsbefore us-
ingthis applianceto preventthe potentialrisk
of fire, electric shock, personalinjuryor dam-
ageto the applianceas a resultof improperus-
ageof the appliance.Use applianceonly for its
intendedpurposeas describedin this guide.
To ensureproperand safe operation:Appli-
ance must be properlyinstalledand grounded
by a qualifiedtechnician.
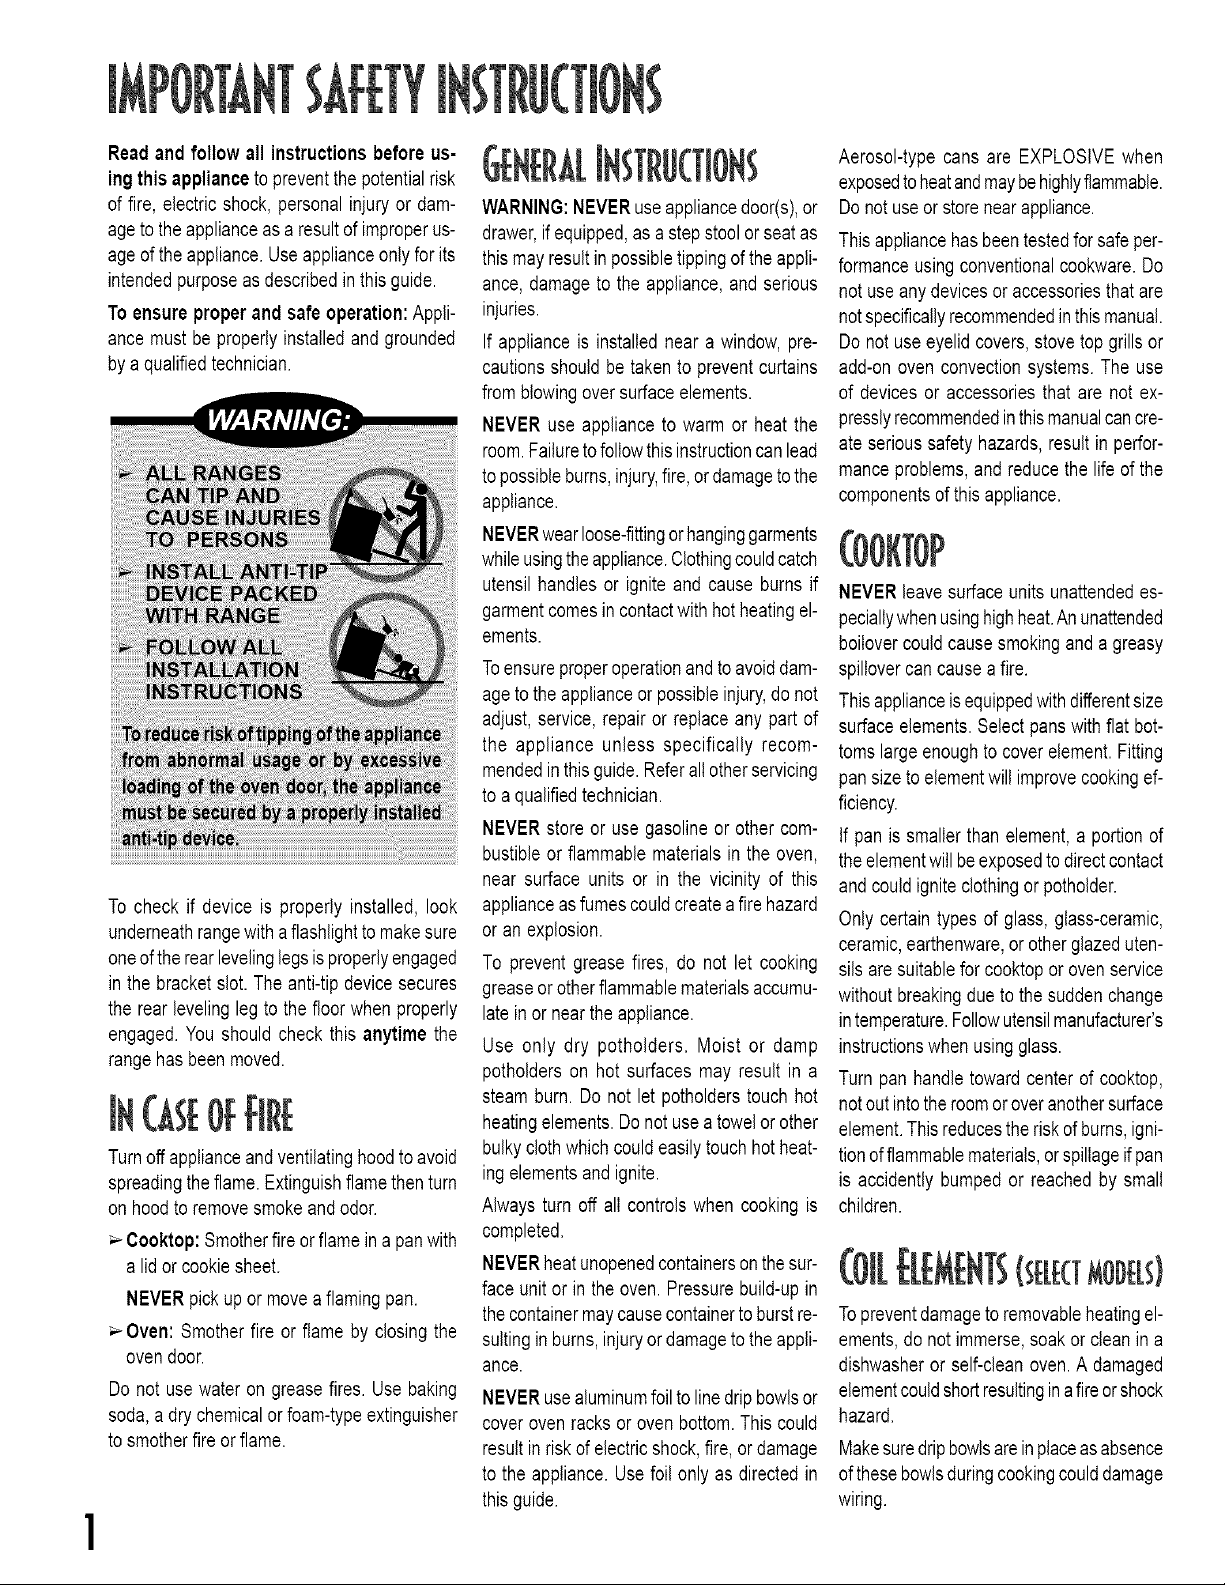
To check if device is properly installed, look
underneathrangewith aflashlightto makesure
oneof the rearlevelinglegsis properlyengaged
in the bracketslot. The anti-tip devicesecures
the rearleveling legto the floor when properly
engaged.You should check this anytimethe
rangehas beenmoved.
Ot:
Turnoffapplianceandventilatinghoodto avoid
spreadingtheflame. Extinguishflamethenturn
on hoodto removesmokeandodor.
Cooktop:Smotherfire or flameina pan with
a lid or cookiesheet.
NEVERpick up or move a flamingpan.
Oven: Smother fire or flame by closingthe
ovendoor.
Do not use water on grease fires. Use baking
soda,a dry chemicalor foam-typeextinguisher
to smotherfire or flame.
WARNING:NEVERuseappliancedoor(s),or
drawer,if equipped,as a stepstoolorseat as
thismayresultin possibletippingof the appli-
ance,damage to the appliance,and serious
injuries.
If applianceis installednear a window,pre-
cautionsshouldbe taken to preventcurtains
from blowingover surfaceelements.
NEVERuse appliance to warm or heat the
room.Failuretofollowthis instructioncan lead
to possibleburns,injury,fire, ordamagetothe
appliance.
NEVERwearloose-fittingorhanginggarments
whileusingthe appliance.Clothingcouldcatch
utensilhandles or ignite and cause burns if
garmentcomesin contactwithhot heatingel-
ements.
Toensureproperoperationand to avoiddam-
ageto the applianceor possibleinjury,do not
adjust,service, repairor replace any part of
the appliance unless specifically recom-
mendedin thisguide.Refer allotherservicing
to a qualifiedtechnician.
NEVERstoreor use gasolineor other com-
bustibleor flammable materialsin the oven,
near surface units or in the vicinity of this
applianceasfumes couldcreateafire hazard
or an explosion.
To prevent grease fires, do not let cooking
greaseor otherflammablematerialsaccumu-
late in or near the appliance.
Use only dry potholders. Moist or damp
potholderson hot surfaces may result in a
steam burn. Do not let potholderstouch hot
heatingelements.Do not useatowelor other
bulkyclothwhichcouldeasilytouchhot heat-
ingelementsandignite.
Always turn off all controls when cooking is
completed.
NEVERheat unopenedcontainersonthe sur-
face unit or in the oven. Pressurebuild-upin
thecontainermaycausecontainerto burstre-
suitingin burns,injuryordamageto the appli-
ance.
NEVERusealuminumfoilto linedripbowlsor
coveroven racks or oven bottom.This could
resultinriskof electricshock,fire,or damage
to the appliance.Usefoil only as directedin
thisguide.
Aerosol-type cans are EXPLOSIVEwhen
exposedtoheatandmaybe highlyflammable.
Do not useor storenearappliance.
Thisappliancehas beentestedfor safe per-
formanceusingconventionalcookware.Do
not use any devicesor accessoriesthat are
notspecificallyrecommendedinthismanual.
Do not use eyelid covers,stove top grillsor
add-onoven convectionsystems.The use
of devices or accessoriesthat are not ex-
presslyrecommendedinthismanualcancre-
ate serious safety hazards,resultin perfor-
manceproblems,and reducethe life of the
componentsof this appliance.
NEVERleavesurface units unattendedes-
peciallywhenusinghighheat.An unattended
boilovercouldcausesmokinganda greasy
spillovercan cause afire.
Thisapplianceis equippedwith differentsize
surfaceelements.Select pans with flat bot-
toms large enoughto cover element.Fitting
pansizeto elementwill improvecookingef-
ficiency.
If pan is smallerthan element,a portion of
theelementwill beexposedto directcontact
andcould igniteclothingor potholder.
Only certain types of glass, glass-ceramic,
ceramic,earthenware,or otherglazeduten-
sils are suitablefor cooktopor oven service
withoutbreakingdueto the suddenchange
intemperature.Followutensilmanufacturer's
instructionswhen usingglass.
Turn pan handletowardcenter of cooktop,
notout intothe roomor overanothersurface
element.This reducesthe risk of burns,igni-
tionofflammablematerials,or spillageif pan
is accidently bumpedor reached by small
children.
iTS MODE[t}
Topreventdamageto removableheatingel-
ements,do not immerse,soakor clean in a
dishwasheror self-cleanoven. A damaged
elementcouldshortresultingina fireorshock
hazard.
Makesuredrip bowlsareinplaceas absence
ofthese bowlsduringcookingcoulddamage
wiring.
ProtectiveLiners:Donotusealuminumfoilto
linesurfaceunitdripbowlsorovenbottoms,
exceptassuggestedinthemanual,Improper
installationoftheselinersmayresultinariskof
electricshockorfire,
I ELE(TMODELS}
NEVERcook on broken cooktop. If cooktop
shouldbreak,cleaningsolutionsand spillovers
maypenetratethe brokencooktopandcreate
ariskof electricshock.Contactaqualifiedtech-
nicianimmediately.
Cleancooktopwithcaution.Somecleanerscan
producenoxiousfumesif appliedto a hot sur-
face. If a wet sponge,cloth, or paper towel is
usedon a hotcookingarea,be carefulto avoid
steamburn.
Useextremecautionwhen movingthegrease
panor disposingof hot grease.Allow grease
to cool beforeattemptingto movepan.
Usecarewhen openingdoor(s).Let hot air or
steam escape before removingor replacing
food.
For proper oven operationand performance,
donot blockor obstructovenventduct.When
oven is in use,the ventand surroundingarea
nearthevent maybecomehotenoughtocause
burns.
Always placeoven racks in desiredlocations
whileovenis cool. Ifrackmustbe movedwhile
oven is hot, do not let potholdercontact hot
elementin oven.
Cleanonlypartslistedinthisguide.Donotclean
doorgasket.The gasketis essentialfor a good
seal.Do not rub,damage,or movethe gasket.
Donotuseovencleaners.Nocommercialoven
cleaneror oven liner protectivecoatingof any
kind shouldbe used in or aroundany part of
the oven.
Beforeself-cleaningthe oven, removebroiler
pan,oven racks and other utensilsto prevent
excessivesmoking,discolorationof the oven
racksor possibledamageto utensils.
Wipeupexcessivespillovers,especiallygreasy
spills,beforethe cleancycleto preventsmok-
ing,flare-upsor flaming.
It is normalforthe cooktopto becomehot dur-
inga cleancycle.Therefore,avoidtouchingthe
cooktop,door,window or oven ventduring a
cleancycle.
iG ITS
NEVERtouch surface or ovenheatingele-
ments,areasnearelements,or interiorsur-
faces of oven.
Heatingelementsmaybehoteventhoughthey
aredarkin color.Areasnearsurfaceelements
andinteriorsurfacesof an oven maybecome
hot enough to cause burns. Duringand after
use,do nottouchor let clothingor otherflam-
mablematerialscontactheatingelements,ar-
easnear elements,or interiorsurfacesof oven
untilthey havehad sufficienttime to cool.
Otherpotentiallyhotsurfacesinclude:Cooktop,
areasfacingthe cooktop,oven vent,and sur-
faces near thevent opening,oven door(s),ar-
easaroundthe door(s)and ovenwindow(s).
NEVERleavechildrenaloneor unsupervised
inareawhereapplianceis in useor is still hot.
NEVERallow childrento sit or standon any
partof theapplianceasthey couldbeinjuredor
burned.
CAUTION:NEVERstore items of interestto
childrenin cabinetsabovean applianceor on
backguardof a range.Childrenclimbingonap-
pliance,door or drawerto reach itemscould
damagetheapplianceorbe burnedorseriously
injured.
Childrenmustbetaughtthatthe applianceand
utensilsin or on it can be hot. Let hot utensils
cool in a safe place,out of reachof smallchil-
dren. Childrenshouldbe taughtthat an appli-
anceis nota toy.Childrenshouldnotbeallowed
to playwith controlsor otherpartsof the unit.
IG
Cleanrange hoodandfiltersfrequentlyto pre-
ventgreaseorotherflammablematerialsfrom
accumulatingon hood or filter and to avoid
greasefires.
Turn the fan on when flambeingfoods (such
as CherriesJubilee)underthe hood.
AND
The CaliforniaSafe DrinkingWater andToxic
EnforcementAct of 1986 (Proposition65) re-
quires the Governorof Californiato publisha
listof substancesknownto the Stateof Califor-
nia to causecanceror reproductiveharm,and
requiresbusinessesto warn customersof po-
tentialexposuresto suchsubstances.
Usersof thisapplianceare herebywarnedthat
whentheovenisengagedin theself-cleancycle,
theremay besomelow levelexposureto some
of the listedsubstances,includingcarbonmon-
oxide. Exposureto these substancescan be
minimizedby properlyventingthe oven to the
outdoorsduringtheself-cleancycleby opening
awindowand/ordoorinthe roomwheretheap-
plianceis located.
IMPORTANT NOTICE REGARDING PET
BIRDS:Neverkeeppetbirdsin thekitchenor in
roomswherethe fumesfrom the kitchencould
reach. Birds have a very sensitive respiratory
system.Fumesreleasedduring an oven self-
cleaningcyclemaybe harmfulor fatal to birds.
Fumesreleaseddueto overheatedcookingoil,
fat, margarineand overheatednon-stickcook-
ware maybe equallyharmful.
FOR
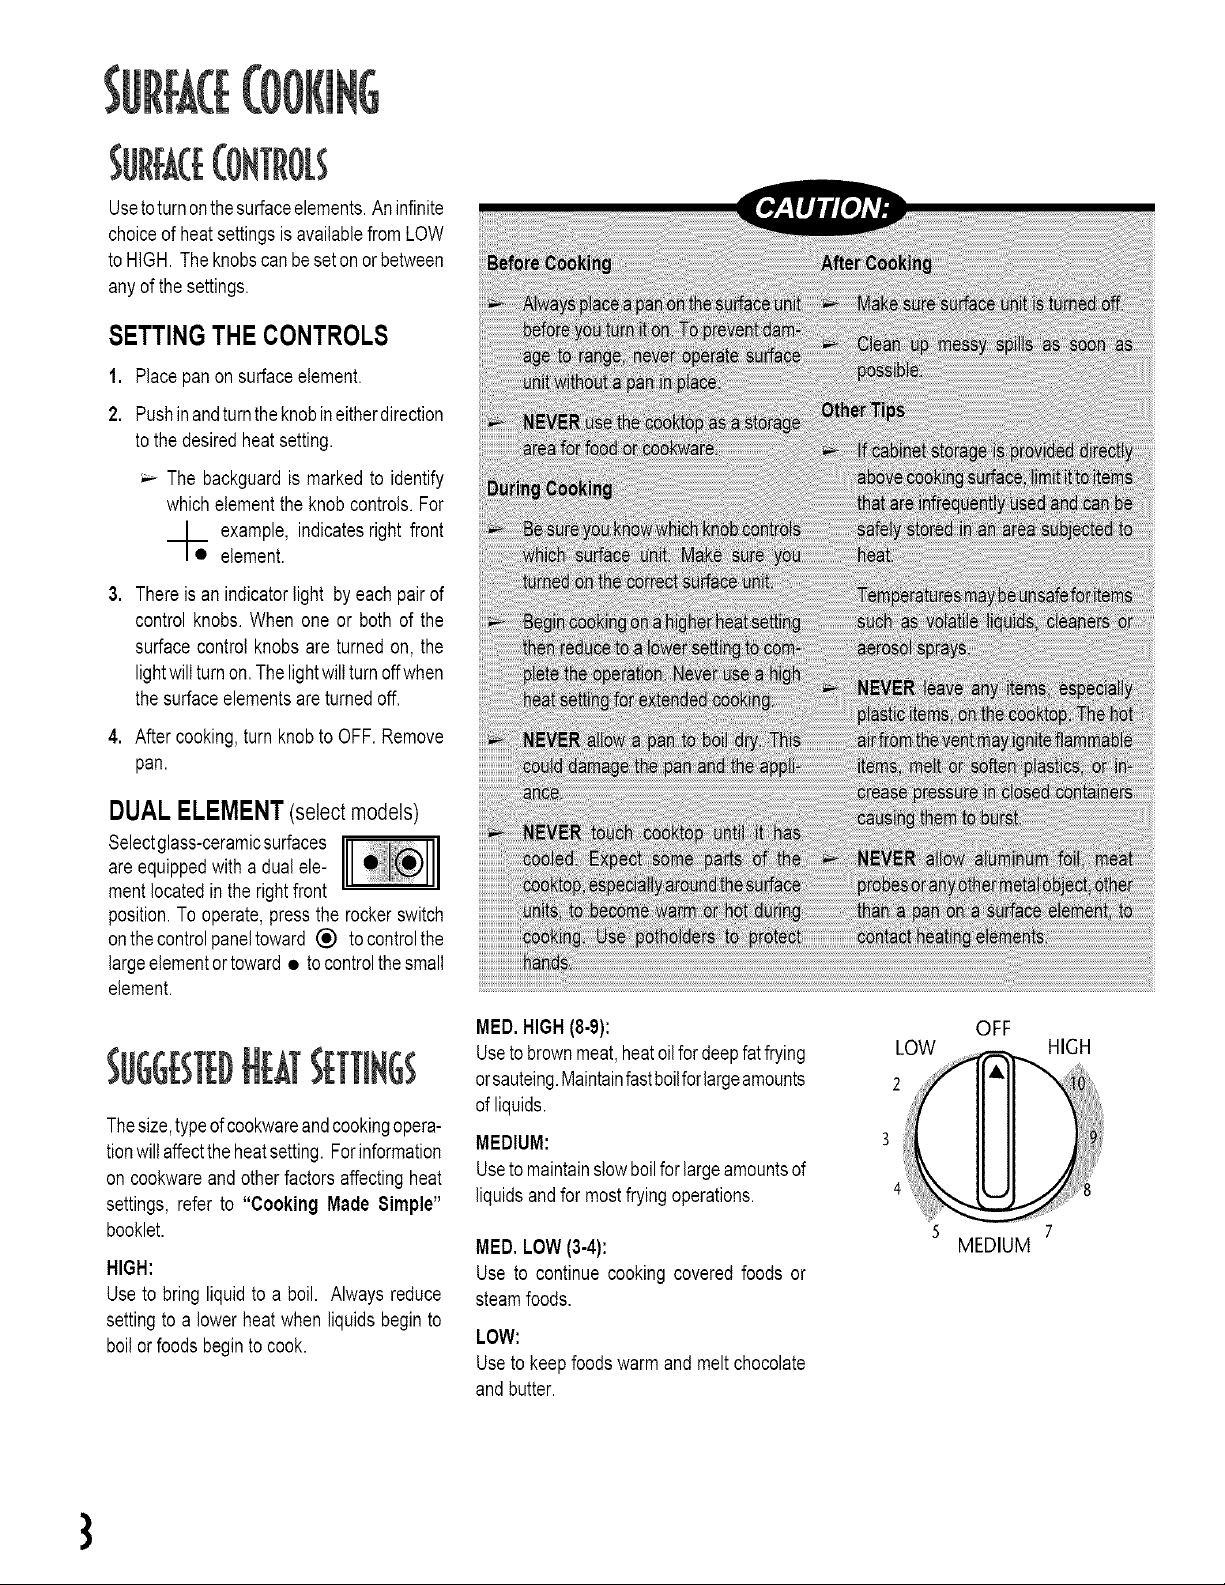
Usetoturnonthesurfaceelements.Aninfinite
choiceof heatsettings is availablefrom LOW
to HIGH. The knobscan beseton or between
any of the settings.
SETTINGTHE CONTROLS
1. Place pan on surfaceelement.
2. Pushin andturntheknobineitherdirection
to the desiredheatsetting.
_,- The backguardis markedto identify
whichelementthe knob controls.For
t xample, indicatesright front
• element.
,
There is an indicatorlight by each pair of
control knobs. When one or both of the
surface control knobsare turned on, the
lightwill turnon.The lightwill turnoffwhen
the surfaceelementsare turnedoff.
4. After cooking,turn knobto OFF.Remove
pan.
DUALELEMENT(select models)
Selectglass-ceramicsurfaces
are equippedwith a dual ele-
mentlocatedinthe rightfront
position.To operate,press the rockerswitch
onthecontrolpaneltoward (_) to controlthe
largeelementortoward • to controlthe small
element.
Thesize,typeofcookwareandcookingopera-
tionwillaffectthe heatsetting.Forinformation
on cookwareand otherfactors affectingheat
settings, refer to "Cooking Made Simple"
booklet.
HIGH:
Use to bring liquidto a boil. Always reduce
settingto a lower heat when liquids beginto
boilor foodsbeginto cook.
MED.HIGH(8-9):
Useto brownmeat,heatoilfor deepfatfrying
orsauteing.Maintainfastboilforlargeamounts
of liquids.
MEDIUM:
Useto maintainslow boilfor largeamountsof
liquids andfor mostfryingoperations.
MED, LOW (3-4):
Use to continue cooking covered foods or
steamfoods.
LOW:
Useto keep foods warm and melt chocolate
and butter.
OFF
HIGH
i°w ]
5 7
MEDIUM
3

I ELECTMOK}ELS}
GLASS-CERAMIC SURFACE
I On Canadianmodels,the surfacewill not operateduringa self-cleancycle.
| Cooktopmayemitlight smokeand odor the firstfew timesthe cooktopis used. This
is normal.
I Whena controlisturnedon,a redglowcanbeseenthroughtheglass-ceramicsurface.
The elementwill cycle on and offto maintainthe presetheatsetting.
| Glass-ceramiccooktopsretainheatfora periodoftime aftertheunitisturnedoff. When
the HOTSURFACElightturnsoff(seebelow),thecookingareawill becool enoughto
touch.
Becauseoftheheatretentioncharacteristics,the elementswillnotrespondtochanges
insettingsas quicklyas coil elements.
I NOTE:Do not attemptto liftthe cooktop.
COOKINGAREAS
The cookingareason your rangeareidenti-
fied by permanent patterns on the glass-
ceramicsurface. For mostefficientcooking,
fit the pansizeto the elementsize.
Pansshouldnotextendmorethan 1/2to 1-
inch beyondthe cookingarea.
For more informationon cookware,refer to
"Cooking Made Simple" booklet.
WAR/vllNG CENTER
DEL$)
LIGHT ON COOKTOP
HOT SURFACELIGHT
Thehotsurfaceindicatorlightislocatedatthe
frontcenter of the cooktop.The light will be
illuminatedwhen any cookingarea is hot. It
willremainon,evenafterthe controlisturned
off, untilthe areahas cooled.
WARMINGCENTER
(select models)
Use the Warming Center to keep cooked
foods warm, such as vegetables, gravies
andoven-safedinnerplates.
Pushthe switchon thecontrol panelto turn
the WarmingCenteron andoff.
WARMINGCENTER
Allfoodsshouldbecoveredwithalid
oraluminumfoilto maintainfoodqual-
ity.
When warming pastries and breads
the covershouldhave an openingto
allowmoistureto escape.
Donotuseplasticwraptocoverfoods.
Plasticmaymeltontothe surfaceand
beverydifficultto clean.
Use only cookware and dishesrec-
ommended as safe for oven and
cooktopuse.
Always use oven mitts when remov-
ingfood fromthe WarmingCenteras
cookwareand plateswill be hot.
It is not recommendedto warmfood
for longer than one hour, as food
qualitymaydeteriorate.
It is not recommendedto heat cold
food on the WarmingCenter.
TIPSTO PROTECTTHE
GLASS-CERAMICSURFACE
Beforefirst use, cleanthe cooktop.(See
Cleaning,page 13.)
_,- Do notuseglass pans.Theymayscratch
the surface.
_,- Do not allow plastic,sugar or foodswith
high sugar contentto melt onto the hot
cooktop. Shouldthis happen,clean im-
mediately.(SeeCleaning,page 13.)
_,- Neverleta panboildryasthiswilldamage
the surfaceand pan.
_,- Neveruse cooktopas a worksurfaceor
cuttingboard.Nevercookfooddirectlyon
the surface.
_,- Neverusefoil-typedisposablecontainers
or place a trivetor wok ringbetweenthe
surfaceand pan. Theseitemscan mark
or etch the top.
_,- Do not slidealuminumpansacrossa hot
surface.Thepansmayleavemarkswhich
needtoberemovedpromptly.(SeeClean-
ing, page 13.)
_,- Makesure the surfaceand the pan bot-
tomarecleanbeforeturningonto prevent
scratches.
_,- To preventscratchingor damageto the
glass-ceramictop, do not leave sugar,
saltorfats onthe cookingarea.Wipethe
cooktop surface with a clean cloth or
papertowelbeforeusing.
_,- Neverusea soileddishclothorspongeto
clean the cooktopsurface.A filmwill re-
mainwhich maycausestainson thecook-
ing surfaceafterthe areais heated.
To retain the appearanceof the glass-
ceramiccooktop,clean aftereachuse.
COILELEMENT SURFACE
using high heatfor long periods.
I On Canadianmodels,the two front ele-
mentswill notoperateduring self-clean. | Do not use oversized cookware. Pans
should not extend more than 1-2 inches
| Cleancooktopafter each use. beyondthe element.
| Wipe acid or sugar spillsas soon as the | When home canning or cookingwith big
cooktop has cooled as these spills may pots,usetheCanningElement(ModelCE1).
discolororetch the porcelain. Contactyour Maytagdealerfor details or i:
To protectdripbowlfinish: call 1-800-688-8408to order, i:
I Tolessendiscolorationandcrazing,avoid I Cleanfrequently. (See page13.) ii
LIFT-UPPORCELAINCOOKTOP COILELEMENTS
To lift: When cool, grasp the cooktopfront
edge. Gentlylift up untilthetwo supportrods
snap into place.
To lower: Hold the cooktopfront edge and
carefully push back on each support rod to
release. Then lowerthe top into place.
_,- When anelementis on, it will cycle on
and off to maintainthe heatsetting.
_,- Coil elementsare self-cleaning.Do not
immersein water.
Toremove:Whencool,raiseelement.Care-
fullypullout andaway from receptacle.
SUPPORT
ROD
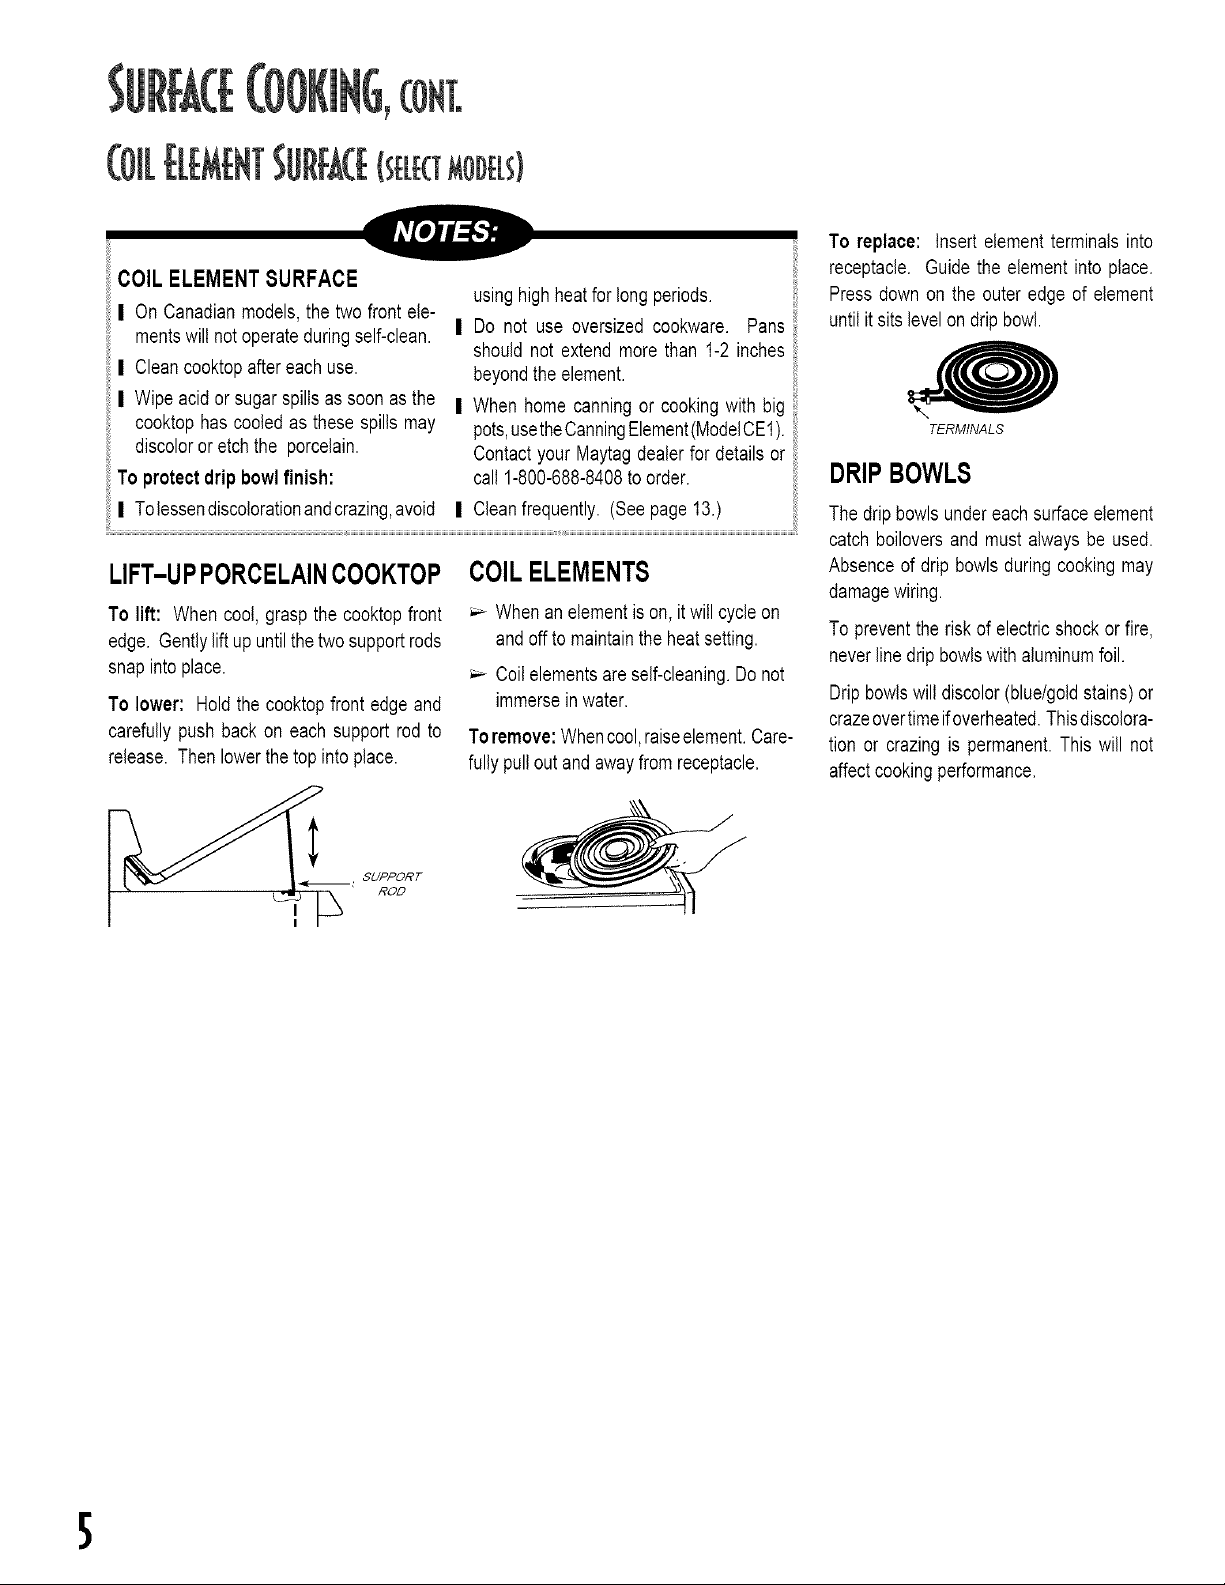
To replace: Insert element terminals into
receptacle. Guide the element into place.
Press down on the outer edge of element
until it sits level ondrip bowl.
TERMINALS
DRIPBOWLS
The drip bowls undereach surfaceelement
catch boiloversand must always be used.
Absenceof drip bowlsduring cooking may
damagewiring.
To preventthe riskof electric shock or fire,
neverline dripbowlswithaluminumfoil.
Drip bowls will discolor (blue/goldstains)or
crazeovertimeif overheated.Thisdiscolora-
tion or crazing is permanent.This will not
affectcookingperformance.
5
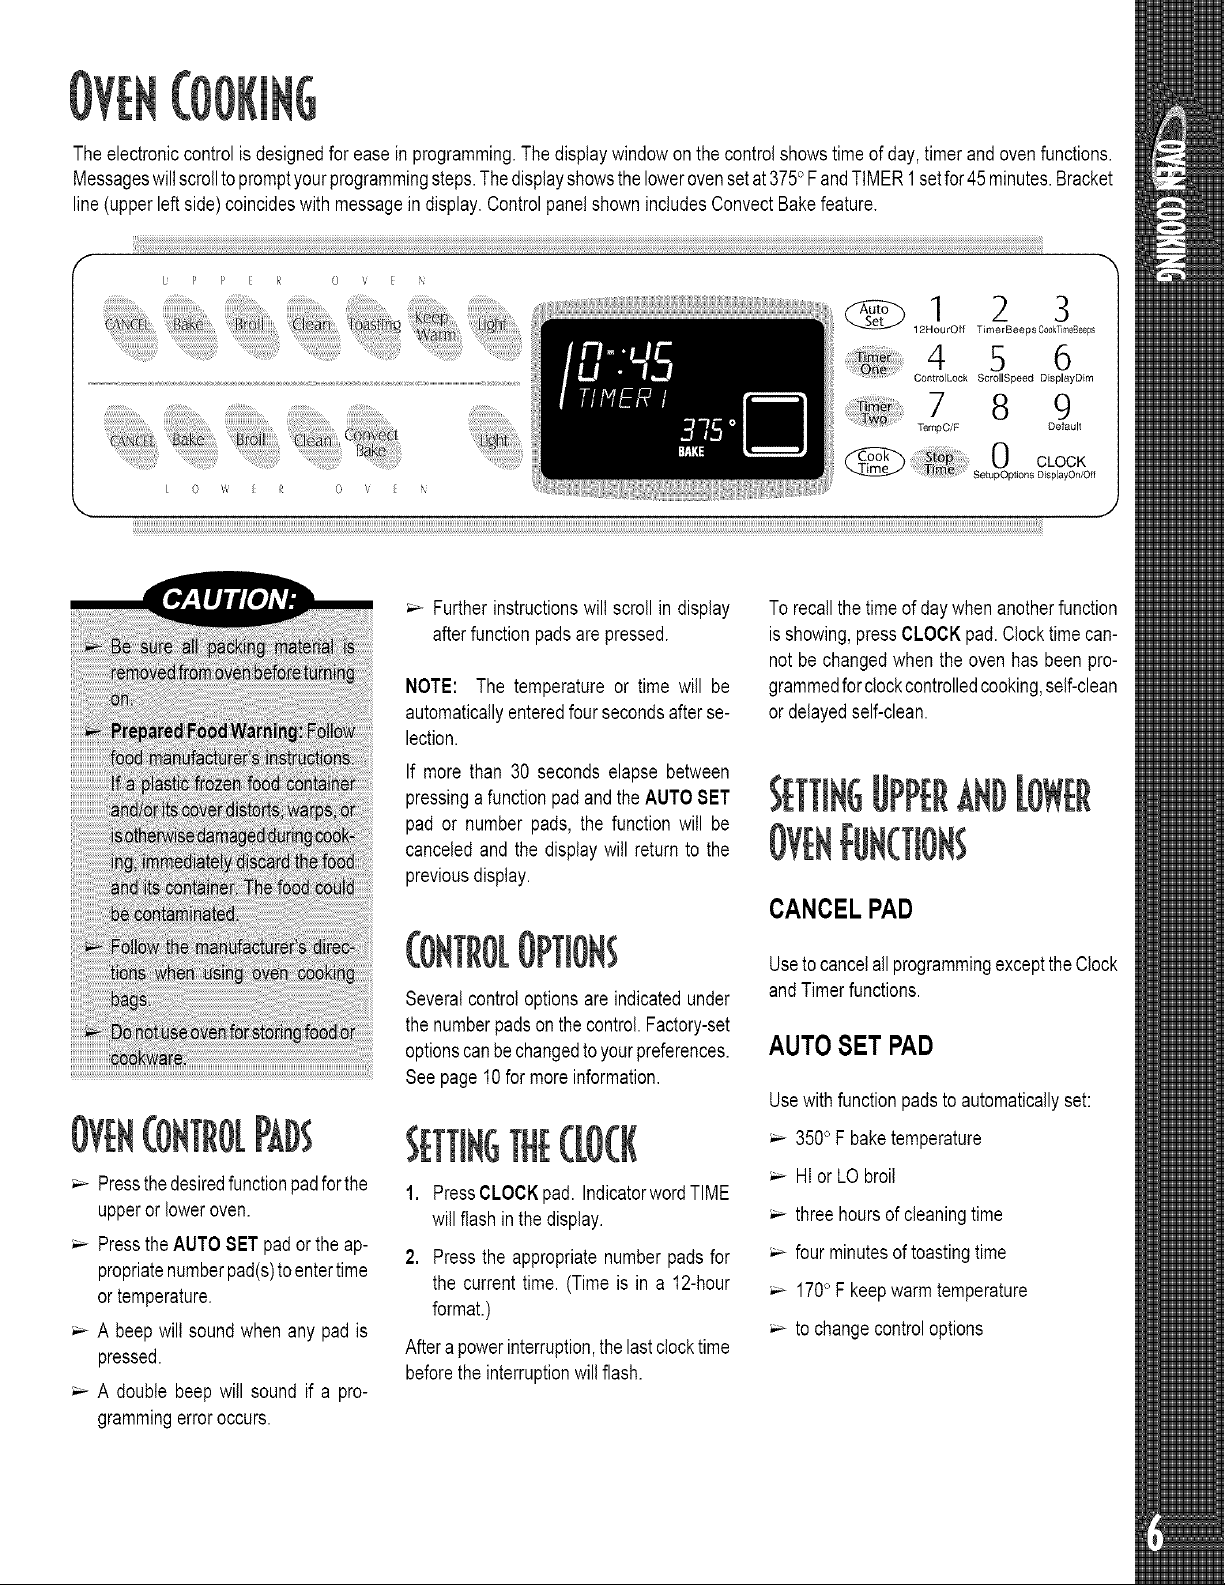
The electroniccontrolis designedfor ease in programming.The displaywindow onthe controlshowstime of day, timer andovenfunctions.
Messageswillscrollto promptyour programmingsteps.Thedisplayshowsthe lowerovensetat3750F andTIMER1setfor 45 minutes.Bracket
line (upperleft side)coincideswith messagein display.ControlpanelshownincludesConvectBakefeature.
f
b P P E R 0 _ [
:W:_[m
[ 0 /_ [ }! 0 _ [ h
1 2 3
12HourOff Time r Beep s Coo_Timeaeeps
4 5 6
ControlLock ScrollSpeed DisplayDirn
7 8 9
Terr_C/F Default
i6
ii : _ faire _ic-:
ii
_,- Pressthedesiredfunctionpadforthe
upperor loweroven.
Pressthe AUTO SET pad orthe ap-
propriatenumberpad(s)to entertime
or temperature.
_,- A beep will sound when any pad is
pressed.
_,- A double beep will sound if a pro-
grammingerroroccurs.
_,- Furtherinstructionswill scroll in display
afterfunctionpadsare pressed.
NOTE: The temperature or time will be
automaticallyenteredfoursecondsafterse-
lection.
If more than 30 seconds elapse between
pressingafunctionpad and the AUTOSET
pad or number pads, the function will be
canceledand the displaywill return to the
previousdisplay.
Several control optionsare indicatedunder
the numberpadson the control.Factory-set
optionscanbe changedto yourpreferences.
See page 10for more information.
,
2.
PressCLOCKpad. IndicatorwordTIME
will flashinthe display.
Pressthe appropriatenumberpads for
the current time. (Time is in a 12-hour
format.)
Afterapowerinterruption,the lastclocktime
beforethe interruptionwillflash.
To recallthe time of daywhen anotherfunction
is showing,pressCLOCKpad. Clocktime can-
not be changedwhen the oven has been pro-
grammedforclockcontrolledcooking,self-clean
ordelayedself-clean.
CANCELPAD
Useto cancel allprogrammingexceptthe Clock
andTimerfunctions.
AUTOSET PAD
Usewithfunctionpadsto automaticallyset:
350oF baketemperature
HIor LObroil
three hoursof cleaningtime
_,- four minutesof toastingtime
170° F keepwarm temperature
_,- to changecontroloptions
BAKEPAD
, (ONT.
Usefor bakingand roasting.
1. PressBAKEpad.
2. Pressagainfor 350oF orpresstheAUTO
SETpad. Eachadditionalpressof AUTO
SETwill raisethe temperature250F. Or,
presstheappropriatenumberpadsforthe
desiredtemperaturebetween100° F and
5500F.
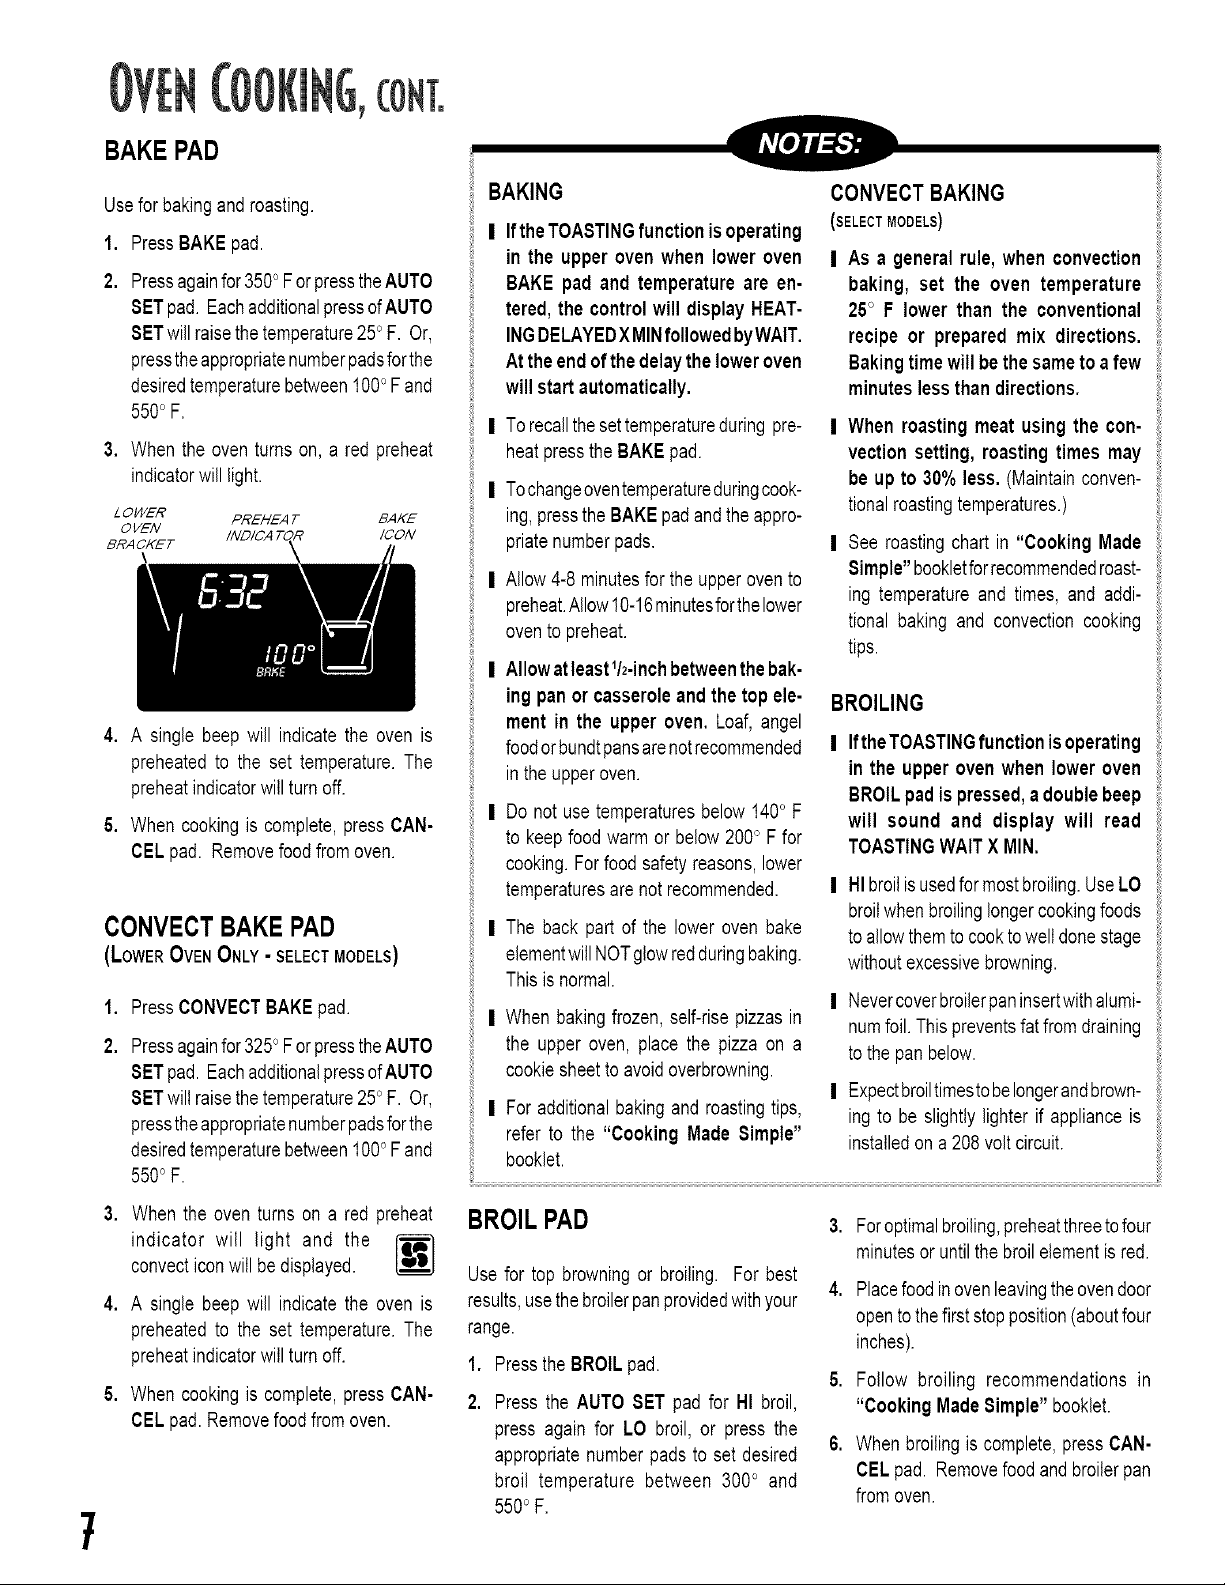
3, When the oven turns on, a red preheat
indicatorwill light.
L O_/ER PREHEAT BAKE
OVEN /CON
BRACKET
4, A single beep will indicate the oven is
preheated to the set temperature. The
preheatindicatorwill turn off.
5. When cooking is complete,press CAN-
CELpad. Removefoodfrom oven.
CONVECTBAKEPAD
(LowEROVENONLY- SELECTMODELS)
1. PressCONVECTBAKEpad.
2. Pressagainfor 3250F orpresstheAUTO
SETpad. EachadditionalpressofAUTO
SETwill raisethe temperature250F. Or,
presstheappropriatenumberpadsforthe
desiredtemperaturebetween100° F and
5500F.
BAKING
| If theTOASTINGfunction isoperating
in the upper oven when lower oven
BAKE pad and temperatureare en-
tered, the control will displayHEAT-
INGDELAYEDX MINfollowed byWAIT.
At the endofthe delaythe loweroven
will start automatically.
CONVECTBAKING
(SELECT MODELS)
As a general rule, when convection
baking, set the oven temperature
25° F lower than the conventional
recipe or prepared mix directions.
Bakingtime will bethe sameto a few
minuteslessthan directions.
I To recallthe set temperatureduring pre-
heatpress the BAKE pad.
| Tochangeoventemperatureduringcook-
ing,pressthe BAKE padandthe appro-
priatenumberpads.
I Allow 4-8 minutesfor the upper ovento
preheat.Allow10-16minutesforthelower
oven to preheat.
I Allowatleast%inch betweenthebak-
ing pan or casseroleand the top ele-
ment in the upper oven, Loaf, angel
foodor bundtpansarenotrecommended
inthe upperoven.
| Do not use temperaturesbelow 1400F
to keepfood warmor below 2000F for
cooking. Forfood safetyreasons,lower
temperaturesare not recommended.
I The back part of the lower oven bake
elementwill NOTglowredduringbaking.
This is normal.
I When bakingfrozen, self-rise pizzas in
the upper oven, place the pizza on a
cookiesheetto avoid overbrowning.
I For additionalbaking and roastingtips,
refer to the "Cooking Made Simple"
booklet.
When roasting meat using the con-
vection setting, roastingtimes may
be up to 30% less. (Maintainconven-
tional roastingtemperatures.)
See roasting chart in "Cooking Made
Simple"bookletforrecommendedroast-
ing temperatureand times, and addi-
tional baking and convection cooking
tips.
BROILING
IftheTOASTINGfunction is operating
in the upper oven when lower oven
BROILpadis pressed,a doublebeep
will sound and display will read
TOASTINGWAIT X MIN.
HIbroilis usedfor mostbroiling.Use LO
broilwhen broilinglongercookingfoods
to allowthemto cookto well donestage
without excessivebrowning.
Nevercoverbroilerpaninsertwithalumi-
numfoil. Thispreventsfat fromdraining
to the pan below.
Expectbroiltimestobelongerandbrown-
ing to be slightly lighter if applianceis
installedona 208volt circuit.
7
3. When the oven turns on a red preheat
indicator will light and the
convecticonwill be displayed.
4. A single beep will indicate the oven is
preheated to the set temperature. The
preheatindicatorwill turn off.
5. When cooking is complete,press CAN-
CEL pad. Removefood fromoven.
BROILPAD
Usefor top browningor broiling. For best
results,usethe broilerpanprovidedwith your
range.
1. Pressthe BROIL pad.
Press the AUTO SET pad for HI broil,
press again for LO broil, or press the
appropriatenumberpads to set desired
broil temperature between 3000 and
5500F.
,
4.
,
6.
Foroptimalbroiling,preheatthreetofour
minutesor until the broilelementis red.
Placefoodinoven leavingtheovendoor
opento thefirst stop position(aboutfour
inches).
Follow broiling recommendations in
"Cooking MadeSimple" booklet.
When broiling is complete,pressCAN-
CEL pad. Removefood andbroilerpan
fromoven.
TOASTINGPAD
(UPPER OVEN ONLY)
For toasting bread and products that are
toastedin a toasterortoasteroven.
1. Pressthe TOASTINGpad.
2. PresstheAUTOSETpadto set4 minutes
of toastingtime. Eachadditionalpresswill
increasethetoastingtimeby 10seconds.
TOASTINGwill bedisplayed.
Or,pressthe appropriatenumberpads
to set the toastingtime in minutesand
secondsbetween 10 secondsand 10
minutes.
Browningtime may vary, watchtoast-
ing carefullyto avoid over-browning.
3. TheAUTO SETtoastingtime (4minutes)
can bechangedforyourconvenience.To
changetheAUTOSETtoastingtime,press
TOASTINGpad, enter the desiredtime,
then pressand holdAUTO SET pad for
several seconds. The controlwill beep
and NEW AUTOSET ENTEREDwill be
displayed.
NOTE:TheAUTOSET timefor TOAST-
INGcan beset from3to 10minutesoron
select models from 10 seconds to 10
minutes.
4. If the lower oven is operatingwhen the
TOASTINGpad is pressed,TOASTING
NOT AVAILABLE - LOWER OVEN IN
USEwill be displayed.
5. At the end of the set toasting time, the
displaywill read TOASTINGCOMPLETE
and beepfour times. One reminderbeep
will soundevery30secondsfor 5 minutes
or untilCANCELpad is pressedor dooris
opened.
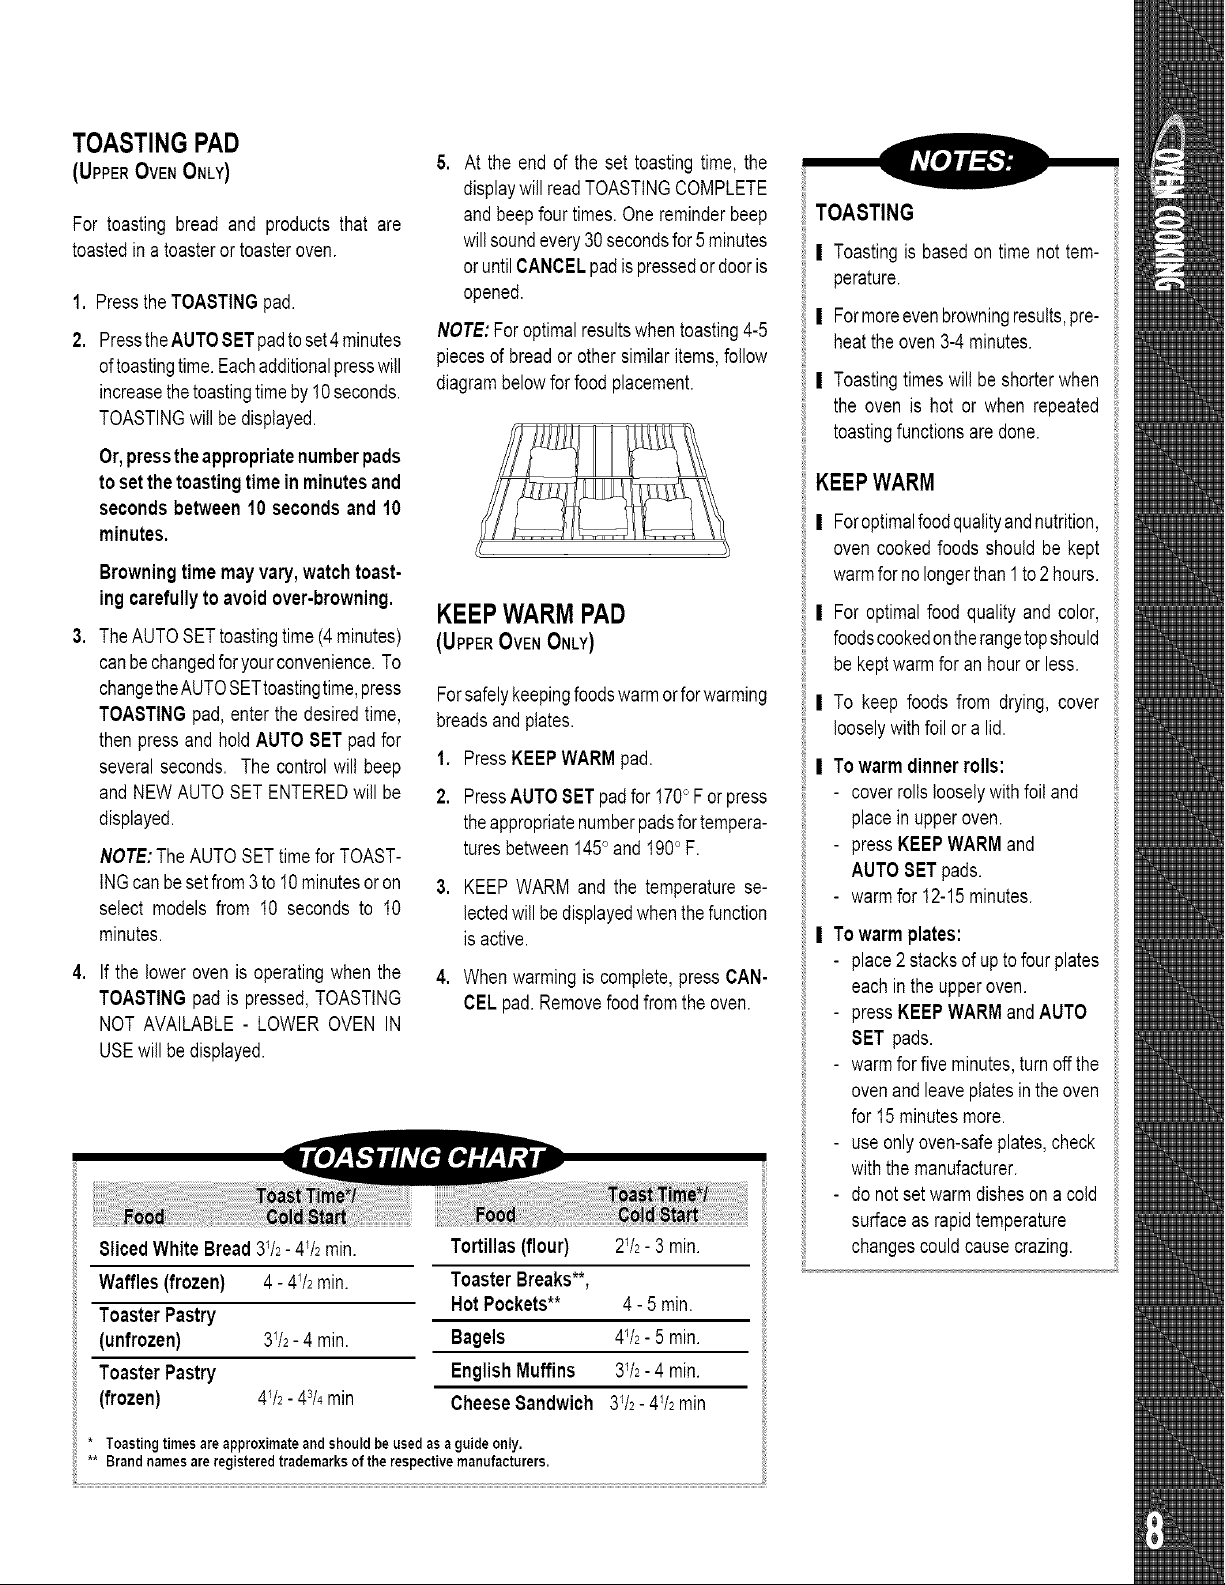
NOTE:For optimalresultswhentoasting4-5
piecesof breador other similar items,follow
diagrambelowfor food placement.
KEEP WARM PAD
(UPPER OVEN ONLY)
Forsafelykeepingfoodswarmor forwarming
breadsand plates.
1. PressKEEPWARM pad.
2. PressAUTOSET padfor 1700F or press
theappropriatenumberpadsfortempera-
turesbetween1450and 1900F.
3. KEEPWARM and the temperature se-
lectedwill be displayedwhenthefunction
is active.
4. When warming is complete,press CAN-
CEL pad.Removefood fromthe oven.
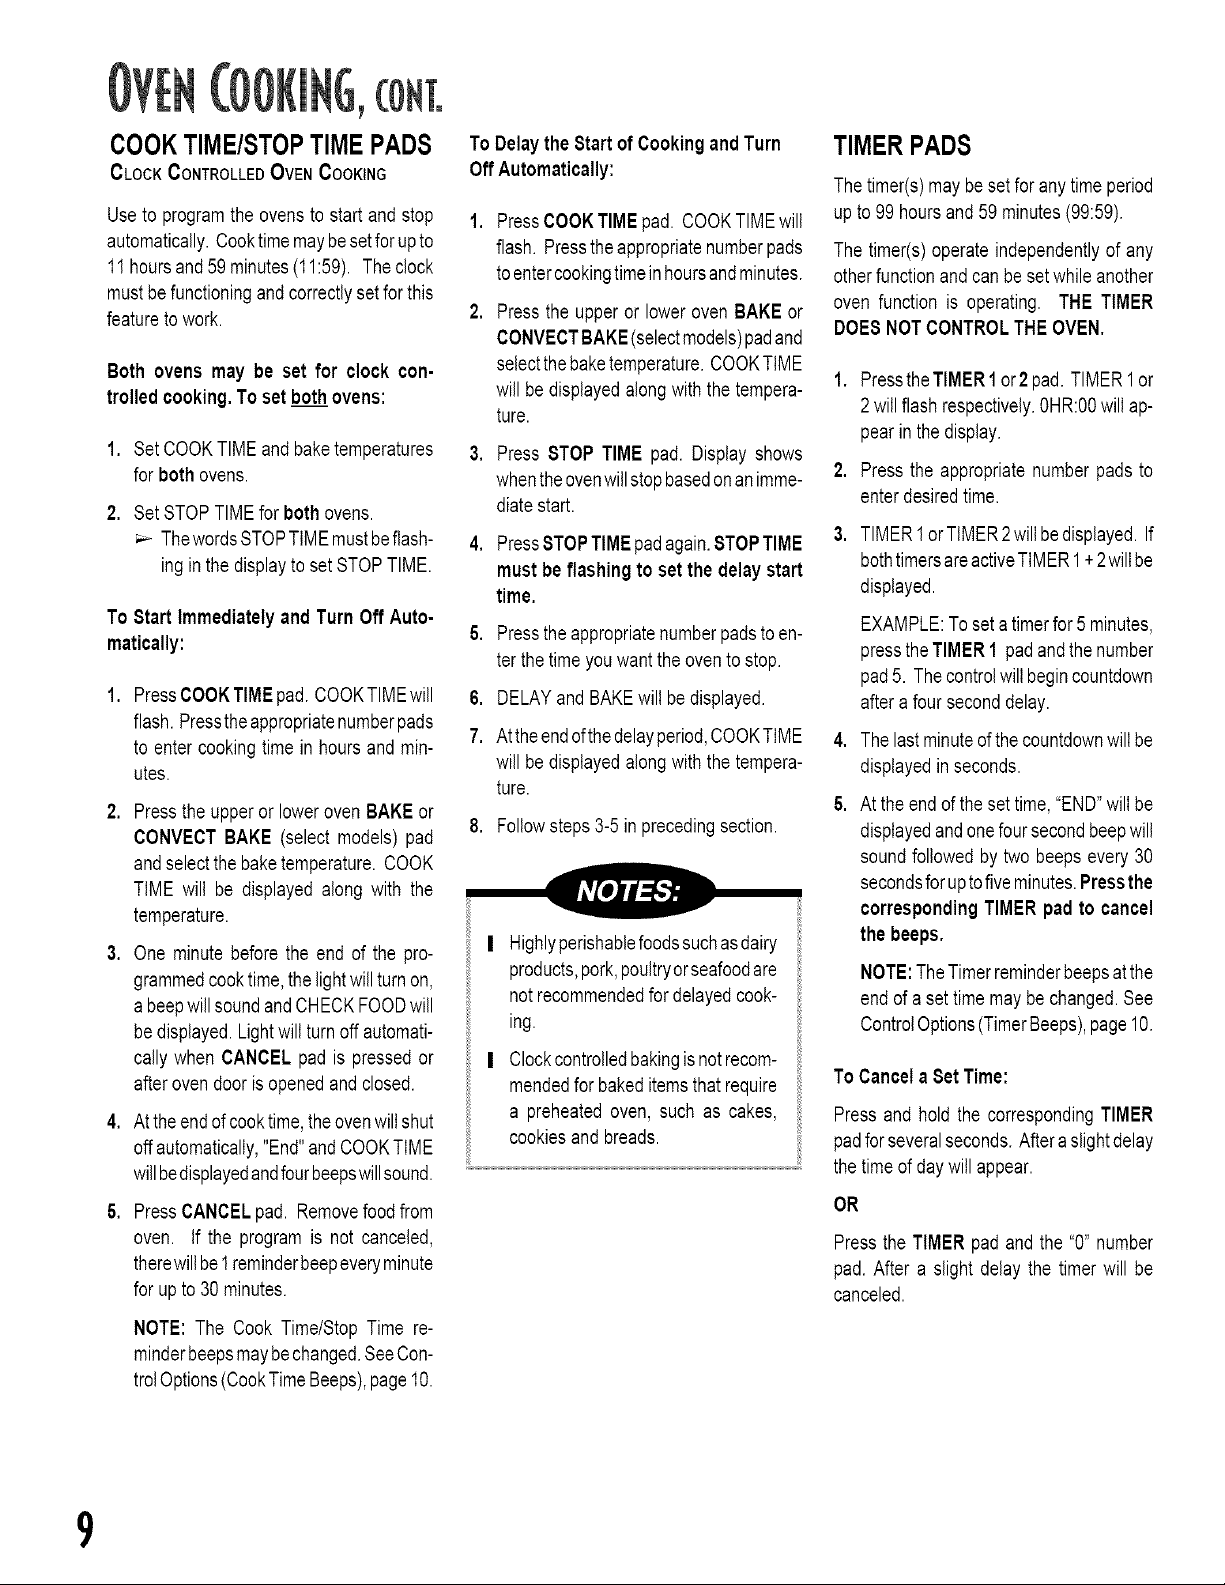
Sliced White Bread31/2- 41/2min.
Waffles (frozen)
Toaster Pastry
(unfrozen)
Toaster Pastry
(frozen)
Tortillas(flour) T/2- 3 min.
4 - 4V2min. ToasterBreaks**,
Hot Pockets** 4 - 5 rain.
3V2- 4 min. Bagels 41/2- 5 min.
EnglishMuffins 31/2- 4 min.
41/2- 43/4min CheeseSandwich 31/2- 41/2min
TOASTING
I
I
Toastingis basedon time not tem-
perature.
Formoreevenbrowningresults,pre-
heat the oven 3-4 minutes.
I Toastingtimes will be shorterwhen
the oven is hot or when repeated
toastingfunctionsare done.
KEEP WARM
I Foroptimalfoodqualityandnutrition,
oven cookedfoods should be kept
warmfor no longerthan 1to 2 hours.
| For optimal food quality and color,
foodscookedontherangetopshould
be kept warmfor an houror less.
I To keep foods from drying, cover
looselywithfoil or a lid.
I Towarm dinnerrolls:
- coverrolls looselywithfoil and
place in upperoven.
- pressKEEPWARM and
AUTOSET pads.
- warmfor 12-15minutes.
I To warm plates:
- place2 stacksof up to four plates
each in the upperoven.
- pressKEEPWARM andAUTO
SET pads.
- warmforfive minutes,turn off the
ovenand leaveplatesin the oven
for 15minutesmore.
- use only oven-safeplates,check
withthe manufacturer.
- do not setwarmdisheson a cold
surfaceas rapidtemperature
changescould causecrazing.
* Toasting times are approximate and shouldbe used as a guide only.
** Brand names areregistered trademarks of the respective manufacturers.
,CONT.
COOK TIME/STOPTIME PADS
CLOCK CONTROLLED OVEN COOKING
To Delaythe Start of Cookingand Turn
Off Automatically:
Use to programthe ovensto start and stop 1,
automatically.Cooktimemaybesetfor upto
11hoursand59 minutes(11:59). Theclock
must be functioningand correctlyset for this
featureto work. 2.
Both ovens may be set for clock con-
trolled cooking.To set bothovens:
SetCOOKTIMEand baketemperatures
for both ovens.
Set STOPTIMEfor both ovens.
_,- ThewordsSTOPTIME mustbeflash-
ing in the displayto set STOPTIME.
.
2,
To Start Immediately and Turn Off Auto-
matically:
PressCOOKTIMEpad. COOKTIMEwill
flash. Presstheappropriatenumberpads
to enter cookingtime in hours and min-
utes.
Pressthe upperor loweroven BAKE or
CONVECTBAKE (select models) pad
andselectthe baketemperature. COOK
TiME will be displayed along with the
temperature.
One minute before the end of the pro-
grammedcooktime, thelightwill turn on,
abeepwill soundandCHECKFOODwill
bedisplayed.Lightwill turnoff automati-
callywhen CANCEL pad is pressedor
afterovendoor is openedand closed.
At the endof cooktime, theovenwillshut
off automatically,"End"andCOOKTIME
willbedisplayedandfourbeepswillsound.
PressCANCELpad. Removefoodfrom
oven. If the program is not canceled,
therewill be1reminderbeepeveryminute
for upto 30 minutes.
NOTE: The Cook Time/Stop Time re-
minderbeepsmaybechanged.SeeCon-
trol Options(CookTimeBeeps),page10.
.
.
.
6,
7.
PressCOOKTIMEpad. COOKTIMEwill
flash. Pressthe appropriatenumberpads
to entercookingtime inhoursandminutes.
Pressthe upperor lower oven BAKE or
CONVECTBAKE (selectmodels)padand
selectthebaketemperature.COOKTIME
will be displayedalong with the tempera-
ture.
Press STOP TIME pad. Display shows
whentheovenwill stopbasedon an imme- 2.
diatestart.
PressSTOPTIMEpadagain.STOPTIME 3,
must be flashing to set the delay start
time.
Pressthe appropriatenumberpadsto en-
ter the timeyou wantthe ovento stop.
DELAYand BAKEwill bedisplayed.
Atthe endofthe delayperiod,COOKTIME 4.
will be displayedalong with the tempera-
ture.
5.
8. Followsteps 3-5 in precedingsection.
Highlyperishablefoodssuch asdairy
products,pork,poultryorseafoodare
not recommendedfor delayedcook-
ing.
Clockcontrolledbakingis notrecom-
mendedfor bakeditemsthat require
a preheatedoven, such as cakes,
cookiesand breads.
TIMER PADS
The timer(s)maybesetfor anytime period
up to 99 hoursand 59 minutes(99:59).
The timer(s)operate independentlyof any
otherfunctionandcan be set whileanother
oven function is operating. THE TIMER
DOESNOT CONTROLTHEOVEN.
PresstheTIMER 1or2pad. TIMER1or
2 will flashrespectively.0HR:00will ap-
pearinthe display.
Pressthe appropriatenumberpads to
enter desiredtime.
TIMER1orTIMER2will bedisplayed. If
bothtimersareactiveTIMER1+2will be
displayed.
EXAMPLE:Toset atimerfor 5 minutes,
presstheTIMER 1 padandthe number
pad5. Thecontrolwill begincountdown
after a four seconddelay.
The last minuteof thecountdownwill be
displayedin seconds.
At the end of the settime, "END"will be
displayedandonefour secondbeepwill
sound followed by two beeps every 30
secondsforupto fiveminutes.Pressthe
correspondingTIMER pad to cancel
the beeps.
NOTE:TheTimer reminderbeepsatthe
end of a set timemaybe changed.See
ControlOptions(TimerBeeps),page10.
To Cancel a Set Time:
Pressand hold the correspondingTIMER
padfor severalseconds.Aftera slightdelay
the time of daywill appear.
OR
Pressthe TIMER pad and the "0" number
pad. After a slight delay the timer will be
canceled.
9
ToChangeFactorySet DefaultOptions:
1. Control options may be changedby se-
lectingtheSetup Options (0) padandthe
desiredoptionpad. (See Optionsbelow.)
2, Currentoptionwill appearin the display.
3. Pressthe AUTO SET pad to changethe
option.
4, PressCANCEL pad to set the displayed
optionand exitthe program.
OPTIONSAVAILABLE:
12 HouROFF(1)
The oven may be set to turn off after 12
hoursorstayonindefinitely,Thedefaultis
setto turnoff after 12hours.
TIMER BEEPS(2)
There are three choices for the end of
"timer" remindersignals.
_,- Onebeepfollowedbytwobeepsevery 30
seconds for up to five minutes (default
setting).
_,- One beep followedby two beeps every
minutefor upto 30 minutes.
One beepfollowedby no other beeps.
COOKTIMEBEEPS(3)
There are three choices for the end of
"clock controlledcooking"remindersig-
nals.
_'- Four short beeps followed by one beep
everyminutefor upto 30minutes(default
setting).
Four short beeps followed by no other
beeps.
Four short beeps followed by one beep
every30 secondsfor up to five minutes.
CONTROLLOCK(4)
The functionpads on the controlcan be
lockedto preventunwantedusefor safety
and cleaningbenefits. The currenttime of
day will remaininthe display.
OVEN TEMPERATUREADJUSTMENT
Ifyouthinkthe ovenisoperatingtoocoldor
hot, you can adjustit. Bake severaltest
itemsand thenadjustthe temperatureset-
ting not morethan 100F at a time.
SCROLLSPEED (5) TO
The scroll speedof the messagesin the 1,
display may be changed from FAST to
MEDIUMto SLOW, The defaultis setfor the
2.
mediumspeed.
DISPLAYDIM(6)
The control intensitymaybe changed for
easier reading, The default is set for the
highestintensity........ . The fewer ..... the
lessthe intensity.
TEMPC/F (7)
Thetemperaturescale may bechangedto
Centigradeor Fahrenheit.Thedefaultis set
for Fahrenheit.
LANGUAGE(8) (select models)
Thewordswhichscrollinthe displaymay
bechangedfrom EnglishtoFrenchorSpan-
ish.
DEFAULT(9)
The control can be reset to restore the
factorysettingforeach option.
DISPLAYON/OFF (CLOCK)
The time-of-daydisplay may be shut off
whenthe oven is not in a cookingor clean-
ing function.
,
,
,
Adjust:
Pressthe BAKE pad (upper or lower
oven)and enter 550o F.
PressandholdtheBAKEpad (upperor
lower oven) for severalseconds until
TEMPADJ is displayed.
PresstheAUTOSETpad - eachpress
changesthe temperatureby5o F. The
controlwill acceptchangesfrom-350to
+350F.
Iftheovenwas previouslyadjusted,the
changewill bedisplayed.Forexample,
iftheoventemperaturewasreducedby
150F,the displaywill show-150F.
When you have madethe adjustment,
presstheCANCELpadandthe timeof
day will reappear in the display. The
oven will now bake at the adjusted
temperature.
Theovenlightsautomaticallycomeonwhen
thedoorsareopened.Whenthe doorsare
closed, press the LIGHT pad (upper or
loweroven)on thecontrolpaneltoturn the
lightson oroff.
The oven lightswill not operate during a
clean cycle. The oven lights will come on
automaticallyoneminutebeforethe endof
a clock controlledcookingoperation.

Whentheovenis in use,theareanearthe
vent may become hot enoughto cause
burns,NEVERblockthe vent opening.
OVEN VENT LOCATION
on glass-ceramic range
on COl/element range
On a coil element
surface, besurethe
dripbowlinthevent
locationhas a hole OVENVENT
inthe center.Do not OPEN_N_
cover the drip bowl with aluminum
foil.
When highmoisturefoods are cookedin
the upper oven, steam may be visible
comingfrom the oven vent. This is nor-
mal.
All racksaredesignedwitha lock-stopedge.
UPPEROVEN
_,- Isequippedwithonerackand rackposi-
tion.
Whenpullingtheup- !1 /_ \'_
per ovenrackout to
remove or check t_ _-_
food, grasp the top
edge of the rack.
LOWEROVEN
_,- Conventional: Is equipped with one
RollerGlideTMrack and one regularflat
rack (select models)or two regularflat
racks.
_,- Convection(select models): Is equipped
withoneRollerGlideTMrackandtworegular
flat racks.
ToREMOVEOVENRACKS:
Pullrackstraightoutuntilitstopsatthelock-
stopposition;lift up on the front of the rack
and pull out.
For RollerGlideTMrack(selectmodels),pull
both the rack glide and rack base out to-
gether.
ToREPLACEOVENRACKS:
Placerack on the racksupportinthe oven;
tilt the frontendup slightly;slide rack back
until it clearsthe lock-stopposition; lower
frontand slideback into the oven.
RACKPOSITIONS
Three-rack Convection
Baking (Racks 1, 3 and 5)
5
-- 4
3
2
1
RACK5: (highestposition)
Usefor toastingbread or broilingthin,non-
fatty foods.
RACK4:
Usefor two-rackbakingand for broiling.
RACK3:
Usefor most bakedgoods on a cookie
sheetor jelly roll pan,layer cakes,
fruit pies, orfrozenconveniencefoods,
andfor broiling.
RACK 2:
Useforroastingsmallcutsofmeat,casse-
roles,bakingloavesofbread,bundtcakes
or custardpies,andtwo-rackbaking.
RACK1:
Usefor roastinglargecuts of meatand
poultry,frozen pies,dessertsoufflesor
angelfood cake, andtwo-rackbaking.
MultipleRackCooking:
Two rack:Userack positions2 and4,
or 1 and 4.
Three rack: (convectionbakingonly,
selectmodels)Use rackpositions1, 3
and5. (Seeillustration.)
HALFRACKACCESSORY
(LOWEROVENONLY)
A half rack, to increase oven capacity, is
availableas an accessory.Itfits in the left,
upperportionoftheovenandprovidesspace
for a vegetabledishwhen a large roasteris
on the lower rack. Contact your Maytag
dealerforthe"HALFRACK"AccessoryKitor
call 1-800-688-8408to order.
]]
CLEANPAD
Use to set a self-clean cycle. (Only one
ovenmay becleanedat a time.Both ovens
will lock when eitheris being cleaned,)
Clean oven
frame, door
frame (area
outside of
gasket) and
around the
"'% , %. .= / ."
openinginthe doorgasketwithanonabra-
sive cleaner such as Bon Ami*. These
areas are not exposed to cleaningtem-
peratures.
2, Removeoven racks. If racks are left in
duringa cleancycle,it may impairfunction
and they will discolor. Turn off the oven
light and closedoor.
3. PressCLEANpad.
4, Pressthe AUTO SET pad for 3 hours of
cleaningtime, pressagainfor4 hoursand
again if 2 hoursof cleantime is desired.
5, CLEANINGand LOC plusthe cleantime
will appearin the displayand both ovens
will lock.
When the clean cycle is complete,
CLEANED will be displayed. LOC will
remainonuntiltheovenhascooled(approx.
1hour).
| To preventdamageto ovendoor,do not
attemptto open eitheroven door when
the LOC indicatorword is displayed.
I Duringthecleaningprocess,the kitchen
should be well ventilatedto help elimi-
natenormalodorsassociatedwithclean-
ing. Odorswill lessenwith use.
I It is normal for flare-ups, smoking or
flaming to occur during cleaning if the
ovenis heavilysoiled. It isbettertoclean
theovenregularlyratherthantowaituntil
there is a heavy buildupof soil.
| Wipe up excessgrease or spilloversto
preventflare-ups. For easein cleaning,
the bake element in the upper or lower
oven can belifted slightly(1inch).
| As the oven heats and cools, you may
hear sounds of metal parts expanding
and contracting.This is normal andwill
not affect performance.
| Wipeupsugaryandacidicspilloverssuch
assweet potatoes,tomatoor milk-based
saucespriorto aself-cleancycle. Porce-
lain enamel is acid resistant, not acid
proof and may discolor if spills are not
wiped up beforea self-cleancycle.
| A white discolorationmay appearafter
cleaningif acidicorsugaryfoodsare not
wiped up before the clean cycle. This
discolorationis normal and will NOT af-
fect performance.
7, Whenthe oveniscool,LOCwill nolonger
bedisplayedandthedoor maybeopened.
8, Wipe out the oven interiorwith a damp
cloth. Ifsoil remainsit indicatesthe cycle
was notlong enough.
ToCancelSelf-CleanCycle:
1. PressCANCELpad.
2. IfLOCis NOTdisplayed,openovendoor.
If LOCis displayed,allow ovento cool.
ToDelaythe Start of a Self-CleanCycle:
1. Followsteps 1-4 above.
2. Pressthe STOPTIMEpad. STOPTIME
will flash.
3. As STOPTIMEflashes, presstheappro-
priatenumberpadsto enterthe timeyou
wishthe oven to stop.
4. DELAYCLN and LOCwill be displayed.
5. Whenthe delay periodis completedand
cleaning begins, CLEANING,LOC and
the cleantime will bedisplayed.
BROILER PAN AND INSERT
;_ Place soapy clothover insertand pan;
let soak to loosensoil.
;_ Washinwarmsoapywater. Usescour-
ingpad to removestubbornsoil.
;_ Broilerpanandinsertcan becleanedin
dishwasher.
BRUSHED CHROME
(SELECT MODELS)
Whencool,washwith soapywater,rinse
andbuffthe surface.
For heavier soil, use a mild abrasive
cleaner such as baking soda or Bon
* Brand namesfor cleaningproductsare registeredtrademarksof the respectivemanufacturers.
&
Ami*, rubbing with the grain to avoid
streakingthe surface.Rinseand buff.
To prevent scratching,do not use abra-
sivecleaners.
To restore luster and remove streaks,
followwithStainlessSteelMagicSpray*
(Part #20000008)**.Chrome will per-
manentlydiscolorif softisallowedto
bake on.
,(ONT.
CONTROL KNOBS
Remove knobs in the OFF position by
pullingforward.
Wash,rinseanddry.Do notuseabrasive
cleaningagents asthey may scratchthe
finish.
Turn on each element to be sure the
knobshave beencorrectlyreplaced.
paste or Bon Ami*. Do not use abrasive
cleanerssuchas steelwool padsor oven
cleaners. These productswill scratch or
permanentlydamagethe surface.
NOTE:Usedrytowelordoth to wipeup spills,
especial/yacid or sugarysp/l/s.Surfacemay
discolor or dull if soil is not immediatelyre-
moved. Thisis especiallyImportantfor white
surfaces.
8TAINLE88 STEEL-
(SELECT MODELS)
• DO NOT USEANY CLEANINGPROD-
UCTCONTAININGCHLORINEBLEACH.
• AL WAYSWIPEWITHTHEGRAINWHEN
CLEANING.
• DailyCleaning/LightSoil -- Wipe with
one of the following- soapy water,white
vinegar/watersolution,Formula409Glass
and Surface Cleaner*or a similarglass
cleaner - using a sponge or soft cloth.
Rinseanddry.To polishand helpprevent
fingerprints,follow with Stainless Steel
MagicSpray (PartNo.20000008)**.
• Moderate/HeavySoil--Wipe with oneof
the following- BonAmi,SmartCleanser,
or Soft Scrub*- using a damp spongeor
soft cloth. Rinse and dry. Stubbornsoils
may be removedwith a damp Scotch-
Brite*pad;rubevenlywiththegrain.Rinse
and dry. To restore luster and remove
streaks,follow withStainlessSteelMagic
Spray*.
• Discoloration-- Usinga damp sponge
or soft cloth, wipe with CameoStainless
Steel Cleaner*. Rinse immediatelyand
dry.To removestreaksandrestoreluster,
followwithStainlessSteelMagic Spray*.
CLOCK AND CONTROL
PAD AREA
To activate"ControlLock"for cleaning,
see page 10.
Wipewith a damp cloth anddry.
Glasscleanersmaybe used if sprayed
on a clothfirst. DONOTspray directly
on control pad and display area.
DRIP BOWLS - PORCELAIN
(SELECT MODELS)
Porcelainmaydiscolororcrazeifoverheated.
This is normal and will not affect cooking
performance.
When cool, wash after each use, rinse
anddry to preventstainingor discolora-
tion.May bewashedinthe dishwasher.
To clean heavysoil, soak in hot sudsy
water,then use a mildabrasivecleaner
suchas SoftScrub*anda plasticscour-
ing pad.
For burnedon soil, removefrom range,
placeon newspapersandcarefullyspray
with commercial oven cleaner. (Do not
spraysurroundingsurfaces.)Placeinplas-
tic bag and allow to soakseveralhours.
Wearingrubbergloves,removefrombag,
wash, rinseanddry.
DRIP BOWLS - CHROME
(SELECT MODELS)
When cool, wash after each use, rinse
anddry to preventstainingor discolora-
tion.
To clean heavysoil, soak in hot sudsy
water,then use a mildabrasivecleaner
suchas SoftScrub*anda plasticscour-
ing pad. Do not use abrasivecleaning
agents.
ENAMEL (PAINTED)- SiDE PANELS,
DOOR PANELS & HANDLES
Whencool,washwith warmsoapywater,
rinseand dry.Neverwipea warm or hot
surface with a damp cloth as this may
damage the surface and may cause a
steamburn.
For stubborn soil, use mildly abrasive
cleaning agents such as baking soda
GLASS - OVEN WINDOWS & DOORS
Avoid usingexcessiveamounts of water
which may seep under or behind glass
causingstaining.
Wash with soap and water. Rinse with
clearwater anddry. Glasscleanercanbe
used if sprayedona clothfirst.
Do not use abrasive materials such as
scouring pads, steel wool or powdered
cleanersas they will scratchglass.
GLASS-CERAMIC COOKTOP -
(SELECT MODELS)
Neveruse ovencleaners,chlorinebleach,
ammoniaor glasscleanerswithammonia.
NOTE: Call an authorizedservicer if the
glass-ceramictopshouldcrack,breakorif
metalor aluminumfoil shouldmelt on the
cooktop.
Allowthe cooktopto coo!beforecleaning.
General - Always clean cooktop after
each use, or when needed,with a damp
papertowelandCooktopCleaningCreme
(Part No.20000001)**.Then, buff with a
clean, dry cloth.
NOTE: Permanent stains will develop if
soil is allowedto cook on by repeatedly
using the cooktopwhen soiled.
HeavySoils or Metal Marks- Dampena
"scratchless"or "never scratch"scrubber
sponge.Apply CooktopCleaningCreme*
(Part No. 20000001)**and scrub to re-
move as much soil as possible.Apply a
thin layerof the cremeoverthe soil,cover
witha damp paper towel andlet stand 30
to 45 minutes (2-3 hours for very heavy
soil). Keep moist by coveringthe paper
towelwith plasticwrap.Scrubagain,then
buff with a clean dry cloth.
* Brandnamesfor cleaningproductsare registeredtrademarksof the respectivemanufacturers.
} ** To order direct,call 1-800-688-8408.
NOTE:Onlyusea CLEAN,DAMP
"scratchless"padthatissafefornon-stick
cookware.Thepatternandglasswillbe
damagedifthepadisnotdamp,ifthepad
issoiled,orifanothertypeofpadisused.
Burned-onorCrustySoils- Scrubwith
a "scratchless"or "never scratch"scour-
ing pad and CooktopCleaningCreme*.
NOTE: Hold a razor blade scraperat a
300 angle and scrape any re-
mainingsoil. Then,clean as
describedabove.Donot
usetherazorblade
for daily cleaning
as it maywear
the pattern
on the glass.
Melted Sugar or Plastic - Immediately
turn elementto LOWand scrapefromhot
surfaceto a coolarea.Thenturn element
OFF and cool. Clean residuewith razor
blade scraper and Cooktop Cleaning
Creme*.
OVEN INTERIORS
Followinstructionson page 12 to set a
self-cleancycle.
OVEN RACKS
Cleanwith soapywater.
Removestubbornsoilwithcleansingpow-
derorsoap-filledscouringpad. Rinseand
dry.
Ifover time, racksdonot slide outeasily,
wipethe rackedge and racksupportwith
a small amountof vegetableoil to restore
ease of movement,then wipe off excess
oil. Likewise,placeonedropof vegetable
oil on rackroller.
NOTE: Remove oven racks duringa clean
cycle.Ifracksareleft intheoven,it mayimpal?
functionand they willdiscolor
PLASTIC FINISHES -
TRIM & END CAPS
When cool, cleanwith soapand water,
rinseand dry.
Usea glasscleanerand a soft cloth.
NOTE:Never useovencleaners,abras/ve
or caustic//_lU/dorpowdered cleanserson
plasticfinishes. Thesecleaningagents will
scratchor mar hnish.
NOTE: Toprevent sta/hingordiscoloration,
wipeup fat,grease or acid(tomato,lemon,
vlhegar,milk,fruity_lice,marinade)immedi-
ately witha drypaper towel
PORCELAIN ENAMEL-
BACKGUARDAREA, TRIM ON GLASS CERAMIC
SURFACE, COOKTOP ON COIL SURFACE
Porcelainenamel is glassfused on metal
andmaycrackorchipwith misuse.It isacid
resistant,not acid proof. All spillovers,es-
peciallyacidicor sugaryspillovers,should
bewiped up immediatelywith a dry cloth.
When cool, wash with soapy water,
rinseand dry.
Neverwipe off a warm or hot surface
with a damp cloth. This may cause
crackingor chipping.
Neveruse oven cleaners,abrasive or
causticcleaningagentson exteriorfin-
ish of range.
Both the upper and lower oven doors are
removable.
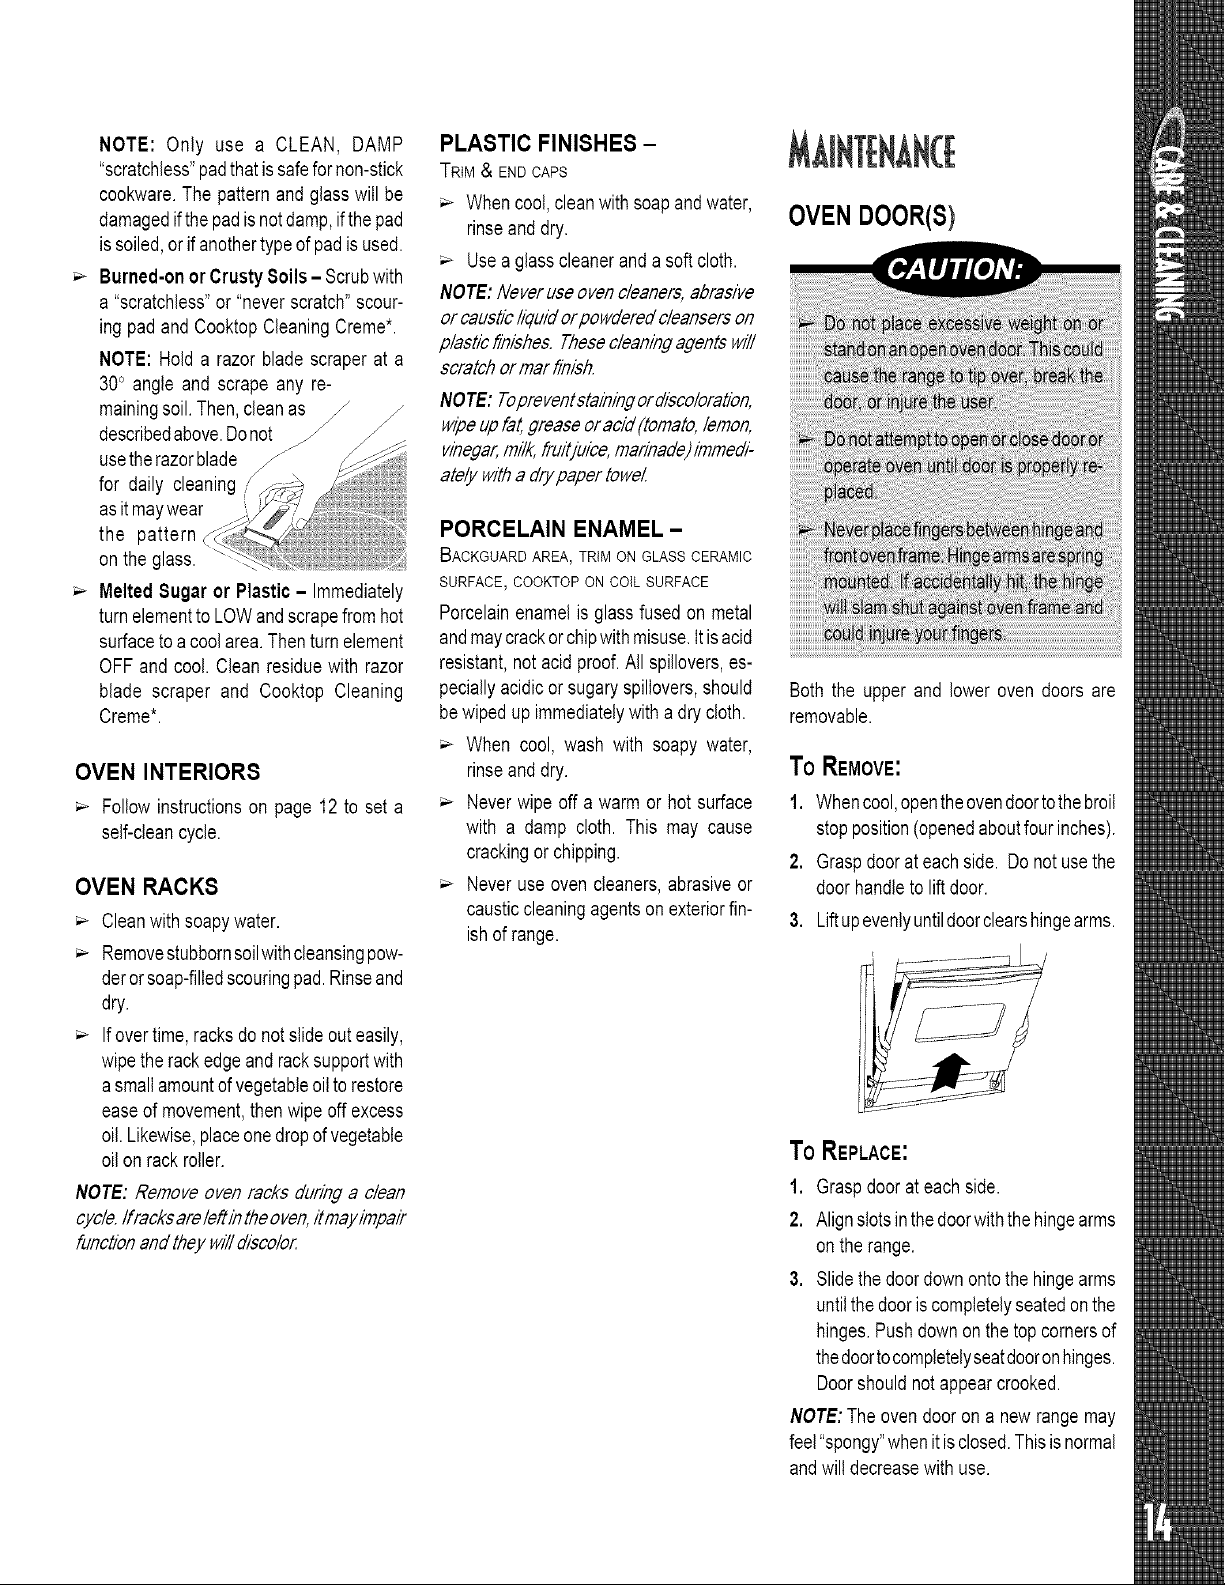
To REMOVE:
1. Whencool,opentheovendoortothe broil
stopposition(openedaboutfour inches).
2. Graspdoorat eachside. Do not usethe
door handleto lift door.
3. Liftupevenlyuntildoorclearshingearms.
ToREPLACE:
1. Graspdoor at each side.
2. Alignslotsin thedoorwith thehingearms
on the range.
3. Slidethe door downonto the hingearms
untilthedooris completelyseatedonthe
hinges.Pushdownon the top cornersof
thedoortocompletelyseatdooronhinges.
Doorshouldnot appear crooked.
NOTE: The oven door on a new range may
feel"spongy"whenit isclosed.This is normal
andwill decreasewith use.
OVENWINDOW(S)
TO PROTECTTHEOVENDOORWINDOW:
1. Donot useabrasivecleaningagentssuch
as steelwool scouringpadsor powdered
cleanersas theymayscratchthe glass.
2. Donot hit the glasswithpots, pans,furni-
ture,toys, orother objects.
3. Do not closethe ovendoor untilthe oven
racks are in place.
Scratching,hitting,jarringorstressingtheglass
mayweakenitsstructurecausinganincreased
riskof breakageat a laterdate.
UPPER AND LOWER OVEN
LIGHTS(SELECTMODELS)
Toassurethe properreplacementbulbis
used, order bulb from MaytagCustomer
Service.Call 1-800-688-8408,askforpart
number74004458- halogenbulb.
LOWEROVENLIGHT
(SELECTMODELS)
LEVELINGLEGS
Besuretheanti-tipbracketsecuresone of
the rear leveling legs to the floor. This
bracketpreventsthe rangefromacciden-
tallytipping.
The rangeshouldbeleveledwhen
installed. If the rangeis not level, /_J
turn the plastic leveling legs, Io- J ]
cated at each corner of the _,1
range, until range is _ '_,',J
level. L::__;: /
\LEVEZ//VG LEG
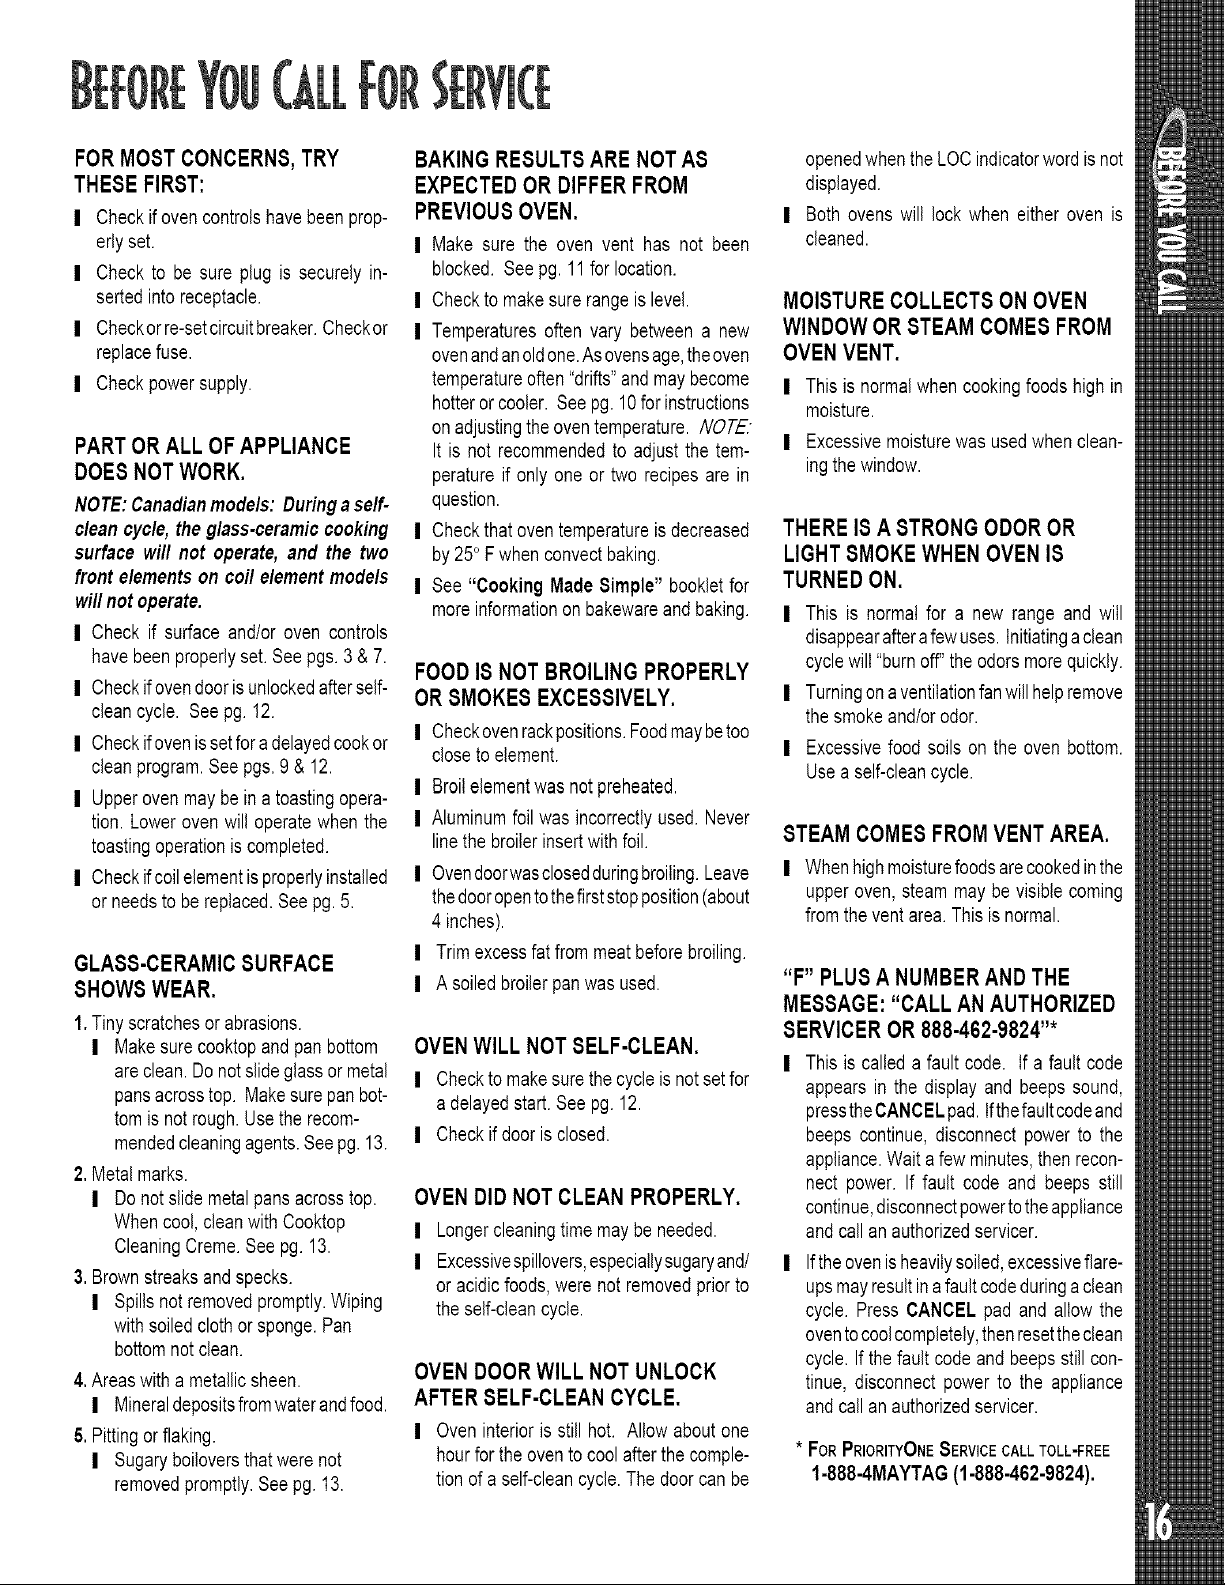
CONVENIENCEOUTLET
(CA.ADIANMODELSONLY)
Theconvenienceoutletis locatedon the lower
leftside of the backguard.
Besureappliancecordsdo not restonor near
the surfaceelement.If the surfaceelementis
turnedon,thecordandoutletwillbe damaged.
Theconvenienceoutletcircuitbreakermaytrip
if the small applianceplugged into it exceeds
10amps.To resetthecircuitbreaker,pressthe
switchlocatedonthe loweredgeof the back-
guard.
TO REPLACEOVEN LIGHTBULB:
1. Whenoveniscool,usefingertipstograsp
edgeof bulbcover.Pull out andremove.
2, Carefully remove old bulb by pulling
straight out of ceramicbase.
3, To avoiddamagingor decreasingthelife
ofthenewbulb,donottouchthebulbwith
barehandsor fingers.Holdwithaclothor
paper towel. Push new bud prongs
straight into smallholesofceramicbase.
4, Replace bulb cover by snapping into
place.
5, Reconnectpower to the range. Reset
clock.
BULB COVER
WIRE
RETAINER
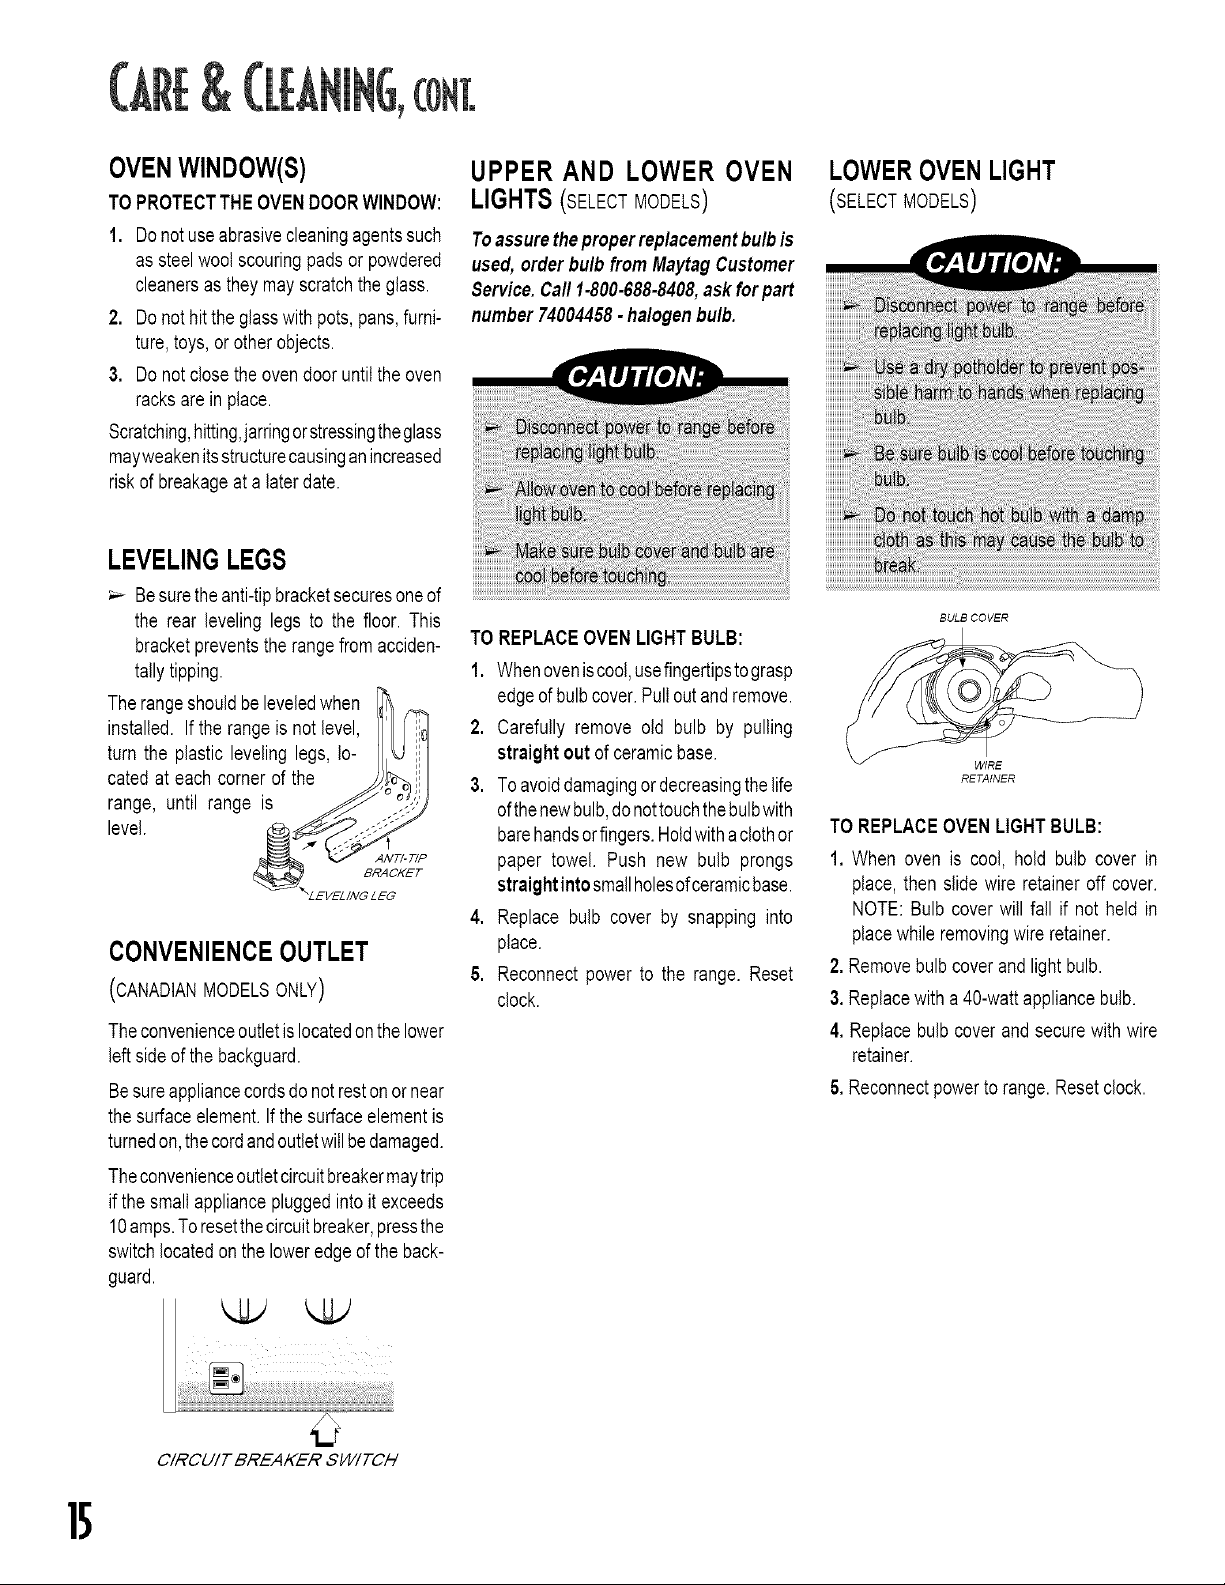
TO REPLACEOVENLIGHT BULB:
1. When oven is cool, hold bulb cover in
place, then slide wire retaineroff cover.
NOTE: Bulb cover will fall if not held in
place while removingwire retainer.
2. Removebulb coverand light bulb.
3. Replacewith a 40-wattappliancebulb.
4. Replacebulbcover and secure with wire
retainer.
5. Reconnectpowerto range.Resetclock.
CIRCUIT BREAKER SWITCH
]5
FOR MOST CONCERNS,TRY
THESE FIRST:
I Checkif oven controlshavebeen prop-
erly set.
I Check to be sure plug is securely in-
sertedinto receptacle.
I Checkorre-setcircuitbreaker.Cheokor
replacefuse.
I Checkpowersupply.
PART OR ALL OF APPLIANCE
DOES NOT WORK.
NOTE:Canadianmodels: Duringaserf-
cleancycle, the glass-ceramiccooking
surface will not operate, and the two
front elements on coil element models
will not operate.
I Check if surface and/or oven controls
havebeen properlyset. See pgs.3 & 7.
I Checkif ovendoor is unlockedafterself-
cleancycle. See pg. 12.
| Checkif ovenis setfor adelayedcook or
cleanprogram.See pgs.9 & 12.
| Upperoven may be in a toastingopera-
tion. Lower oven will operatewhen the
toastingoperationis completed.
| Checkif coilelementis properlyinstalled
or needsto be replaced.See pg. 5.
GLASS-CERAMIC SURFACE
SHOWS WEAR.
1,Tiny scratchesor abrasions.
| Make surecooktopand panbottom
areclean.Do notslideglassor metal
pansacrosstop. Make surepanbot-
tomis not rough.Use the recom-
mendedcleaningagents.Seepg. 13.
2, Metal marks.
| Do not slide metalpansacrosstop.
Whencool, cleanwith Cooktop
CleaningCreme.See pg. 13.
3, Brownstreaksand specks.
| Spillsnot removed promptly.Wiping
withsoiledclothor sponge. Pan
bottomnot clean.
4, Areaswith a metallicsheen.
| Mineraldepositsfromwaterandfood.
5, Pittingor flaking.
| Sugaryboiloversthatwere not
removedpromptly.Seepg. 13.
BAKINGRESULTSARE NOTAS
EXPECTEDOR DIFFER FROM
PREVIOUSOVEN.
I Make sure the oven vent has not been
blocked. See pg. 11 for location.
| Checkto makesure range is level.
| Temperatures often vary between a new
ovenandan oldone.As ovensage,theoven
temperatureoften "drifts"and may become
hotteror cooler. Seepg. 10for instructions
on adjustingthe oventemperature. NOTE
It is not recommendedto adjust the tem-
peratureif only one or two recipesare in
question.
| Checkthat oven temperatureis decreased
by 25o F when convectbaking.
I See "Cooking MadeSimple" bookletfor
moreinformationonbakewareandbaking.
FOOD IS NOT BROILING PROPERLY
OR SMOKES EXCESSIVELY.
I Checkovenrackpositions.Foodmaybetoo
closeto element.
I Broilelementwas not preheated,
| Aluminum foil was incorrectlyused. Never
linethe broilerinsertwith foil.
| Ovendoorwasclosedduringbroiling.Leave
thedoor opento thefirststopposition(about
4 inches).
| Trim excessfat frommeatbeforebroiling.
| A soiledbroiler pan wasused.
OVENWILL NOTSELF-CLEAN.
I Checkto makesure the cycleis not setfor
a delayedstart.See pg. 12.
| Checkif door is closed.
OVEN DID NOT CLEAN PROPERLY.
I Longercleaningtime maybe needed.
I Excessivespillovers,especiallysugaryand/
or acidicfoods, were not removedprior to
the self-cleancycle.
OVEN DOOR WILL NOT UNLOCK
AFTER SELF-CLEAN CYCLE.
I Oven interioris still hot. Allow about one
hourfor the ovento cool after the comple-
tion of a self-cleancycle.The doorcan be
openedwhenthe LOCindicatorword is not
displayed.
I Both ovens will lock when either oven is
cleaned.
MOISTURE COLLECTS ON OVEN
WINDOW OR STEAM COMES FROM
OVEN VENT.
I This is normalwhen cookingfoods highin
moisture.
| Excessivemoisturewas usedwhen clean-
ingthe window.
THERE IS A STRONG ODOR OR
LIGHT SMOKE WHEN OVEN IS
TURNED ON.
I This is normal for a new range and will
disappearafterafew uses. Initiatinga clean
cyclewill "burnoff" the odors morequickly.
I Turningon aventilationfanwill helpremove
the smokeand/orodor.
I Excessivefood soils on the oven bottom.
Usea self-cleancycle,
STEAMCOMES FROM VENT AREA.
I Whenhighmoisturefoodsarecookedinthe
upper oven, steam may be visible coming
fromthe vent area.Thisis normal.
"F" PLUSA NUMBERAND THE
MESSAGE:"CALL AN AUTHORIZED
SERVICEROR 888-462-9824"*
| This is called a fault code. If a fault code
appears in the display and beeps sound,
presstheCANCELpad. Ifthefaultcodeand
beeps continue, disconnect power to the
appliance.Wait a fewminutes,then recon-
nect power. If fault code and beeps still
continue,disconnectpowerto theappliance
and call anauthorizedservicer.
I Ifthe ovenis heavilysoiled,excessiveflare-
ups mayresultin a faultcodeduringa clean
cycle. Press CANCEL pad and allow the
ovento coolcompletely,thenresetthe clean
cycle. If the fault codeand beeps still con-
tinue, disconnect power to the appliance
and call anauthorizedservicer.
* FOR PRIORITYONESERVICECALL TOLL-FREE
1-888-4MAYTAG (1-888-462-9824).
=
=
4.
5.
=
NS
Conditionsand damagesresultingfrom any of the following:
a. improperinstallation,delivery,or maintenance.
b. Any repair,modification,alteration,or adjustment not authorizedby the manu-
facturer or an authorized servicer.
c. Misuse, abuse, accidents,or unreasonableuse.
d. incorrectelectric current,voltage, or supply.
e. impropersetting of any control.
Warrantiesare void if the original serial numbers have bee removed, altered,or
cannotbe readilydetermined.
Light bulbs.
Productspurchasedfor commercialor industrialuse.
The cost of serviceor servicecall to:
a. Correct installationerrors.
b. instructthe user on the proper use of the product.
c. Transportthe applianceto the servicer.
Consequentialor incidentaldamagessustainedby any personas a result of any
breachof thesewarranties.Somestatesdo not allowthe exclusionor limitationof
consequentialor incidentaldamages, so the aboveexclusion maynot apply.
I Callthe dealerfrom whomyour appliancewaspurchasedor callMaytagAppliances
SalesCompany, MaytagCustomerAssistanceat 1-888-462-9824,USAto locate
an authorizedservicer.
I Be sure to retain proofof purchaseto verifywarrantystatus. Referto WARRANTY
for further informationon owner's responsibilitiesfor warranty service.
I If the dealer or service company cannot resolve the problem, write to Maytag
AppliancesSales Company,Attn: CAIR®Center, RO. Box 2370, Cleveland,TN
37320-2370,or call 1-888-4Maytagfor PriorityOneService (1-888-462-9824).
U.S. customers using TTY for deaf, hearing impaired or speech impaired, call
1-800-688-2080.
NOTE:Whenwritingor calling abouta serviceproblem, pleaseincludethe follow-
ing information:
a. Your name,addressand telephonenumber;
b. Model numberand serial number(found behindthe backguard);
c. Nameand addressof your dealer or servicer;
d. A clear descriptionof the problemyou are having;
e. Proofof purchase(salesreceipt).
I User's guides,service manuals and parts informationare availablefrom Maytag
AppliancesSales Company,MaytagCustomerAssistance.
]7
MAYTAG • 403 West Fourth Street North ° EO. Box 39 ° Newton, Iowa 50208
CUISINII_RE #LECTRIQUE GEMINI TMDE MAYTAG
Installateur: Veuillez laisserle present
guideavecI'appareil.
Client : Veuillezlire le presentguideet le
conserver pour r6ference future.
Conservezaussi les re;us de caisseet
les chequesoblit6resa titre de preuve
d'achat.
Numerodemodele
Numerodeserie
Dated'achat
_URITE
• ............ Pages 19 & 21
_0N SURELEMENTS.Pages 22&24
AUFOUR...... Pages 25 a 30
ETHETTOYAGEPages 31&35
D'APPELER......... Page 36
TIE............... Page3_
Si vous avez des questions,t61ephonez
au
1-888-4MAYTAG(1-888-462-9824)
(lundiauvendredi,de8 h a 20 h HNE)
Internet: http://www.maytag.com
Pour obtenirdesrenseignements sur
le service, consultezla page 37.
!ADELUSUARIO
........ Page 38
_' http://www.maytag corn Litho USA.
J t
Veuillezlife et observertoutes les consignes
avantd'utiliserlepresentappareil pourprevenir
toutrisqued'incendie,d'electrocution,deblessures
oudedommagesaI'appareilenraisond'unemploi
impropre.UtilisezI'appareilseulementpourson
butprevu,conformementau presentguide.
Pour assurer une utilisation approprieeet
securitaire : seul un technicienqualifiedevrait
installerI'appareiletIe mettrea Iaterre.
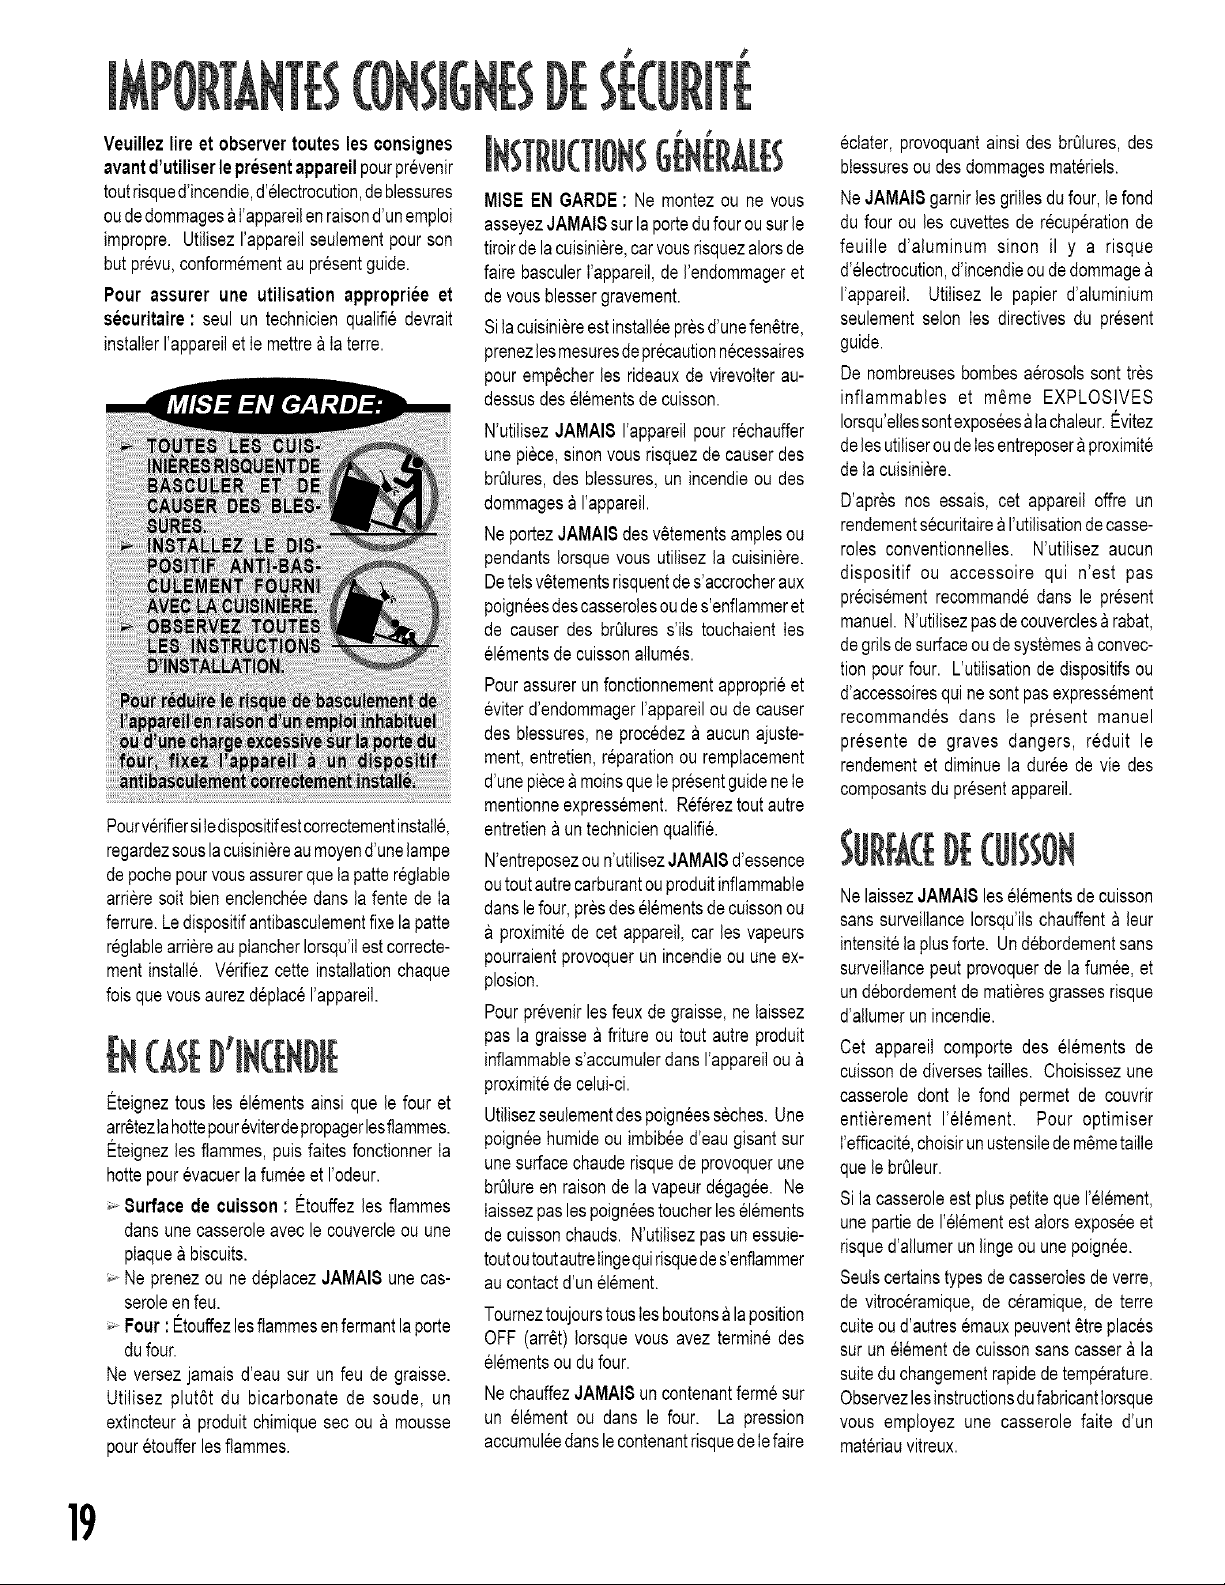
Pourverifiersiledispositifestcorrectementinstall&
regardezsouslacuisiniereau moyend'unelampe
depochepourvousassurerquelapattereglable
arrieresoit bienenclencheedans la fentede Ia
ferrure.Ledispositifantibasculementfixelapatte
reglablearriereau plancherIorsqu'ilest correcte-
mentinstalle. Verifiezcette installationchaque
foisquevousaurezdeptac4I'appareil.
(ASE DiE
Eteigneztous les elementsansi que le four et
arr6tezlahottepour4viterdepropagerlesflammes.
Eteignezles flammes,puisfaites fonctionnerIa
hottepourevacuerlafumeeet I'odeur.
_-Surface de cuisson: Etouffezles ftammes
dartsune casseroleavecle couvercleou une
plaquea biscuits.
_-Ne prenezou ne deplacezJAMAI8 unecas-
seroleenfeu.
_-Four: Etouffezlesflammesenfermantlaporte
dufour.
Ne versezjamaisd'eau sur un feu de graisse.
Utilisez plut6t du bicarbonate de soude, un
extincteura produitchimiquesec ou a mousse
pouretoufferlesflammes.
MISEEN GARDE: Ne montezou ne vous
asseyezJAMAI8sur la portedufourousurle
tiroirde lacuisiniere,carvousrisquezalorsde
faire basculerI'apparei],deI'endommageret
de vousblessergravement.
Silacuisiniereestinstalleepresd'unefen6tre,
prenezlesmesuresdeprecautionnecessaires
pouremp6cherles rideauxde virevoIterau-
dessusdes4Iementsde cuisson.
N'utilisezJAMAI8 I'apparei]pour rechauffer
unepiece,sinonvousrisquezdecauserdes
brQlures,des btessures,un incendieou des
dommagesa I'appareil.
NeportezJAMAI8 desv6tementsamplesou
pendantsIorsquevous utilisezla cuisiniere.
Detelsv6tementsrisquentdes'accrocheraux
poigneesdescasserolesou des'enflammeret
de causer des brt31uress'iis touchaientIes
el4mentsde cuissonallumes.
Pourassurerunfonctionnementapproprieet
eviterd'endommagerI'appareilou de causer
des blessures,ne procedeza aucunajuste-
ment,entretien,r4parationou remplacement
d'unepiecea moinsqueIepresentguideneIe
mentionneexpressement.R4fereztoutautre
entretiena untechnicienqualifi&
N'entreposezoun'utilisezJAMAI8d'essence
outoutautrecarburantouproduitinflammable
danslefour, presdeselementsde cuissonou
proximitede cet appareil,car les vapeurs
pourraientprovoquerun incendieouuneex-
plosion.
Pourprevenirlesfeuxde graisse,ne laissez
pas la graissea friture ou toutautre produit
inflammables'accumulerdansI'apparei]ou
proximitede celui-ci.
Utilisezseulementdespoigneesseches.Une
poigneehumideou imbibeed'eaugisantsur
unesurfacechauderisquede provoquerune
brQlureen raisonde la vapeurd4gagee. Ne
laissezpaslespoigneestoucherleselements
decuissonchauds. N'utilisezpas unessuie-
toutoutoutautreIingequirisquedes'enflammer
aucontactd'unelement.
ToumeztoujourstousIesboutonsa la position
OFF (arr6t)Iorsquevous avez terminedes
el4mentsou dufour.
NechauffezJAMAI8 un contenantfermesur
un element ou dans le four. La pression
accumuleedanslecontenantrisquedeIefaire
eclater,provoquantainsides brQlures,des
btessuresoudesdommagesmateriels.
NeJAMAI8 garnirlesgrillesdufour,lefond
du four ou les cuvettesde r4cuperationde
feuille d'aluminum sinon il y a risque
d'electrocution,d'incendieoude dommage
I'appareil. Utilisez le papierd'aluminium
seulementselon Ies directivesdu present
guide.
De nombreusesbombesaerosolssont tres
inflammables et m4me EXPLOSIVES
Iorsqu'ellessontexposeesa lachaleur.Evitez
delesutiliseroude Iesentreposera proximite
de la cuisiniere.
D'apres nos essais, cet appareiloffre un
rendementsecuritairea I'utilisationdecasse-
roles conventionnelles. N'utilisez aucun
dispositif ou accessoire qui n'est pas
pr4cisementrecommandedans le present
manuel.N'utilisezpasdecouverclesa rabat,
degrilsdesurfaceoudesystemesaconvec-
tion pour four. L'utiIisationde dispositifsou
d'accessoiresquinesont pasexpressement
recommandes darts le present manuel
presente de graves dangers, reduit le
rendementet diminuela dureede vie des
composantsdu presentappareil.
NelaissezJAMAI8 lesel4mentsdecuisson
sanssurveillanceIorsqu'iischauffenta leur
intensitelaplusforte. Undebordementsans
surveillancepeut provoquerde la fumee,et
undebordementdematieresgrassesrisque
d'allumerun incendie.
Cet appareil comporte des 41ementsde
cuissonde diversestailles. Choisissezune
casseroledont le fond permetde couvrir
entierement I'element. Pour optimiser
I'efficacit&choisirunustensiledem6metaille
quelebrOleur.
Si la casseroleestpluspetitequeI'el4ment,
unepartiede I'elementest alorsexposeeet
risqued'allumerunlingeouune poignee.
Seulscertainstypesde casserolesdeverre,
de vitroceramique,de ceramique,de terre
cuiteoud'autresemauxpeuvent6treplaces
sur un elementdecuissonsanscassera la
suiteduchangementrapidedetemperature.
ObservezlesinstructionsdufabricantIorsque
vous employez une casserole faite d'un
materiauvitreux.
19
Tournezla poigneedescasserolesverslecen-
tredelasurfacedecuisson,etnonversI'exterieur
delacuisiniereouau-dessusd'unautreelement.
Cette pratique reduit le risque de brQlures,
d'allumagedes materiauxinflammableset de
renversementencasd'accidentou si unjeune
enfanttouchelacasserole.
P ,#
[[[M[NT$[NSPIRAL[
((ERTAIN MOD LE )
Poureviterqueleselementschauffantssubissent
des dommages,ne pas Ies immergerou Ies
laver dansun lave-vaisselle,ou dansun four
autonettoyant.Unelementendommagepourrait
produireuncourt-circuitsuscitantunrisquede
chocelectrique.
Veillerace que les cuvettesde recuperation
soienttoujoursenplace;leurabsencedurantIa
cuisson peut exposer Ie c&blage a des
dommages.
Garnituresde protection:Nepas garnirlescu-
vettesde recuperationsousleselementsouIe
fonddu fouravecde lafeuilled'aluminium,sauf
Iorsquececi est suggeredans Ie manuel. La
miseenplaced'untel garnissagepeutsusciter
unrisquedechocelectriqueou d'incendie.
NefaitesJAMAI8 de cuissonsur unesurface
cassee.Silasurfacedecuissonvenaitacasser,
Iesliquidesnettoyantset lesdebordementsdes
casserolesrisqueraientdes'infiltrersouslasur-
face,provoquantundangerd'electrocution.Dans
untel cas,communiquezimmediatementavec
untechnicienqualifie.
Nettoyezlasurfacedecuissonavecprecaution.
Certains produits nettoyants degagent des
vapeursnocivesIorsqu'ilsviennentencontact
avecunesurfacechaude.Si vous utilisezune
eponge,un chiffon ou un essuie-toutimbibe
d'eau pour essuyer une surface chaude,
procedezavecprecautionpoureviterlesbrOlures
causeesparIavapeur.
AgissezavecgrandsoinIorsquevousdeplacez
Ia friteuseou IorsquevousjetezI'huilechaude.
LaissezrefroidirI'huileavantdetenterdedeplacer
Iafriteuse.
Ouvrezla(s)porte(s)dufouravecsoin.Laissez
s'echapperI'airchaudet Ia vapeuravantd'en
retirerou d'y introduireunecasserole.
PourassurerIefonctionnementet lerendement
appropriedufour,nemasquezpasetn'obstruez
pas Ia bouche d'aeration. Lorsque Ie four
fonctionne,lazonepeuventdevenirsuffisamment
chaudspourprovoquerdesbrC_lures.
Placeztoujoursles grillesdu fourauxpositions
approprieesIorsquele four est froid. Si vous
devezdeplacerune grille Iorsquele four est
chaud,veillez a ne pas toucher un element
chaudavecIa poignee.
HETTOYANT
NettoyezseulementIespiecesenumereesdans
Ie presentguide.Ne nettoyezpasIejoint de la
porte.Ce joint est une pieceessentiellepour
assurer une bonne isolation. Ne pasfrotter,
endommagerou deplacerlejoint.
N'utilisezaucunproduitnettoyantpour Iefour.
Deplus,n'utilisezaucunproduitnettoyantcom-
mercialpourlefour ourev6tementprotecteur
I'interieurdufour ou autourde toute piecedu
four.
Avantde procedera I'autonettoyagedu four,
retirezla lechefrite,les grillesdu four et toute
autrecasserolepoureviterI'excesde fumee,la
decolorationdes grilles et les dommagesaux
casseroles.
EssuyezI'excesdesdebordements,surtouts'ii
s'agitdematieresgrasses,avantdedemarrerle
cycled'autonettoyagepoureviterlaformationde
fumee,la productionde braiseouI'allumage.
IIestnormalquelasurfacedecuissondevienne
chaudedurantIecycledenettoyage.Enconse-
quence,evitezdetoucherlasurface,laporte,le
hublotetlabouched'aerationdurantlenettoyage.
Ne touchezJAMAI8 les elementsde la
surfacedecuissonoudufour,leszones
proximitedes elementset les surfaces
interieuresdu fourdanslesminutesqui
suiventleurutilisation,
M_mesi leselementsont reprisleurcouleur
d'origine (foncee),ils peuventencore6tre
treschauds.Leszonesautourdeselements
de la surfacede cuisson et les surfaces
interieuresdu four peuventdevenirassez
chaudespourcauserdesbrOlures.Durantou
immediatementapres Ieur utilisation, ne
touchezpaset nelaissezaucunv6tementou
autre materiau inflammable toucher un
element,unezoneautourd'unelementou la
surfaceinterieuredufouravantdeleurlaisser
Ietempsderefroidirsuffisamment.
D'autressurfacespeuventdevenirchaudes,
notammentla surfacede cuisson,la zone
devant la surface de cuisson,la bouche
d'aerationdufour,la porteetlehublotdufour
ainsique toutesIeszonesavoisinantes.
Ne laissezJAMAI8 unenfantseuIou sans
surveillanceIorsquela cuisinierefonctionne
ou qu'elleestchaude.
Ne laissezJAMAI8 un enfants'asseoirou
montersurtoutepiecede la cuisiniere.
ATTENTION:N'entreposezJAMAI8d'objets
susceptiblesd'interesserunenfantdansles
armoiressitueesau-dessusdela cuisiniere
ousur ledosseret.Unenfantquigrimpesur
Iacuisiniere,laporteouletiroirpouratteindre
detelsobjetsrisqued'endommagerl'appareiI,
de se brOleroudese blessergravement.
Appreneza vosenfantsquela cuisiniereet
Iescasserolesdeposeessur la surfacede
cuissonou introduitesdartslefour peuvent
_trechaudes.Faitesrefroidirlescasseroles
chaudesdansunendroitsecuritaire,horsde
Ia porteedes enfants. Les enfantsdoivent
comprendreque la cuisinieren'est pas un
jouet;ilsnedoiventpasjoueraveclesboutons
ou touteautrepiecede I'appareil.
t t
Nettoyezsouventlahotteetlefiltrepourenlever
toute accumulationde graisse ou d'autres
matieres inflammableset eviter ainsi les
incendies.
Faitesfonctionnertahotteaumomentdeflamber
unmets(commedescerisesjubilees).
SEENGARDEETAYIS
IMPORTANTSENMATIERE
r p
l_ESE(URITE
Envertude la CaliforniaSafe DrinkingWater
andToxicEnforcementActof 1986(Proposi-
tion65), Ie gouverneurde la Californiedolt
publierunelistedessubstancesqui,selonI'etat
delaCalifornie,causentlecanceroupresentent
un risquepourla reproduction.En outre, les
entreprisesdoivent avertir leurs clients de
I'expositionpotentiellea detellessubstances.
Lesutilisateursdu presentappareilsontpar la
presente, avertis gue I'utilisation du cycle
d'autonettoyagerisquede produiredefaibles
emanations de certaines des substances
enumerees,ycomprislemonoxydedecarbone.
PourminimiserI'expositionaces substances,
aerezlacuisinierea I'airexterieur,c.-a-d,ouvrez
unefen6treoula portede Ia piecependantIe
cycled'autonettoyage.
AVISIMPORTANT- OISEAUXFAMILIERS:
Ne laissezjamais vos oiseaux domestiques
dartslacuisineoudansunepieceo_lesvapeurs
de la cuisine pourraient les atteindre. Les
oiseauxont un systemerespiratoiretres sen-
sibleet les vapeursqui s'echappentd'un four
pendantIe cycle autonettoyantpeuventleur
_tre nocivesou m_me fatales.De plus, les
vapeurs qui s'echappentIorsque I'huile
cuisson,les corpsgras, la margarineet Ies
po_lesouchaudronsa rev_tementantiadhesif
sontsurchaffespeuventegalement_trenocives.
r r r
LBPRBENTBINSTRIJ(TIONSPOURREa:EREN(E!:UTURE.
21
J J
r t
DESELEMENTS
SURGE
Cesboutonsserventa allumerles elementsde
surface.Chaqueboutonoffreuneplageinfiniede
reglages,deLOW(faibleintensite)a HIGH(forte
intensite). Vous pouvezreglerces boutons
toutevaleurinscriteeta toutepositionentreces
valeurs.
REGLAGE D'UN BOUTON
,
2,
PlacezunecasserolesurI'element.
Poussezleboutonettournez-ledansl'uneou
I'autredirectionjusqu'aureglagede chaleur
desire.
LedosseretcomportedessymboIesqui
indiquentchaqueelementet son bouton
t orrespondant. Par exemple,
• indiqueI'elementavantdedroite.
3, IIy a unvoyantpourchaquepairedeboutons.
Lorsqu'unoulesdeuxboutonsdeselements
desurfacecorrespondantssonttournesdans
Ia plaged'intensit&le voyants'allume. Le
voyant s'eteint Iorsque les deux boutons
correspondantssont revenusa la position
OFF(arr6t).
4, Apres la cuisson, tournez le bouton a la
positionOFF (arr6t).Enlevezlacasserole.
ELEMENT DOUBLE
(CERTAINS MODELES)
Certaines surfaces en vitro- I
Iceramiquesont equipeesd'un
elementdoublesitue a I'avantdroit. Pour le
mettre en marche,appuyer sur I'interrupteur
berceaudutableaudecommande,a (_) pourle
grandelementoua • pourlepetitelement.
Latailleetletypedecasseroledem6mequele
typedecuissoninfluentsurlereglagedechaleur.
Pourobtenirde plus amplesrenseignements
surlescasserolesetautresfacteursquiinfluent
sur lesreglagesde chaleur,consultezIeIivret
+:Lacuisinesirnplifiee>>.
HIGH(elevee):
Pouramenerun liquideaebullition.Reduisez
toujourslachaleurIorsqueleliquidecommence
bouillirouIorsqueI'alimentcommenceacuire.
MED,HIGH(8-9)(moyenne-elevee):
Pourr6tiruneviande,chaufferdeI'huilea friture
ou pour sauter. MaintenezI'elementa une
chaleureleveepouramenerunegrandequantite
deIiquideaebullition.
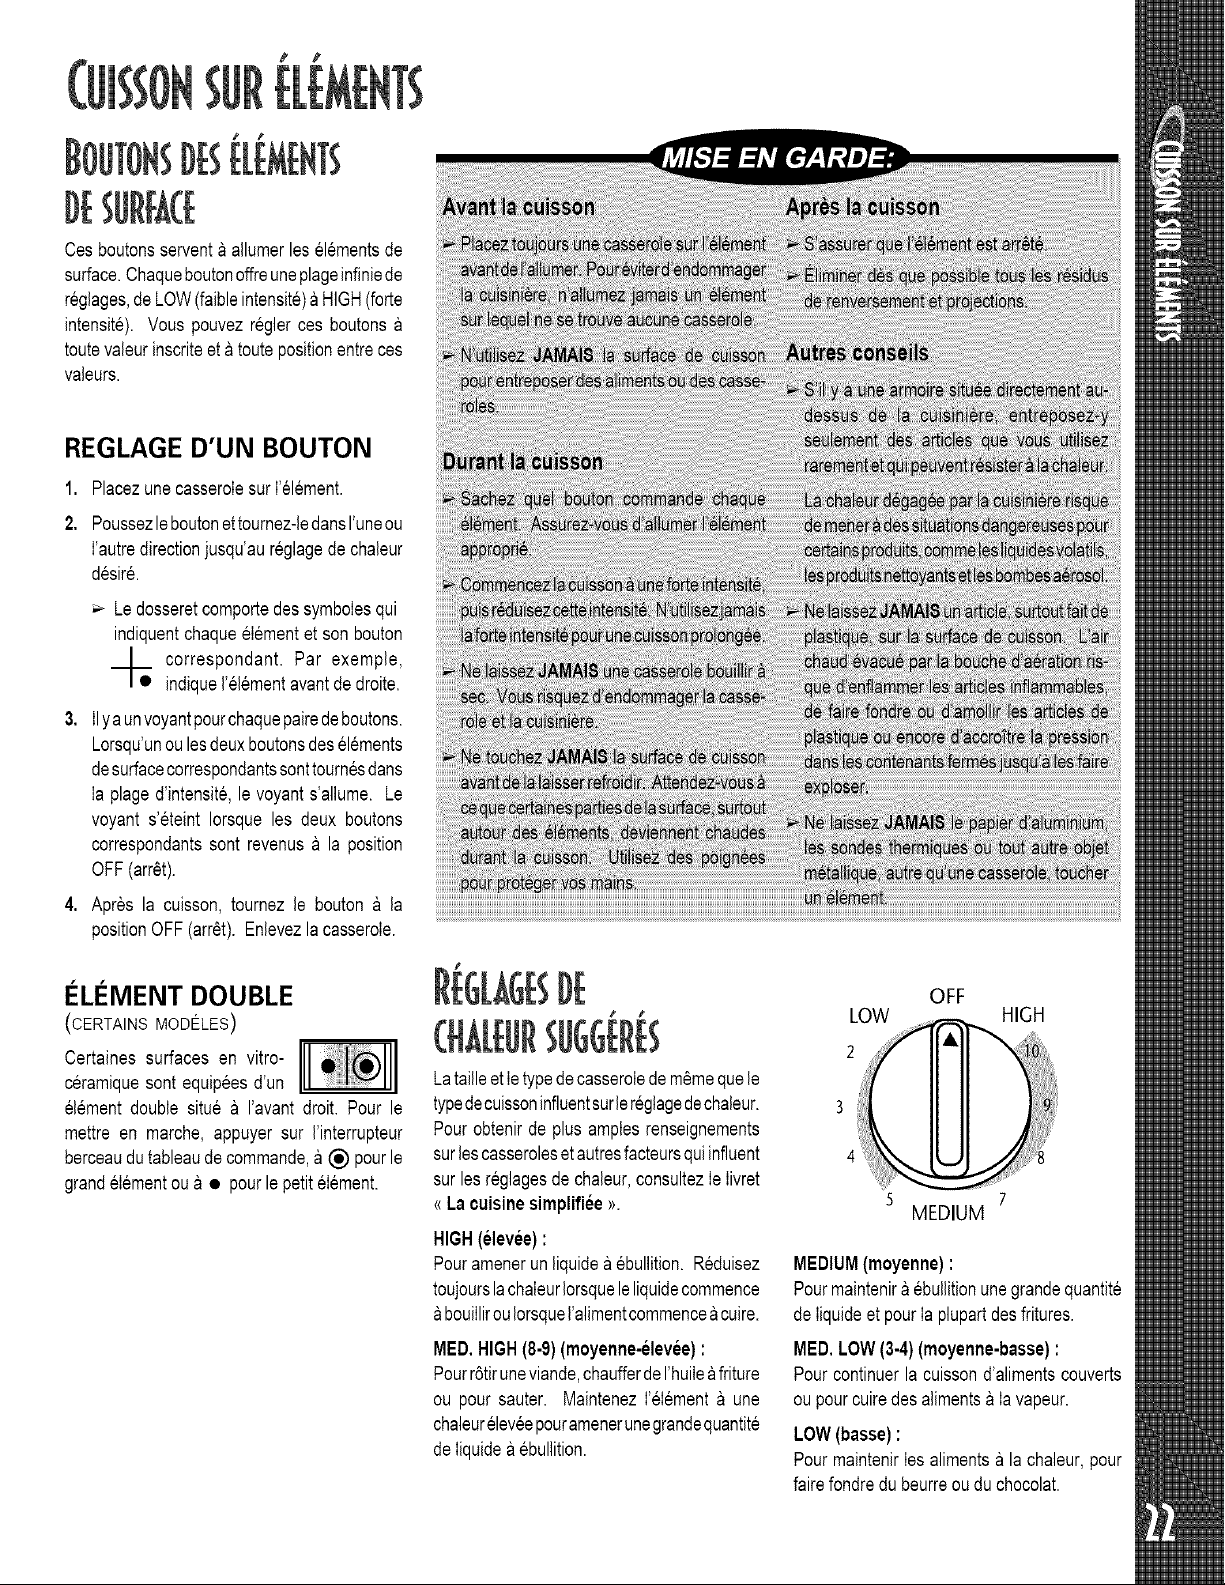
OFF
LOW HIGH
34i2 k__ i _
MEDIUM
MEDIUM(moyenne):
Pourmaintenira ebullitionunegrandequantite
deIiquideet pourIaplupartdesfritures.
MED,LOW(3-4)(moyenne-basse):
Pourcontinuerla cuissond'alimentscouverts
oupourcuiredesalimentsa Iavapeur.
LOW(basse):
PourmaintenirIesalimentsa la chaleur,pour
fairefondredubeurreouduchocolat.
i J
2}
UE
SURFACEDECUISSONENVITROCI_RAMIQUE
I Surloscuisinieresdestineesaumarchecanadien,Iasurfacede cuissonnefonctionnepas
durantle cycled'autonettoyage.
I IIpoutemanerunelegerefumeeet une faibleodeurde lasurfacede cuissonlospremieres
fois quevous I'utilisez. II s'agitla d'unesituationnormale.
I Lorsqu'unboutonestreglea une intensitede chaleur,I'elementdevientrouge,visibleau
travers de la surfacede vitroceramique.L'eIements'allumeet s'eteintsans cessepour
maintenirI'intensitede chaleurselectionnee.
I Unesurfacedecuissonenvitroceramiqueconservela chaleurpendantunecertaineperiode
apresqueI'elementsesoiteteint.LorsquelevoyantHOTSURFACE(surfacechaude)s'eteint
(voirci-dessous),lasurfacede cuissona assezrefroidipourvouspermettrede latoucher.
Lossurfacesenvitroceramiqueconserventlachaleur.EteindreIeselementsquelquesminutes
avantqueIanourrituresoitcomptetementcuiteetseservirdelachaleurrestantepourterminer
Iacuisson.
I REMARQUE: N'essayezpasde souleverla surfacede cuisson.
et continuea lukejusqu'aceque Iasurfacede
cuissonssesoitrefroidie.
SURFACESDECUISSON
Lessurfacesde cuissonsont indiqueessur la
cuisinierepardesdessinspermanentsappliques
surlasurfacedevitroceramique.Pouraccroftre
le rendementde la cuisson, choisissezune
casserolede lataillede I'element.
Lescasserolesnedoiventpasdepasserde
plus de 1/2po (12mm)b 1 po (25 mm) au-
dell de lasurfacede cuisson.
Pourobtenirde plus amplesrenseignements
surIescasseroles,consultezlelivret_{LaCui-
sine8implifiee >>. CENTREDE
RECHA UFFA GE
WARMINGCENTER(CENTRE DE
RECHAUFFAGE) (CERTAINSMODELES)
Utiliserle centrede rechauffagepourmaintenir
au chauddes alimentscults commelegumes,
sauceset desassiettes-repasallantaufour.
Appuyer sur I'interrupteurberceaua marche-
arr6t.
CONSEILSPOURPROTI GERLA
SURFACEDEVITROCI RAMIQUE
Avantlapremiereutilisation,nettoyerlasur-
facedecuisson.(Voir Nettoyage,page33.)
VOYANT
SURFAOE CHAUDE
VOYANTHOTSURFACE
(SURFACECHAUDE)
Levoyantdesurfacechaudesituea I'avant,au
centre,s'allumeIorsqueI'appareilesten marche
N'utilisezpasdescasserolesdeverre.EIles
risquentd'egratignerla surface.
Ne laissezpas los objets de plastique,le
sucreet lesalimentsaforteteneurensucre
fondresurlasurfacedecuissonchaude.Si
cela se produit,nettoyezimmediatement.
(VoirNettoyage,page33.)
N'utilisezjamaisla surfacedecuissonpour
travaillerou pourcouperdes aliments.Ne
faitesjamaiscuirelesalimentsdirectement
sur la surfacede cuisson.
Ne laissezjamaisunecasserolebouillir
sec. Vous risquezd'endommagerla cas-
seroleet Ia cuisiniere.
N'utilisezjamaisde contenantsjetablesen
aluminiumet ne placezjamaisunsous-plat
ou un supportawokentre lasurfaceet la
casserole.Cesarticlesrisquentdemarquer
ou d'egratignerIa surface.
Ne faites pas glisser des casseroles
d'aluminiumsur la surfacechaude. Los
casserolesrisquentde Iaisserdesmarques
quevousdevrezaussit6tsupprimer.(Voir
Nettoyage,page33.)
Assurez-vousque lasurfaceetlefondde la
casserole sont propres avant d'allumer
I'element,pourainsieviterlesegratignures.
Poureviterd'eraflerou d'endommagerIa
surfacedevitroceramique,n'ylaissezaucun
dep6t de sucre, de sel ou de matieres
grasses. Essuyezla surface au moyen
d'unchiffonpropreoud'unessuie-toutavant
devousenservir.
N'utilisezjamaisunlingea vaisselleouune
epongesale pour nettoyerla surfacede
cuisson. II peutse deposersur lasurface
unepelliculequilaisseraitdestachesapres
Ie chauffagede la zone.
Pour maintenirI'aspectdu Ia surfacede
cuissonenvitroceramique,nettoyezapres
chaqueutilisation.
I Couvrirtouslesalimentsd'uncouvercleou
d'un papierd'aluminiumpourpreserverla
qualitede la nourriture.
I Lorsdu rechauffagede p&tisserieset de
pains, le couvercledolt comporterune
ouverturepourqueI'humidites'echappe.
I Nepasutiliserdefilmetirablepourrecouvrir
Iesaliments.Leplastiquerisquedefondre
surlasurfaceetseraittresdifficileanettoyer.
N'utiliserquedesustensilesrecommandes
pourlefouret la tabledecuisson.
Portertoujoursdesgantsisolantspourretirer
Ianourrituredu centrede rechauffage,los
assietteset ustensilesseronttres chauds.
II n'est pas recommandede rechaufferla
nourritureplusIongtempsqu'uneheure,la
qualitedelanourriturerisquantd'ensouffrir.
IIn'estpasrecommandede rechaufferdes
alimentsfroidssurle centrede rechauffage.
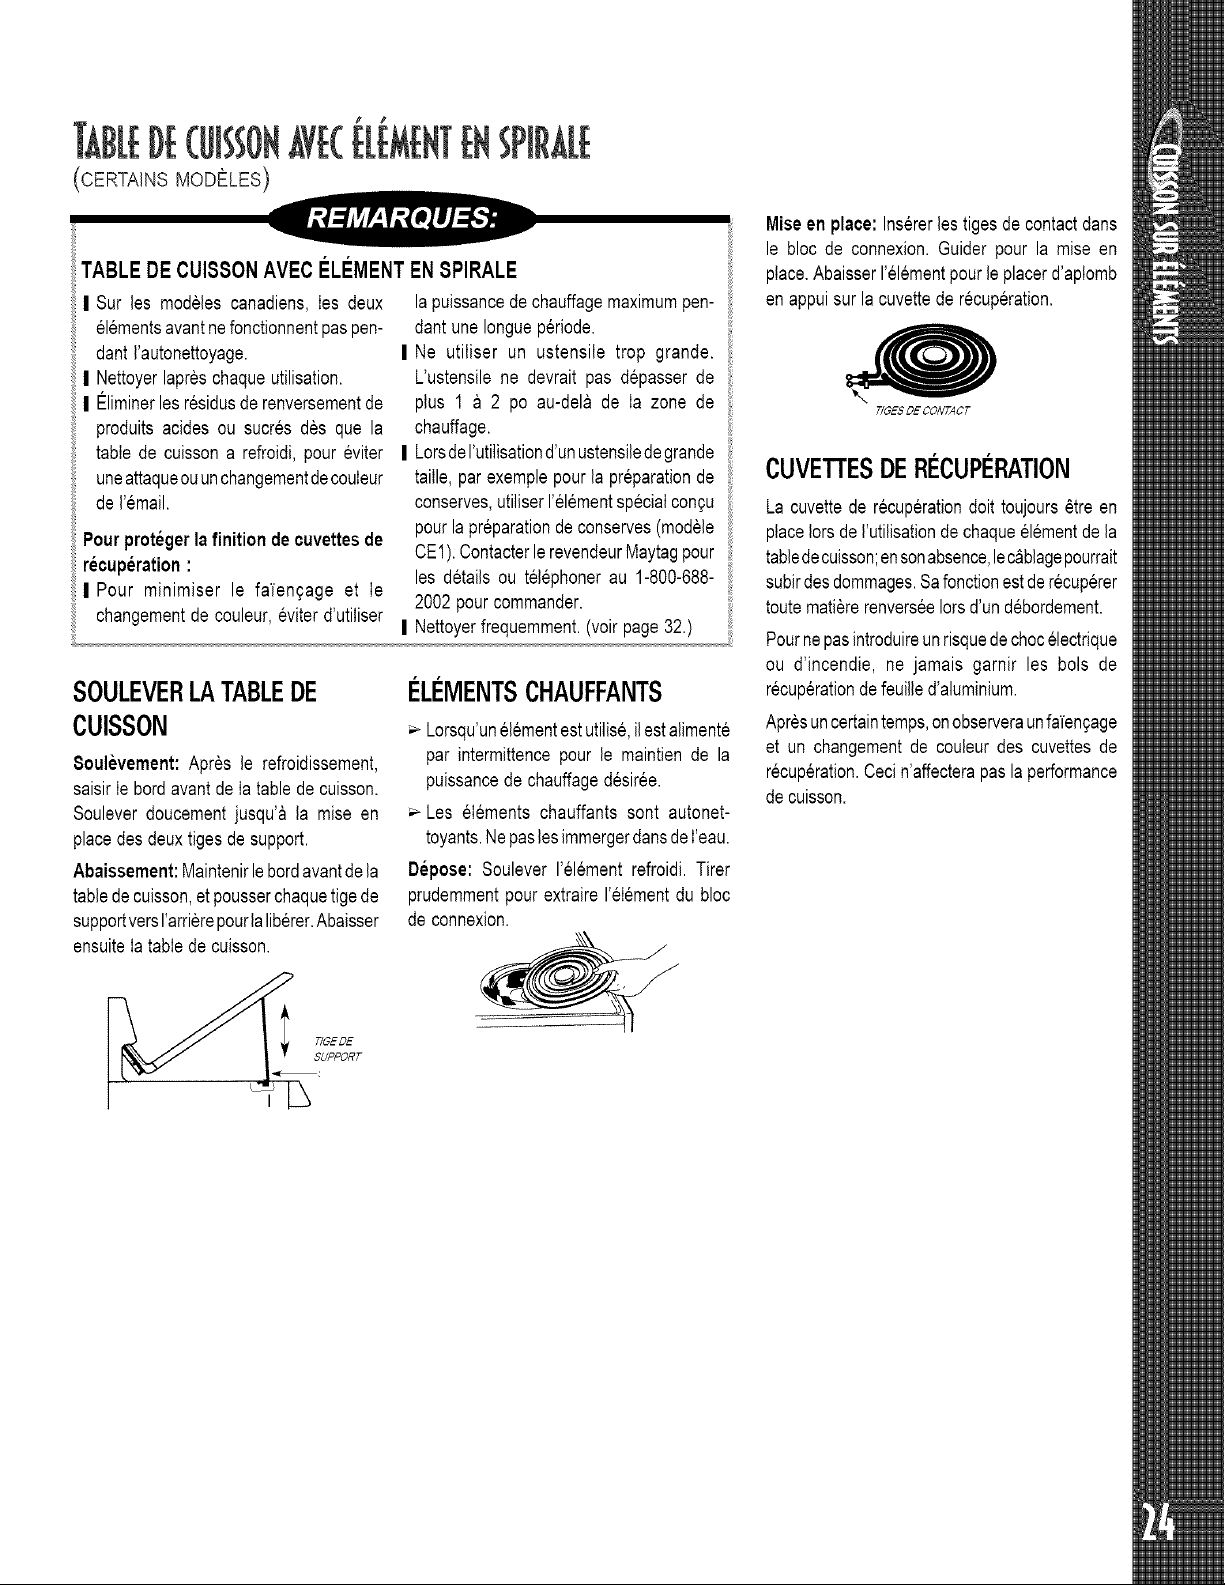
p p
DE(UIS ONAVE(ELEMENTENSPIRALE
(CERTAINS MODELES)
TABLEDECUISSONAVECI[LI[MENT
I Sur les modelescanadiens,Ies deux
elementsavantnefonctionnentpaspen-
dant I'autonettoyage.
I Nettoyerlapreschaqueutilisation.
I Eliminerles residusde renversementde
produitsacidesou sucres des que la
table de cuissona refroidi,poureviter
uneattaqueouunchangementdecouleur
deI'email.
Pourprotegerlafinitionde cuvettesde
recuperation :
I Pour minimiser le falengage et Ie
changementde couleur,eviterd'utiliser
ENSPIRALE
lapuissancedechauffagemaximumpen-
dantune Iongueperiode.
I Ne utiliser un ustensile trop grande.
L'ustensilene devrait pas depasserde
plus 1 a 2 po au-dela de Ia zone de
chauffage.
I LorsdeI'utilisationd'unustensiledegrande
taille,parexemplepour la preparationde
conserves,utiliserI'elementspecialcongu
pourlapreparationdeconserves(modele
CE1).Contacterle revendeurMaytagpour
les details ou telephonerau 1-800-688-
2002pourcommander.
I Nettoyerfrequemment.(voirpage32.)
SOULEVERLATABLEDE
CUISSON
8oulevement: Apres le refroidissement,
saisirIe bordavantde Ia tabledecuisson.
Soulever doucementjusqu'a la mise en
placedes deuxtiges de support.
Abaissement:Maintenirlebordavantdela
tabledecuisson,etpousserchaquetigede
supportversI'arrierepourlaliberer.Abaisser
ensuiteIa tabledecuisson.
I LI MENTSCHAUFFANTS
Lorsqu'unelementestutilise,ilestalimente
par intermittencepour le maintiende la
puissancede chauffagedesiree.
Les elements chauffants sont autonet-
toyants.NepaslesimmergerdartsdeI'eau.
Bepose: Soulever I'elementrefroidi. Tirer
prudemmentpour extraireI'@Iementdu bloc
de connexion.
Miseen place:Insererlestiges de contactdans
le bloc de connexion.Guider pour la mise en
place.AbaisserI'elementpour leplacerd'aptomb
en appuisur la cuvettede r@cup@ration.
T/GESDE CONTACT
CUVE'I-rESDERI CUPI RATION
La cuvettede recuperationdolt toujours@treen
placeIorsde I'utilisationde chaqueelementde la
tabledecuisson;ensonabsence,lec&blagepourrait
subirdesdommages.Safonctionestderecup@rer
toutematiererenverseeIorsd'und@bordement.
Pournepasintroduireunrisquedechocelectrique
ou d'incendie, ne jamais garnir les bols de
recuperationdefeuilled'aluminium.
Apresuncertaintemps,onobserveraunfafen9age
et un changementde couleur des cuvettesde
recuperation.Ceci n'affecterapas la performance
decuisson.
I TIGEDE
SUPPORT
I
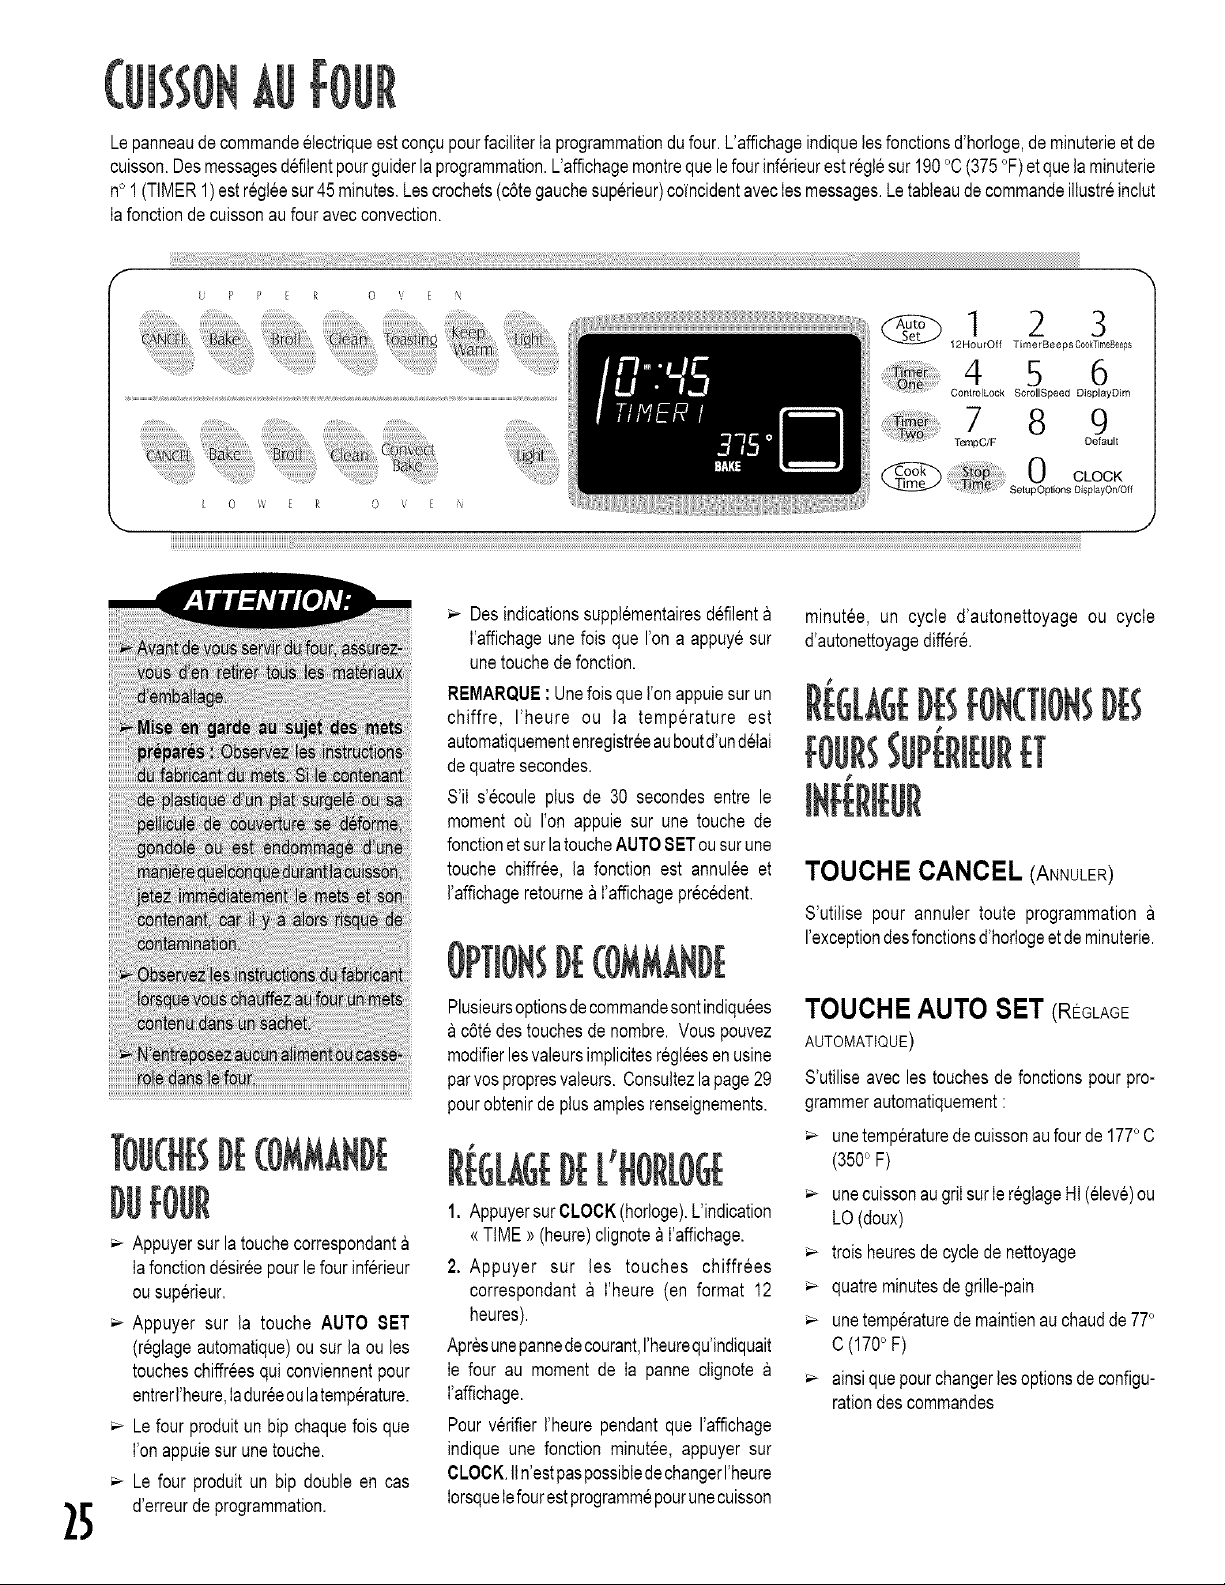
Lepanneaudecommandeelectriqueestcon£upourfaciliterIaprogrammationdufour.L'affichageindiquelesfonctionsd'horloge,de minuterieet de
cuisson.Desmessagesdefilentpourguiderla programmation.L'affichagemontrequele fourinf@ieurestreglesur 190°C(375°F)et quelaminuterie
n° 1(TIMER1) estregleesur45minutes.Lescrochets(c6tegauchesup@ieur)coincidentavecIesmessages.Letableaudecommandeillustreinclut
Iafonctiondecuissonaufouravecconvection.
I 2 3
12HourOff Time r Beeps CookTimeBeegs
4 5 6
ControlLock ScrollSpeed DisplayDirn
7 8 9
TonlpC/F Default
CLOCK
SetupOptions DisplayOn/Of f
Appuyersur latouchecorrespondant
Iafonctiondesireepourlefourinf@ieur
ousup@ieur.
Appuyer sur la touche AUTO SET
(reglageautomatique)ousur la ou les
toucheschiffreesqui conviennentpour
entrerl'heure,Iadureeoulatemp@ature.
Lefour produitunhip chaquefois que
I'onappuiesurunetouche.
Le four produitun hip doubleen cas
d'erreurdeprogrammation.
Desindicationssupplementairesdefilent
I'affichageune foisque I'ona appuyesur
unetouchedefonction.
REMARQUE: Unefoisque I'onappuiesurun
chiffre, I'heure ou la temp@ature est
automatiquementenregistreeauboutd'undelai
dequatresecondes.
S'il s'ecoule plus de 30 secondesentre le
momento_ I'on appuie sur une touchede
fonctionetsurlatoucheAUTOSETousurune
touche chiffree, la fonction est annulee et
I'affichageretourneaI'affichageprecedent.
Plusieursoptionsdecommandesontindiquees
c6tedes touchesde nombre.Vous pouvez
modifierlesvaleursimplicitesregleesen usine
parvospropresvaleurs.Consultezlapage29
pourobtenirde plusamptesrenseignements.
1. AppuyersurCLOCK(horloge).L'indication
<<TIME>>(heure)clignotea I'affichage.
2. Appuyer sur les touches chiffrees
correspondanta I'heure (en format 12
heures).
Apresunepannedecourant,I'heurequ'indiquait
Ie four au momentde Ia panne clignote
I'affichage.
Pourv@ifierI'heurependantque I'affichage
indique une fonction minutee,appuyer sur
CLOCK.IIn'estpaspossibledechangerI'heure
IorsqueIefourestprogrammepourunecuisson
minutee, un cycle d'autonettoyage ou cycle
d'autonettoyagediff@e.
TOUCHE CANCEl (ANNULER)
S'utilise pour annuler toute programmation
I'exceptiondesfonctionsd'horIogeetdeminuterie.
TOUCHE AUTO SET (REGLAGE
AUTOMATIQUE)
S'utiliseavec lestouchesde fonctionspour pro-
grammerautomatiquement:
unetemp@aturedecuissonau fourde177oC
(3500F)
unecuissonaugriIsurIereglageHI(eleve)ou
LO(doux)
troisheuresdecycledenettoyage
quatreminutesde grille-pain
unetemp@aturedemaintienauchaudde 770
0(170° F)
ainsiquepourchangerlesoptionsdeconfigu-
rationdescommandes
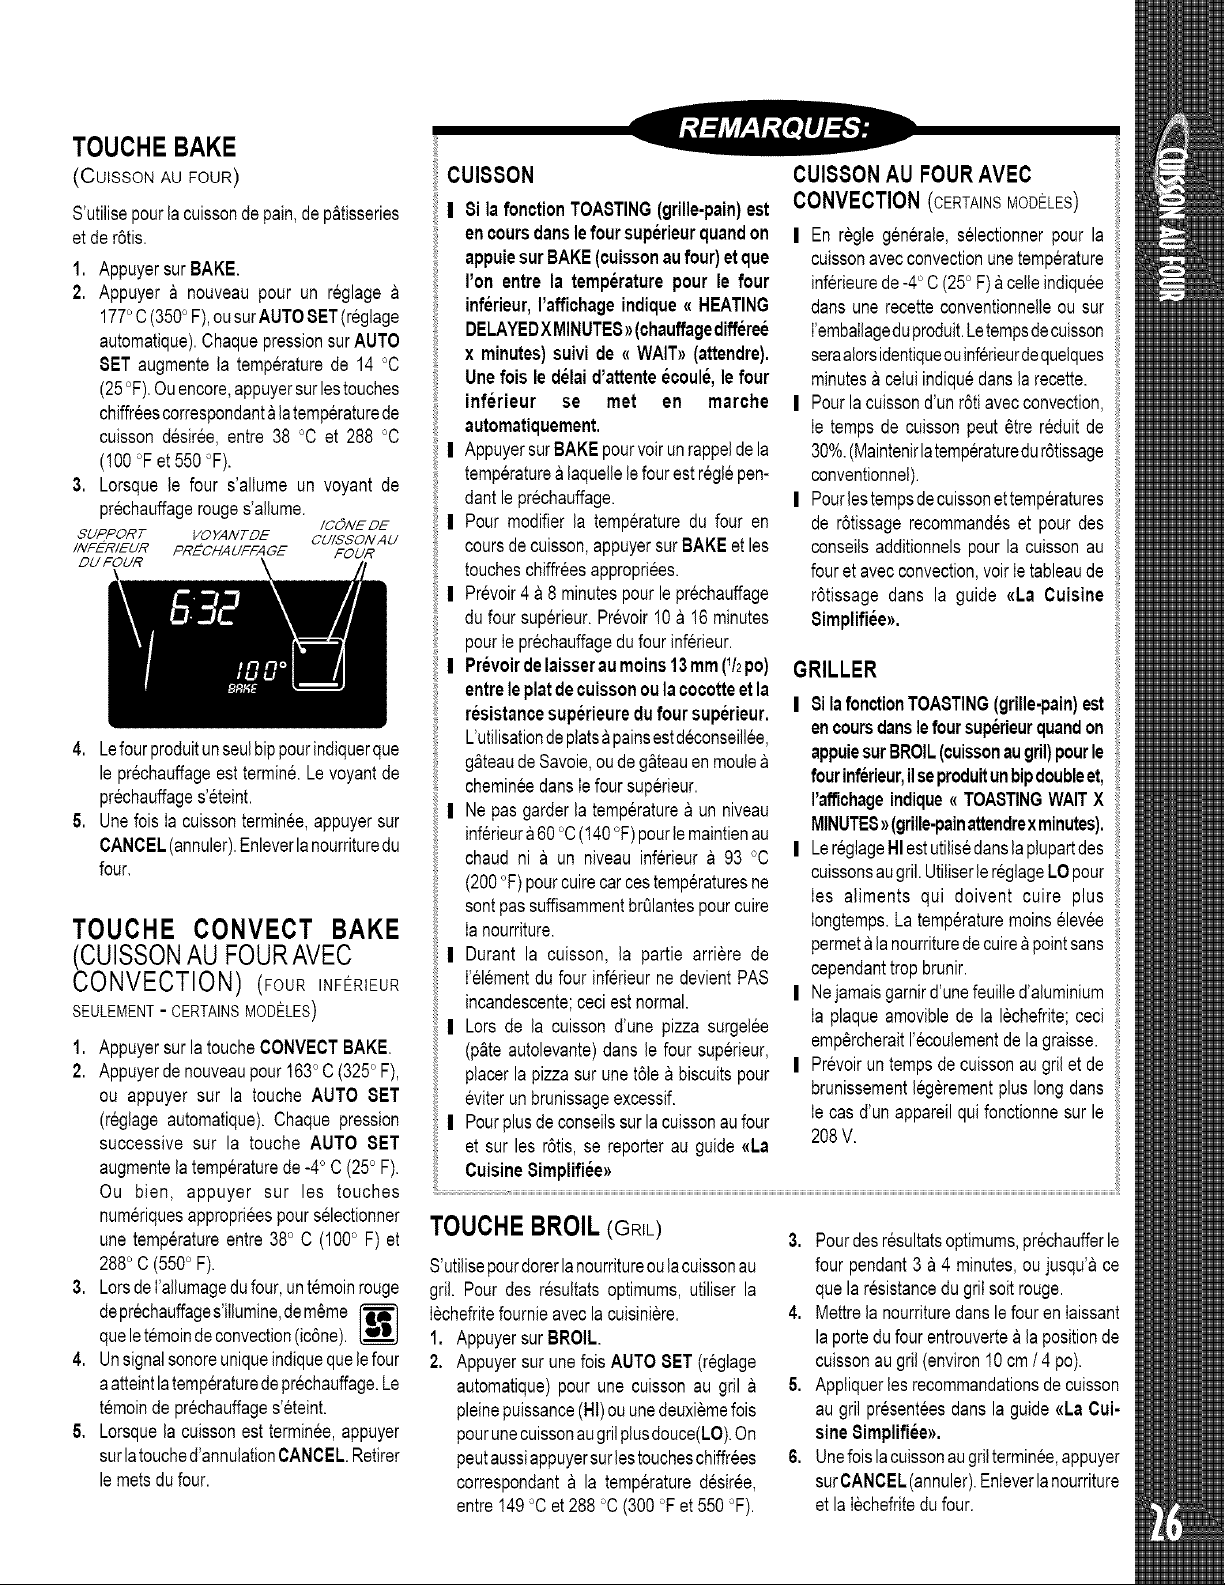
TOUCHEBAKE
(CuISSON AU FOUR)
S'utilisepourla cuissondepain,dep_tisseries
et de r6tis.
1. Appuyersur BAKE.
2. Appuyer a nouveau pour un reglage
1770C (3500F),ousurAUTOSET(reglage
automatique).ChaquepressionsurAUTO
SET augmentela temperaturede 14 °C
(25°F).Ouencore,appuyersurlestouches
chiffreescorrespondantalatemperaturede
cuisson desiree,entre 38 °C et 288 °C
(100°Fet 550°F).
3. Lorsque le four s'allume un voyant de
prechauffagerouges'allume.
/CONE DE
SUPPORT VOYANTDE CUISSONAU
INPERIEUR PRECHAUPFAGE POUR
DU FOUR
4. Lefourproduitunseulbippourindiquerque
le prechauffageesttermine.Le voyantde
prechauffages'eteint.
5. Unefois Ia cuissonterminee,appuyersur
CANCEL(annuler).Enleverlanourrituredu
four.
TOUCHE CONVECT BAKE
(CUISSONAU FOURAVEC
CONVECTION) (Four ,NFERIEUR
SEULEMENT - CERTAINS MODELES)
1. Appuyersur latoucheCONVECTBAKE.
2. Appuyerdenouveaupour163oC (325oF),
ou appuyer sur la touche AUTO BET
(reglageautomatique).Chaquepression
successive sur la touche AUTO SET
augmentelatemperaturede -40C (25° F).
Ou bien, appuyer sur les touches
numeriquesapproprieespourselectionner
unetemperatureentre38° C (1000F) et
2880C (55O° F).
3. LorsdeI'allumagedufour,untemoinrouge
deprechauffages'illumine,dem6me
queletemoindeconvection(ic6ne).
4. Unsignalsonoreuniqueindiquequelefour
aatteintlatemperaturedeprechauffage.Le
temoindeprechauffages'eteint.
5. Lorsquela cuissonest terminee,appuyer
surlatouched'annulationCANCEL.Retirer
lemetsdufour.
CUISSON
I Si la fonctionTOASTING(grille-pain)est
encoursdanslefour superieurquandon
appuiesurBAKE(cuissonaufour)etque
I'on entre la temperaturepour le four
inferieur,I'affiohageindique<<HEATING
DELAYEDXMINUTES_(chauffagedifferee
x minutes)suivide <<WAI%>(attendre).
Unefoisle delaid'attenteecoule,lefour
inferieur se met en marohe
automatiquement.
I AppuyersurBAKEpourvoirunrappeldela
temperaturealaquellelefourestreglepen-
dantle prechauffage.
I Pour modifier la temperaturedu four en
coursdecuisson,appuyersurBAKEet les
toucheschiffreesappropriees.
I Prevoir4 a 8 minutespourleprechauffage
dufour superieur.Prevoir!0 a !6 minutes
pourIe prechauffagedufour inferieur.
I Prevoirdelaisseraumoins13mm(1/2po)
entreleplatdecuissonoulaoocotteetla
resistancesuperieuredu foursuperieur.
L'utilisationdeplatsa painsestdeconseillee,
g_teaudeSavoie,oudeg_teauenmoule
chemineedansIefoursuperieur.
I Ne pas garderla temperaturea un niveau
inferieura 60°C(140°F)pourle maintienau
chaud ni a un niveauinferieur a 93 °C
(200°F)pourcuirecarcestemperaturesne
sontpassuffisammentbrQlantespourcuire
Ia nourriture.
I Durant la cuisson, la partie arriere de
I'elementdu four inferieurnedevientPAS
incandescente;ceciest normal.
I Lors de la cuisson d'une pizza surgelee
(p&teautolevante)dans le four superieur,
placerla pizzasur une t61ea biscuitspour
eviterunbrunissageexcessif.
I Pourplusde conseilssurla cuissonaufour
et sur les r6tis,se reporterau guide {{La
CuisineSimplifiee_
CUISSONAU FOURAVEC
CONVECTION(CERTAINS MODELES)
| En regle generale,selectionnerpour la
cuissonavecconvectionunetemperature
inferieurede -40C (25° F) acelleindiquee
dartsune recetteconventionnelleou sur
I'emballageduproduit.Letempsdecuisson
seraalorsidentiqueouinferieurdequelques
minutesa celuiindiquedanslarecette.
| Pourlacuissond'unr6tiavecconvection,
Ie tempsde cuissonpeut_tre reduitde
30%.(Maintenirlatemperaturedur6tissage
conventionnel).
| Pourlestempsdecuissonettemperatures
de r6tissagerecommandeset pourdes
conseilsadditionnelspour la cuissonau
fouretavecconvection,voirIetableaude
r6tissage dans la guide <<LaCuisine
Simplifiee_.
GRILLER
I 8i la fonctionTOASTING(grille-pain)est
encoursdansle foursuperieurquandon
appuiesurBROIL(cuissonaugril)pourle
fourinferieur,ilseproduitunbipdoubleet,
I'affichageindique<_TOASTINGWAITX
MINUTES_(grille-painattendrexminutes).
I LereglageHI estutilisedanslaplupartdes
cuissonsaugril.UtiliserlereglageLOpour
Ies aliments qui doivent cuire plus
Iongtemps.La temperaturemoinselevee
permeta lanourrituredecuireapointsans
cependanttrop brunir.
I Nejamaisgarnird'unefeuilled'aluminium
Ia plaqueamoviblede la bchefrite;ceci
emp6rcheraitI'ecoulementde la graisse.
I Prevoirun tempsdecuissonaugrilet de
brunissementlegerementpluslongdarts
Ie cas d'un appareilquifonctionnesur le
208V.
TOUCHEBROIL (GRIL)
S'utilisepourdorerla nourritureoulacuissonau
gril. Pourdes resultatsoptimums,utiliser la
Iechefritefournieaveclacuisiniere.
1. AppuyersurBROIL.
2. Appuyersur unefoisAUTOBET(reglage
automatique)pourune cuissonau gril
pleinepuissance(HI)ou unedeuxiemefois
pourunecuissonaugrilplusdouce(LO).On
peutaussiappuyersurlestoucheschiffrees
correspondanta la temperaturedesiree,
entre!49 °Cet 288 °C(300°Fet 550°F).
3. Pourdesresultatsoptimums,prechaufferle
four pendant3 a 4 minutes,ou jusqu'ace
quelaresistancedu gril soit rouge.
4. Mettrela nourrituredartsle fourenIaissant
la portedufourentrouvertea la positionde
cuissonau gril(environ10cm/4 pc).
5. Appliquerlesrecommandationsdecuisson
au gril presenteesdansla guide {{LaCui-
sine Simplifiee_.
6. Unefoislacuissonaugrilterminee,appuyer
surCANCEL(annuler).Enleverlanourriture
et la Iechefritedufour.
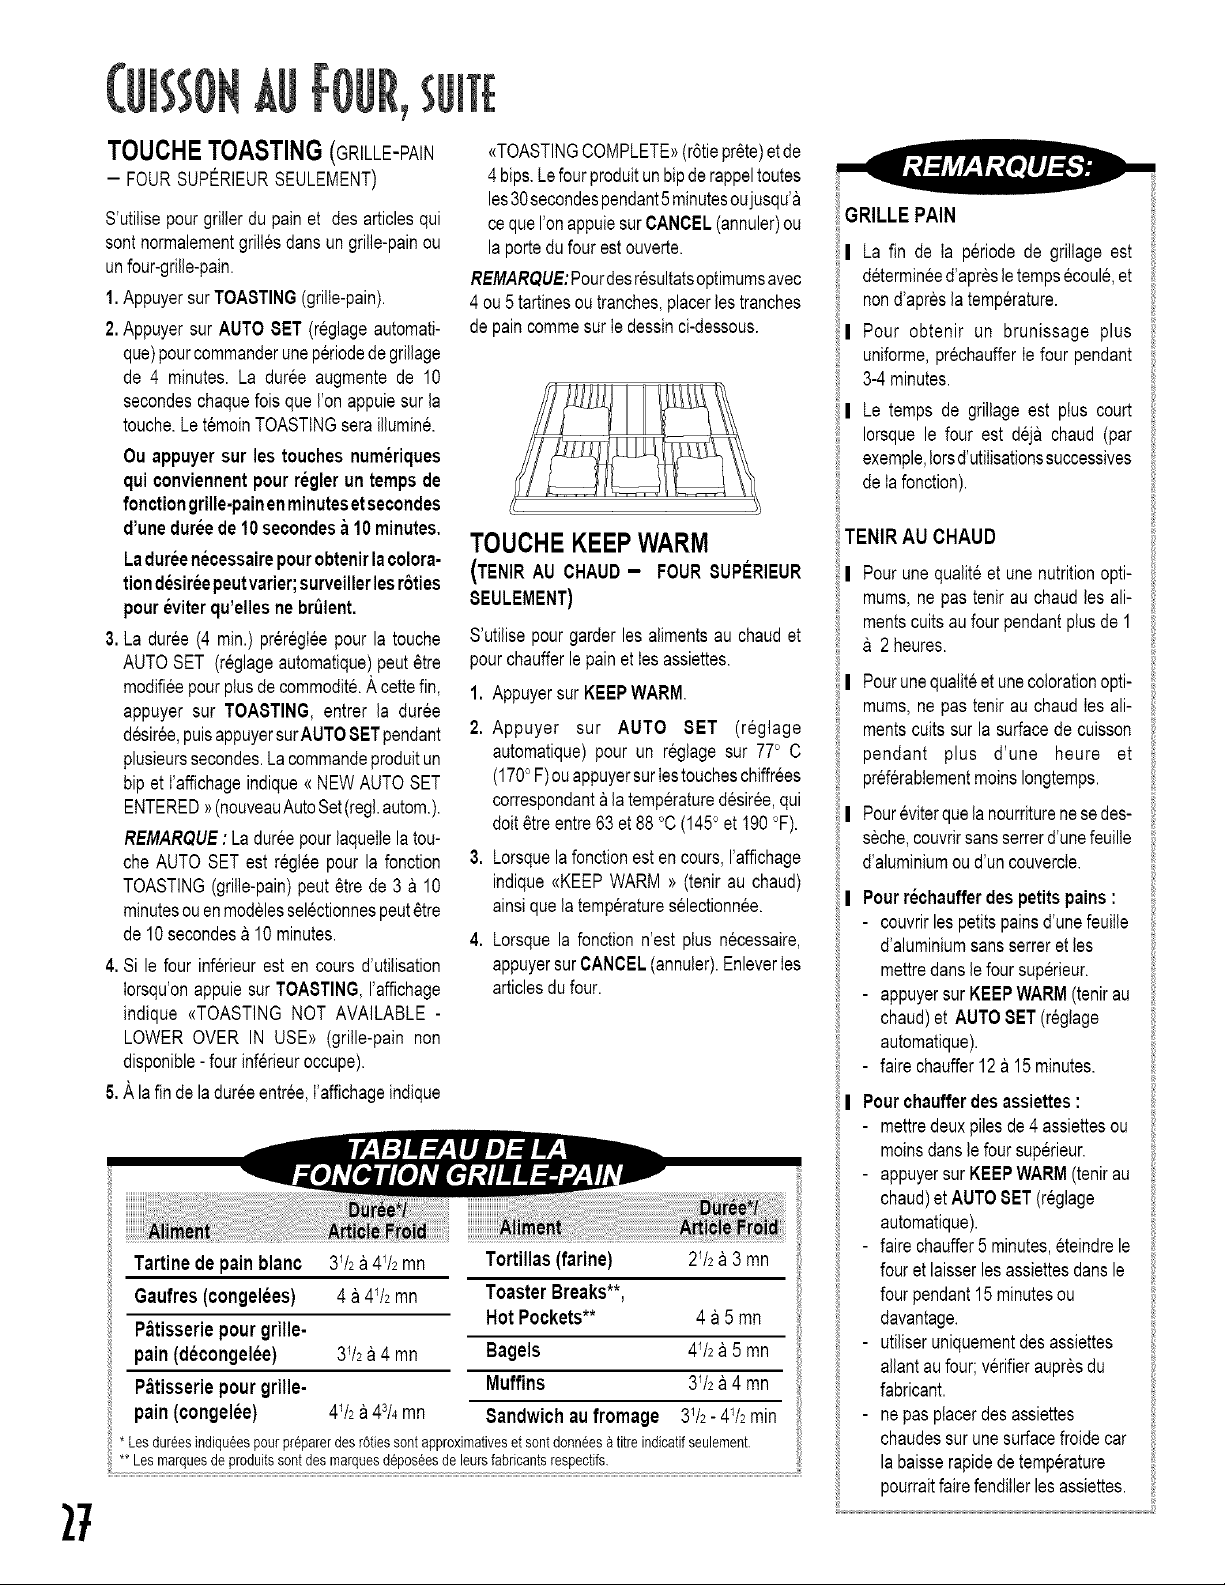
2t
TOUCHETOASTING(GRILLE-PAIN
- FOURSUPERIEURSEULEMENT)
S'utilisepourgrillerdupain et des articlesqui
sontnormalementgrillesdans un grille-painou
unfour-grille-pain.
1. AppuyersurTOASTING(grille-pain).
2. Appuyersur AUTO SET (reglageautomati-
que)pourcommanderuneperiodedegrillage
de 4 minutes. La duree augmentede 10
secondeschaquefoisqueI'onappuiesur la
touche.Le temoinTOASTINGseraillumine.
Ou appuyersur les touches numeriques
qui conviennentpour regler un tempsde
fonctiongrille-painenminutesetsecondes
d'unedureede 10secondesa 10minutes,
Ladureenecessairepourobtenirlacolora-
tiondesireepeutvarier;surveillerlesr6ties
poureviterqu'ellesne brt_lent.
3. La duree(4 min.) preregIeepourla touche
AUTOSET (reglageautomatique)peut6tre
modifieepourplusde commodite.A cettefin,
appuyer sur TOA8TING,entrer la duree
desiree,puisappuyersurAUTOSETpendant
plusieurssecondes.La commandeproduitun
bip et I'affichageindique<<NEWAUTOSET
ENTERED>>(nouveauAutoSet(regl.autom.).
REMARQUE:La dureepourlaquellelatou-
che AUTOSET est regleepourla fonction
TOASTING(grille-pain)peut 6tre de 3 a 10
minutesouenmodelesselectionnespeut6tre
de 10secondesa 10 minutes.
4, Si le four inferieurest en coursd'utilisation
Iorsqu'onappuiesurTOASTING,I'affichage
indique <<TOASTINGNOT AVAILABLE -
LOWEROVER IN USE>>(grille-pain non
disponible- fourinferieuroccupe).
5, A lafinde ladureeentree,I'affichageindique
<<TOASTINGCOMPLETE>>(r6tiepr6te)etde
4 hips.Le fourproduitunhipderappeltoutes
les30secondespendant5 minutesoujusqu'a
ce queI'onappuiesurCANCEL(annuler)ou
laportedufour estouverte.
REMARQUE:Pourdesresultatsoptimumsavec
4 ou 5tartinesou tranches,placerlestranches
de paincommesur Iedessinci-dessous.
TOUCHEKEEPWARM
(TENIRAU CHAUD- FOURSUPI_RIEUR
SEULEMENT)
S'utilisepourgarderles alimentsau chaudet
pourchaufferlepain et Iesassiettes.
1. Appuyersur KEEPWARM.
2. Appuyer sur AUTO SET (reglage
automatique)pour un reglagesur 770C
(1700F)ouappuyersurIestoucheschiffrees
correspondanta latemperaturedesiree,qui
dolt6treentre63 et88 °C(1450et 190°F).
3. Lorsquelafonctionestencours,I'affichage
indique<<KEEPWARM >>(tenir au chaud)
ainsique latemperatureselectionnee.
4. Lorsquela fonctionn'est plus necessaire,
appuyersurCANCEL(annuler).EnleverIes
articlesdufour.
Tartinede pain blanc 3_/2a 4_/2mn Tortillas(farine) 2_/2a 3mn
Gaufres (congelees) 4 a 41/2mn Toaster Breaks**,
Hot Pockets** 4 a 5 mn
P_tisserie pour grille-
pain (decongelee) 3I/2a 4 mn Bagels 41/2a 5mn
P_tisserie pour grille- Muffins 3_/2a 4 mn
pain (congelee) 41/2a 43/4mn Sandwichau fromage 3_/2- 41/2rain
* Les dureesindiqueespour preparerdesr6tiessontapproximativeset sont donneesa titreindicatifseulement.
** Les marquesde produitssontdes marquesd@oseesde leursfabricantsrespectifs.
GRILLE PAIN
I La fin de Ia periodede grillage est
determineed'apresle tempsecoule,et
nond'apreslatemperature.
Pour obtenir un brunissage plus
uniforme,prechaufferIe four pendant
3-4minutes.
i;I Le temps de grillageest ptus court
Iorsquele four est deja chaud (par
exemple,Iorsd'utilisationssuccessives
deIafonction).
TENIR AU CHAUD
I Pourunequaliteet une nutritionopti-
mums,ne pas tenirau chaudles ali-
mentscultsaufour pendantplusde 1
2heures.
I
iI,
Pourunequaliteetuneco!orationopti-
mums,ne pas tenirau chaudIes ali-
mentscultssur lasurfacede cuisson
pendant plus d'une heure et
preferabtementmoinsIongtemps.
Poureviterquelanourriturenesedes-
seche,couvrirsansserrerd'unefeuille
d'aluminiumoud'uncouvercle.
Pourrechaufferdespetitspains:
couvrirlespetitspainsd'unefeuiIle
d'aluminiumsansserreret les
mettredanslefoursuperieur.
appuyersurKEEPWARM(tenirau
chaud)et AUTOSET(reglage
automatique)
i - fairechauffer12a 15minutes.
Pourchaufferdes assiettes:
- mettredeuxpilesde 4 assiettesou
moinsdansle foursuperieur,
appuyersurKEEPWARM(tenirau
chaud)et AUTOSET(reglage
automatique)
- fairechauffer5 minutes,eteindrele
four et laisserlesassiettesdansle
four pendant15minutesou
davantage.
utiliseruniquementdesassiettes
allantau four;verifieraupresdu
fabricant
nepasplacerdesassiettes
chaudessurunesurfacefroidecar
labaisserapidedetemperature
pourraitfairefendillerlesassiettes
TOUCHESCOOK TIME/STOPTIME
(TEMPSDE CUISSON/HEURED'ARRET)(CUISSONCONTROLEEPARL'HORLOGE)
S'utilisepourprogrammerIa miseen marche
etI'arr6tautomatiquesdufour.LeregIagemaxi-
mumest 11heures59 minutes(!1:59). L'hor-
logodoltfonctionneret6trea I'heurepourque
cettefonctionpuisse6treutiIisee.
On pout reglerlos deux fours pour une
cuissoncontr61eeparI'horloge. Pourpro-
grammerune cuissondanslosdeuxfours:
SelectionnerleCOOKTIME(tempsdecuis-
son)etlestemperaturesdecuissonpourles
deuxfours.
ReglerI'heuredefin decuissondesdeux
fours a I'aidede la touche 8TOP TIME
(heured'arr6t).
_, LosrootsSTOPTIME(heured'arr6t)
doiventclignotera I'affichagepourque
I'heurede finde cuissonpuisse6tre
reglee.
Pour une cuissonimmediate et un arr6t
automatique:
1. Appuyersur COOKTIME(tempsde cuis-
son). <<COOKTIME>>(tempsde cuisson)
clignotea I'affichage.Appuyersur los tou-
cheschiffreesquiconviennentpourentrer
letempsdecuissondesireen heureset en
minutes.
2. Appuyersur Ia toucheBAKE (cuissonau
four)ou CONVECTBAKE(cuissonaucon-
vection)(certainsmodeles)dufourinferieur
ousuperieur,puisselectionnerla tempera-
ture. L'affichageindique<<COOKTIME>>
(tempsde cuisson)et latemperature.
3, Uneminuteavantlafin dutempsde cuis-
sonprogramm&laIumieres'allume,le four
produitunbipetI'affichageindique<<CHECK
FOOD>>(verifierla nourriture).La lumiere
s'etiendreautomatiquementIorsquelaporte
dufour estouverteou la toucheCANCEL
estappuie.
4. Alafin dutempsde cuisson,Iefour s'eteint
automatiquement,I'affichageindique<<End>>
(fin)et <<COOKTIME>>(tempsde cuisson)
et le fourproduit4 hips.
5, AppuyersurCANCEL(annuler).Enleverla
nourrituredufour.Sileprogrammen'estpas
annul&ilse produiraun hip derappeItou-
teslos minutesjusqu'aunmaximumde 30
minutes.
NOTE:Onpoutmodifierloscaracteristiques
des signauxsonoresde rappel Tempsde
cuisson/Findecuisson.Voir los optionsde
commandoa Iapage29.
Pour une cuisson differ_e et un arr6t
automatique:
1. AppuyersurCOOKTIME(tempsdecuisson).
<<COOKTIME>>(tempsde cuisson)clignote
I'affichage.Appuyersur los toucheschif-
freesqui conviennentpour entrer le temps
decuissondesireenheureset en minutes.
2. AppuyersurlatoucheBAKE(cuissonaufour)
ouCONVECTBAKE(cuissonauconvection)
(certains modeles) du four inferieur ou
superieur,puisselectionnerlatemperature.
L'affichageindique<<COOKTIME>>(tempsde
cuisson)et latemperature.
3. Appuyersur8TOPTIME(heured'arr6t).L'af-
fichageindiquequandlefourva s'arr6ters'il
estmisenmarcheimmediatement.
4. Appuyera nouveausur 8TOPTIME(heure
d'arr_t)._<STOPTIME>_doltclignotepour
mettrerle differeeen marche.
5. Appuyersur los toucheschiffreesqui con-
viennentpourentrerI'heurea laquelleIacuis-
sondolt seterminer.
6. L'affichageindique <<DELAY>>(attente) et
<<BAKE>>(cuissonaufour).
7. Unefois ledelaid'attenteecoul&le fourse
metenmarcheet I'affichageindique<<COOK
TIME>>(tempsdecuisson)etlatemperature.
8. SuivreIesindications3 a 5 precedentes.
L'utilisationde la fonctionde raiseen
marche du four differee est
deconseilleepour los alimentstres
perissablescommelosproduitslaitiers,
leporc,la votaille,Iesfruitsdemer.
I Lacuissoncontr61eeparI'horlogeest
deconseilleepourlosarticlesquiexi-
gentle prechauffagedu four,telsque
g_teaux,biscuitset pain.
TOUCHESTIMER
(MINUTERIE)
Laoulosminuteriespeuvent6treregleespour
unedureeallantjusqu'a99 heureset 59 mi-
nutes(99:59).
Losminuteriespeuvents'utiliserindependam-
mentde touteautre activitedu four et olios
peuvent6tre regleespendantqu'une autre
fonctiondu four est en cours.LE8 MINUTE-
RIE8NECONTRC)LENTPA8LEFONCTION-
NEMENTDU FOUR.
1. AppuyersurTIMER1ouTIMER2(minute-
rio). L'indication<<TIMER>>(minuterie)cli-
gnotea I'affichageainsique<<#1>>ou <<#2>>
(numero 1 ou 2) et I'affichage indique
<<OHR:OO>>.
2. Appuyersur los toucheschiffreescorres-
pondantau nombred'heureset de minu-
tesdesirees.
3. L'affichageindique<<TIMER1>>ou <<TIMER
2>>,(minuterie1ouminuterie2).Si Iesdeux
minuteriessont en cours de fonctionne-
ment,I'affichageindique<<TIMER1 + 2>>
(minuteries1 ou 2)>>.
EXEMPLE: PourreglerIa minuteriesur5
minutes,appuyersurTIMER1etsurlatou-
che chiffree5. Laminuteriecommencele
comptea reboursauboutde4 secondes.
4. Pendantla derniereminute,le compte
reboursestafficheensecondes.
5. AIafin dela dureeprogrammeeL'affichage
indique<<END>>et la commandoproduitun
bipde4 secondessuivide deuxbipstou-
teslos30secondespendantunmaximum
de5 minutes.Pour annuler,appuyersur
latoucheTIMER(minuterie)qui convient.
REMARQUE:Pourchangerlos bips, voir
Optionsde regIageTimerBeeps(Bipsde
Iaminuterie),page29.
Pour annuler :
Appuyersur latoucheTIMER(minuterie)qui
convientpendantplusieurssecondes.Aubout
d'uncourtlapsdetemps,I'affichageindique
nouveauI'heure.
OU
Appuyersur TIMERet sur la touchechiffree
<<O>>.Au boutd'uncourtlapsdetemps,le mi-
nuterieannul&
r
DEREGLAGE
Pourmodifierlesoptionspardefaut
configureesen usine:
1. Lesoptionspeuvent6tre modifieesen se-
iectionnantla toucheSETUPOPTIONS(0)
(configurationdes options) et la touche
correspondanta I'optiondesiree.(Voirop-
tionsci-dessous.)
2. L'optionactuelieapparafta I'affichage.
3. AppuyersurAUTOSET (reglageautomati-
que)pourmodifieri'option.
4. AppuyersurCANCEL(annuler)pourconfir-
meri'optionafficheeetsortirduprogramme.
OPTIONSDISPONIBLES'
12-HOUROFF(1)
(ARRETAPREB 12 HEURE8)
Lefourpeut_treconfigurepours'eteindre
au boutde 12heuresdefonctionnementou
resterallumeindefiniment.L'optionpardefaut
estI'arrGtdu four au boutde 12heures.
TIMERBEEPS(2)
(B,PSDELAMmUTEmE)
II existetroischoixpourles bipssignalant
lafin du comptea reboursdela minuterie.
Un bip suivi de deux bips toutes les 30
secondespendantunmaximumde5 minu-
tes(regiagepardefaut).
Un bip suivi de deux bips toutes les 60
secondes pendant un maximumde 30
minutes.
Unbip suivid'aucunautrebip.
COOK TiMEBEEPS(3)
(BIP8 DE FINDE CUISSON)
II existetroischoixpourles bipssignalant
lafin d'unecuissoncontrGleepar I'horloge.
Quatrebipsrapidessuivis d'un bip toutes
ies minutespendantun maximumde 30
minutes(reglagepardefaut).
Quatrebipsrapidessuivisd'aucunautrebip.
Quatrebipsrapidessuivis d'un bip toutes
ies minutes pendant un maximumde 5
minutes.
CONTROLLOCK(4)
(BLOCAGEDESCOMMANDE8)
Lestouchesde fonctionspeuvent6tre blo-
queesde fagona emp6cherleur utilisation
pourdesraisons desecuriteoupourpermet-
tre lenettoyage.L'affichagecontinuea indiquer
rheure.
SCROLLSPEED (S)
(RAPIDITI_DE DEFILEMENT)
Larapiditedesmessagesquidefilenta I'affi-
chagepeut6tre modifiee etpasseede FAST
(vite) & MEDIUM (moyenne) ou a SLOW
(lente).LavitessemoyenneestI'optionparde-
faut.
DISPLAYDIM(6)(REDUCTIONDE LA
LUMINOSITI_DE L_AFFICHAGE)
L'intensitedescommandespeut6tre modi-
flee pourenfaciliter lalecture.Lereglagepar
defautest sur la plushauteintensite ........
MoinsiI y a de ..... , moinsI'intensiteest forte.
TEMPC/F (7) (TEMpI_RATURE EN C/F)
Lestemperaturespeuvent6tre exprimeesen
degresCentigradeou Fahrenheit.Lesdegres
FahrenheitsentI'optionpardefaut.
LANGUAGE (8)(LANGUE)
(CERTAINS MODELES)
On peut selectionner la langue-- anglais,
frangaisouespagnol-- pourles messages
qui apparaissentsurI'afficheur.
DEFAULT(9) (DEFAUT)
Chaqueoptionpeut 6tre remise au reglage
usine.
DISPLAY ON/OFF (AFFICHAGE
ALLUME/ETEINT) (HORLOGE)
L'affichage de I'heure peut _tre eteint Iors-
que le four n'est pas en cours de cuisson ou
d'autonettoyage.
RI_GLAGEDU THERMOSTATDU
FOUR
S'il semblequelefourdevrait6trepluschaud
ou moins chaud,iI estpossiblede le regler
soi-mGme.Fairecuireplusieurstypesdeg&-
teaux, puis modifier le reglage de la
temperatured'un maximumde 6 °C(10°F)
lafois.
Reglageduthermostat:
1. AppuyersurBAKE(cuissonaufour)(four
superieurou inferieur)et entrer288 °C
(550°F),
2. Appuyerdefa£oncontinuesurBAKE(four
superieurouinferieur)pourplussecondes
jusqu'acequeI'affichageindique<{TEMP
ADJ>>(modif.temp.).
3. AppuyersurAUTOSET(reglageautoma-
tique).La temperaturechangede 5 °F
chaquefois queronappuiesurla touche.
Lacommandeacceptedes modifications
de-35a +35°F.
4, Sile thermostata dejaete regleaupara-
vant, ce reglage sera indiqu& Si, par
exemple,le thermostata ete baisse de
15°F,I'affichageindique-!5°.
5. UnefoisIamodificationeffectuee,appuyer
surCANCEL(annuler).L'affichageindique
nouveauI'heure.Lefourva maintenant
cuireen tenantcomptede la modification
apporteeauthermostat.
Lalumieredu(des)four(s)s'alIumeautomati-
quementIorsquelaporteestouverte.Pourvoir
I'interieurdu ou des foursIorsquela porte
est fermee, appuyersur la touche LIGHT
(Iumiere)(fourinferieurousuperieur)poural-
lumer (ou eteindre) la lumiere du four. La
lumieredu (des) four(s) ne fonctionnepas
pendantle cycled'autonettoyage.
Lalumieredu(des)four(s)s'allumeautomati-
quement! minuteavantlafin du fonctiondu
fourcontrolee,
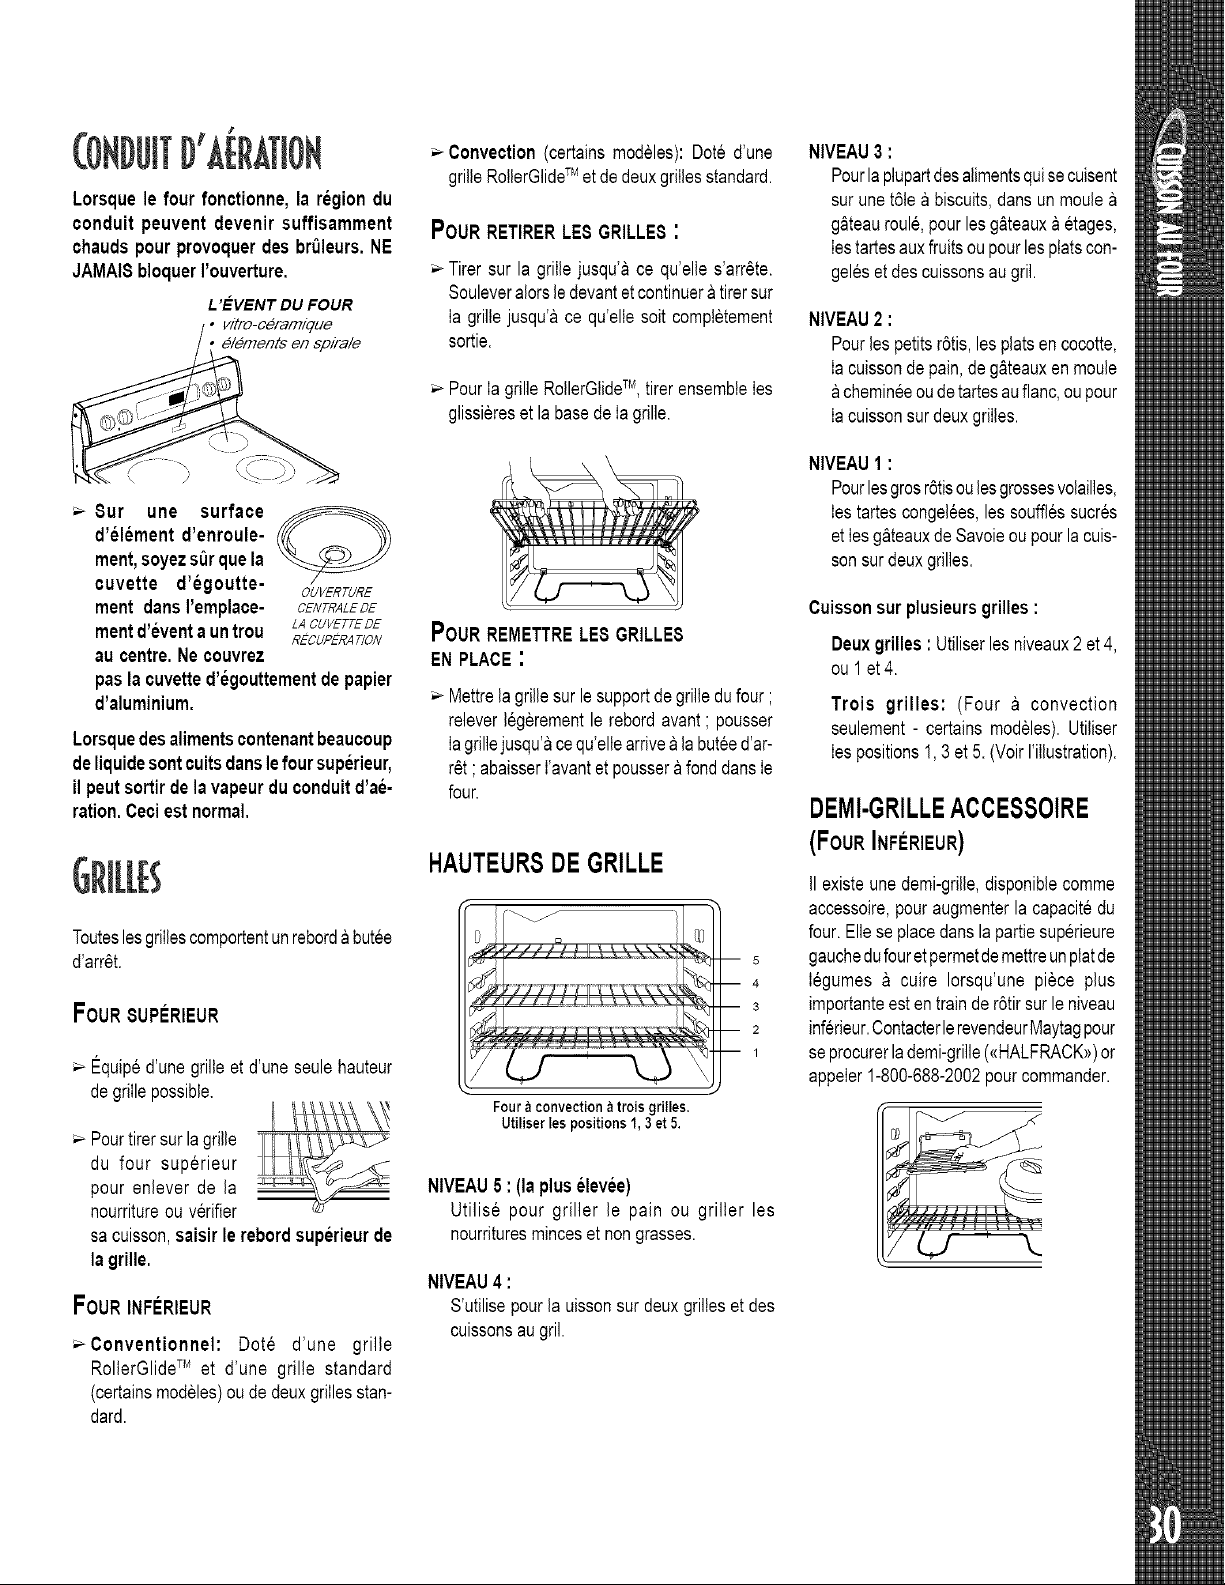
litD'A RATION
Lorsquele four fonctionne,la regiondu
conduit peuvent devenir suffisamment
chaudspour provoquerdes br_leurs.NE
JAMAI8bloquerI'ouverture.
L 'EVENT DU FOUR
vitro-oeramique
• elements en sp#ale
Convection(certainsmodeles):Dote d'une
grilleRotlerGlideTMetdedeuxgrillesstandard.
POURRETIRERLE8 GRILLES:
Tirersur la grillejusqu'ace qu'elles'arr6te.
Souleveralorsledevantetcontinuera tirersur
Ia grille jusqu'ace qu'ellesoit comptetement
sortie.
PourIa grilleRollerGlideT_,tirerensembleIes
glissiereset la basedeIa grille.
NIVEAU3 :
Pourlaplupartdesalimentsquisecuisent
sur unet61ea biscuits,dansun moule
g_teauroul& pourlesg&teauxaetages,
Iestartesauxfruitsou pourlesplatscon-
geleset descuissonsau gril.
NIVEAU2 :
Pourlespetitsr6tis,les platsencocotte,
Iacuissondepain,deg&teauxen moule
chemineeoudetartesauflanc,ou pour
Iacuissonsurdeuxgrilles.
\ 9
8ur une surface
d'element d'enroule-
ment,soyezs_r quela
cuvette d'egoutte- OUVERTURE
ment dartsI'emplace- CENTRALEDE
mentd'eventa untrou L,4CUVETTEDE
REcUPERATION
au centre.Ne couvrez
pasla cuvetted'egouttementde papier
d'aluminium.
Lorsquedesalimentscontenantbeaucoup
deliquide sontcults danslefoursuperieur,
il peutsortirde la vapeurduconduitd'ae-
ration.Ceciest normal.
Touteslesgrillescomportentun reborda butee
d'arr6t.
FOUR8UPERIEUR
Equiped'une grille et d'une seulehauteur
degrillepossible.
Pourtirer surlagrille _k__>,-
du four superieur __
pour enlever de la
nourritureou verifier
sa cuisson,saisir le rebordsuperieur de
la grille.
FOURINFERIEUR
_Conventionnel: Dote d'une grille
RollerGlideTMet d'une grille standard
(certainsmodeles)ou de deuxgrillesstan-
dard.
POURREMETTRELE8 GRILLE8
EN PLACE:
Mettrela grillesur le supportdegrilledufour ;
releverlegerementle rebordavant; pousser
Iagrillejusqu'acequ'ellearrivealabuteed'ar-
r6t ; abaisserI'avantet poussera fonddartsIe
four.
HAUTEURSDEGRILLE
Four a convection;_trois grilles.
Utiliser les positions 1, 3 et 5.
-- 5
4
3
2
1
NIVEAU5 : (lapluselevee)
Utilise pour griller le pain ou griller les
nourrituresminceset nongrasses.
NIVEAU4 :
S'utilisepourla uissonsurdeuxgrilleset des
cuissonsau gril.
NIVEAU1 :
Pourlesgrosr6tisoulesgrossesvolailles,
Iestartescongelees,lessoufflessucres
et Iesg_teauxde Savoieou pourla cuis-
sonsurdeuxgrilles.
Cuissonsur plusieursgrilles
Deuxgrilles: Utiliserlesniveaux2et 4,
ou 1 et4.
Trois grilles: (Four a convection
seulement- certains modeles).Utiliser
Iespositions1,3 et 5. (VoirI'illustration).
DEMI-GRILLEACCESSOIRE
(Four IN ErlEur)
IIexisteunedemi-grille,disponiblecomme
accessoire,pouraugmenterlacapacitedu
four.Ellese placedartslapattiesuperieure
gauchedufouretpermetdemettreunplatde
Iegumes a cuire Iorsqu'une piece plus
importanteesten trainde r6tirsurle niveau
inferieur.ContacterlerevendeurMaytagpour
seprocurerlademi-grille(<<HALFRACK>>)or
appeler1-800-688-2002pourcommander.
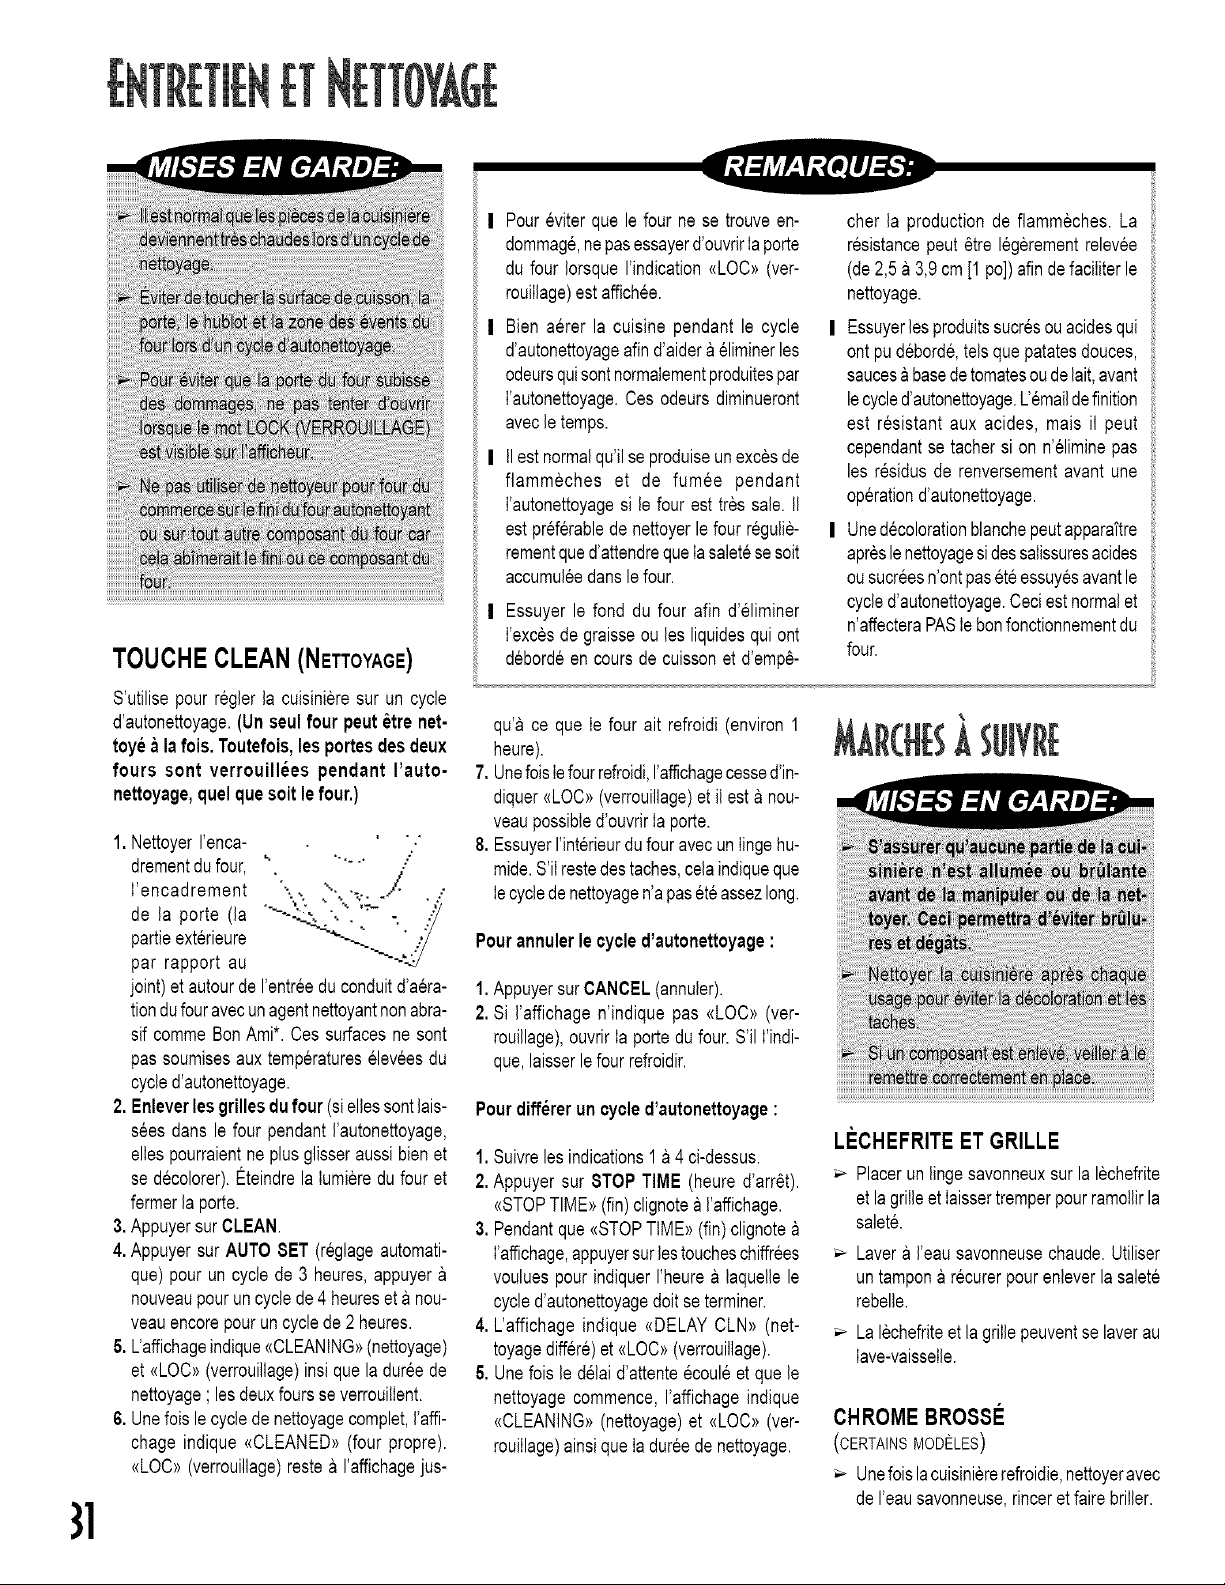
}]
TOUCHECLEAN(NETTOYAGE)
S'utilisepour reglerla cuisinieresur un cycle
d'autonettoyage.(Unsoulfourpout_tre net-
toyea lafois. Toutefois,losportesdesdeux
fours sont verrouillees pendant I'auto-
nettoyage,quel que soitlefour.)
1.NettoyerI'enca- .'.
drementdu four, ", ...... ."
I'encadrement "" ",. , l
de la porte (la ""-- ":- • " "--
partieexterieure ---_..
par rapport au "'_:
joint) et autourde I'entreeduconduitd'aera-
tiondufouravecunagentnettoyantnonabra-
sif commeBonAmi*. Cos surfacesne sont
pas soumisesauxtemperatureseleveesdu
cycled'autonettoyage.
2. Enleverlos grillesdufour (siellessontlais-
sees dans le four pendantI'autonettoyage,
ellespourraientne plusglisseraussibienet
se decolorer).Eteindrela Iumieredu four et
formerlaporte.
3. AppuyersurCLEAN.
4. Appuyersur AUTOSET (reglageautomati-
que)pour un cyclede 3 heures,appuyer
nouveaupouruncyclede4 heureseta nou-
veauencorepouruncyclede2 heures.
5. L'affichageindique_(CLEANING))(nettoyage)
et {(LOC))(verrouillage)insique la dureede
nettoyage; losdeuxfoursseverrouilIent.
6. Unefoislecyclede nettoyagecomplet,I'affi-
chage indique <(CLEANED))(four propre).
<(LOC)>(verrouillage)restea I'affichagejus-
I Poureviterque le four ne se trouveen-
dommage,nepasessayerd'ouvrirIaporte
du four IorsqueI'indication{(LOC)>(ver-
rouillage)est affichee.
I Bien aerer la cuisine pendant le cycle I
d'autonettoyageafind'aidera eliminerlos
odeursquisontnormalementproduitespar
I'autonettoyage.Cos odeursdiminueront
avecle temps.
I IIestnormalqu'ilse produiseunexcesde
flammeches et de fumee pendant
I'autonettoyagesile four est tressale.II
est preferablede nettoyerle four regulie- I
rementqued'attendrequeIasaletesesoit
accumuleedartsle four.
Essuyerle fond du four afin d'eliminer
I'excesde graisseou los liquidesqui ont
debordeencoursde cuissonet d'emp6-
cher la productionde flammeches.La
resistancepout6tre legerementrelevee
(de2,5a 3,9cm[1 pc]) afindefaciliterle
nettoyage.
Essuyerlosproduitssucresouacidesqui
ontpu deborde,telsquepatatesdouces,
saucesa basedetomatesoudelait,avant
lecycled'autonettoyage.L'emaildefinition
est resistant aux acides, mais il pout
cependantse tacher si on n'eliminepas
los residusde renversementavant une
operationd'autonettoyage.
UnedecolorationblanchepoutapparaTtre
apreslenettoyagesidessalissuresacides
ousucreesn'ontpaseteessuyesavantle
cycled'autonettoyage.Ceciestnormalet
n'affecteraPASIebonfonctionnementdu
foul
qu'a ce que Ie four ait refroidi(environ1
heure).
UnefoisIefourrefroidi,I'affichagecessed'in-
diquer{(LOC)>(verrouillage)et il esta nou-
veaupossibled'ouvrirIaporte.
EssuyerI'interieurdufour avecun Iingehu-
mide.S'ilrestedestaches,colaindiqueque
Iecycledenettoyagen'apaseteassezlong,
%
Pourannulerle cycled'autonettoyage:
1. AppuyersurCANCEL(annuler).
2. Si I'affichagen'indique pas {(LOC)>(ver-
rouillage),ouvrirIa portedufour.S'il I'indi-
que,laisserle fourrefroidir.
Pourdiffererun cycled'autonettoyage:
1. Suivrelos indications1a 4 ci-dessus.
2. Appuyersur 8TOP TIME (heure d'arr6t).
<(STOPTIME))(fin)clignotea I'affichage.
3. Pendantque{(STOPTIME)>(fin)clignote
I'affichage,appuyersurlostoucheschiffrees
vouluespourindiquerI'heurea laquellele
cycled'autonettoyagedoltsetermineL
4. L'affichage indique <(DELAYCLN)>(net-
toyagediffere)et {(LOC))(verrouiilage).
5. Unefois le delai d'attenteecouleet que le
nettoyagecommence,I'affichageindique
<(CLEANING))(nettoyage)et {(LOC)>(ver-
rouillage)ainsiqueIadureedenettoyage.
LECHEFRITEET GRILLE
Placerun lingosavonneuxsurla lechefrite
et la grilleet Iaissertremperpourramotlirla
salete.
Lavera I'eausavonneusechaude.Utiliser
untampona recurerpourenleverlasalete
rebelle,
Lalechefriteet la grille peuventse laverau
Iave-vaisselle.
CHROME BRO88E
(CERTAINS O E ES)
Unefoislacuisiniererefroidie,nettoyeravec
de I'eausavonneuse,rinceret fairebriller.
Silasurfaceestrelativementsale,utiliserun
produitnettoyantlegerementabrasifetfrotter
danslesensdugrainpoureviterdefairedes
rayures.Rinceretsecher.
Poureviterloseraflures,nepasutiliserd'ar-
ticlesouproduitsabrasifsoucaustiques.
Pourredonneralasurfacesonbrillantet
eliminerlestraTnees,fairesuivredeproduit
vaporiserStainlessSteelMagicSpray*(re-
ferenceno2OOOOOO8)**.Le chromesera
decoloredefa_onpermanentesila salete
cultdessus.
ACIER INOXYDABLE
(CERTAtNS MODELES)
NE PAS UTILISER DE PRODUITS DE
NETTOYAGE CONTENANT DU
JAVELLISANT.
ESSUYERTOUJOURSDANSLESENSDE
L'ACIERLORSDUNETTOYAGE.
Nettoyage journalier/salete legere -
EssuyeravecI'undesproduitssuivants:eau
savonneuse,vinaigreblanc/eau,produitde
nettoyagepourverreetsurfaceFormula409*
ouunproduitsemblabteverre- avecunIinge
soupleet uneeponge.Rinceretsecher.Pour
poliret enleverlesmarquesdedoigts,faire
suivre par Stainless Steel Magic Spray*
(pieceno20000008)**.
Saletemodereelepaisse-EssuyeravecI'un
des produits suivants: Bon Ami, Smart
Cleanserou SoftScrub*- aI'aided'unlinge
soupleou d'une epongehumide.Rinceret
secher. Les taches rebelles peuvent6tre
enlevees avec un tampon Scotch-Brite*
humidifie.Frotteruniformementdanslesens
du metal.Rinceret secher.Pour redonner
du lustreet retirerIes rayures,faire suivre
parStainlessSteelMagicSpray*.
Decoloration - #, I'aide d'une eponge
humideou d'un linge souple,essuyeravec
le CameoStainlessSteelCleaner*.Rincer
immediatementet secher.Pour retirer les
marqueset redonnerdu lustre,faire suivre
parStainlessSteelMagicSpray*.
PANNEAUDE COMMANDE
ET HORLOGE
Pour mettre le dispositifde blocagedes
commandesenfonction,voir page29.
Essuyeravecun lingehumideet secher.
Lesproduitspourlesvitrespeuvent6treuti-
lises s'ils sont d'abord vaporisessur un
linge.NEPASvaporiser directementsur
le panneau decommando.
BOUTONS
Enleverlesboutonsdereglageentirantdi-
rectementdessusIorsqu'ilssontsur la po-
sition<<OFF>>(arr6t).
Laver,rinceret secher.Ne pasutilisernet-
toyantsabrasifscar il pourraienteraflerle
fini.
Allumerchacundes elementsde cuisson
pours'assurerque Iesboutonssontplaces
correctement.
CUVETTESDE RECUPERATION-
EMAIL(CERTNNSMODELES)
Un @chauffementexcessifprovoquele
faiengageet le changementde couleur de
I'email;ceciest normalet n'affectepasla per-
formancedecuisson.
Apres chaque utilisation,laisser refroidir
puis laver/rincer/secherpour eviterla for-
mationde tachesou de changementde
couleur.On peutlaverloscuvettesauIave-
vaisselle.
Pour enleverde grossessouillures,faire
tremperdans de I'eau savonneuse,puis
utiliserunproduitdenettoyagelegerement
abrasifcommeSoftScrub*avecuntampon
de recuragedeplastique.
Pourun residucarbonise,retirerlacuvette
de recuperationpourla placersur unjour-
nal, et appliquerprudemmentun produit
commercialpulverisablede nettoyagede
four (no pas pulveriser sur la surface
environnante).Placer la cuvette dans un
sachetdeplastiquependantplusieursheures
pourIaisserleproduitagir.Porterdesgants
decaoutchouc,retirerlacuvettedu sachet,
puislaver/rincer/secher.
CUVETTES DE R_:CUP_:RATION-
CHROME (CERTAINSMODELES)
Apres chaque utilisation,laisser refroidir
puis laver/rincer/secherpour eviterla for-
mationde tachesou de changementde
couleur.
Pour enleverde grossessouillures,faire
tremperdans de I'eau savonneuse,puis
utiliserunproduitdenettoyagelegerement
abrasifcommeSoftScrub*avecuntampon
de recuragede plastique.Ne pas utiliser
produitsdenettoyageabrasifs.
PEINTURE EMAIL - PANNEAUX
LATEREAUX,TIROIR DE REMISSAGEET POtGNES
DE PORTE
Unefois Ia cuisinierefroide,laveravec de
I'eausavonneusechaude,rinceret secher.
Nejamais essuyerunesurfacechaudeou
brelanteavecunlingehumidecarcelapour-
raitabtmerla surfaceet provoquerdesbre-
luresparla vapeur.
Encasde saleterebelle,utiliserunproduit
abrasif doux oomme du bicarbonatede
soudeou du Bon Ami*.Ne pas utiliserde
nettoyeurabrasifs,puissantsou caustiques
telsquelesnettoyeurspourfourou lestam-
ponsenlained'acier.Cesproduitsrayeraient
ou endommageraientla surfacede fagon
permanente.
REMARQUE: Ut#/seruneservietteouunI/hge
secpour essuyer/es /iquidesqui debordent,
en part/cullers'# s'ag/?de/iqulclesacidesou
sucres.Lasurfacepeutsedecolorerousetern#
s//a sa/eMn'estpas enlevee/mmediatemen[
Ceciestparticu//_rementimportantpourlessur-
facesblanches.
VERRE - FENETRE ET PORTE DES FOURS
Eviterd'employertropd'eauquipourraits'in-
troduirederrierela plaquedeverreetformer
destaches.
Nettoyerau savon et a I'eau.Rinceravec
I'eau claire et secher. Un nettoyantpour
vittrespeut@treutilises'ilestd'abortpulverise
surun chiffon.
Ne pasutiliser d'articlesou produitsabra-
sirstelsquetamponsa recurer,lained'acier
oupoudresa recurer.Ilsendommageraient
Ieverre.
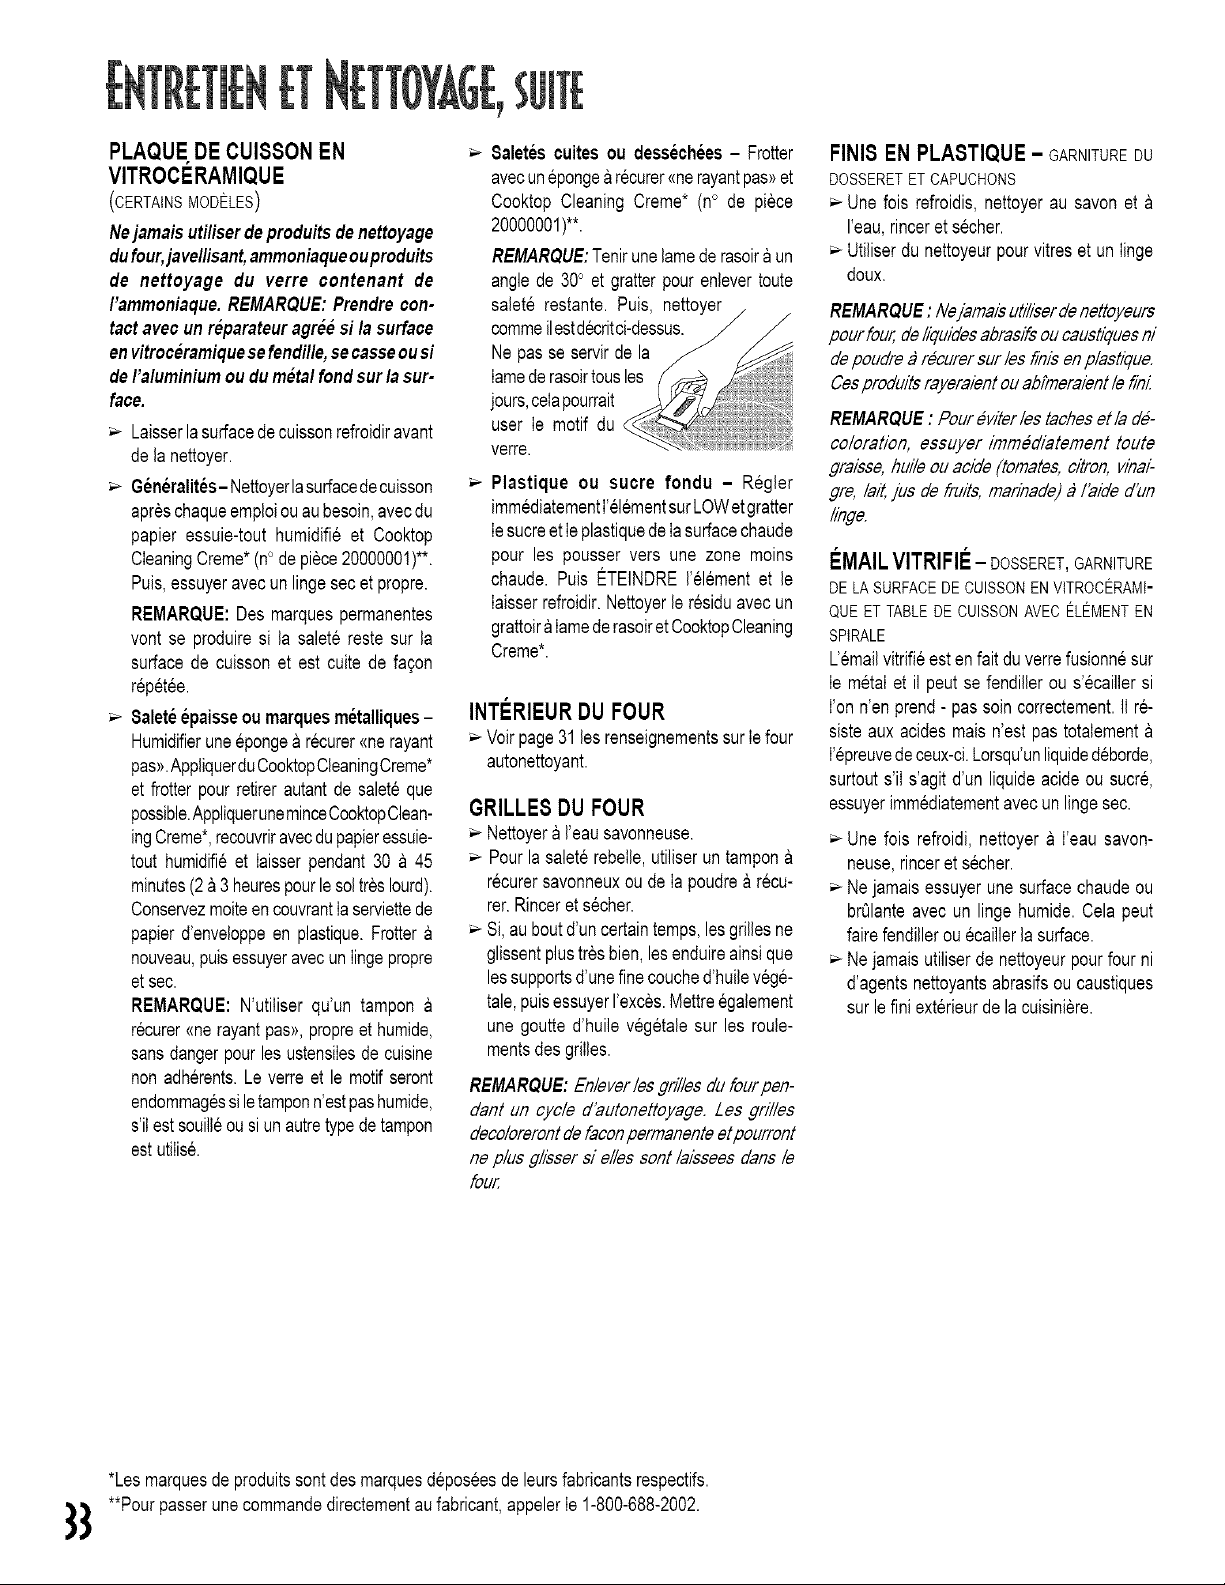
PLAQUEDECUISSON EN
VITROCERAMIQUE
(CERTAINS MODI_LES)
Nejamaisutiliserdeproduitsdenettoyage
dufour,javellisant,ammoniaqueouproduits
de nettoyage du verre contenant de
I'ammoniaque.REMARQUE:Prendrecon-
tactavecunreparateuragreesi la surface
envitroceramiquesefendi//e,secasseousi
deI'aluminiumou dumetalfondsurla sur-
face.
Laisserlasurfacedecuissonrefroidiravant
dela nettoyer.
6eneralites- Nettoyerlasurfacedecuisson
apreschaqueemploiouaubesoin,avecdu
papier essuie-touthumidifie et Cooktop
CleaningCreme*(no depiece20000001)**.
Puis,essuyeravecun lingesec etpropre.
REMARQUE:Des marquespermanentes
vont se produiresi la salete reste sur la
surfacede cuissonet est cuite de fa£on
repetee.
8aleteepaisseou marquesmetalliques-
Humidifieruneepongearecurer<{nerayant
pas>>.AppliquerduCooktopCleaningCreme*
et frotterpour retirerautantde saleteque
possible.AppliqueruneminceCooktopClean-
ingCreme*,recouvriravecdupapieressuie-
tout humidifieet Iaisserpendant30 a 45
minutes(2a 3heurespourle soltresIourd).
Conservezreciteen couvrantIaserviettede
papierd'enveloppeen plastique.Frotter
nouveau,puisessuyeravecunIingepropre
et sec.
REMARQUE:N'utiliserqu'un tampon
recurer<merayantpas>>,propreet humide,
sansdangerpourles ustensilesde cuisine
non adherents.Leverre et le motifseront
endommagessiletamponn'estpashumide,
s'ilest souilleousiunautretypede tampon
estutiIis&
8aletes cuites ou dessechees- Frotter
avecunepongearecurer{merayantpas>>et
Cooktop CleaningCreme* (n° de piece
20000001)**.
REMARQUE:Tenirunelamede rasoiraun
anglede 300et gratterpour enlevertoute
salete restante. Puis,
commeilestdecritci-dessus.
Ne passe servirde la
lamederasoirtousles
jours,celapourrait
user Ie motif du
verre.
Plastique ou sucre fondu - Regler
immediatementI'elementsurLOWetgratter
IesucreetIeplastiquedeIasurfacechaude
pour les pousser vers une zone moins
chaude.Puis ETEINDREI'elementet le
Iaisserrefroidir.Nettoyerle residuavecun
grattoira lamederasoiretCooktopCleaning
Creme*.
INTERIEURDU FOUR
Voirpage31lesrenseignementssurIefour
autonettoyant.
GRILLESDU FOUR
Nettoyera I'eausavonneuse.
PourlasaleterebeIle,utiliserun tampon
recurersavonneuxoude Iapoudrea recu-
rer.Rinceret secher.
Si,au boutd'uncertaintemps,lesgrillesne
glissentplustresbien,lesenduireainsique
lessupportsd'unefinecouched'huilevege-
tale,puisessuyerI'exces.Mettreegalement
une goutted'huile vegetalesur les roule-
mentsdesgrilles.
REMARQUE:EnleverYesgrilles dufourpen-
dant un cycle d'autonettoyage.Les grilles
decoforerontde faconpermanenteetpourront
nep/us g//ssersi dies sontlaisseesclansle
four.
FINIS EN PLASTIQUE- GARNITUREDU
DOSSERETET CAPUCHONS
Une fois refroidis,nettoyerau savon et
I'eau,rinceret secher.
Utiliserdu nettoyeurpourvitreset unIinge
doux.
REMARQUE:Nejama/sut#/serdenettoyeurs
pourfour,de/iquidesabras#sou caustiques/7/
depoudre# recurersurYesfinisenplast/_Tue.
Cesproduitsrayera/entou ab?mera/entlehn/:
REMARQUE: Poureviterles tachesetla de-
coforat/on, essuyer immediatement toute
graisse,huileou acide(tomates,citron,v/na#
gre, layt,jus de fru#s,marinade)a #aided'un
linge.
EMAILVITRIFIE- DOSSERET,GARNITURE
DE LA SURFACEDE CUISSONEN VtTROCERAMI-
QUEETTABLEDECUISSONAVECELEMENTEN
SPIRALE
L'emailvitrifieestenfaitdu verrefusionnesur
Ie metal et il peutse fendillerou s'ecaillersi
I'onn'en prend- pas soincorrectement.II re-
sisteaux acidesmaisn'est pas totalement
I'epreuvedeceux-ci.Lorsqu'unliquidedeborde,
surtouts'il s'agitd'un liquideacideou sucr&
essuyerimmediatementavecunlingesec.
Une fois refroidi,nettoyera I'eau savon-
neuse,rinceret secher.
Nejamais essuyerunesurfacechaudeou
brQlanteavec un linge humide.Cela peut
fairefendillerouecaillerlasurface.
Nejamaisutiliserde nettoyeurpourfour ni
d'agentsnettoyantsabrasifsou caustiques
surle fini exterieurdelacuisiniere.
*Lesmarquesde produitssontdesmarquesdeposeesde leursfabricantsrespectifs.
3 **Pourpasserune commandedirectementaufabricant,appelerIe 1-800-688-2002.
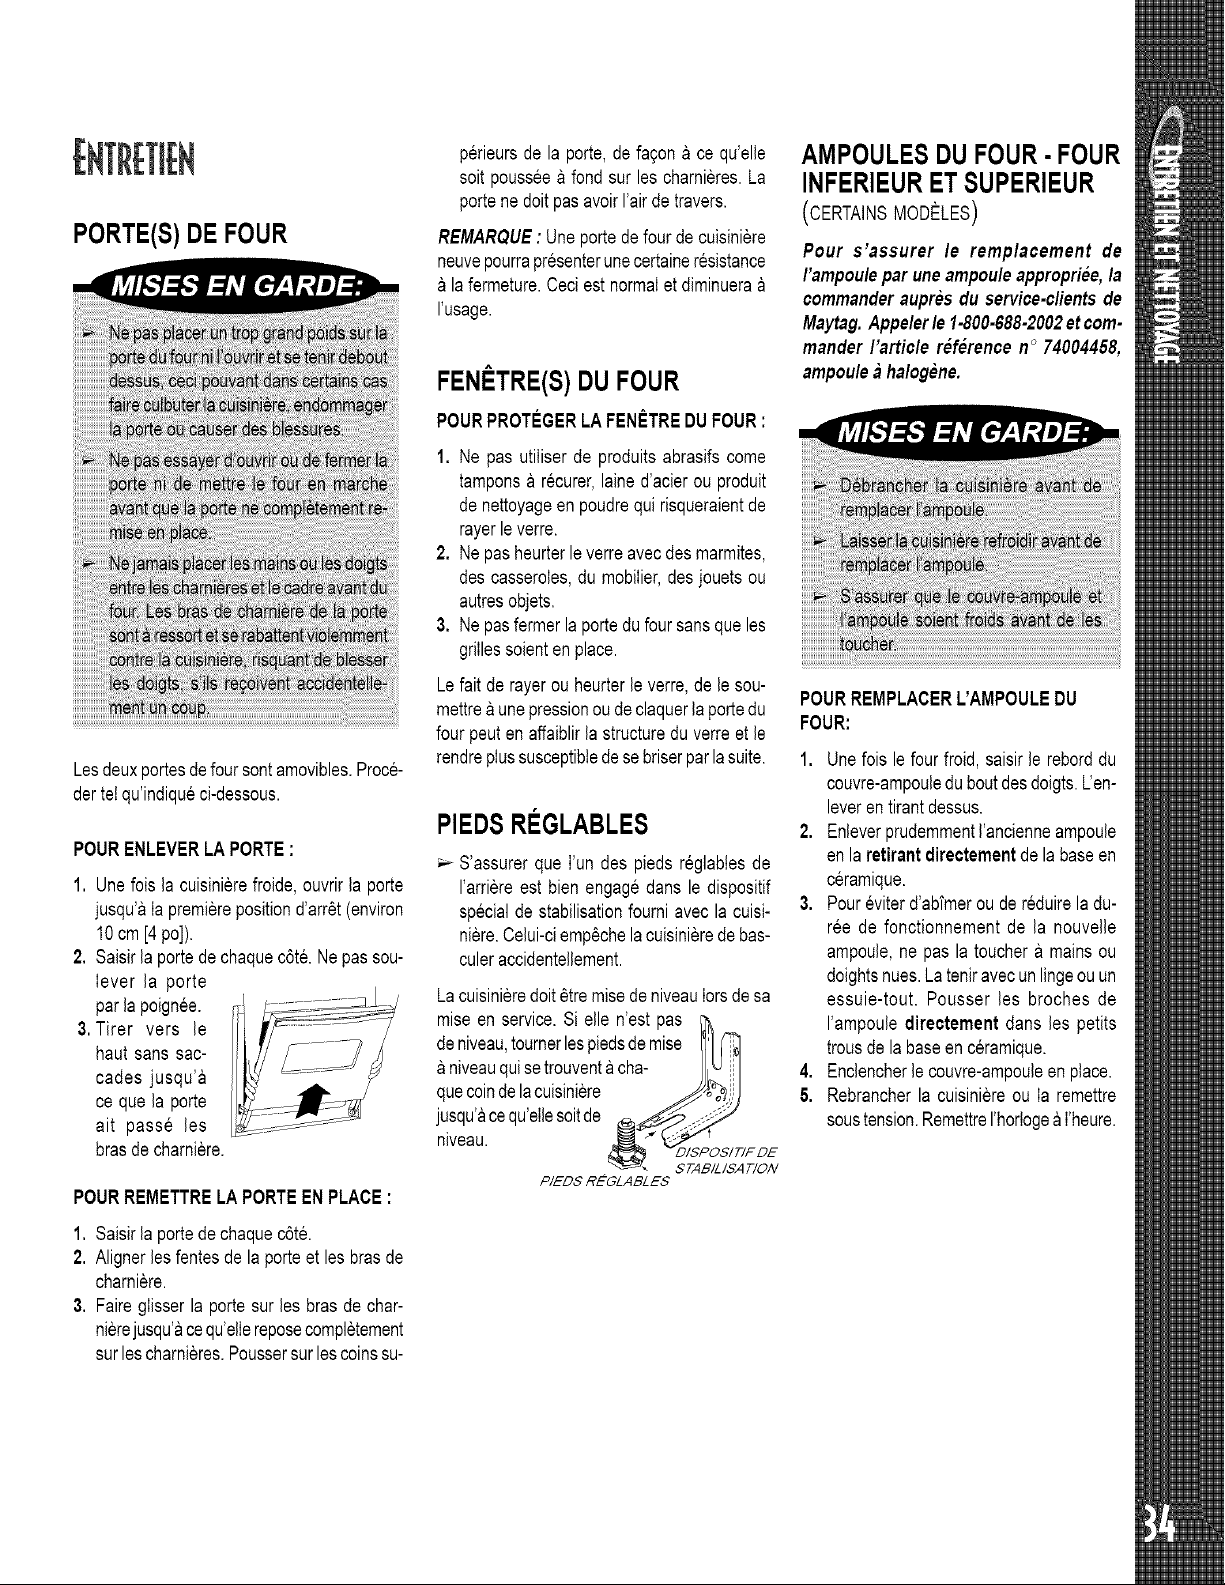
PORTE(S)DE FOUR
Lesdeuxportesdefoursontamovibles.ProcG
dertel qu'indiqueci-dessous.
POURENLEVERLAPORTE:
1. Unefois la cuisinierefroide,ouvrirla porte
jusqu'aIa premierepositiond'arr6t(environ
10cm[4pc]).
2. Saisirlaportedechaquec6t& Ne passou-
lever la porte
parla poignee.
3. Tirer vers le
haut sans sac-
cades jusqu'a
ce que la porte
ait passe les
brasde charniere.
POURREMETTRELAPORTEEN PLACE:
1. Saisirla portede chaquec6t&
2. Alignerlesfentesdela porteet les brasde
charniere.
3. Faireglisserla portesur les brasde char-
nierejusqu'acequ'ellereposecompletement
surlescharnieres.Poussersurlescoinssu-
perieursde la porte,de fa£onace qu'elle
soit pousseea fond sur les charnieres.La
portene doltpasavoirI'airdetravers.
REMARQUE: Uneportedefourde cuisiniere
neuvepourrapresenterunecertaineresistance
lafermeture.Ceciestnormalet diminuera
I'usage.
FEN :TRE(S)DU FOUR
POURPROTCGERLAFENETREDUFOUR:
1. Ne pas utiliserde produitsabrasifscome
tamponsa recurer,lained'acierou produit
de nettoyageenpoudrequi risqueraientde
rayerle verre.
2. Ne pasheurterleverreavecdesmarmites,
des casseroles,du mobilier,desjouetsou
autresobjets.
3. Ne pasfermerlaportedufour sansqueles
grillessoienten place.
Lefait derayerou heurterle verre,de le sou-
mettrea unepressionou declaquerlaportedu
fourpeuten affaiblirla structuredu verreet le
rendreplussusceptiblede sebriserparlasuite.
PIEDSREGLABLES
S'assurerque I'un des piedsreglabtesde
I'arriereest bien engagedans le dispositif
specialde stabilisationfourni avecla cuisi-
niere.Celui-ciemp6chelacuisinierede bas-
culeraccidentellement.
Lacuisinieredolt6tremisedeniveauIorsdesa
miseen service.Si elle n'est pas
deniveau,tournerlespiedsderaise I1]1_'_]
niveauquisetrouventacha- J_J
quecoindelacuisiniere _,,_°_,:,
jusqu'acequ'ellesoitde ___,;;;_
niveau. _" _O$/T/F DE
_. STABILISATIOIV
PIED$ REGLABLES
AMPOULESDU FOUR- FOUR
INFERIEURET SUPERIEUR
(CERTAINSMODELES)
Pour s'assurer le remplacement de
I'ampouleparuneampouleappropriee,la
commanderaupres du service-clientsde
Maytag.Appelerle 1-800-588-2002etcom-
mander rarticle reference n° 74004458,
ampouleahalogene.
POURREMPLACERL'AMPOULEDU
FOUR:
1. Unefois le fourfroid, saisirle reborddu
couvre-ampouleduboutdesdoigts.L'en-
leveren tirantdessus.
2. EnleverprudemmentI'ancienneampoule
enlaretirantdirectementde la baseen
ceramique.
3. Poureviterd'abfmerou dereduirela du-
ree de fonctionnementde la nouvelle
ampoule,ne pas la touchera mainsou
doightshues.Lateniravecunlingeouun
essuie-tout. Pousser les broches de
I'ampouledirectementdans les petits
trousdela baseen ceramique.
4. Enclencherlecouvre-ampouleenplace.
5. Rebrancherla cuisiniereou Ia remettre
soustension.RemettreI'hortogea I'heure.
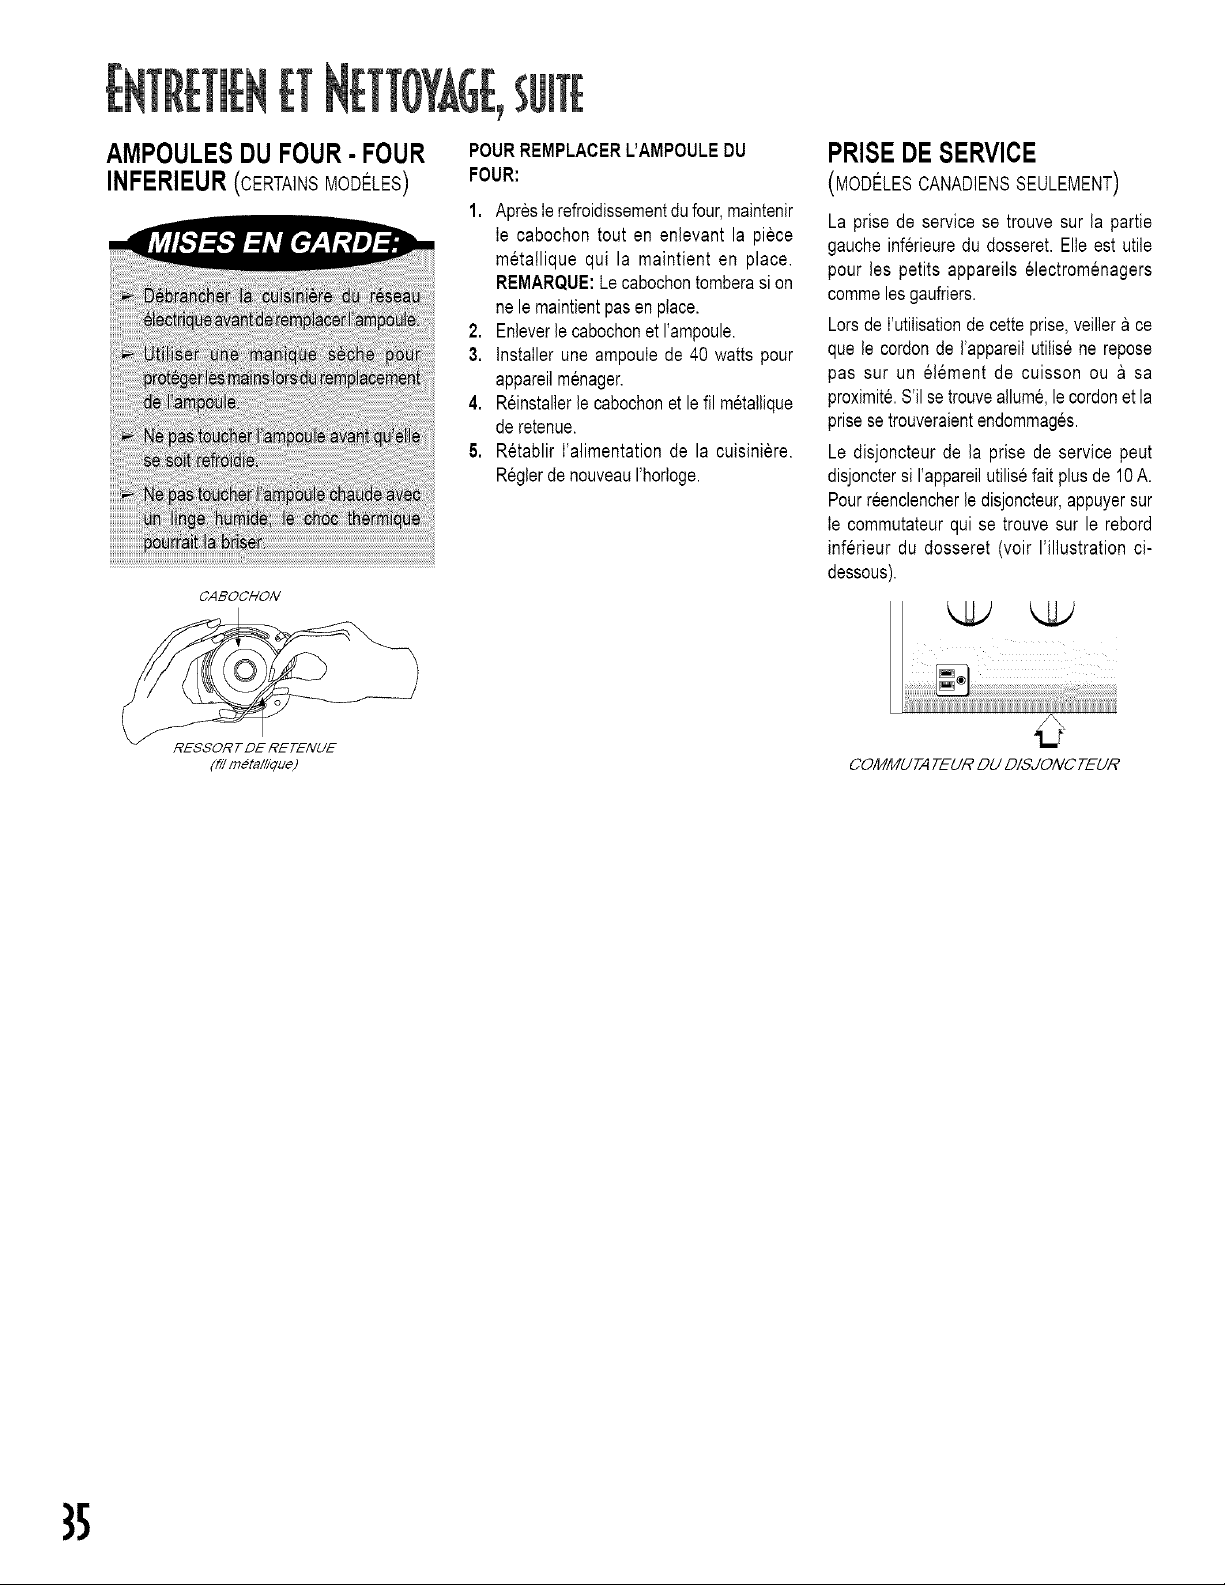
AMPOULES DU FOUR - FOUR
INFERIEUR(CERTAINSMODELES)
CABOCHON
POURREMPLACERL'AMPOULEDU
FOUR:
1. ApresIerefroidissementdufour,maintenir
Ie cabochontout en enlevant la piece
meta!lique qui la maintient en place.
REMARQUE:Lecabochontomberasi on
ne le maintientpasenplace.
2, Enleverlecabochonet I'ampoule.
3, InstaIlerune ampoulede 40 watts pour
appareilmenager.
4, Reinstallerle cabochonet le fil metallique
de retenue.
5, Retablir I'alimentationde la cuisiniere.
ReglerdenouveauI'hortoge.
PRISEDESERVICE
(MODELES CANADIENSSEULEMENT)
La prise de service se trouve sur la partie
gaucheinferieuredu dosseret.Elle est utile
pour les petits appareils electromenagers
commelesgaufriers.
Lorsde I'utilisationde cetteprise,veillerace
que le cordonde I'appareilutilise ne repose
pas sur un element de cuisson ou a sa
proximite.S'il setrouveallumk lecordonet la
prisesetrouveraientendommages.
Le disjoncteur de la prise de service peut
disjonctersi I'appareilutilisefait plusde 10A.
Pourreenclencherle disjoncteur,appuyersur
Ie commutateurqui se trouvesur le rebord
inferieur du dosseret (voir I'illustration ci-
dessous).
i iii iii,i.ii'
i2
OOMMU7-A 7-EUR DU DISJONC 7-EUR
}5
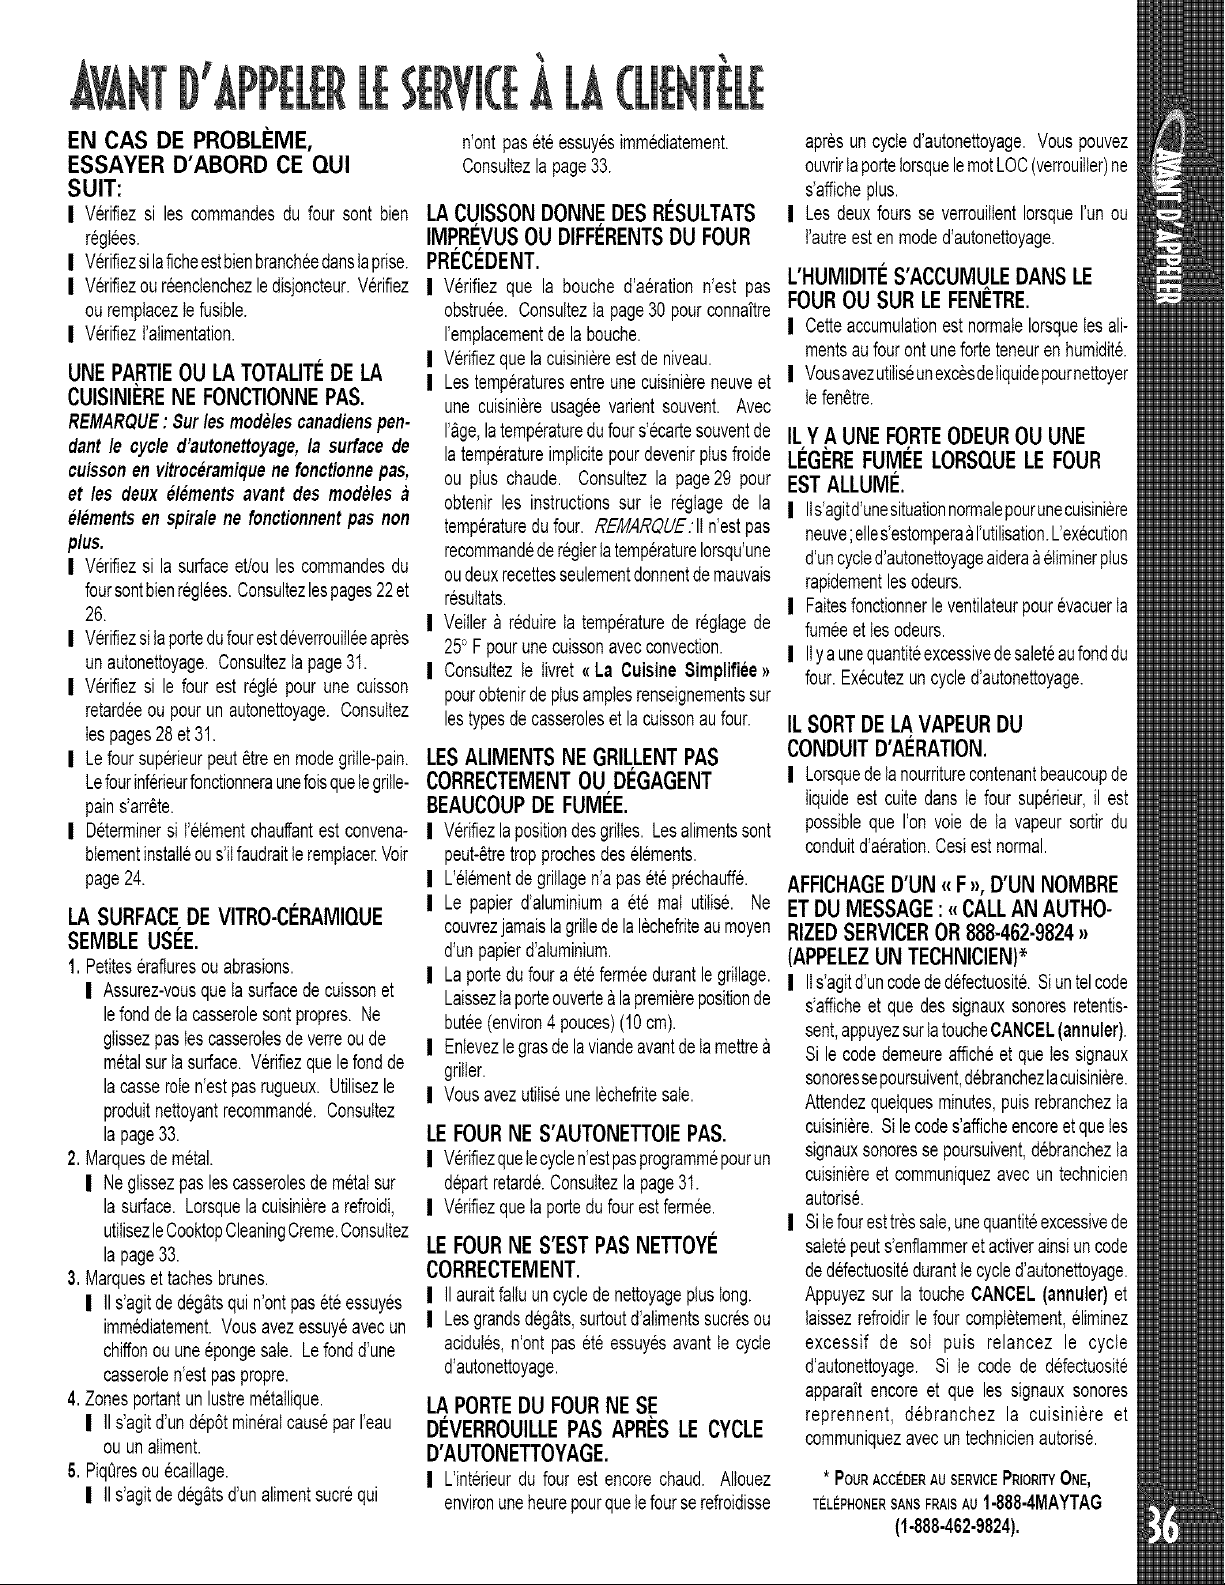
EN CAS DE PROBLEME,
ESSAYER D'ABORD CE QUI
SUIT:
I Verifiezsi les commandesdu four sont bien
r6gtees.
I VerifiezsilaficheestbienbrancheedartsIaprise.
I Verifiezoureenctenchezledisjoncteur.Verifiez
ouremplaceztefusible.
I VerifiezI'atimentation.
UNEPARTIEOU LA TOTALIT¢DELA
CUISINIERENEFONCTIONNEPAS.
REMARQUE: Surlesmodelescanadienspen-
dantle cycled'autonettoyage,la surfacede
cuissonen vitroceramiquene fonctionnepas,
et les deux elements avant des modeles
elementsen spiralene fonctionnentpas non
plus.
I Verifiezsi lasurfaceet/oules commandesdu
foursontbienreglees.Consultezlespages22et
26.
I Verifiezsitaportedufourestdeverrouitleeapres
unautonettoyage.Consultezta page31.
I Verifiezsi le four est regtepourune cuisson
retardeeou pourunautonettoyage.Consuttez
Iespages28et 31,
I Lefoursuperieurpeut6treenmodegrille-pain.
LefourinferieurfonctionneraunefoisqueIegrille-
pains'arrete.
I Determinersi t'etementchauffantestconvena-
btementinstatleous'itfaudraitIeremptacer.Voir
page24.
LA SURFACEDEVITRO-CCRAMIQUE
SEMBLEUSF:E.
1. Petiteserafluresouabrasions.
I Assurez-vousquetasurfacedecuissonet
lefondde tacasserolesontpropres.Ne
glissezpastescasserolesdeverreoude
metalsurtasurface.Verifiezquelefondde
lacasserolen'estpasrugueux.Utilisezle
produitnettoyantrecommande.Consuttez
lapage33.
2. Marquesde metal.
I Neglissezpaslescasserolesde metalsur
lasurface.Lorsquelacuisinierea refroidi,
utitisezleCooktopCleaningCreme.Consuttez
lapage33.
3. Marquesettachesbrunes.
I IIs'agitdedeg_tsqui n'ontpaseteessuyes
immediatement.Vousavezessuyeavecun
chiffonouuneepongesate. Lefondd'une
casserolen'estpaspropre.
4. Zonesportantunlustremetatlique.
I IIs'agitd'undepetmineralcausepar I'eau
ou un aliment.
5. PiqQresou ecaillage.
I IIs'agitdedeg_tsd'unalimentsucrequi
n'ontpaseteessuyesimmediatement.
Consuttezla page33.
LA CUISSON DONNE DES RI_SULTATS
IMPRI!VUSOU DIFFI_RENTSDU FOUR
PReCeDENT.
I Verifiezque la bouched'aerationn'est pas
obstruee.Consulteztapage30pourconnaftre
I'emptacementde la bouche.
I Verifiezque la cuisiniereestdeniveau.
I Lestemperaturesentreunecuisiniereneuveet
une cuisiniereusageevarientsouvent. Avec
I'&ge,latemperaturedufours'ecartesouventde
latemperatureimplicitepourdevenirplusfroide
ou plus chaude. Consultezla page29 pour
obtenirles instructionssur te reglagede la
temperaturedufour. REM,4RQUE:IIn'estpas
recommandederegIertatemperatureIorsqu'une
oudeuxrecettesseulementdonnentdemauvais
resuttats.
I Veitlera reduireta temperaturede regtagede
250F pourunecuissonavecconvection.
I Consuttezte tivret<<La Cuisine8implifiee>_
pourobtenirde ptusamptesrenseignementssur
lestypesdecasseroleset lacuissonau four.
LESALIMENTSNE GRILI.ENTPAS
CORRECTEMENTOU,DEGAGENT
BEAUCOUPDE FUIVIEE.
I Verifiezla positiondesgrilles.Lesalimentssont
peut-etretropprochesdeselements.
I L'eIementdegrillagen'apaset6prechauff8.
I Le papierd'aluminiuma ete mat utitis8. Ne
couvrezjamaislagrilledelalechefriteaumoyen
d'unpapierd'aluminium.
I Laportedufoura etefermeedurantlegrillage.
Laisseztaporteouvertealapremierepositionde
butee(environ4 pouces)(10cm).
I Entevezlegrasde laviandeavantdeIamettre&
gritter.
I Vousavezutitiseunelechefritesate.
LEFOURNES'AUTONETTOIEPAS.
I Verifiezquetecyclen'estpasprogrammepourun
departretard&Consultezlapage31.
I VerifiezqueIa portedufourestfermee.
LEFOURNES'ESTPASNETTOYI_
CORRECTEMENT.
I IIauraitfaltuun cycledenettoyageptustong.
I Lesgrandsdeg&ts,surtoutd'alimentssucresou
acidutes,n'ontpas eteessuyesavantIe cycle
d'autonettoyage.
LA PORTE DU FOUR NE SE
DEVERROUILLEPASAPRF:SLECYCLE
D'AUTONETTOYAGE.
I L'interieurdu four est encorechaud. Altouez
environuneheurepourqueIefourserefroidisse
apresun cycled'autonettoyage.Vouspouvez
ouvrirtaportetorsquelemotLOC(verrouiIter)ne
s'afficheplus.
I Les deuxfoursse verrouittentIorsqueI'unou
I'autreest enmoded'autonettoyage.
L'HUMIDITI!S'ACCUMULEDANSLE
FOUROU SURLE FENf:TRE.
I CetteaccumulationestnormateIorsquetesali-
mentsaufouront uneforteteneurenhumidit&
I VousavezutiIiseunexcesdeIiquidepournettoyer
Iefenetre.
IL Y A UNE FORTEODEUR OU UNE
LI_GF:REFUMI_ELORSQUELEFOUR
ESTALLUIVI¢.
I IIs'agitd'unesituationnormalepourunecuisiniere
neuve;elles'estomperaaI'utilisation.L'execution
d'uncycled'autonettoyageaideraaeliminerptus
rapidementlesodeurs.
I FaitesfonctionnerleventilateurpourevacuerIa
fumeeettesodeurs.
I IIya unequantiteexcessivedesaleteaufonddu
four.Executezuncycled'autonettoyage.
IL SORT DE LA VAPEUR DU
CONDUIT D'AI_RATION.
I LorsquedeIanourriturecontenantbeaucoupde
liquideest cuitedans te four superieur,il est
possibleque I'onvole de ta vapeursortirdu
conduitd'aeration.Cesiestnormal.
AFFICHAGED'UN{{F_, D'UNNOMBRE
ETDU MESSAGE:{{CALLANAUTHO-
RIZEDSERVICEROR888-462-9824_
(APPELEZUN TECHNICIEN)*
I IIs'agitd'uncodededefectuosit&Si untelcode
s'afficheet que des signauxsonoresretentis-
sent,appuyezsurtatoucheCANCEL(annulet).
Si le codedemeureafficheet quetessignaux
sonoressepoursuivent,debranchezlacuisiniere.
Attendezquelquesminutes,puisrebranchezta
cuisiniere.Si lecodes'afficheencoreet quetes
signauxsonoresse poursuivent,debranchezta
cuisiniereet communiquezavecun technicien
autorise.
I Sitefouresttressate,unequantiteexcessivede
satetepeuts'enflammeretactiverainsiuncode
dedefectuosit8duranttecycled'autonettoyage.
Appuyezsur la toucheCANCEL(annuler)et
laissezrefroidirle four comptetement,eliminez
excessif de soI puis relancez le cycle
d'autonettoyage.Si te code de defectuosit6
apparattencoreet que les signauxsonores
reprennent, debranchez la cuisiniere et
communiquezavecuntechnicienautorise.
* POURACCEDERAUSERVICEPRIORITYONE_
TELEPHONERSANS FRAISAU 1-888-4MAYTAG
(1-555-462-9824).
GARANTI[D[[A(UIflNI[R[
,
,
4.
5.
,
Lesetatset lesdommagescausesparI'unedes situationssuivantes:
a. Installationerronee,livraisonou entretien.
b. Reparation,modification,alterationoureglagenonautoriseparIefabricantou le
technicienautoris&
c. Mauvaiseutilisation,abus,accidentsou utilisationderaisonnable.
d. Intensitedecourant,tensionoualimentationelectriqueincorrecte.
e. Reglageerroned'unecommande.
Lesgarantiessontnullessi Iesnumerosdeserieoriginauxonteteenlevesoumodifies
ouencores'il estimpossiblede leslire.
Ampoules.
Produitsachetespouruneutilisationcommercialeouindustrielle.
LecootdeI'entretiendansles cassuivants:
a. PourcorrigerIeserreursd'installation.
b. PourinstruireI'utilisateura I'utilisationapproprieedu produit.
¢. Le transportdeI'appareiljusqu'aucentrede service.
Les dommagesconsecutifsou indirectscausespar une personnea la suited'une
inobservationde cesgaranties. Certainsetatsne permettentaucuneexclusionou
restrictiondesdommagesconsecutifsou indirects.Lapresenteexclusionpeutdoncne
pass'appliquer.
YOU ¥EZ
I_ AuxEtats-UnisetauCanada,communiquezavecledetaillantquivousavenduI'appareil
ouavecMaytagAppliancesSalesCompany,MaytagCustomerAssistanceau 1-888-
462-9824,Etats-Uniset Canada,pourIocaliserlecentredeservicele plusproche.
I_ Assurez-vousde conserverune preuved'achat pour verifierI'etat de la garantie.
Consultezla section Garantiepour obtenirde plus amples renseignementssur Ies
responsabilitesdu proprietaireen vued'un servicecouvertpar lagarantie.
I_ Sile detaillantoulecentredeservicenepeuventresoudreleprobleme,ecrivezaMaytag
AppliancesSalesCompany,Attn:CAIR®Center,P.O.Box2370,Cleveland,TN37320-
2370ouappelezle 1-888-462-9824pourdu service PriorityOne.
REMARQUE: Au momentd'ecrireoud'appelerausujetd'unprobleme,veuillezinclure
lesrenseignementssuivants:
a. Vosnom,adresseet numerodetelephone,
b. Lesnumerosde modeleet deserie,
c. Lesnoraet adressede votredetaillantou du centredeservice,
d.Unedescriptiondetailleeduproblemeeprouv&
e. Unepreuved'achat(re£udecaisse).
Lesguidesd'utilisation,lesmanuelsd'entretienet lesrenseignementsde piecessont
offertsaupresde MaytagAppliancesSalesCompany,MaytagCustomerAssistance.
MAYTAG • 403 West Fourth Street North • P.O. Box 39 • Newton, Iowa 50208
ESTUFAELECTRICAMAYTAGGEMINITM
MAY[AG
Instalador: Deje este manual con el
electrodomestico.
Cliente:Leay conserveestemanualpara
futurasreferencias.Conserveelrecibode
compra y/o el cheque canceladocomo
comprobantede compra.
Nt3merodemodelo
NQmerodeserie
U
DIDAD.......... P&ginas 39 & 40
_t:I[IE PARA[O[IHAllP&ginas 41 & 43
EADO........... P&ginas 44 & 49
YLIMPIEZA.... P&ginas 50 & 53
Fechadecompra
DELLAMAR......... P&gina 54
p
TIA.............. Pagina 55
Sideseaobtenermasinformaci6nIlamea:
1-888-4MAYTAG(1-888-462-9824)
(Delunesa viernesde 8:00a.m.
a 5:00p.m.horadel Este)
Internet:http://www.maytag.com
Si deseaobtenermasinformationsobreel
servicio, consultelapagina 55.
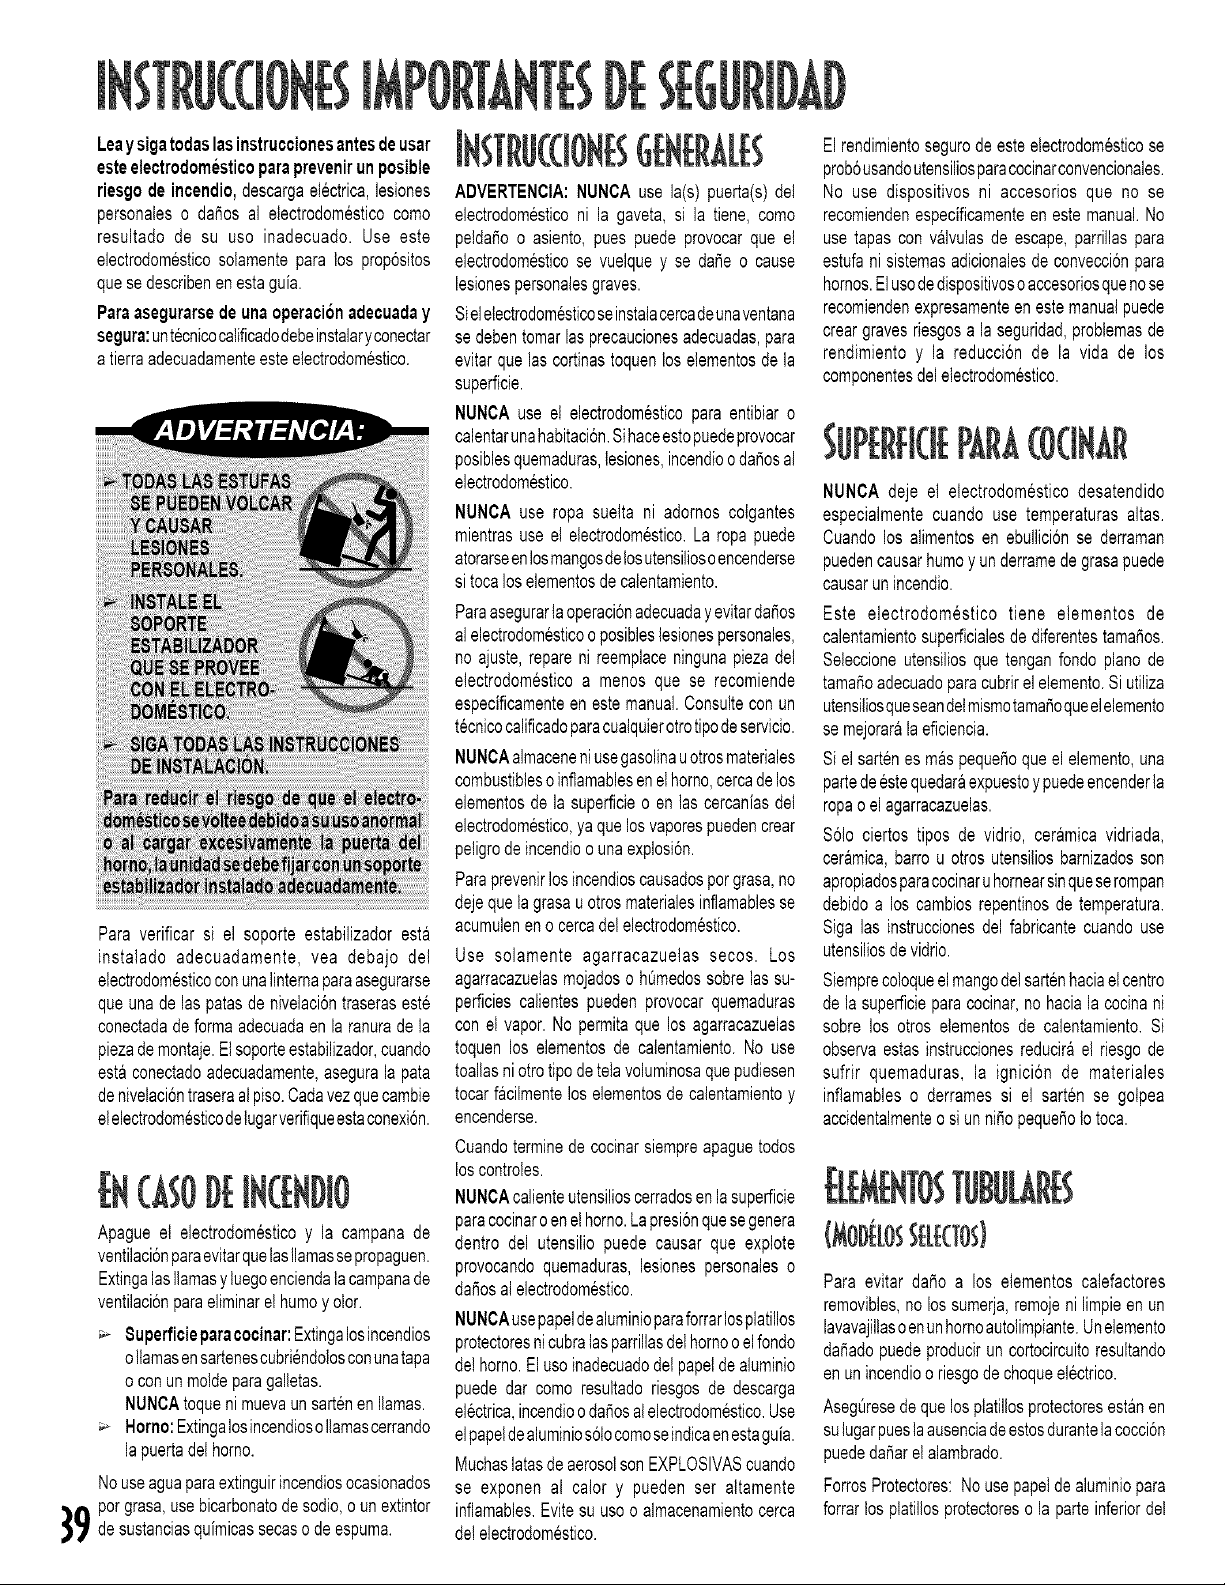
Leaysigatodaslasinstruccionesantesdeusar
esteelectrodomesticoparaprevenirunposible
riesgodeincendio,descargaelectrica,lesiones
personaleso daSosal electrodomesticocomo
resultado de su uso inadecuado.Use este
electrodomesticosolamenteparalosprop6sitos
quesedescribenen estaguia.
Paraasegurarsedeunaoperationadecuaday
segura:untecnicocatificadodebeinstalaryconectar
atierraadecuadamenteesteelectrodomestico.
Paraverificarsi el soporteestabilizadoresta
instalado adecuadamente,vea debajo det
electrodomesticoconunaIinternaparaasegurarse
queunadelas patasde nivelaci6ntraseraseste
conectadadeformaadecuadaenla ranuradela
piezademontaje.Elsoporteestabilizador,cuando
estaconectadoadecuadamente,aseguralapata
denivelaci6ntraseraalpiso.Cadavezquecambie
elelectrodomesticodetugarverifiqueestaconexi6n.
(AS(}[)6IN({Ngl(}
Apagueel electrodomesticoy la campanade
ventilaciSnparaevitarquelasllamassepropaguen.
Extingalasllamasyluegoenciendalacampanade
ventilaciSnparaeliminarelhumoy olor.
8uperficieparacocinar:Extingalosincendios
ollamasensartenescubriendoiosconunatapa
oconunmoldeparagalletas.
NUNCAtoquenimuevaunsartenen llamas.
Horno:Extingalosincendioso llamascerrando
lapuertadelhorno.
Nouseaguaparaextinguirincendiosocasionados
9 porgrasa,usebicarbonatode sodio,o unextintor
desustanciasquimicassecaso de espuma.
GENERALE$
ADVERTENCIA:NUNCAuse la(s)puerta(s)del
electrodomesticoni la gaveta,si la tiene,como
peldai_oo asiento,pues puedeprovocarque el
electrodomesticose vuelquey se da_eo cause
lesionespersonalesgraves.
Sieletectrodomesticoseinstalacercadeunaventana
sedebentomarlasprecaucionesadecuadas,para
evitarquelas cortinastoquenlos elementosdela
superficie.
NUNOAuse el electrodomesticopara entibiaro
calentarunahabitaci6n.Sihaceestopuedeprovocar
posiblesquemaduras,tesiones,incendioo da_osal
electrodomestico.
NUNCAuse ropa suelta ni adornoscotgantes
mientrasuse el electrodomestico.La ropapuede
atorarseenlosmangosdelosutensiliosoencenderse
si tocaloselementosde calentamiento.
Paraasegurartaoperaci6nadecuaday evitardai_os
alelectrodomesticooposibleslesionespersonales,
no ajuste,repareni reemplaceningunapiezadel
electrodomesticoa menos que se recomiende
especificamenteenestemanual.Consulteconun
tecnicocalificadoparacualquierotrotipodeservicio.
NUNCAalmaceneniusegasolinauotrosmateriales
combustiblesoinflamablesenelhomo,cercadelos
eiementosdela superficieo en lascercaniasdel
electrodomestico,yaquelosvaporespuedencrear
petigrodeincendioounaexplosi6n.
Paraprevenirlosincendioscausadosporgrasa,no
dejequelagrasauotrosmaterialesinflamablesse
acumuleneno cercadelelectrodomestico.
Use solamente agarracazuetas secos. Los
agarracazuelasmojadoso htJmedossobrelassu-
perficiescalientespuedenprovocarquemaduras
conel vapor.No permitaquelos agarracazuelas
toquenlos elementosde catentamiento.No use
toallasniotrotipodetetavoluminosaquepudiesen
tocarfacilmentelos elementosdecalentamientoy
encenderse.
Cuandoterminede cocinarsiempreapaguetodos
loscontroles.
NUNOAcaiienteutensilioscerradosenlasuperficie
paracooinaro enelhomo.Lapresi6nquesegenera
dentro del utensiliopuedecausarque explote
provocandoquemaduras,lesionespersonaleso
dai_osalelectrodomestico.
NUNCAusepapeldealuminioparaforrarlospiatillos
protectoresnicubratasparrillasdelhomooelfondo
deihorno.Elusoinadecuadodelpapeldealuminio
puededar como resultadoriesgosde descarga
electrica,incendioo dai_osalelectrodomestico.Use
eipapeldealuminios61ocomoseindicaenestaguia.
MuchaslatasdeaerosolsonEXPLOSIVAScuando
se exponenal calory puedenser altamente
inflamables.Evitesu usoo almacenamientocerca
delelectrodomestico.
Elrendimientosegurodeesteelectrodomesticose
prob6usandoutensiliosparacocinarconvencionales.
No use dispositivosni accesoriosque no se
recomiendenespecificamenteenestemanual.No
usetapascon v&lvulasde escape,parrillaspara
estufanisistemasadicionalesdeconvecci6npara
hornos.Elusodedispositivosoaccesoriosquenose
recomiendenexpresamenteenestemanualpuede
creargravesriesgosa la seguridad,problemasde
rendimientoy la reducci6nde la vida de los
componentesdelelectrodomestico.
£ARA((}GHAR
NUNCAdeje et electrodomesticodesatendido
especialmentecuando use temperaturasaltas.
Cuandolos alimentosen ebullici6nse derraman
puedencausarhumoy underramede grasapuede
causarunincendio.
Este electrodomestico tiene etementos de
calentamientosuperficialesde diferentestamai_os.
Seleccioneutensiliosquetenganfondopianode
tamai_oadecuadoparacubrirelelemento.Siutiliza
utensiliosqueseandetmismotama_oqueelelemento
semejoraralaeficiencia.
Sielsartenesmaspeque_oqueelelemento,una
partedeestequedaraexpuestoy puedeencenderta
ropaoelagarracazuelas.
$61ociertos tipos de vidrio,ceramicavidriada,
ceramica,barrou otrosutensiliosbarnizadosson
apropiadosparacocinaruhornearsinqueserompan
debidoa los cambiosrepentinosde temperatura.
Sigalas instruccionesdel fabricantecuandouse
utensiliosde vidrio.
Siemprecoloqueel mangodelsartenhaciael centro
delasuperficieparacocinar,nohacialacocinani
sobrelos otros elementosde calentamiento.Si
observaestasinstruccionesreducirael riesgode
sufrir quemaduras,la ignici6n de materiales
inflamableso derramessi el sarten se gotpea
accidentalmenteo siunnii_opequei_oIotoca.
Para evitar da_o a los elementoscalefactores
removibles,nolossumerja,remojenilimpieenun
lavavajillasoenunhomoautolimpiante.Unelemento
dai_adopuedeproduciruncortocircuitoresultando
enunincendiooriesgodechoqueelectrico.
AsegQresedequelosplatil!osprotectoresestanen
sutugarpueslaausenciadeestosdurantelacocci6n
puededa_arel alambrado.
ForrosProtectores:Nousepapelde aluminiopara
forrarlos ptatil!osprotectoresola parteinferiordet
homo,exceptocomosesugieraenlaguia.La
instalaci6nincorrectadeestosforrospuederesultar
enunriesgodechoqueetectricooincendio.
DEViDRI0/
PARA(0(tNAR
{MOD L0 SELE(TO }
NUNCAcocinesobrela superficieparacocinarsi
estarota.Sitasuperficieparacocinarserompe,las
solucionesdelimpiezaylosderramespuedenpenetrar
enlasgrietasy crearunriesgodedescargael¢ctrica.
P6ngaseinmediatamenteencontactoconuntecnico
calificado.
Limpieconcuidadolasuperficieparacocinar.Algunos
limpiadorespuedenproducirvaporest6xicoscuando
seaplicanenunasuperficiecaliente.Si utilizauna
esponja,pai_ootoalladepapelhOmedaparatimpiar
unasuperficiecaliente,hagalocon cuidadopara
evitarquemadurasconel vapor.
Extremelasprecaucionescuandomuevaunsarten
Ilenode aceiteo cuandodesechegrasacaliente.
Permitaque el aceitese enfrieantesde intentar
moverel sarten.
Tengacuidadocuandoabrala(s)puerta(s)delhomo.
Permitaqueelairecalienteoelvaporescapenantes
dequitarocolocaralimentos.
Paralaoperaci6ny el rendimientoadecuadosdel
homo, no bloqueeni obstruyael conductode
ventilaci6ndelhomo.Cuandoesteusandoelhomo,
ei areacircundantese cafientanIosuficientecomo
paracausarquemaduras.
Coloquesiemprelasparrillasdelhomoenlaposici6n
mientrasel homoeste frio. Si deseamoveruna
parrillamientraselhomoestacaliente,no permita
que el agarracazuelasentreen contactocon los
eiementos.
RNODELIMPIE7A
J
Limpies61olaspartesquesemencionanenestaguia.
Nolimpieelempaquedelapuerta.El empaquees
esencialparaunbuensellado.Norestriegue,dai_eni
muevaelempaquedelapuerta.
Nouse limpiadoresparahomo.Nose debeusar
ningunaclasedelimpiadorescomercialesparahomo
nicapasprotectorasdehomodentronienninguna
partedel homo.
Antesdelalimpiezaautomaticadelhomo,saquela
bandejaparaasar,las parrillasdelhomoy demas
utensilios,paraprevenirla producci6nde humo
excesivo,decoloraci6nde lasparrillasdel homoo
posiblesda_osa losutensilios.
Antesdeiniciareiciclodelimpiezalimpielosderrames
grandes,especialmentelosdegrasa,paraevitarla
producci6ndehumoy flamaradas.
Duranteelciclodelimpiezaesnormalquetasuperficie
paracocinarsecaliente.Asiqueevitetocarlasuperficie
paracocinar,puerta,ventanaoconductodeventilaci6n
delhomoduranteelciclode fimpieza.
NUNCAtoqueloselementosdecalentamientode
lasuperficieo delhorno,lasareasadyacentesa
loselementosni el interiorde la superfieiedel
horno.
Los elementosde calentamientopuedenestar
calientesauncuandotenganuncolorobscuro.Las
areasadyacentesa loselementosdecalentamiento
dela superficiey lasuperficieinteriordeun homo
puedencalentarseIo suficientecomoparacausar
quemaduras.Durante y despues del uso det
electrodomesticonotoqueni permitaquelaropau
otrosmaterialesinflamablesentrenen contactocon
loselementosdecalentamiento,lasareasadyacentes
a losetementoso lassuperficiesen el interiordel
homohastaquehayapasadosuficientetiempopara
queestosseenfrien.
Otrassuperficiespotencialmentecalientesson:la
superficieparacocinar,las areasenfrentede la
superficieparacocinar,el conductodeventilaci6ndet
homo, las superficiescerca del conducto de
ventilaci6n,la(s) puerta(s)del homo,las areas
alrededordela(s)puerta(s)y ventanadethorno.
NUNCAdeje a los niSossoloso sin supervisi6n
mientrasel electrodomesticoesteenusoo caliente.
NUNCApermitaquelosnii_ossesientenopatenen
ningunapartedeletectrodomestico.
SedebeenseSara losniSosquelosutensiliosque
estansobreo dentrodelelectrodomesticopueden
estarcalientes.Dejeenfriarlosutensiliosenunlugar
segurofueradel alcancede los niSos.Se debe
enseSaralosniSosqueelelectrodomesticonoesun
juguetey quenodebenjugarconloscontrolesnicon
otraspartesdela unidad.
PRECAUCION:NUNCAalmacenearticulosque
atraiganel interesdelosnitrosenlosgabinetes
queseencuentransobreelelectrodomesticoni
enelpaneldecontrolesdelaestufa.Silosni_os
sesubenenelelectrodomestico,enlapuertao
enlagavetaparaalcanzaresosarticulos,pueden
dai_aretelectrodomestico,quemarseo lesionarse
seriamente.
,t
DEYENTIBGON
Limpiefrecuentementelas campanasdel
etectrodomesticoy losfiltrospara prevenirla
acumulaci6nde grasa y otros materiales
inflamabtesy evitarincendios.
Enciendaelventiladorcuandoflameealimentos
(comoduloede oerezas)bajolaoampana.
LaLeysobreSustanciasT6xicasyAguaPotable
Segurade1986deCalifornia(Proposici6n65)
estipulaqueel GobemadordeCaliforniadebe
publicarunalistadesustanciasconocidasenel
estadodeCaliforniaquecausencanceroda_os
en et sistemareproductor,y requierequelas
empresasalerten a los clientes sobre la
exposici6npotenciala talessustancias.
Losusuariosde esteelectrodomesticoquedan
advertidosporestemedioque,cuandoelciclo
delimpiezaautomaticaestafuncionando,puede
haberunbajoniveldeexposici6naalgunadelas
sustanciaslistadas,inclusivemon6xidode
carbono.Laexposici6nsepuedeminimizarpor
mediode la ventilaci6napropiadadel homo
duranteeiciclodeftmpiezaautomatica,abriendo
unapuertao ventanadelahabitaci6ndondese
encuentraelelectrodomestico.
AVISOIMPORTANTERESPECTOA LOS
PAJARO8DOMESTICO8:Nuncamantenga
lospajarosdejaulaenlacocinaoenhabitaciones
hastadondepuedanIlegarlos humosde la
cocina.Lospajarostienenunsistemarespiratorio
muysensitivo.Loshumosproducidosduranteel
ciclode autolimpiezadel homo puedenser
perjudicialeso mortalesparalos pajaros.Los
humosquedespidenel aceitede cocina,la
grasa,tamargarinacuandosesobrecalientany
lavajiltaantiadherentesobrecalentadapueden
tambienserperjudiciales.
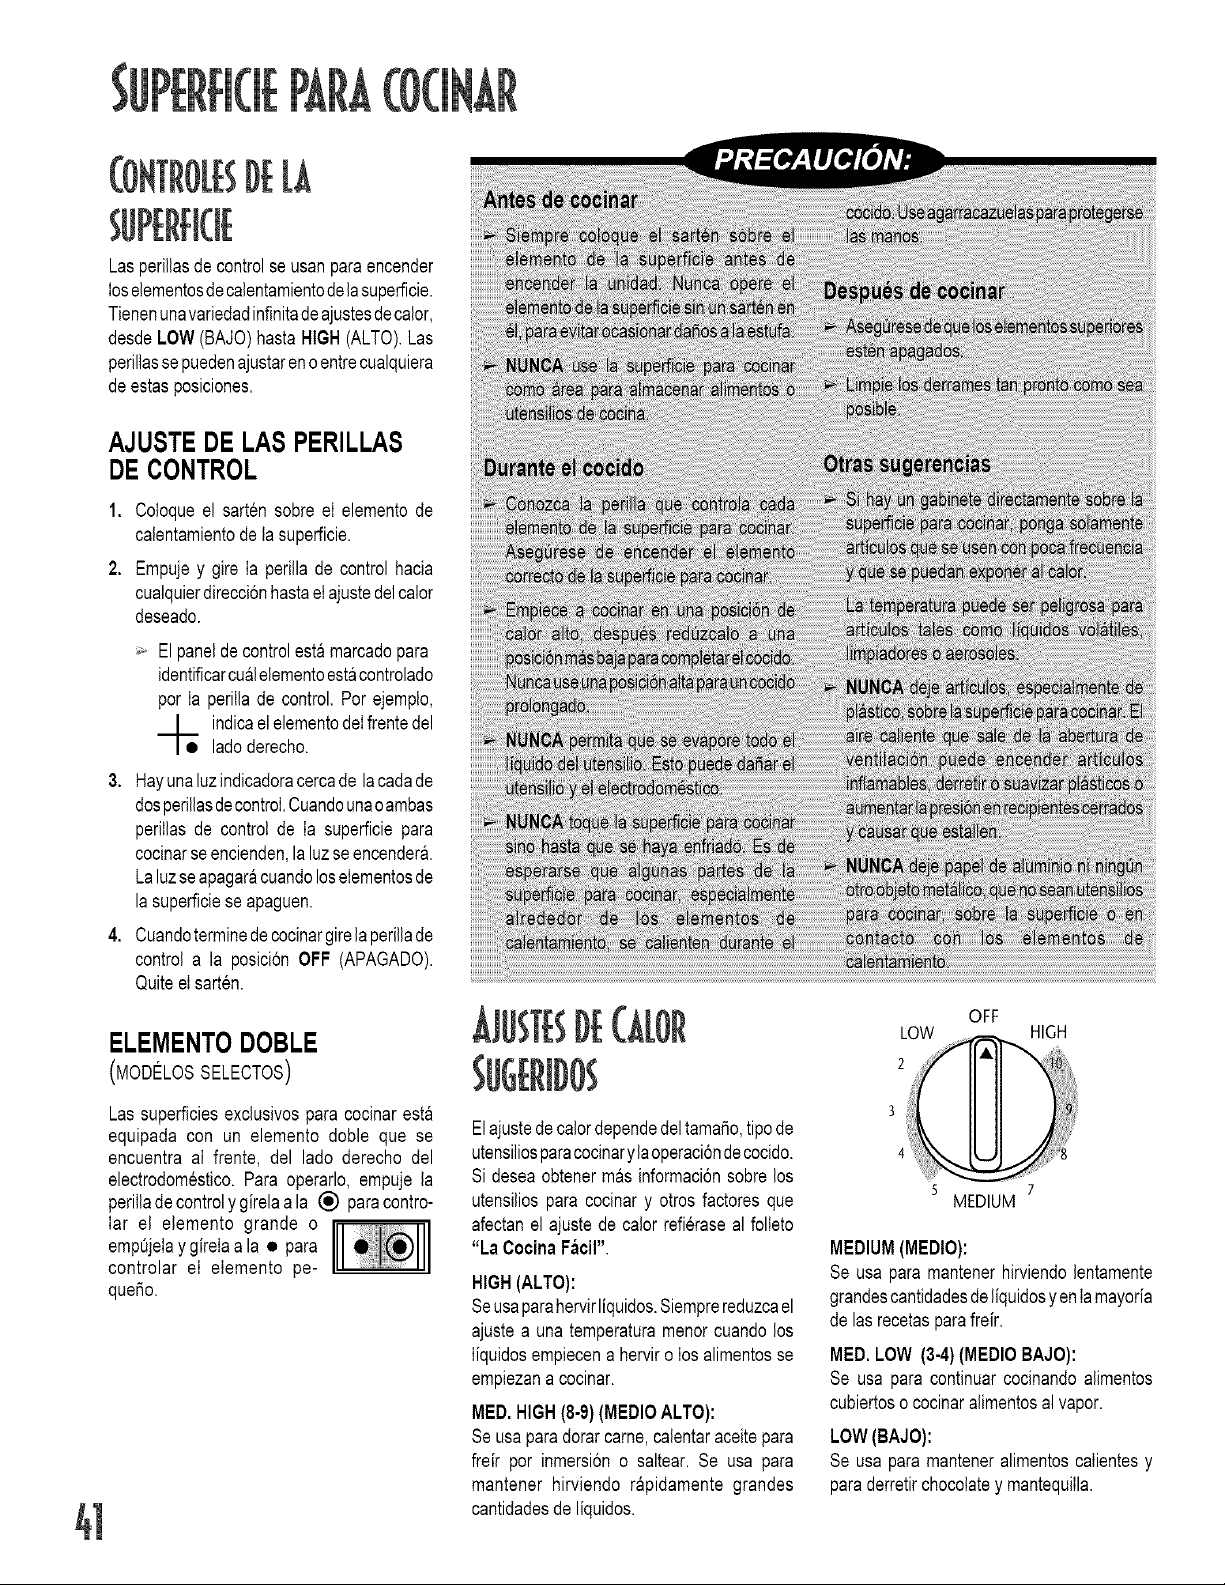
SUP[RFI(t[
DEB
Lasperillasdecontrolse usanparaencender
loselementosdecalentamientodelasuperficie.
Tienenunavariedadinfinitadeajustesdecalor,
desdeLOW(BAJO)hastaHIGH(ALTO).Las
perillasse puedenajustarenoentrecualquiera
deestasposiciones.
AJUSTEDE LAS PERILLAS
DECONTROL
1. Coloqueel sartensobreel elementode
calentamientode la superficie.
2. Empujey gire Ia perillade control hacia
cualquierdireccionhastaelajustedelcalor
deseado.
_- El panelde controlestamarcadopara
identificarcualelementoestacontrolado
por Ia perillade control.Por ejemplo,
indicaelelementodeIfrentedel
ladoderecho.
3. Hayunaluzindicadoracercade lacadade
dosperillasdecontrol.Cuandounaoambas
perillas de controlde Ia superficiepara
cocinarseencienden,la luzseencender&
Laluzseapagaracuandoloselementosde
la superficiese apaguen.
4. Cuandoterminedecocinargirelaperillade
control a la posicion OFF (APAGADO).
Quiteel sarten.
ELEMENTODOBLE
(MODELOSSELECTOS)
Las superficiesexclusivosparacocinaresta
equipada con un elemento doble que se
encuentraal frente, del lado derecho del
electrodomestico.Para operarlo,empuje la
perilladecontrolygirelaa la (_) paracontro-
Iar el elemento grande o
empQjelay girelaa la • para
controlar el elemento pe-
que_o.
DE
Elajustedecalordependedeltama_o,tipode
utensiliosparacocinarylaoperaci6ndecocido.
Si deseaobtenermas informaci6nsobrelos
utensiliospara cocinary otrosfactoresque
afectanel ajustede calorrefierasealfolleto
"La CocinaFacil",
HIGH(ALTO):
Seusaparahervirliquidos.Siemprereduzcael
ajustea unatemperaturamenorcuandolos
Iiquidosempiecena herviro los alimentosse
empiezana cocinar.
MED.HIGH(8-9)(MEDIOALTO):
Seusaparadorarcame,calentaraceitepara
freir por inmersiono saltear. Se usa para
mantener hirviendo rapidamente grandes
cantidadesde liquidos.
OFF
LOW _ HIGH
324_
5
MEDIUM
MEDIUM(MEDIO):
Se usa para mantenerhirviendolentamente
grandescantidadesdeliquidosyen Iamayoria
de lasrecetasparafreir.
MED.LOW (3-4)(MEDIOBAJO):
Se usa para continuarcocinandoalimentos
cubiertoso cocinaralimentosal vapor.
LOW(BAJO):
Se usa para manteneralimentoscalientesy
paraderretirchocolatey mantequiIla.
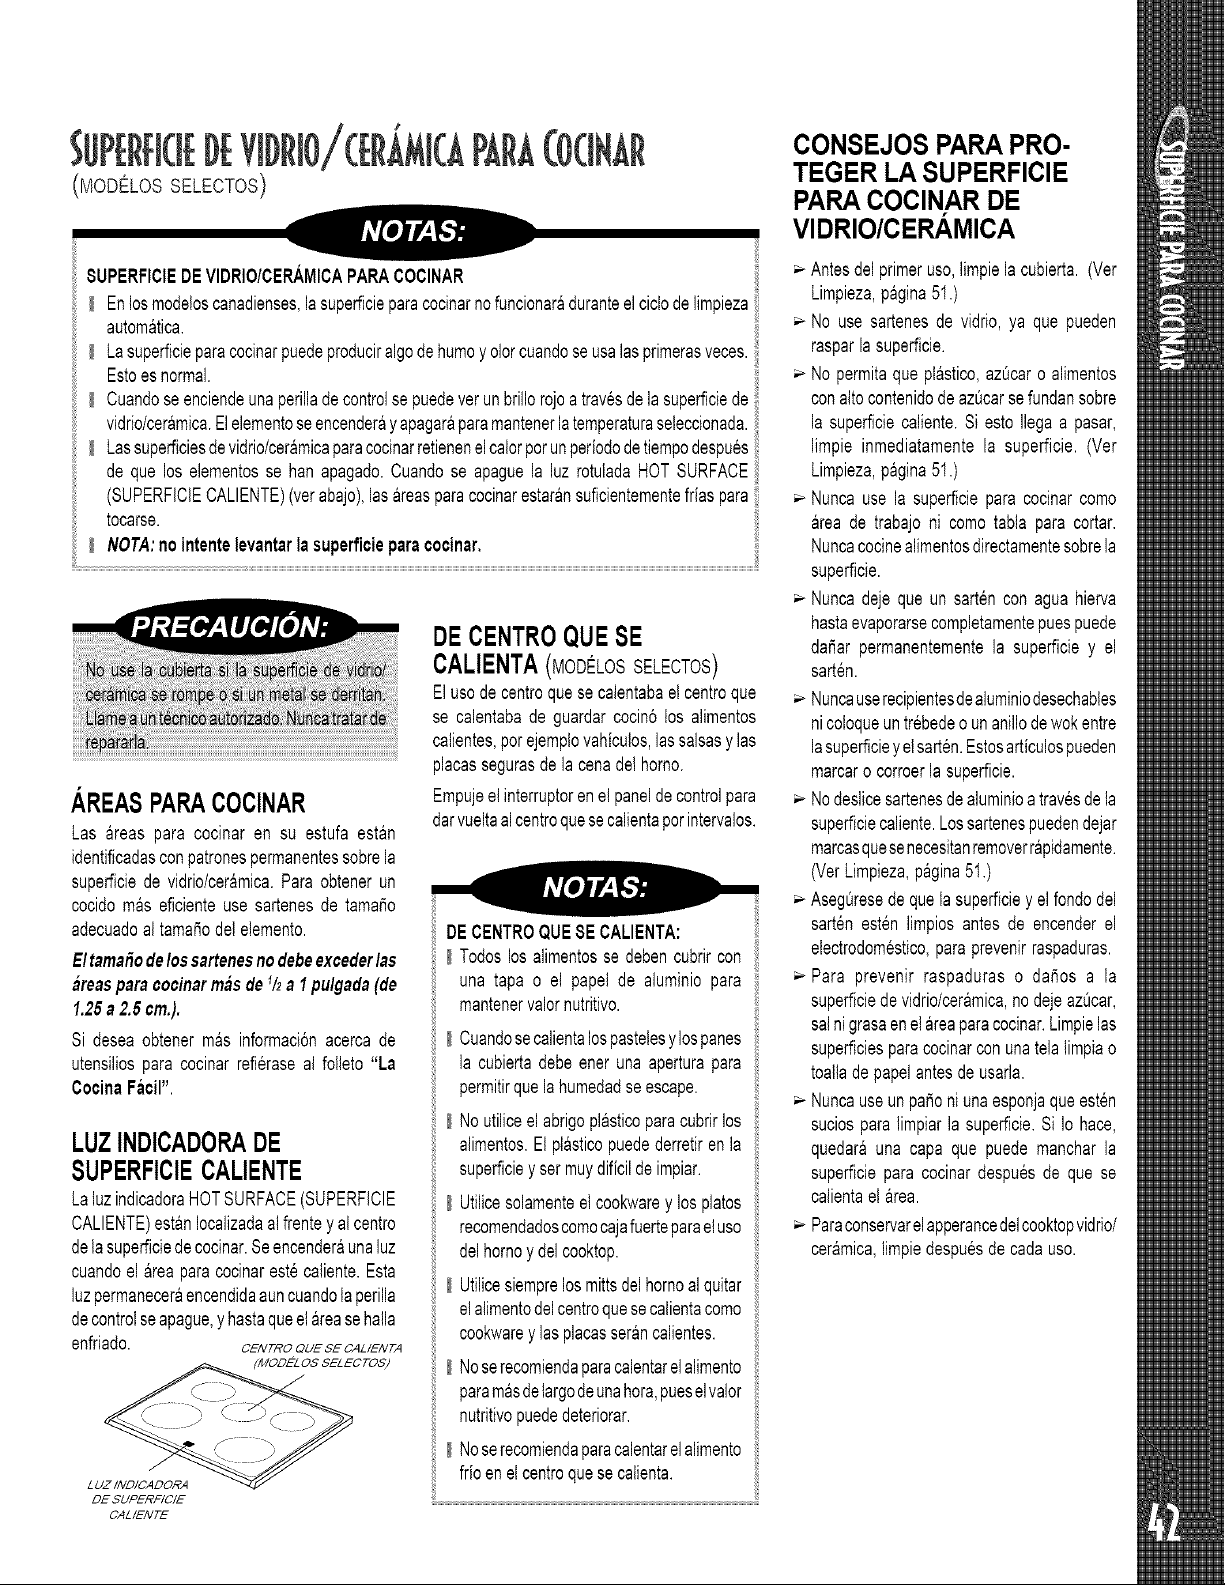
DE¥1DRI0
(MODELOSSELECTOS)
CONSEJOS PARA PRO-
TEGER LA SUPERFICIE
PARA COCINAR DE
VIDRIO/CERAMICA
SUPERFICIEDEVIDRIO/CERAMICAPARACOCINAR
Enlosmodeloscanadienses,lasuperficieparacocinarnofuncionaraduranteel ciclodelimpieza
automatica.
Lasuperficieparacocinarpuedeproduciralgodehumoy olorcuandoseusalasprimerasveces.
Estoesnormal.
Cuandoseenciendeunaperillade controlse puedeverunbrillorojoatravesdelasuperficiede
vidrio/ceramica.Elelementoseencenderayapagaraparamantenerlatemperaturaseleccionada.
Lassuperficiesdevidrio/ceramicaparacocinarretienenelcalorporunperiododetiempodespues
de que los elementosse han apagado.Cuandose apaguela luz rotuladaHOTSURFACE
(SUPERFICIECALIENTE)(verabajo),lasareasparacooinarestaransuficientementefriaspara
tocarse.
NOTA:nointentelevantarlasuperficieparacocinar.
AREASPARACOClNAR
Las areas para cocinaren su estufa estan
identificadasconpatronespermanentessobrela
superficiede vidrio/ceramica.Paraobtenerun
cocidomaseficienteuse sartenesde tamafio
adecuadoaltamafiodelelemento.
Eltamaledelossartenesnodebeexceder/as
areasparacocinarmasde_/2a 1pulgada(de
1.25a 2.5cm.).
Si deseaobtenerm&sinformaci6nacercade
utensiliospara cocinarrefieraseal foileto"La
CocinaFacil".
LUZINDICADORADE
SUPERFIClECALIENTE
LatuzindicadoraHOTSURFACE(SUPERFIClE
CALIENTE)estanIocalizadaalfrenteyalcentro
delasuperficiedecocinar.Seencender&unaluz
cuandoel &reaparacocinarestecaliente.Esta
luzpermaneceraencendidaauncuandolaperilla
decontrolseapague,y hastaqueelareasehalla
enfriado. CENTROQ/JESECAL/ENTA
L UZ INDICADORA
DE SUPERFICIE
CALIENTE
DECENTROQUESE
CALIENTA(MODELOSSELECTOS)
Elusodecentroquesecalentabaelcentroque
se calentabade guardarcocin6losalimentos
catientes,porejemplovahicutos,lassalsasy las
placassegurasde lacenadel horno.
Empujeelinterruptorenel panelde controlpara
darvueltaalcentroquesecalientaporintervalos.
DECENTROQUE8ECALIENTA:
Todoslosalimentosse debencubrircon
una tapa o el papetde aluminiopara
mantenervalornutritivo.
Cuandosecalientalospastelesylospanes
la cubiertadebeenerunaaperturapara
permitirquelahumedadseescape.
Noutiliceel abrigopiasticoparacubrirlos
alimentos.Et plasticopuedederretirenla
superficiey sermuydificilde impiar.
Utilicesolamenteelcookwarey losplatos
recomendadoscomocajafuerteparaeluso
delhomoy delcooktop.
Utilicesiemprelosmittsdelhornoal quitar
elalimentodelcentroquesecalientacomo
cookwarey lasplacasserancalientes.
Noserecomiendaparacalentarelalimento
paramasdelargodeunahora,pueselvalor
nutritivopuededeteriorar.
Noserecomiendaparacalentarelalimento
frioen eicentroquesecalienta.
Antesdel primeruso,limpiela cubierta.(Ver
Limpieza,pagina51.)
No usesartenesde vidrio,ya que pueden
rasparlasuperficie.
Nopermitaqueptastico,azOcaro alimentos
conaltocontenidodeazOcarsefundansobre
la superficiecaliente.Si estoIlegaa pasar,
limpie inmediatamentela superficie.(Ver
Limpieza,pagina51.)
Nuncausela superficiepara cocinarcomo
areade trabajoni comotabla para cortar.
Nuncacocinealimentosdirectamentesobrela
superficie.
Nuncadejequeun sartenconagua hierva
hastaevaporarsecompletamentepuespuede
dafiar permanentementela superficiey el
sarten.
Nuncauserecipientesdealuminiodesechables
nicoloqueuntrebedeo unanillodewokentre
lasuperficieyelsarten.Estosarticulospueden
marcaro corroerla superficie.
Nodeslicesartenesde aluminioatravesde la
superficiecaliente.Lossartenespuedendejar
marcasquesenecesitanremoverrapidamente.
(VerLimpieza,pagina51.)
AsegOresede quela superficiey el fondodel
sartenestenlimpiosantesde encenderel
electrodomestico,paraprevenirraspaduras.
Para prevenir raspaduraso dafios a la
superficiede vidrio/ceramica,nodejeazOcar,
salni grasaenel areaparacocinar.Limpielas
superficiesparacocinarconunatelatimpiao
toattade papelantesdeusarla.
Nuncauseunpationiunaesponjaqueesten
suciosparalimpiarla superficie.Si Io hace,
quedarauna capa que puede mancharla
superficiepara cocinardespuesde que se
calientael area.
Paraconservarelapperancedelcooktopvidrio/
ceramica,limpiedespuesdecadauso.
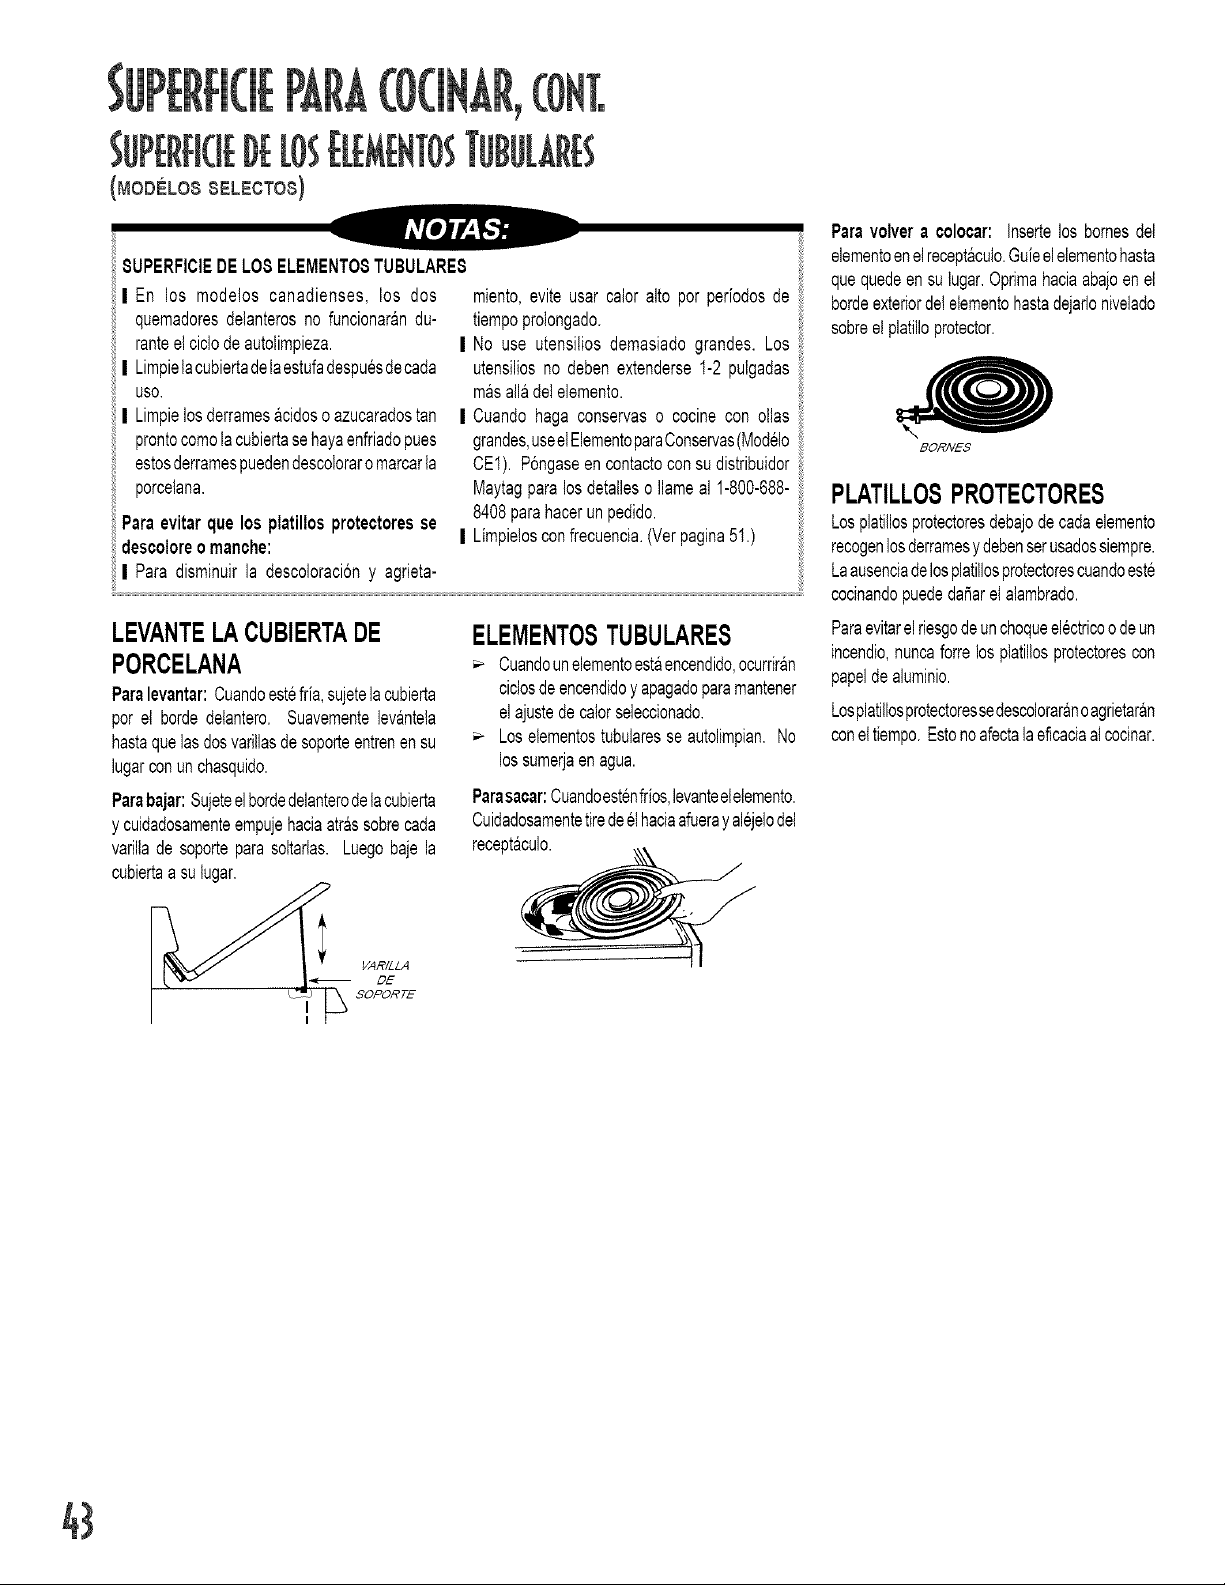
ITOS
ii 8UPERFICIEDELOSELEMENTO8TUBULARE8
I En los modetos canadienses, los dos
ii quemadoresdelanterosno funcionarandu-
ranteeloiclodeautolimpieza. I
I Limpietacubiertadetaestufadespuesdecada
USO.
I Limpielosderramesacidoso azucaradosten I
prontocomolacubiertasehayaenfriadopues
estosderramespuedendescoloraromarcarla
porceiana.
Paraevitarque los platillosprotectoresse
descoloreo manche: I
I Paradisminuirla descoloraci6ny agrieta-
miento,eviteusarcaloralto por periodosde
tiempoprolongado.
No use utensiliosdemasiadograndes.Los
utensiliosno debenextenderse1-2 pulgadas
masaliadelelemento.
Cuandohaga conservaso cocinecon ollas
grandes,useelElementoparaConservas(Modelo
CE1).P6ngeseencontactoconsudistribuidor
Maytagparalosdetalleso Ilameal 1-800-688-
8408parahacerunpedido.
Limpielosconfrecuencia.(Verpagina51.)
LEVANTELACUBIERTADE
PORCELANA
Paralevantar:Cuandoestefria,sujetelacubierta
porel bordedelantero.Suavementelevantela
hastaquelasdosvaritlasdesoporteentrenensu
lugarconunchasquido.
Parabajar:Sujeteelbordedelanterodetacubierta
y cuidadosamenteempujehaciaatr&ssobrecada
varillade soporteparasoitarlas.Luegobajela
cubiertaasutugar.
ELEMENTOSTUBULARES
Cuandounelementoestaencendido,ocurrir&n
cidosdeencendidoy apagadoparamantener
elajustedecalorseleccionado.
Loseiementostubularesseautolimpian.No
lossumerjaenagua.
Parasacar:Cuandoestenfrios,levanteelelemento.
Cuidadosamentetiredeethaciaafueray alejelodel
receptaculo.
Paravolver a ¢olocar:Insertelos bornesdel
elementoenelrecept&culo.Guieelelementohasta
quequedeensulugar.Optimahaciaabajoenel
bordeexteriordeleiementohastadejarlonivelado
sobreelplatilloprotector.
BORNES
PLATILLOSPROTECTORES
Losplatillosprotectoresdebajodecadaelemento
recogenlosderramesy debenserusadossiempre.
Laausenciadelosplatillosprotectorescuandoeste
codnandopuededaSarelatambrado.
Paraevitarel riesgodeunchoqueelectricoodeun
incendio,nuncaforrelosplatil!osprotectorescon
papeldealuminio.
Losplatillosprotectoressedescolorar&noagrietar&n
coneltiempo.Estonoafectalaeflcaciaatcocinar.
43
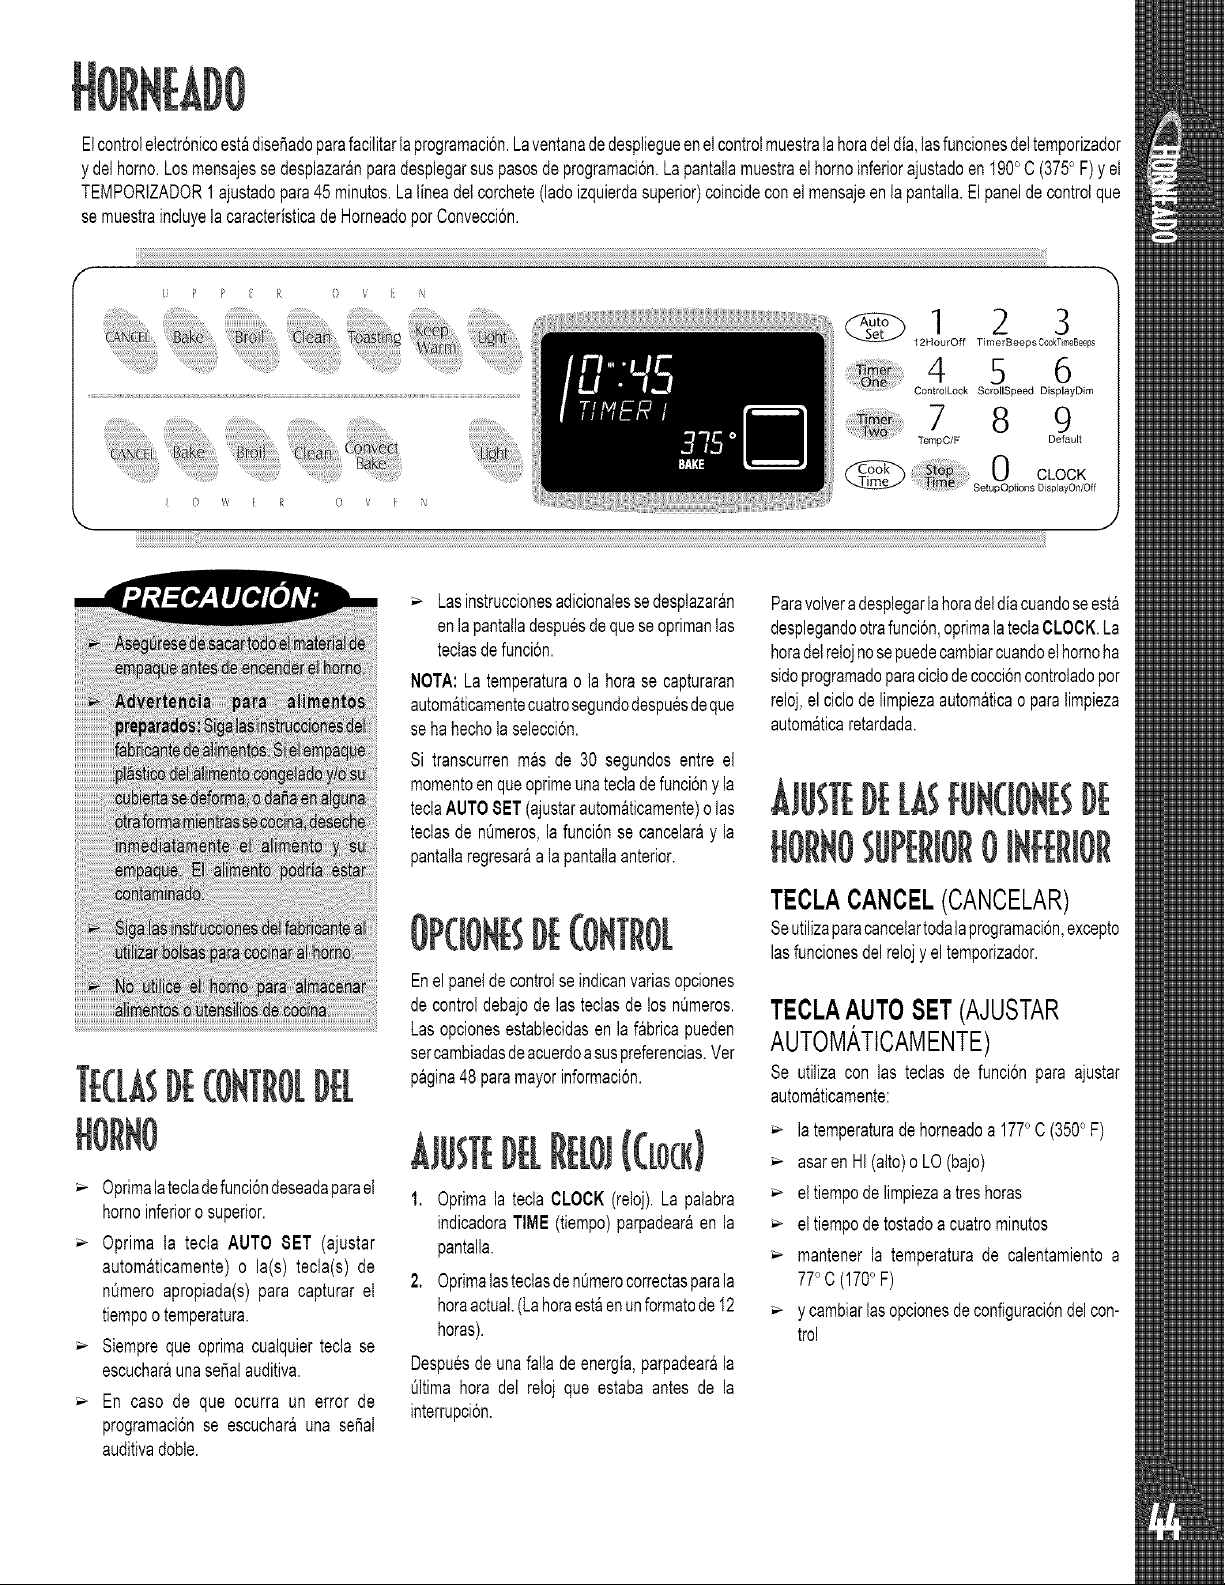
Elcontroletectr6nicoestadiseffadoparafacilitarla programaci6n.Laventanadedespliegueenelcontrolmuestralahoradetdia,lasfuncionesdeltemporizador
y delhorno.Losmensajessedesplazaranparadesplegarsuspasosdeprogramaci6n.Lapantallamuestrael homoinferiorajustadoen 1900C (3750F)y el
TEMPORIZADOR1ajustadopara45 minutos.Lalineadelcorchete(ladoizquierdasuperior)coincideconelmensajeenla pantatla.Elpaneldecontrolque
semuestraincluyelacaracteristicade HorneadoporConvecci6n.
0 F R 0 _ N
@ 1 2 3
t2HourOff TimerBeeps CookT meBe_ps
4 5 6
ControlLock ScrollSpeed DisplayDim
7 8 9
TempO/F Default
0 CLOCK
SetupOptions D splayOn/Off
Oprimalatectadefunci6ndeseadaparael
homoinferiorosuperior.
Oprimata tecla AUTO 8ET (ajustar
automatioamente)o la(s)tecla(s) de
n0meroapropiada(s)paraoapturaret
tiempoo temperatura.
Siempreque oprimacualquierteclase
escucharaunasepalauditiva.
En caso de que ocurra un error de
programaci6nse escucharauna seffal
auditivadoble.
Lasinstruccionesadicionatessedesplazaran
enlapantalladespuesdequeseoprimanlas
teclasdefunci6n.
NOTA:La temperaturao la horase capturaran
automaticamentecuatrosegundodespuesdeque
sehahecholaselecci6n.
Si transcurrenmas de 30 segundosentre et
momentoenqueoprimeunatecladefunci6ny la
teclaAUTO8ET(ajustarautomaticamente)o las
teclasde n0meros,lafunci6nse cancelaray la
pantallaregresaraa tapantallaanterior.
DE
Enelpaneldecontrolseindicanvariasopciones
decontroldebajodelas teclasdelos nQmeros.
Lasopcionesestablecidasen lafabricapueden
sercambiadasdeacuerdoasuspreferencias.Ver
pagina48paramayorinformaci6n.
1. Oprimala teclaCLOCK(retoj).La palabra
indicadoraTIME(tiempo)parpadearaen la
pantalla.
2. Oprimalasteclasdent_merocorrectasparala
horaactual.(Lahoraestaenunformatode12
horas).
Despuesdeunafalladeenergia,parpadearala
Qltimahora det relojque estaba antesde la
interrupci6n.
Paravolvera desplegarlahoradeldiacuandoseesta
desplegandootrafunci6n,oprimalateclaCLOCK.La
horadelrelojnosepuedecambiarcuandoelhomoha
sidoprogramadoparaciclodecocci6ncontroladopor
reloj,elciclode limpiezaautomaticao paratimpieza
automaticaretardada.
ilt t:UN(J0NB#E
J4ORNOSgRJ RJORO[NJ:@IOR
TECLACANCEL(CANCELAR)
Seutilizaparacancelartodalaprogramaci6n,excepto
lasfuncionesdelrelojy eltempodzador.
TEOLAAUTO SET (AJUSTAR
AUTOM,&,TICAMENTE)
Se utilizacon las teclasde funci6nparaajustar
automaticamente:
latemperaturadehorneadoa1770C(3500F)
asaren HI(alto)o LO(bajo)
eltiempodelimpiezaatreshoras
eltiempodetostadoa cuatrominutos
mantenerla temperaturade calentamientoa
77°0 (1700F)
y cambiarlasopcionesdeconfiguraci6ndelcon-
trol
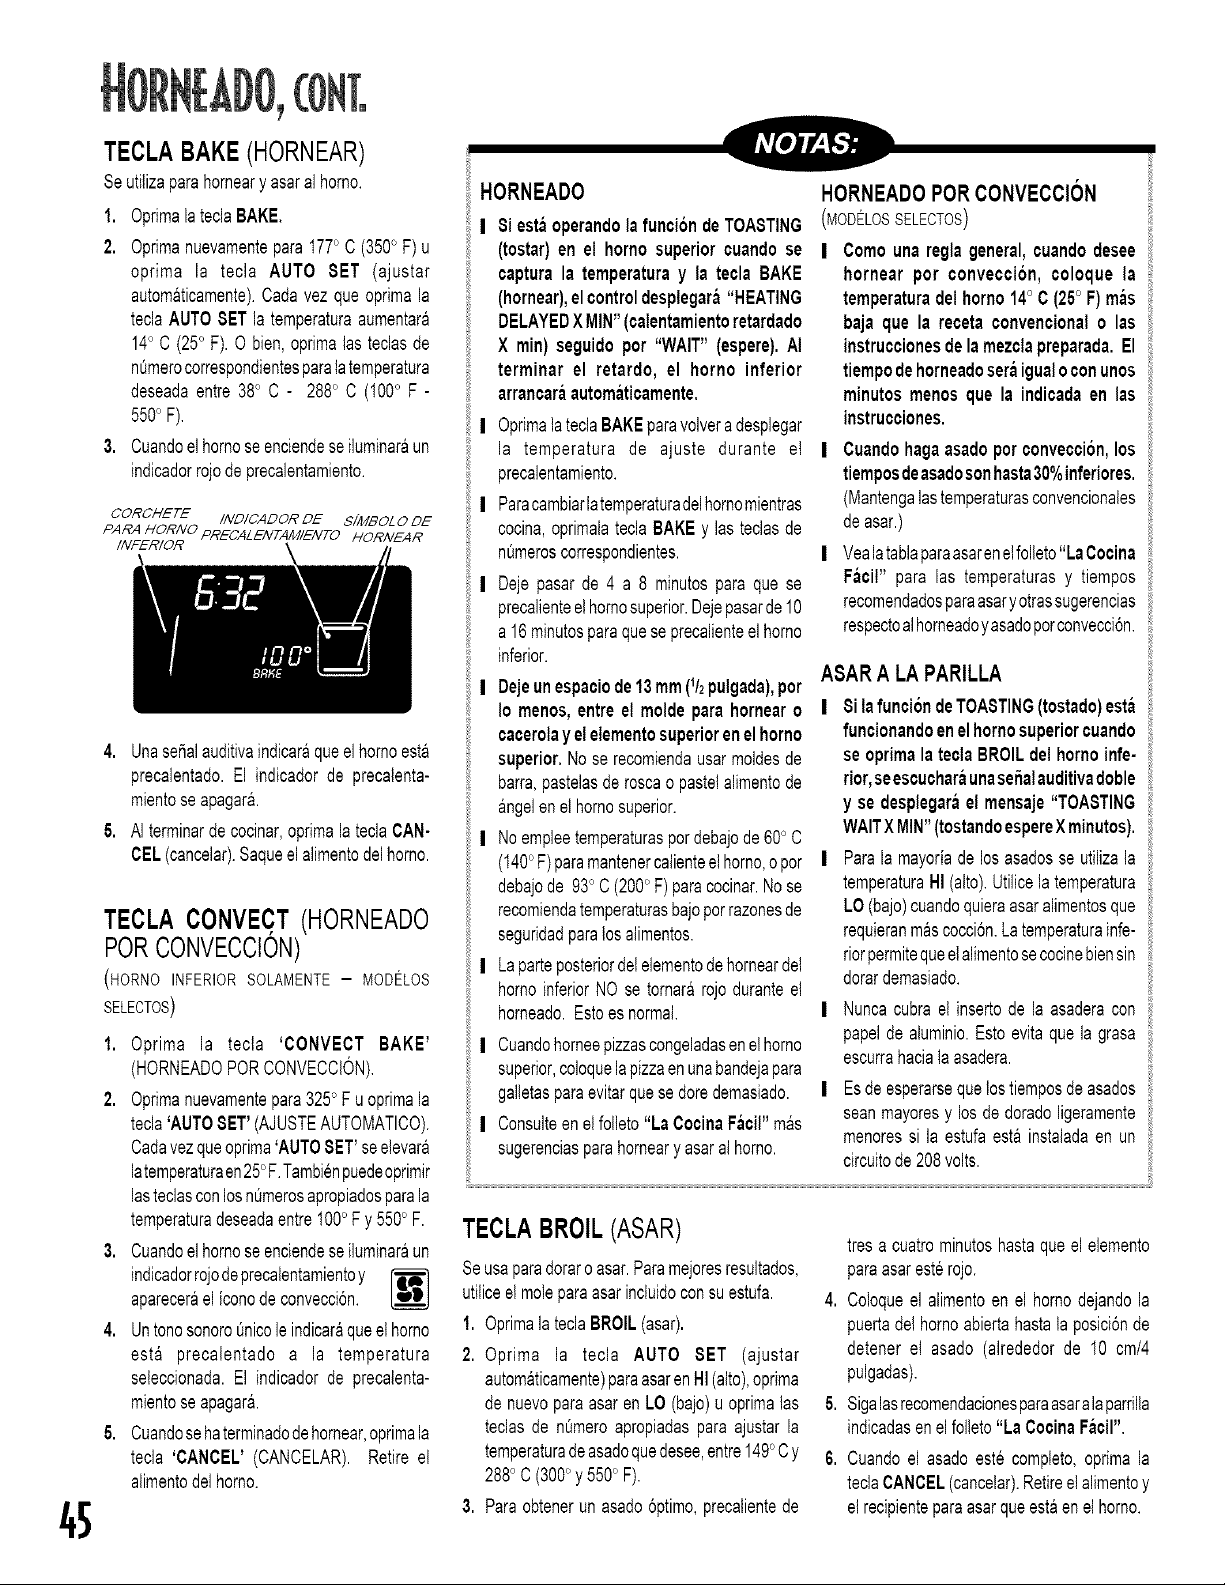
45
TECLABAKE(HORNEAR)
Seutiiizaparahomeary asaralhomo.
1. OprimalateclaBAKE.
2. Optimanuevamenteparat770C (3500F)u
oprima la tecla AUTO BET (ajustar
autom&ticamente).Cadavezqueoprimala
teclaAUTOSETla temperaturaaumentara
140C (250F).O bien,oprimalasteclasde
nOmerocorrespondientesparalatemperatura
deseadaentre38°0- 288°0 (1000F-
5500F).
3. Cuandoelhomoseenciendeseiluminar_lun
indicadorrojodeprecalentamiento.
OOROHETE INDIOADOR DE $iMBOL 0 DE
PARA HORNO PREOALEIVTAMIENTO HORIVEAR
INFERIOR
4. Unasepalauditivaindicaraqueelhomoesta
precalentado.El indicadorde precalenta-
mientoseapagara.
5. AIterminarde cocinar,oprimala teclaCAN-
CEL(cancelar).Saqueel alimentodelhomo.
TECLA CONVECT(HORNEADO
PORCONVECCION)
(HORNO INFERIOR SOLAMENTE - MODELOS
SELECTOS)
,
2.
Oprima la tecla 'CONVECT BAKE'
(HORNEADOPORCONVECCION).
Optimanuevamentepara3250Fuoprimala
tecla'AUTOBET'(AJUSTEAUTOMATICO).
Cadavezqueoprima'AUTOBET'seelevara
latemperaturaen250F.Tambienpuedeoprimir
lasteclasconlosmJmerosapropiadosparala
temperaturadeseadaentre1000F y 5500F.
Cuandoelhomoseenciendeseiluminaraun
indicadorrojodeprecalentamientoy
aparecer_leliconodeconvecci6n.
Untonosonoro0nicoleindicaraqueethomo
esta precalentado a la temperatura
seleccionada.El indicadorde precalenta-
mientoseapagara.
Cuandosehaterminadodehomear,oprimala
tecla 'CANCEL'(CANCELAR).Retireel
alimentodelhomo.
HORNEADO
I 8i estaoperandola funciondeTOASTING
(tostar)en el homosuperior cuandose
capturala temperaturay la tecla BAKE
(hornear),elcontroldesplegara"HEATING
DELAYEDXMIN"(calentamientoretardado
X rain)seguidopor "WAIT" (espere).AI
terminar el retardo, el homo inferior
arrancaraautomaticamente.
I OprimalateclaBAKEparavolveradesplegar
la temperatura de ajuste durante et
precalentamiento.
I Paracambiarlatemperaturadelhomomientras
cocina,oprimalateclaBAKEy lasteclasde
n0meroscorrespondientes.
I Dejepasarde 4 a 8 minutosparaquese
precalienteelhomosuperior.Dejepasarde10
a16minutosparaqueseprecalienteeihomo
inferior.
I Dejeunespaciode13mm(1/2pulgada),por
Io menos,entreel moldepara hornearo
cacerolayelelementosuperiorenelhorno
superior.Nose recomiendausarmoidesde
barra,pasteiasderoscao pastelalimentode
angelenel homosuperior.
I Noempleetemperaturaspordebajode600C
(1400F)paramantenercalienteelhomo,opor
debajode 930C (2000F)paracocinar.Nose
recomiendatemperaturasbajoporrazonesde
seguridadparalosalimentos.
I Laparteposteriordelelementodehomeardel
homoinferiorNO se tornar&rojo duranteel
homeado.Estoes normal.
I Cuandohorneepizzascongeladasenelhomo
superior,coloquelapizzaenunabandejapara
galletasparaevitarquesedoredemasiado.
I Consuiteen elfolleto"La CocinaF_lcil"m&s
sugerenciasparahomeary asaralhomo.
HORNEADOPORCONVECCION
(MODELOSSELECTOS)
I Comouna reglageneral,cuandodesee i
hornear por conveccion,coloque la
temperaturadelhomo14oC (25o F)m_ls
baja que la recetaconvencionalo las
instruccionesdelamezclapreparada.El
tiempodehorneadoseraigualoconunos
minutos menos que la indicadaen las
instrucciones.
I Cuandohagaasadoporconvection,los
tiemposdeasadosonhasta30%inferiores.
(Mantengalastemperaturasconvencionalesi;
deasar.)
I Veaiatablaparaasarenelfoileto"LaCoeina
Facil"
para las temperaturasy tiempos
recomendadosparaasaryotrassugerencias
respectoalhomeadoyasadoporconvecci6n.
ASARA LAPARILLA i
I 8i la funciondeTOASTING(tostado)esta
funcionandoenelhomosuperiorcuando
seoprimalateclaBROILdel homoinfe-
rior,seescucharaunaseSalauditivadoble
y se desplegarael mensaje"TOASTING
WAITXi "
IN (tostandoespereXminutos).
I Paralamayoriadelosasadosse utiiizala
temperaturaHI(alto).Utilicela temperatura
LO(bajo)ouandoquieraasaralimentosque
requieranmascocci6n.Latemperaturainfe- i;
riorpermitequeelalimentosecocinebiensin
dorardemasiado.
I Nunoaoubrael insertode la asaderacon i;
papelde aluminio.Estoevitaque lagrasa ;;
escurrahacialaasadera.
I Esdeesperarsequelostiemposdeasados
seanmayoresy los dedoradoligeramentei;
menoressi la estufaest_linstaladaen un
circuitode208volts.
TECLABROIL(ASAR)
Seusaparadoraroasar.Paramejoresresultados,
utiticeel moleparaasarincluidoconsuestufa.
1. OprimalateclaBROIL(asar).
2. Oprima la tecla AUTO SET (ajustar
automaticamente)paraasarenHI(alto),oprima
denuevoparaasarenLO(bajo)u oprimalas
teclasde mJmeroapropiadasparaajustarla
temperaturadeasadoquedesee,entre1490Cy
2880C(3000y 5500F).
3. Paraobtenerun asado6ptimo,precatientede
tresa cuatrominutoshastaqueeielemento
paraasaresterojo.
4. Coloqueel alimentoen el homodejandola
puertadelhomoabiertahastata posici6nde
detenerel asado (alrededorde 10 cm/4
pulgadas).
5. Sigaiasrecomendacionesparaasaralaparrilla
indicadasenelfolleto"La CocinaFacil".
6. Cuandoel asadoeste completo,oprimala
teclaCANCEL(cancelar).Retireelalimentoy
elrecipienteparaasarqueest&en ethorno.
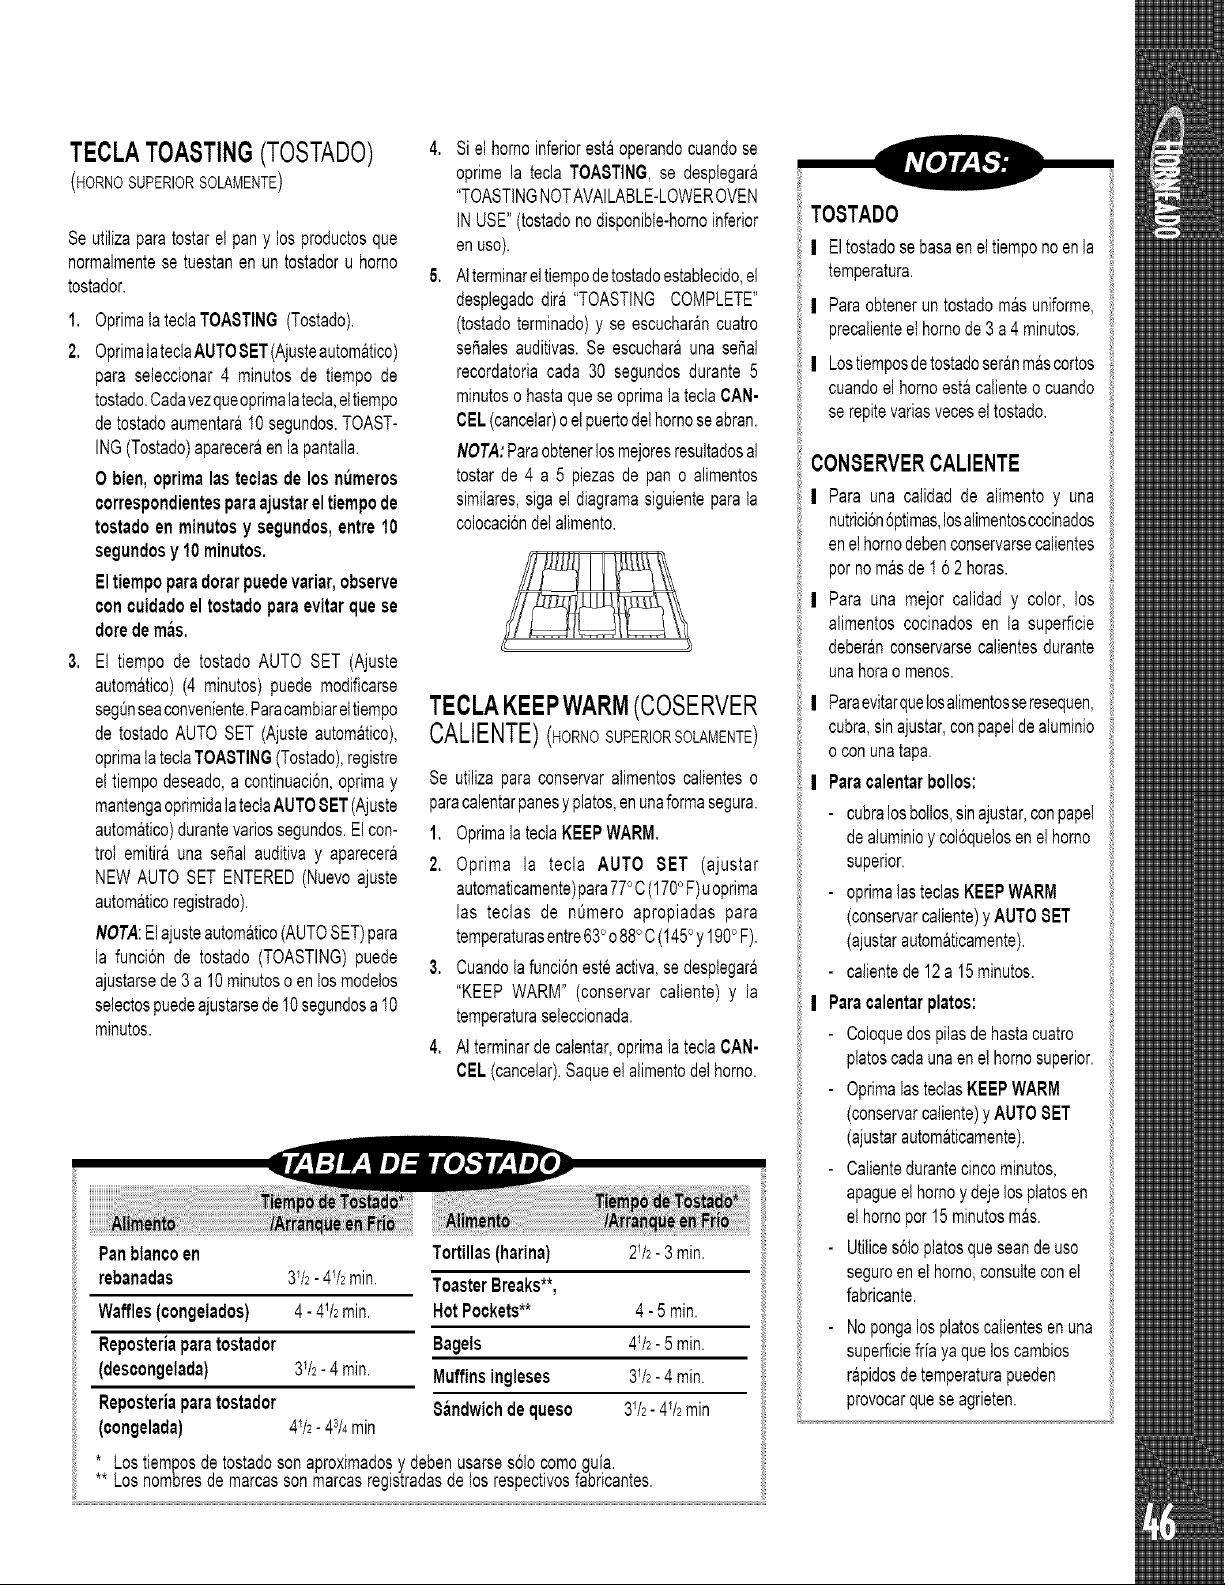
TECLATOASTING(TOSTADO)
(HORNOSUPERIORSOLAMENTE)
Seutilizaparatostarel pany losproductosque
normalmentese tuestanen un tostadoru homo
tostador.
1. OprimatateclaTOASTING(Tostado).
2. OprimalateclaAUTOSET(Ajusteautomatico)
para seteccionar4 minutosde tiempode
tostado.Cadavezqueoprimalatecla,eltiempo
detostadoaumentara10segundos.TOAST-
ING(Tostado)apareceraenlapantalta.
O bien,oprimalas teclasde los numeros
correspondientesparaajustareltiempode
tostadoen minutosy segundos,entre10
segundosy 10minutos.
Eltiempoparadorarpuedevariar,observe
concuidadoel tostadoparaevitarquese
dotedemas.
3, El tiempo de tostadoAUTOSET (Ajuste
automatico)(4 minutos)puedemodificarse
segOnseaconveniente.Paracambiarettiempo
de tostadoAUTOSET(Ajusteautomatico),
oprimatateclaTOASTING(Tostado),registre
el tiempodeseado,a continuaci6n,optimay
mantengaoprimidalateclaAUTOSET(Ajuste
automatico)durantevariossegundos.Elcon-
troi emitirauna sepalauditivay aparecera
NEWAUTOSETENTERED(Nuevoajuste
automaticoregistrado).
NOTA:Elajusteautomatico(AUTOSET)para
la funciGnde tostado(TOASTING)puede
ajustarsede3 a 10minutoso enlosmodelos
selectospuedeajustarsede10segundosa10
minutos.
Sielhomoinferiorestaoperandocuandose
opfimela tecla TOASTING,se desplegara
"TOASTINGNOTAVAILABLE-LOWEROVEN
INUSE"(tostadonodisponibte-hornoinferior
en USO).
Atterminareltiempodetostadoestablecido,el
despiegadodira "TOASTINGCOMPLETE"
(tostadoterminado)y se escucharancuatro
seSalesauditivas.Se escucharaunaseSal
recordatoriacada 30 segundosdurante5
minutoso hastaqueseoprimatateclaCAN-
CEL(cancelar)oelpuertodethomoseabran.
NOTA:Paraobtenerlosmejoresresuitadosal
tostarde 4 a 5 piezasde pano alimentos
simitares,sigaet diagramasiguienteparata
colocaciGndelalimento.
TECLAKEEPWARM(COSERVER
CALIENTE)(HORNO SUPERIORSOLAMENTE)
Se utilizaparaconservaralimentoscalienteso
paracalentarpanesy ptatos,enunaformasegura.
1. OprimalateciaKEEPWARM.
2, Oprima la tecla AUTO SET (ajustar
automaticamente)para770C(1700F)uoprima
las teclas de nOmeroapropiadas para
temperaturasentre630o880C(1450y 1900F).
3. Cuandolafunci6nesteactiva,sedesptegara
"KEEPWARM"(conservarcaliente)y la
temperaturaseleccionada.
4. Aiterminardecalentar,oprimalateclaCAN-
CEL(cancelar).Saqueel alimentodel horno.
Panblancoen Tortillas(harina) Z/2- 3 min.
rebanadas 3V2-4V2min. ToasterBreaks**,
Waffles(congelados) 4- 4V2min. HotPockets** 4- 5 min.
Reposteriaparatostador Bagels 4_/2- 5min.
(descongelada) 3V2-4 min. Muffinsingleses 3V2-4 rain.
Reposteriaparatostador Sandwichdequeso 3V2-41/2rain
(congelada) 41/2- 43/4min
* Lostiemposdetostadosonaproximadosy debenusarsesSIocomoguia.
** Losnombresdemarcassonmarcasregistradasdelosrespectivosfabricantes.
TOSTADO
| Eltostadosebasaeneltiemponoenla
temperatura.
| Paraobteneruntostadomasuniforme,
precalienteet homode3a4 minutos.
| Lostiemposdetostadoseranm&scortos
cuandoel homoest&calienteo cuando
serepitevariasvecesel tostado.
CONSERVERCALIENTE
I Parauna catidadde alimentoy una
nutriciGn6ptimas,losalimentoscocinados
enelhomodebenconservarsecalientes
pornomasde162 horas.
| Para una mejor calidady color, los
alimentoscocinadosen ia superficie
deberanconservarsecalientesdurante
unahorao menos.
I Paraevitarquetosalimentosseresequen,
cubra,sinajustar,conpapeldealuminio
oconunatapa.
I Paracalentarbollos:
- cubralosboltos,sinajustar,conpapel
dealuminioy col6quelosenel homo
superior.
- oprimatasteclasKEEPWARM
(conservarcaliente)yAUTOSET
(ajustarautomaticamente).
- calientede12a15minutos.
I Paracalentarplatos:
- Coloquedospilasdehastacuatro
ptatoscadaunaenelhomosuperior.
- OprimalasteclasKEEPWARM
(conservarcaliente)yAUTOSET
(ajustarautomaticamente).
- Calientedurantecincominutos,
apagueelhomoy dejelospiatosen
elhomopor15minutosm&s.
- UtilicesGtopiatosqueseandeuso
seguroenei homo,consuiteconel
fabricante.
- Nopongalospiatoscatientesenuna
superficiefriayaqueloscambios
r&pidosde temperaturapueden
provocarqueseagrieten.
TECLASCOOKTIME/STOPTIME
CONTROLADAPORRELOJ)
Se utilizanpara programarel arranquey paro
automaticosdelhomo.Ettiempodecocci6npuede
ajustarsehastaen11horasy59minutos(11:59).
Pararealizarestafunci6nesnecesarioqueelretoj
estefuncionandoy debidamenteajustado.
Losdoshornospuedenajustarseparacocinar
contiempocontrolado.Paraajustarambos
hornos:
1. Indiqueel TIEMPODE COCCION(COOK
TIME)y lastemperaturasde horneadopara
amboshomos.
2. Selecdoneel TIEMPODEPARADA(STOP
TIME)paraamboshornos.
Laspalabras'STOPTIME'(TIEMPODE
PARADA)debendestettarenelindicador
parapoderseleccionareltiempode
parada.
PARAARRANCARDEINMEDIATOYAPAGAR
AUTOMATICAMENTE:
1. Oprima la tecla COOK TIME (tiempo de
cocci6n).Estaempezar&aparpadear.Oprima
lasteclasden0meroapropiadasparacapturar
eltiempodecocci6nenhorasy minutos.
2. OprimalateclaBAKE(hornear)o CONVECT
BAKE(horneadopor oonvecci6n)(modelos
selectos)en et homosuperioro inferiory
selecdonela temperaturade horneado.Se
desplegara COOK TIME junto con la
temperatura.
3. Unminutoantesdequetermineeltiempode
cocci6nprogramado,la luzseencender&,se
escuchar&unaseral auditivay sedesplegara
CHECKFOOD(revisaralimento).Cuandola
teclaCANCEL(cancelar)seopriman,la luce
se aparagaautomaticamenteo despuesdel
puertoseabrany cierran.
4. At finalizarei tiempode cocci6n,el homose
apagaraautomaticamente,sedesptegara"End"
(Fin)y COOKTIME,ademasseescuchar&n
cuatroserales.
5. OprimalateclaCANCEL(cancelar).Saqueel
alimentodel horno.Siel programanose ha
cancetado, habra una seral auditiva
recordatoriacadaminuto,durantehasta30
minutos.
(COCClONAL HORNO
NOTA:Lasseralesauditivasde TIEMPODE
PARADAoTIEMPODECOCCIONpuedenser
cambiados.VerOpcionesde Control,Cook
Time(seralesauditivasdeltiempodecocci6n),
pagina48.
PARARETARDARELINIClODECOCCIONY
APAGARAUTOMATICAMENTE:
1. OprimalateclaCOOKTIME(tiempodecocci6n).
Estaempezaraaparpadear.Oprimatasteclas
den0meroapropiadasparacapturareltiempo
decocci6nenhorasy minutos.
2. Oprimala teclaBAKE(hornear)o CONVECT
BAKE(horneadopor convecci6n)(modelos
seiectos)en el homo superioro inferiory
seleccionela temperaturade horneado.Se
desplegaraCOOKTIMEjuntoconlatemperatura.
3. Oprimatatecla8TOPTIME(tiempodeparo).La
pantallamuestracuandosedetendrael homo
tomandocomobaseelarranqueinmediato.
4. Oprimade nuevo8TOP TIME.8TOPTIME
debeparpadeandarseparaponerel tiempo
deretardo.
5. OprimalasteclasdenOmeroapropiadaspara
capturaret momentoen quequieraque se
detengaelhomo.
6. Se desptegaranDELAY(retardo)y BAKE
(hornear).
7. Ai finaldelperiododeretardo,se desplegara
COOKTIMEjuntoconlatemperatura.
8. Sigatospasos3a5delasecci6nanterior.
No se recomiendata cocci6nretardadaI
paralosalimentosaltamenteperecederos
comoloslacteos,elpuerco,lasaveso los
mariscos.
| Noserecomiendaelhorneadocontrolado
porrelojparalosalimentoshorneadosque
requierenunhomoprecalentado,comoes
elcasodepasteles,gaitetasy panes.
TECLAS TIMER
(TEMPORIZADOR)
El temporizador(o temporizadores)puede(n)
ajustarseparacualquierperiododetiempo,hasta
99horasy 59minutos(99:59).
Eltemporizador(otemporizadores)opera(n)de
maneraindependientedecualquierotrafunci6n
ypuede(n)ajustarsemientrasqueesteoperando
cualquier otra funci6n en et horno. EL
TEMPORIZABORNOCONTROLAELHORNO.
1. OprimalateclaTIMER1(TEMPORIZADOR
1)o TIMER2 (TEMPORIZADOR2), cada
unaparpadeararespectivamente.Aparecera
0HR:0Oenla pantatta.
2. Oprimalas teclasde nOmeroapropiadas
paracapturareltiempodeseado.
3. Se despiegaranTIMER1 o TIMER2. Si
ambosrelojestemporizadoresestanactivos
sedesplegaraTIMER1 +2.
EJEMPLO:Paraajustaruntemporizadora5
minutos,oprimalatectaTIMER1y la tecla
deln=Jmero5.Elcontrolempezar&lacuenta
regresivadespuesdeunretardodecuatro
segundos.
4. El Oltimominutodelacuentaregresivase
desplegaraensegundos.
5. AIfinaldeltiempofijado,sedesplegaraEND
y seescuchar&unaserialauditivadecuatro
segundosseguidapordosseralesauditivas
cada 30 segundosdurantehastacinco
minutos.OprimalateclaTIMERapropiada
paracancelarlasse_alesauditivas.
NOTA:Paracambiarlasseratesauditivas
indicadorasalfinaldeltiempofijado,consulte
lasOpcionesdecontrolTimerBeeps(serales
auditivasdetemporizador)enpagina48.
PARACANCELARUN TIEMPOFIJADO:
Oprimay mantengaoprimidala tecla TIMER
durantevariossegundos.DespuesdeunIigero
retardoapareceratahoradeidia.
OBIEN
OprimalateclaTIMERy lateclaconeln0mero
"O".Despuesdeunligeroretardocancelarade
temporizador.
4t
DE@NTR0[
PAPACAMBIARLABOPCIONE8AJUSTADA8
ENFABRICA/PREESTABLECIDAS:
1. Las opcionesde controlpuedencambiarse
seleccionandola teclaSetupOptions(ajustar
opciones)(0) y la teclade opciGndeseada
(consultelesopoionesabajo).
2. LaopciGnactualapareceraen lapantalta.
3. Oprima la tecla AUTO 8ET (ajustar
automaticamente)paracambiarlaopciGn.
4. Oprimala tecla CANCEL(cancelar)para
configurarla opciGndesplegaday salirdel
programa.
OPClONESDISPONIBLES:
12-HouROFF(1) (APAGADODE
12 HORAS)
Elhornopuedeconfigurarseparaqueseapague
despu(_sde 12horaso paraseguirencendido
indefinidamente.LafunciGnpreestablecidaesta
configuradaparaapagarel homodespuesde 12
horas.
TIMER BEEPS (2) (SEQALES
AUDITIVAS DEL TEMPORIZADOR)
Haytres opcionesparalas seSalesrecorda-
toriasdelfinaldel"temporizador'.
UnaseSalauditivaseguidade dos seSales
cada30 segundosperhastacincominutes.
(preestabtecida)
UnaseSalauditivaseguidade dos seSales
cada60segundosperhasta30minutes.
UnaseSalauditivasinningunaotraseSalpos-
terior.
COOK TIME (3) (SEiqALES AUDI-
TIVAS DEL TIEMPO DE COCCION)
Haytresopcionesparalasse_alesrecordatorias
delfinalde"coccioncontroladaperreloj".
CuatroseSalesauditivascortasseguidasde
unaseSalcadaminuteperhasta30minutes
(preestablecida).
Cuatrose_alesauditivascortassin ninguna
otrasepalposterior.
Cuatrose_alesauditivascortasseguidasper
unasepalcadaminuteperhastacincominutes.
CONTROLLOCK (4) (CIERRE DE
CONTROL)
Lasteclas de funcion en el controlpueden
asegurarseparaevitareluseinvoluntarioyper
razonesdeseguridadylimpieza.Laheraactual
deldiapermanecer&enlapantalla.
SCROLL SPEED (S) (VELOCIDAD
DEL DESPLIEGUE)
Lavelocidaddedesplieguedelmensajepuede
cambiarde RAPIDAa MEDIAo a LENTA.El
valorpreestablecidoestaajustadoen velocidad
media.
DISPLAYDIM(6) (INTENSIDAD DE
LA LUZ DE LA PANTALLA)
La intensidaddelcontrolpuedecambiarse
parafacilitarla lectura.Elvalorpreestablecido
seajustaparataintensidadmasalta....... .Entre
menos***,menorintensidad.
TEMPC/F (7) (TEMPERATURA
C/F)
Laescaladetemperaturapuedecambiarsea
CentigradesoFahrenheit.Elvalorpreestablecido
esFahrenheit.
LANGUAGE (8) (IDIOMA)
(MODELOS SELECTOS)
Laspalabrasquesedesplieganenelindicador
puedenser cambiadasde inglesa franc(_so
espahol.
DEFAULT (9) (PREESTABLECIDO)
El controlpuederestablecerseparavolvera
restaurarelajustedefabricaencadaopcion.
DISPLAY ON/OFF (DESPLIEGUE
ENC/APAG) (RELOJ)
Lapantalladela heradeldiapuedeapagarse
cuandoel homonoestaen unafuncionde
cocciono limpieza.
AJUSTE DE TEMPERATURA DEL
HORNO
Si piensaqueel homoestaoperandocon una
temperaturademasiadoaitaobaja,puedeajustarlo
ustedmismo.Horneevariesalimentosdeprueba
y despuesconfigurelatemperaturaajustandono
masde60C (100F)cadavez.
PARAAJUSTAR:
1. OprimalateclaBAKE(homear)(homosupe-
rioroinferior)y capture2880C(5500F).
2. Oprimay mantengaoprimidatateclaBAKE
(homosuperioroinferior)parasegundosvarios
hastaquesedespliegueTEMPADJ(ajuste
temperatura).
3. Oprima la tecla AUTO SET (ajustar
automaticamente)- cadavezqueoprima,ta
temperaturacambiara50F.Elcontrolaceptara
cambiosdesde-350F hasta+350F.
4. Si el hornofue previamenteajustado,los
cambiosse desplegaran.Perejemplo,si la
temperaturadelhomoseredujoen 150F,la
pantaltamostrara-150F.
5. Cuandohayahechoelajuste,oprimalatecla
CANCEL(cancelar) y la hera del dia
reapareceraenlapantalla.Elhomofuncionara
ahoraa latemperaturaajustada.
La luz(o luces) del homo se enciende(n)
automaticamentecuandola(s)puerta(s)seabre(n).
Si la(s) puerta(s)esta(n)cerrada(s),oprimata
teclaLIGHT(tuz)(homosuperioroinferior)enel
paneldecontrolparaencenderoapagarlaluz(o
luoes).
Laslucesdelhornonofuncionaranduranteelciclo
delimpieza.Laluz(oluces)dehomoseenciende(n)
automaticamenteunminuteantesdequetermine
et tiempode cocciGnprogramado.

D[[ )RNO
Cuandoel homoestaenuso,estaareapuede
estar tibia o oalientebastanepor oausa
quemara.Nuncabloqueela aberturade la
ventila. LOCALIZACtONDEL
RESPIRADERODEL HORNO
_ , estufa de v/dr/o/oeram/ca
•estufade/os e/ementos
Enunsuperficiedelelementodelabobina,
seaseguraqueeltazondefuentedelgoteo
enla Iocalizaciondelrespiraderotieneun
agujeroenel centro.Nocubraeltazonde
funtedelgoteoconel papeldealuminio.
Cuando se estan cocinandoalimentos
altamentehumedosenel homosuperior,se
podraverelvaporprovenientedelaventiladel
horno.Estoesnormal.
RIL[A$D[[ RNO
Todaslasparrillasestandise_adasconunborde
detopedeseguridad.
HORNOSUPERIOR II !_'_'_ '_l
Est&equipadocon _L_d_,_L&_-
una parrilla y una
posici6n para la
parrilla.
Cuandojalehaciafueraia parrilladel homo
superiorparaquitaflaopararevisarelatimento,
agarreel bordesuperiorde lapard!la.
HORNOINFERIOR
Convencional:Estaequipadoconunaparrilla
RollerGlideTUy una parrilla ptanaregular
(modeiosselectos)o dos parrillasplanas
regulares.
El horno de convection (modelos
selectos): Estaequipadocon unaparrilla
RollerGlidemydosparrillasplanasregulares.
PAPAQUITARLABPARRILLA8DELHORNO:
Jale lasparrillasderechashaciafuerahasta
quese detenganen la posici6ndeltopede
seguridad;levanteelfrentedelaparrillayjale
haciafuera.
ParalaparritlaRollerGlideTM(modetosselectos),
tire haciaafuerade ambas,lacorrederay la
basedelaparrillajuntas.
PAPAVOLVERA PONERLABPARRILLAS:
Coloquelaparrillasobreelsoportedetaparriila
en el homo, inclineel extremodelantero
ligeramentehaciaarriba;deslicelaparrillahacia
atrashastaquedespejelaposici6ndeltopede
seguridad;bajeelfrente,deslicehaciaatr&sy
haciadentrodelhorno.
POSICIONESDELASPARRILLAS
HorneadodeConveccibn de
Tres Parrillas (Parrillas 1, 3 y 5)
-- 5
4
3
2
1
I
PARRILLA5(posieionmasalta):
Seusaparatostarpanoasaralaparriilaalimentos
delgadosno grasos.
PARRILLA4:
Seutilizaparahornearendosparrillasy los
asados.
PARRILLA3:
Seutilizaparalamayoriadebocadoshorneados
enunahojaparagalletasomoldepararollode
mermelada,parapastelesencapas,tartasde
frutaso alimentospreparadoscongeladosy los
asados.
PARRILLA2:
Seutilizaparaasaralhomopequei_oscortes
decame,cacerolas,parahornearhogazas
depan,pastetesderoscao tartasdeflany
parahornearendosparrillas.
PARRILLA1:
Seutilizaparaasarathomocortesgrandes
decamey aves,tartascongeladas,postres
desouffteopastelalimentode&ngeiy para
hornearendosparri!las.
Coecionen multiplesparrillas:
Dosparrillas:Utilicelasposiciones2y 46
ly4.
Tresparrillas:(horneadoporconvecci6n
solamente,modelosselectos)Uselas
posiciones1,3y 5delaparfi!la.(Ver
ilustraci6n.)
ACCESORIODEMEDIA
PARRILLA(HORNO INFERIOR
SOLAMENTE)
Paraaumentarlaoapaoidaddelhomo,seofreoe
el accesoriode una mediaparrilla.Estase
ajustaa laparteizquierdasuperiordelhomoy
proporcionaespacioparaunplatodevegetales
cuandohayunasadograndeenlaparrillainfe-
rior.ComuniqueseconsudistribuidorMaytagsi
deseael Juegode Accesorio"HALFRACK"
(MediaPari!la)o paraordenarlammeal1-800-
688-8408.
49
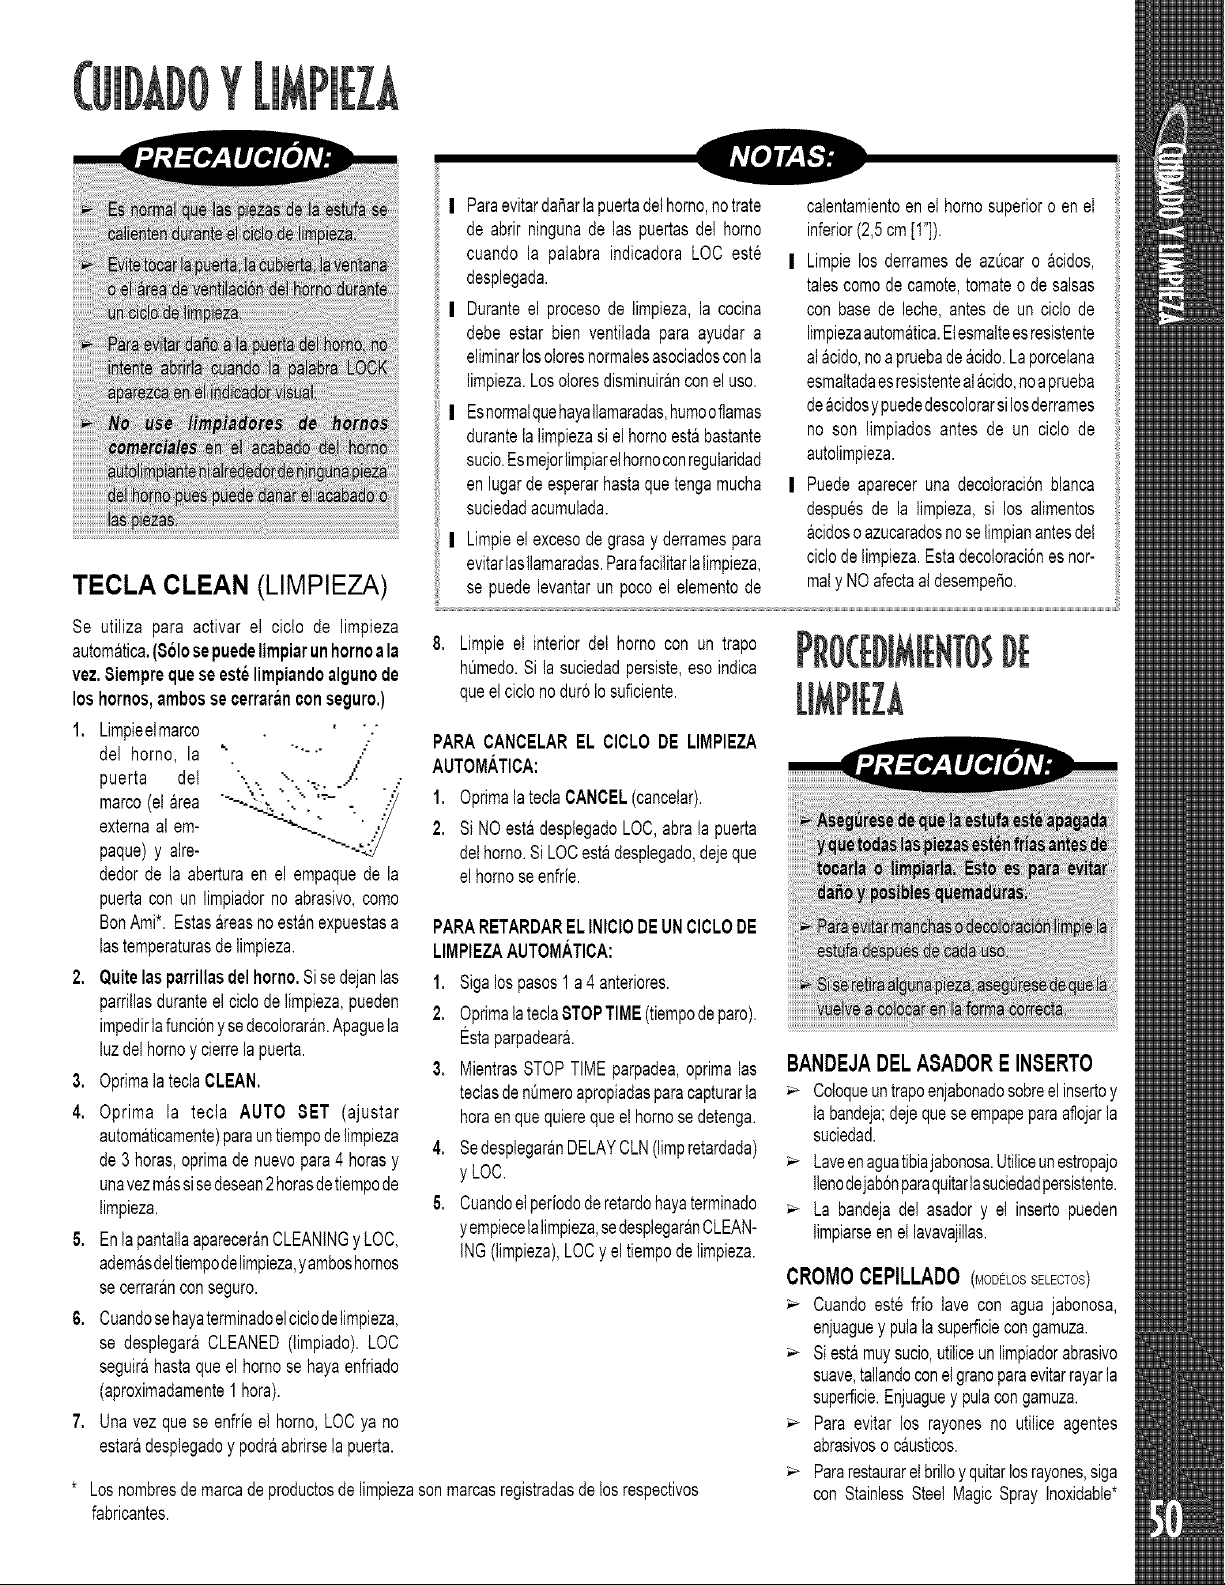
Y
TECLA CLEAN (LIMPIEZA)
Se utiliza para activar el ciclo de Iimpieza
automatica.(861osepuedelimpiarunhornoala
vez.8iemprequeseestelimpiandoalgunode
loshornos,ambossecerraranconseguro.)
dedorde la aberturaen el empaquede la
puertacon unlimpiadorno abrasivo,como
BonAmi*.Estas&reasnoestanexpuestasa
lastemperaturasdelimpieza.
2, Quitelasparrillasdelhomo.Sisedejanlas
parri!lasduranteel ciclodelimpieza,pueden
impedirlafunci6nysedecoloraran.Apaguela
luzdelhomoy cierrelapuerta.
3. OprimalateclaCLEAN.
4. Optima la tecla AUTO SET (ajustar
automaticamente)parauntiempodelim#eza
de3 horas,optimade nuevopara4 horasy
unavezmassisedesean2 horasdetiempode
limpieza.
5. Enlapantallaaparecer&nCLEANINGy LOC,
adem&sdeltiempodelimpieza,yamboshomos
secerrar&nconseguro.
6. Cuandosehayaterminadoelciclodelim#eza,
se desptegar&CLEANED(limpiado).LOC
seguir&hastaqueel homosehayaenfriado
(aproximadamente1hora).
7. Unavez quese enfr[eel homo,LOCya no
estaradesplegadoy podr&abrirselapuerta.
,
| ParaevitardaSarlapuertadelhomo,notrate
de abrir ningunade las puertasdel homo
cuandola palabraindicadoraLOC este
desplegada.
| Duranteel procesode limpieza,la cocina
debeestarbien ventiladapara ayudara
eliminartosoloresnormalesasociadosconla
limpieza.Losoloresdisminuiranconeluso.
| Esnormalquehayallamaradas,humoofiamas
durantelalimpiezasi elhomoestabastante
sucio.Esmejorlimpiarelhornoconreguiaridad
enlugardeesperarhastaquetengamucha
suciedadacumuiada.
| Limpieelexcesodegrasay derramespara
evitarlasllamaradas.Parafacilitarlalimpieza,
se puedelevantarunpocoel elementode
Limpieel interiorde{homocon un trapo
hQmedo.Si lasuciedadpersiste,esoindica
queelciclonodur6Iosuficiente.
calentamientoen el homosuperioro en el
inferior(2,5cm[1"]).
| Limpielosderramesde azQcaro &cidos,
talescomodecamote,tomateode salsas
con basede leche,antesde un cictode
limpiezaautomatica.Etesmalteesresistente
atacido,noapruebadeacido.Laporcelana
esmaltadaesresistenteal&cido,noaprueba
deacidosypuededescolorarsilosderrames
no son limpiadosantes de un ciclo de
autolimpieza.
| Puedeaparecerunadecoloraci6nblanca
despuesde la limpieza,si los alimentos
&cidosoazucaradosnoselimpianantesde{
ciclodelimpieza.Estadecoloraci6nesnor-
maly NOafectaaldesempeSo.
PARACANCELAREL CICLODE LIMPIEZA
AUTOMATICA:
1. OprimalateclaCANCEL(cancelar).
2. Si NOest&desplegadoLOC,abrala puerta
delhorno.Si LOCestadesplegado,dejeque
elhomoseenfr[e.
PARARETARDARELINIClODEUNCICLODE
LIMPIEZAAUTOMATICA:
1. Sigalospasos1 a4 anteriores.
2. OprimaIatecla8TOPTIME(tiempodeparo).
Estaparpadear&.
3. MientrasSTOPTIMEparpadea,oprimalas
tedasdenQmeroapropiadasparacapturarla
horaen quequierequeel homosedetenga.
4. SedesplegaranDELAYCLN(limpretardada)
y LOC.
5. Cuandoetperiododeretardohayaterminado
yempiecetalimpieza,sedesplegar&nCLEAN-
ING(limpieza),LOCy el tiempode limpieza.
* Losnombresdemarcadeproductosdelimpiezasonmarcasregistradasdelosrespectivos
fabricantes.
BANDEJADELASADORE INSERTO
Coloqueuntrapoenjabonadosobreel insertoy
labandeja;dejequeseempapeparaaflojarla
suciedad.
Laveenaguatibiajabonosa.Utiliceunestropajo
Ilenodejab6nparaquitarlasuciedadpersistente.
La bandejadel asadory el insertopueden
limpiarseenellavavajillas.
CROMOCEPILLADO(MODELOSSELECTOS)
Cuandoeste frio lave con aguajabonosa,
enjuaguey putalasuperficiecongamuza.
Siestamuysucio,utiliceunlimpiadorabrasivo
suave,tallandoconelgranoparaevitarrayarla
superficie.Enjuaguey pulacongamuza.
Paraevitarlos rayonesno utilice agentes
abrasivoso c&usticos.
Pararestaurare{brilloy quitarlosrayones,siga
con StainlessSteelMagicSprayInoxidabte*
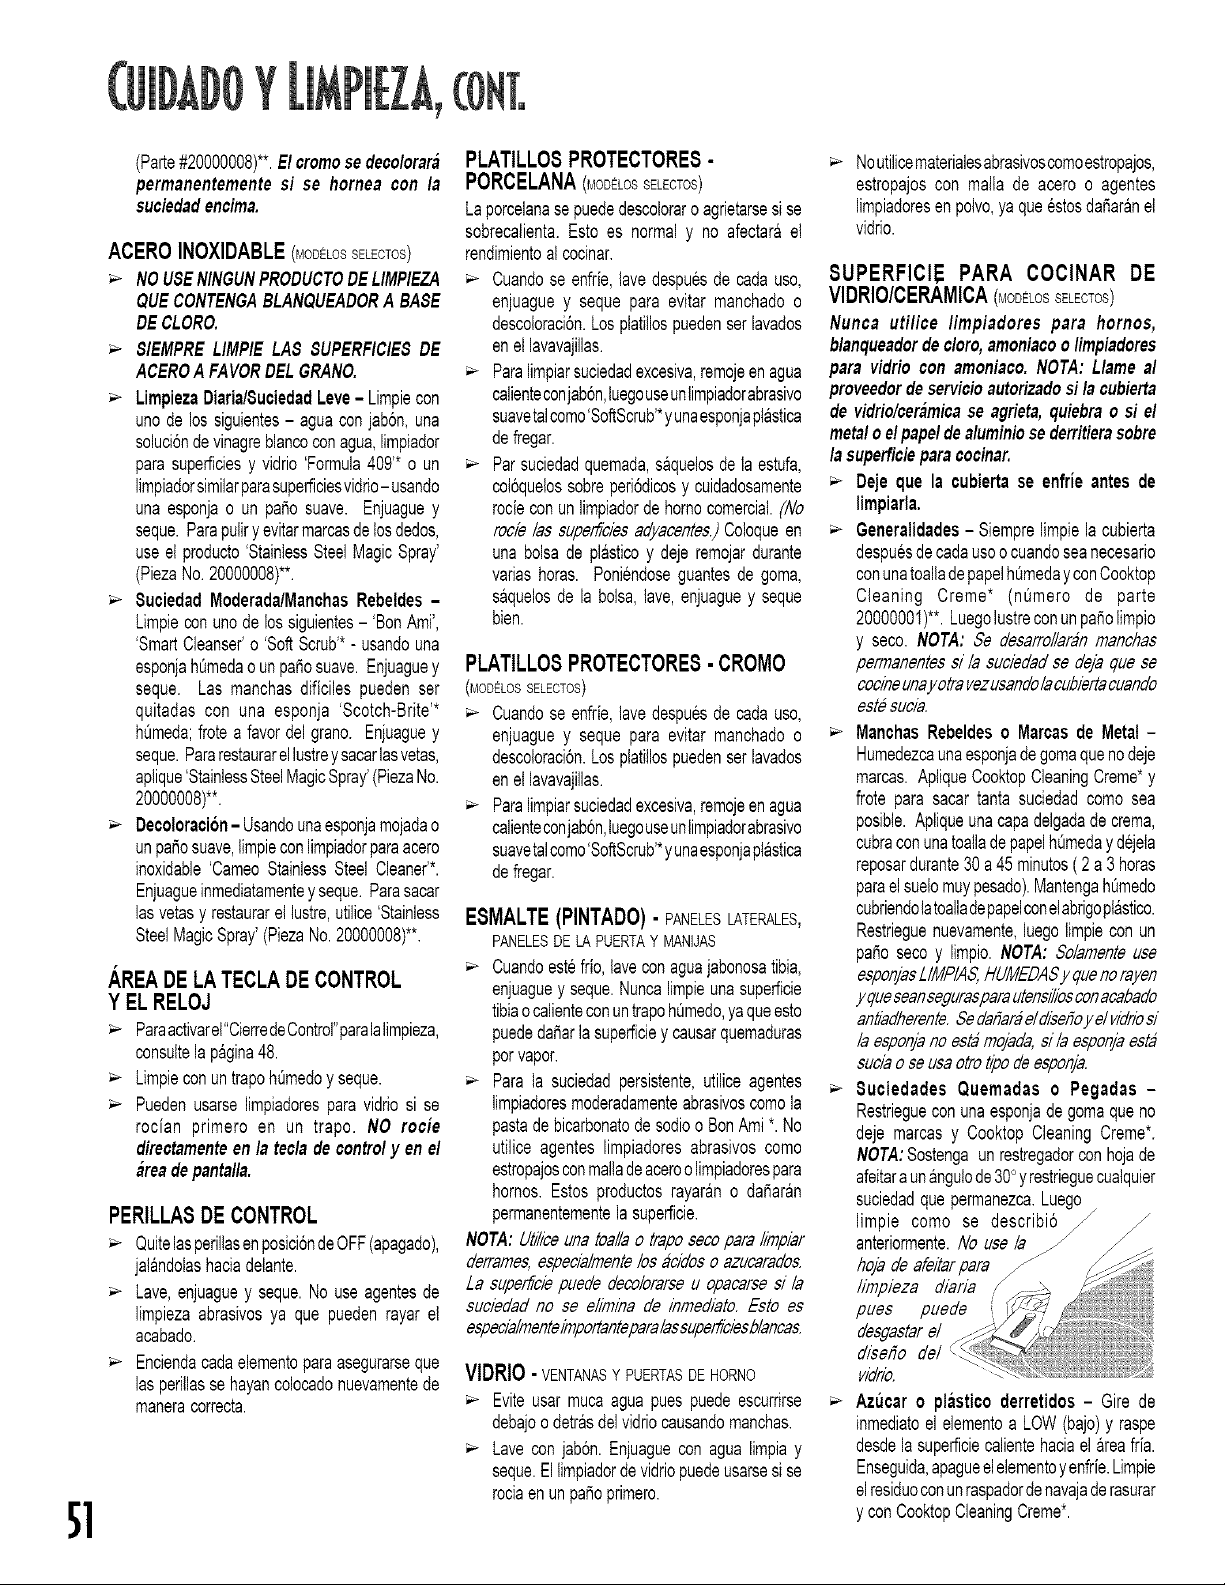
Y
5]
(Parte#20000008)**.Elcromosedecolorara
permanentementesi se hornea con la
suciedadencima.
ACEROINOXlDABLE(MODELOSSELECTOS)
NOUSENINGUNPRODUCTODELIMPIEZA
QUECONTENGABLANQUEADORA BASE
DECLORO.
$1EMPRELIMPIELA8 SUPERFICIESDE
ACEROA FAVORDELGRANO.
LimpiezaDiaria/SuciedadLove- Limpiecon
unodelos siguientes- aguaconjab6n,una
soluci6ndevinagreblancoconagua,limpiador
paresuperficiesy vidrio'Formula409'*o un
limpiadorsimilarparasuperficiesvidrio-usando
unaesponjao un pasosuave. Enjuaguey
seque.Parapuliry evitarmarcasdelosdodos,
useet producto'StainlessSteelMagicSpray'
(PiezaNo.20000008)**.
8uciedad Moderada/ManchasRebeldes-
Limpieconunodelossiguientes- 'BonAmi',
'SmartCleanser'o 'SoftScrub'*- usandouna
esponjahOmedaounpai_osuave.Enjuaguey
seque. Las manchasdificilespuedenser
quitadascon una esponja'Scotch-Brite'*
hOmeda;frotea favordel grano. Enjuaguey
seque.Pararestaurarellustreysacarlasvetas,
aplique'StainlessSteelMagicSpray'(PiezaNo.
20000008)**.
Oecoloracion- Usandounaesponjamojadao
unpasosuave,limpieconlimpiadorparaacero
inoxidable'CameoStainlessSteelCleaner'*.
Enjuagueinmediatamentey seque.Parasacar
lasvetasy restaurarel lustre,utilice'Stainless
SteelMagicSpray'(PiezaNo.20000008)**.
AREADELATECLADECONTROL
Y ELRELOJ
Paraactivarel"CierredeControl"paralalimpleza,
consultelapagina48.
LimpieconuntrapohOmedoy seque.
Puedenusarselimpiadoresparavidriosi se
rocian primero en un trapo. NO rocie
directamenteenla tecladecontroly enel
areadepanta//a.
PERILLASDECONTROL
Quitelasperillasenposici6ndeOFF(apagado),
jatandolashaciadetente.
Lave,enjuaguey seque.No useagentesde
limpiezaabrasivosya que puedenrayarel
acabado.
Enciendacadaelementoparaasegurarseque
lasperillassehayancolocadonuevamentede
maneracorrecta.
PLATILLOSPROTECTORE8-
PORCELANA(MODELOSSELECTDS)
Laporcelanasepuededescoloraro agrietarsesise
sobrecalienta.Estoes normaly no afectarael
rendimientoatcocinar.
Cuandose enfrie,lavedespuesde cadauso,
enjuaguey sequepara evitar manchadoo
descoloracbn.Losplatitlospuedenserlavados
enetlavavajillas.
Paralimpiarsuciedadexcesiva,remojeenague
calienteconjab6n,luegouseunlimpiadorabrasivo
suavetalcomo'SoftScrub'*yunaesponjaplastica
defregar.
Parsuciedadquemada,s&quelosdelaestufa,
col6queiossobreperi6dicosy cuidadosamente
rocieconunlimpiadorde homocomerciat.(No
rode/as superficiesadyacentes.)Coioqueen
unabolsade plasticoy dejeremojardurante
variashoras. Poniendoseguantesde goma,
saquelosde la bolsa,lave,enjuaguey seque
bien.
Noutilicematerialesabrasivoscomoestropajos,
estropajoscon maltade acero o agentes
limpiadoresenpolvo,yaqueestosda_aranet
viddo.
PLATILLOSPROTECTORES- CROMO
(MODELOSSELECTOS)
Cuandose enfrie,lavedespuesde cadauso,
enjuaguey sequepara evitarmanchadoo
descoloracbn.Losplatitlospuedenserlavados
eneilavavajillas.
Paralimpiarsuciedadexcesiva,remojeenague
calienteconjab6n,luegouseunlimpiadorabrasivo
suavetalcomo'SoftScrub'*yunaesponjaplastica
defregar.
ESMALTE(PINTADO)- PANELESLATERALES,
PANELESDE LA PUERTAY MANIJAS
Cuandoestefrio,laveconaguejabonosatibia,
enjuaguey seque.Nuncalimpieunasuperficie
tibiaocalienteconuntrapohOmedo,yaqueesto
puededa_arlasuperfidey causarquemaduras
porvapor.
Parala suciedadpersistente,utiliceagentes
limpiadoresmoderadamenteabrasivoscomola
pastadebicarbonatodesodiooBonAmi*.No
utiliceagenteslimpiadoresabrasivoscomo
estropajosconmalladeaceroolimpiadorespare
hornos.Estosproductosrayarano dai_aran
permanentementeia superficie.
NOTA:Ut/I/ceuna toallao traposecopara/Imp/ar
derrames,especla/mente/osacidoso azucarados.
La supenfclepuededeco/orarseu opacarsesi /a
suciedadno se e/Imlnade inmedlato.Esto es
especl#lmentelmpo/tantepara/assuperhlc/esb/ancas.
VIDRIO- VENTANASYPUERTASDEHORNO
Eviteusermucaaguapuespuedeescurrirse
debajoodetrasdelvidriocausandomanchas.
Laveconjab6n.Enjuaguecon aguelimpiay
seque.Eltimpiadordevidriopuedeusarsesi se
rodaenunpasoprimero.
SUPERFICIE PARA COCINAR DE
VIDRIO/CERAMICA(MODELDS SELECTOS)
Nunca utilice limpiadorespara hornos,
blanqueadordecloro,amoniacoo limpiadores
paravidrio conamoniaco.NOTA:Llameal
proveedordeservicioautorizadosila cubierta
de vidrio/ceramicase agrieta,quiebrao si el
metalo elpapeldealuminiosederritierasobre
lasupefficieparacocinar.
Dejeque la cubiertase enfrieantes de
limpiarla.
Generalidades- Siemprelimpielacubierta
despuesdecadausoocuandoseanecesario
conunatoalladepapelhOmedayconCooktop
Cleaning Creme* (nOmero de parte
20000001)**.Luegolustreconunpai_olimpio
y seco. NOTA:Se desarrollardnmanchas
permanentess/ la suciedadse dejaquese
coc/neunayotravezusando/acubiertacuando
est#suc/#.
ManchasRebeldeso Marcasde Metal-
Humedezcaunaesponjadegomaquenodeje
marcas.ApliqueCooktopCleaningCreme*y
froteparesacartantasuciedadcomosea
posible.Apliqueunacapedelgadade crema,
cubraconunatoalladepapelhOmedaydejela
reposardurante30a45minutos(2 a 3 horas
pareelsuelomuypesado).MantengahOmedo
cubriendolatoailadepapelconelabrigopt&stico.
Restrieguenuevamente,luegolimpieconun
pa5osecoy limpio.NOTA:$olamenteuse
esponjasLIMPIAS,HUMEDASy quenorayen
y queseansegurasparautenslllosconacabado
antladherente.$edal_arae/dlSel_oy e/vie/riosi
/aesponjano estamojada,s/la esponjaesta
suclao seusaottotipodeesponja.
8uciedades Quemadaso Pegadas-
Restriegueconunaesponjadegomaqueno
deje marcasy CooktopCleaningCreme*.
NOTA:Sostengaunrestregadorconhojade
afeitaraun&ngulode300yrestrieguecuaiquier
suciedadquepermanezca.Luego
limpie como se describi6 //
anteriormente.No usela
hoy#de afe/_arpare
hmpleza dlarla ./
pues puede
desgastare/
d/sefio
v#r/o.
Azucar o plasticoderretidos - Gire de
inmediatoel elementoa LOW(bajo)y raspe
desdelasuperficiecalientehaciael&reafria.
Enseguida,apagueelelementoyenfrie.Limpie
elresiduoconunraspadordenavajaderasurar
y conCooktopCleaningCreme*.

INTERIORDELHORNO
_'- Sigalas instruccionesde la pagina50 para
configurarunciclodelimpiezaautomatica.
PARRILLASDELHORNO
Limpieconaguajabonosa.
Retirela suciedadpersistentecon polvo
limpiadoro conunestropajoIlenodejab6n.
Enjuaguey seque.
_'- Si conel tiempo,lasparri!lasnose deslizan
haciafueraconfacilidad,limpieel bordey el
soportedelaparrillaconunacantidadpequeSa
deaceitevegetalpararestaurarlafacilidadde
movimiento,timpiedespueselexcesodeaceite.
De iguatmanera,pongaunagotade aceite
vegetalenelrodil!odelaparrilla.
NOTA:Ouranteun c/c/odeIlmpiezaautomatica,
quitare/aspaml/asde/homo.$i/asparr!llasesdn
dejaradoene/homo,nosefuncidnercorrectamente
y sedecolorara.
ACABADOSDEPLASTICO-AGARRADERAS
DE LAS PUERTAS,VISTAS POSTERIORESY TAPAS
TRASERAS
_" Cuandoestenfrias,limpieconjab6ny agua,
enjuaguey seque.
_'- Utiliceunlimpiadorparavidrioyuntraposuave.
NOTA:Nuncaut/lice/Imp/adoresparahomo,//qu/do
abrasivoo caustlcoo limp/adoresenpoivosobre
/osacabadosdepiastlco.Estosagenteshmpladores
rayaranomaroarane/acabado.
NOTA:Paraev!?ar/asmanohasoladeooloracl_n,
I/mpiela grasao el aolclo(tomate,/imdn,vlnagre.
leohe,j_lgodefruta,mar/nada)bmedlatamentecon
unatoal/adepape/
ESMALTEDE PORCELANA- AREADE
PROTEOCIONTRASERA,VISTASENLASUPERFICIEDE
VlDRIO/CERAMIOAY OUBIERTAEN LA SUPERFIOIE
CONELEMENTOSTUBULARES
El esmaltede porcelanaes vidriofundidosobre
metalypuedeagrietarseo astillarseconelmaluso.
Esresistentealacido,noapruebadeacido.Todos
losderrames,especiatmentelosdeacidooaz=Jcar,
debenIimpiarsedeinmediatoconuntraposeco.
_'- Cuandoestefrio, lavecon aguajabonosa,
enjuaguey seque.
Nuncalimpieunasuperficietibiaocalientecon
untrapoh0medo,yaqueestopuedecausar
queseagrieteo astilie.
_'- Nuncautilicelimpiadoresparahornos,agentes
detimpiezaabrasivosocausticosenelacabado
exteriordelaestufa.
ITENANCE
PUERTA(S)DEI,.HORNO
Tantola puertadeihomosuperiorcomela del
inferiorsondesmontables.Sigalasinstrucciones
quese presentana continuaci6n.
PARAQUITAR:
1. Cuandoestefrio,
abrala puertadet
homo hasta la
posici6nde tope
paraasar(abierta
aproximadamentecuatropulgadas).
2. Agarrela puertadecadalado.No utilicela
agarraderaparatevantarlapuerta.
3. Levanteet homouniformementehastaquela
puertalibrelosbrazosdela bisagra.
PAPAVOLVERA COLOCAR:
1. Agarretapuertadecadalade.
2. Alineeiasranurasenlapuertaconlosbrazosde
labisagrasobrelaestufa.
3. Deslicetapuertahaciaabajosobrelosbrazos
detabisagrahastaquequedecompletamente
asentadaenlasbisagras.Empujehaciaabajo
las esquinassuperioresde la puertapara
asentarlacompletamentesobrelas bisagras.
Lapuertanodebeversetorcida.
NOTA:La puertadel homoen unaestufanueva
puedesentirse"esponjosa"cuandosecierra.Esto
esnormaly disminuir&conetuso.
VENTANA(S)DELHORNO
PARA PROTEGERLA VENTANA DE LA
PUERTADELHORNO:
No useagentesde limpiezaabrasivostales
comoesponjasdefregardelanadeaceroo
limpiadoresen poivopuespuedenrayarel
vidrio.
2. Nogolpeeelvidrioconollas,sartenes,muebles,
juguetesuotrosobjetos.
3. No cierrela puertadeihomohastaquelas
parriltasestenensu lugar.
Siraya,golpea,sacudeo presionaelvidrioeste
puededebilitarsuestructuraaumentandoelriesgo
dequebradurasposteriormente.
TOMADE CORRIENTEDE
CONVENIENCIA
(SOLOLOSMODELOSCANADIENSE8)
LatomadecorrientedeconvenienciaseIocaliza
sobreel ladoizquierdoinferiordela protecci6n
trasera.Es=Jtilparaelectrodomesticospeque_os,
comolaswaffleras.
Siemprequeutilicelatomadecorfiente,asegOrese
dequeelcord6ndetaestufanodescansesobreo
cercadet elementosuperficial.Si el elemento
superficialestaencendido,elcord6ny latomade
corrientesedaSar&n.
Eldisyuntordecircuitodela tomadecorrientede
conveniencia puede dispararse si el
electrodomesticopequeSoconectadoenelexcede
10amps.Pararestablecereldisyuntordecircuito,
oprimael interruptorcolocadoenelbordeinferior
de la protecci6ntrasera.(Yeala ilustraci6nde
abajo).
i _ i i i _ii
0
INTERRUP TOR DEL
DIS YL/NTOR DE OlROUITO
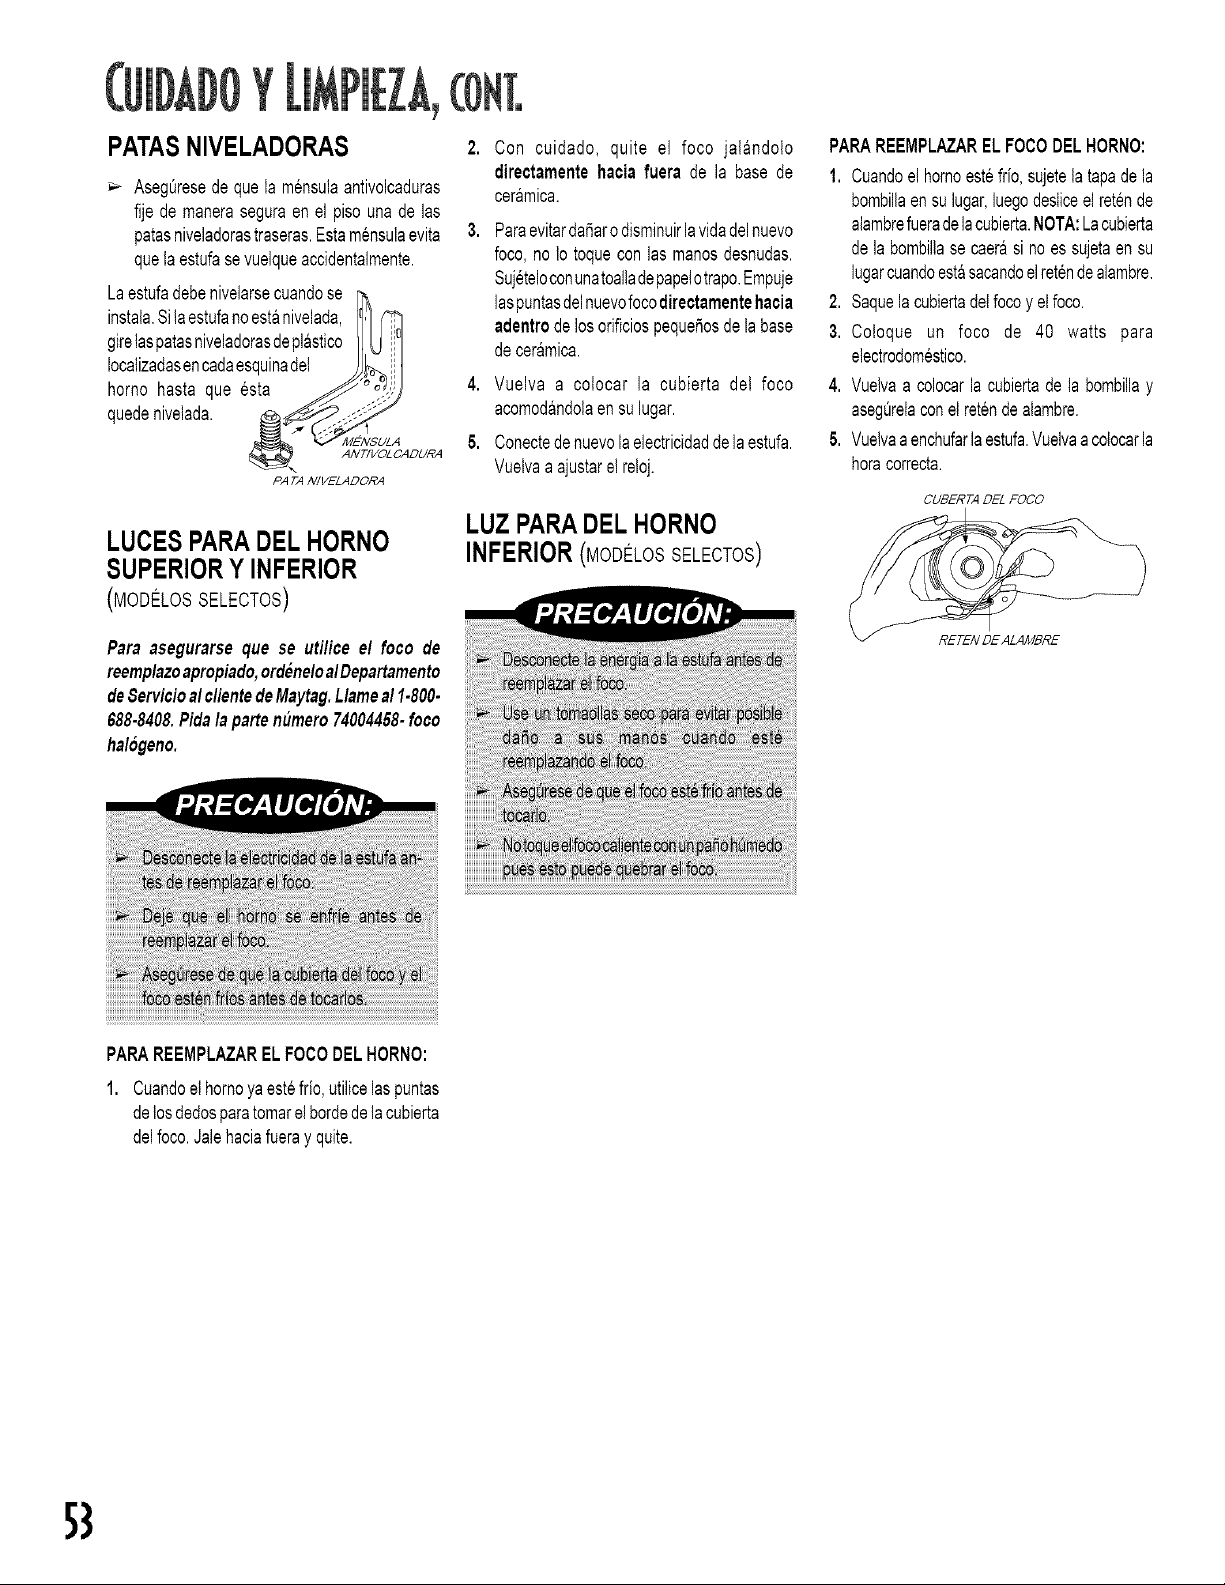
Y
PATASNIVELADORAS
AsegOresede que la mensulaantivoicaduras
fijede maneraseguraenel pisouna de las
patasniveladorastraseras.Estamensulaevita
quelaestufasevuelqueaccidentalmente.
Laestufadebenivelarsecuandose
instala.Sila estufanoestanivelada,
girelaspatasniveladorasdeplastico 11
Iocatizadasencadaesquinadel , H
homo hasta que esta _ _,:,j
quedenivelada. _ I"
L_
_ _MENSULA
_\ ANTIVOL CADURA
PA TA NIVELADORA
LUCESPARADELHORNO
SUPERIORY INFERIOR
(MODELOSSELECTOS)
Para asegurarseque se utiliceel foco de
reemplazoapropiado,ordeneloalDepartamento
deServicioalclientedeMaytag.L/amea/1.800.
688.8408.Pida/aparten(lmero74004458-foco
halogeno.
Con cuidado, quite el foco jal&ndolo
directarnentehaciafuera de la basede
ceramica.
Paraevitardaifiaro disminuirlavidadelnuevo
foco,no Io toqueconlas manosdesnudas.
Sujeteloconunatoalladepapelotrapo.Empuje
laspuntasdelnuevofocodirectamentehacia
adentrodelosorificiospeque_osdelabase
deceramica.
4. Vuelva a cotocar la cubierta det foco
acomod&ndolaensulugar.
5. Conectedenuevolaelectricidaddeiaestufa.
Vuelvaa ajustarel reloj.
LUZ PARADEL HORNO
INFERIOR(MODELOSSELECTOS)
PARAREEMPLAZARELFOCODELHORNO:
1. Cuandoelhomoestefrio,sujetetatapadela
bombillaensulugar,luegodesliceetretende
alambrefueradelacubierta.NOTA:Lacubierta
delabombillase caerasi noessujetaen su
lugarcuandoest&sacandoelretendealambre.
2. Saquelacubiertadeifocoy elfoco.
3. Coloque un foco de 40 watts para
eiectrodomestico.
4. Vuetvaa colocarla cubiertade la bombillay
asegt._relaconetretendealambre.
5. Vuelvaaenchufarlaestufa.Vuelvaa colocarla
horacorrecta.
OUBERTA DEL FO00
RETEN DE ALAMBRE
PARAREEMPLAZARELFOCODELHORNO:
1. Cuandoelhomoyaestefrio,utilicelaspuntas
delosdedosparatomarelbordedelacubierta
delfoco.Jalehaciafueray quite.
5}
PARALAMAYORIADELOSPRO-
BLEMAS,TRATEESTOPRIMERO:
Revisesiloscontrolesdelhomoestandebidamente
ajustados.
Verifiqueparaasegurarsedequeelenchufeeste
firmementeinsertadoeneltomacomente.
Verifiqueovuelvaareponereldisyuntor.Verifique
o reemplaceelfusible.
Verifiqueel suministrodeenergia.
ALGUNAPARTEO TODALAESTUFA
NOFUNCIONA.
NOTA:Enlosmode/oscanadienses,duranteun
ciclode autolimpieza,la superficiede vidrio
cer_miconofuncionar_y en /osmodeloscon
e/ementos tubulares,/os dos quemadores
de/anterosnofuncionaran.
I Revisesiloscontrolesdeihomoy/olasuper_ciese
hanajustadocorrectamente.Consultelaspaginas
41y45.
| Revisequela puertadelhomono tengaseguro
despuesdelciclodelimpiezaautomatica.Consuke
lapagina50.
| Revisesielhornoestaconfiguradoparaelprograma
de limpiezao cocci6nretardado.Consultelas
paginas47y 50.
| El homosuperiorpuedeestaren operaci6nde
tostado.El homoinferiorfuncionaracuandola
operaci6ndetostadotermine.
| Verifiquesi el elementotubularestadebidamente
instaladoo necesitaserreemplazado.Verpagina
43.
LOSRESULTADO8DELHORNEADONO
SONLOQUE USTEDESPERABAO SON
DIFERENTE8A LOS DELHORNOANTE-
RIOR,
| Aseg0resedequeetrespiraderodelhomonoeste
btoqueado.Verpagina49 paralaubicaci6n.
| Verifiqueparaasegurarsede quela estufaesta
nivelada.
| Lastemperaturasamenudovarianentreun homo
nuevoyunoantiguo.Amedidaquepasaeltiempo,
latemperaturadelhomocambiay puedehacerse
mascalienteo masfria. Verpagina48 paralas
instruccionessobrecomoajustarlatemperaturadet
horno. NOFA.No se recomiendaajustarla
temperaturasi hatenidoprobtemasconsolounao
dosrecetas.
| Verifiquesilatemperaturadelhomohadisminuido
en250Fcuandosehorneaporconvecci6n.
| Yea et folleto"La CocinaFa¢il"para mayor
informaci6nsobrelosutensiliosparahorneary et
horneado.
LA 8UPERFICIEDE VIDRIO/CERAMICA
MUESTRADESGASTE.
1. Pequefiosrayoneso abrasiones.
| Reviseparaasegurarsequelasuperficie
paracocinary el fondodetabandejaesten
limpios.Nodeslicesartenesdevidrioo de
metalporla cubierta.Aseg0resequeetfondo
delsartennoseaaspero.Utiticelosagentes
delimpiezarecomendados.Consultela
pagina51.
2. Marcasde metal.
| Nodeslicelossartenesdemetalporla
cubierta.Si aparecenmarcasdemetal,
limpieuandoyaestefdoconlaCooktop
CleaningCreme.Consultelapagina51.
3. Rayonesomanchasdecolorcaf&
| Losderramesnoselimpiarondeinmediato.
Selimpioconunatelao esponjasucia.El
fondodelsartennoestabalimpio.
4. Areasconbrillometalico.
| Dep6sitosmineraiesde aguay alimento.
5. Picadurasoescamas.
| DerramesdeazOcarquenosequitaronde
inmediato.Consultelapagina51.
LOSALIMENTO8NO8E ASANA LA
PARRILLAENFORMADEBIDAO SALE
DEMASIADOHUMO.
Verifiquelasposicionesdelasparrillasdelhomo.
Elalimentopuedeestarmuycercadel etemento.
Elelementodeasarnofueprecalentado.
Elpapeldealuminioseus6demaneraincorrect&
Nuncaforreetasadorconpapeldealuminio.
Lapuertadelhomoestabacerradamientrasse
asabaa la parrifla.Dejelapuertaabiertaenla
primeraposici6n(atrededorde4 pulgadas).
I Recorteel excesodegrasadelacameantesde
ponertaasara lapamlla.
I Seus6unaasaderasucia.
ELHORNONO8E LIMPIA
AUTOMATICAMENTE.
I Revisepara asegurarseque ei ciclono esta
configuradoparaarranqueretardado.Verp&gina
50.
I Revisequela puertaestecerrada.
ELHORNONO8E LIMPIO
CORRECTAMENTE.
| Pudieranecesitarsemastiempoparatalimpieza.
I Los derramesen exceso,especialmentede
alimentosazucaradosy/oacidos,no se quitaron
antesdelciclodelimpiezaautomatica.
SALEVAPORDELAREA
DELAVENTILA.
I Cuandosecocinanatimentosaltosenhumedaden
elhomosuperior,elvaporpuedehacersevisibleat
satirdetareadela ventila.Estoesnormal.
ELSEGURODE LAPUERTADEL
HORNONOSE DESTRABADESPUI'_-S
DELCICLODELIMPIEZA
AUTOMATICA.
| El interiordethomotodaviaestacaliente.Deje
queelhomoseenfrieaproximadamenteunahora
despuesde terminar el cicto de limpieza
automatica.Lapuertapuedeabrirsecuandola
palabraindicadoraLOCnoestedesptegada.
I Amboshomosse cerraranconsegurocuando
cualquieradeel!osse estelimpiando.
SE JUNTACONDENSACION
DEHUMEDADENLAVENTANADEL
HORNO.
| Estoes normalcuandose cocinaalimentocon
altahumedad.
| Seutiliz6demasiadahumedadcuandoselimpi6
laventana.
HAYUN FUERTEOLORO UN
HUMOLIGEROCUANDOSE ENCIENDE
ELHORNO.
| Estoesnormalenunaestufanuevaydesaparecer&
despuesquese utilicevariasveces.Elarranque
deunciclodelimpieza"quemara"losolorescon
masrapidez.
| Encenderelventiladorayudaraa eliminarelhumo
y/oelolor.
| Haydemasiadasuciedadenetfondodelhomo.
Utiliceun ciclode limpiezaautomatica.
"F" ADEMASDE UNNUMEROY EL
MENSAJE"CALL AN AUTHORIZED
SERVICEROR888-462-9824"*
I Estosellamac6digodefafla.Siapareceunc6digo
defallaen el desplegadoy se emitensefiales
auditivas,oprimatateclaCANCEL.Sielc6digode
faflay las se_atescontint_an,desconectela
electricidadde la estufa.Esperounoscuantos
minutosy vuelvaa conectarla electricidad.Siel
c6digodefallaylasse_alescontinOan,desconecte
laelectricidaddelaestufay flamea unproveedor
deservicioautorizado.
| Si el homo esta muysucio, las Itamaradas
excesivaspuedendarcomoresultadounc6digo
defalladuranteel ciclode limpieza.Oprimala
teclaCANCELy deje que el ornose enfrie
completemente,limpiefueradeexcessodesuelo,
luegorestabtezcaelciclodelimpieza.Sielc6digo
defatlay lassefiatescontinQan,desconectela
electricidaddelaestufayflamea unproveedorde
servicioautorizado.
*PAPA8ERVIClOPRIORITYONE
LLAME GRATUITAMENTE AL 1-8884MAYTAG
(1-888-462-9824).
N N
:N snto: onNONN N
_a; ;Mn
los _ntre
,
4.
G.
GARANTIASNO(UBRENLOflGUENT[:
Condioionesyda_osresuitantesdeoualquieradelassiguientessituaciones:
a. Instalaci6n,entregao mantenimientoinadecuados.
b. Cualquierreparaci6n,modificaci6n,atteraci6no ajusteno autorizadoporel fabficante
o porunproveedordeservicioautorizado.
c. Maluso,abuso,accidenteso usonorazonable.
d. Corrienteelectrica,voltajeo fuentede poderincorrecta.
e. Ajusteinadecuadode uncontrol.
Lasgarantiasseinvalidaransisequita,alterao nosepuededeterminarrapidamenteeln0merodesede
original.
Focode latuz.
Productoscompradosparausocomercialoindustrial.
Elcostodelservicioodelatlamadapara:
a. Corregirerroresdeinstalaci6n.
b. Instruiralusuarioenel usoadecuadodelproducto.
¢. Transportedelelectrodomesticoalproveedordelservicio.
Losda5osemergentesoincidentalesocasionadosporunapersonacomoresultadodealgunaviolaci6n
a estasgarantias.Atgunosestadosno permitenlaexclusi6nnilimitaci6ndelosda5osemergenteso
incidentales,asiquelaexclusi6nanterior,puedenoaplicaren sucaso.
SlNECEflT, SERVEIO
Llameatdistribuidoratquelecompr6eletectrodomesticootlameaMaytagAppliancesSalesCompany,
Departamentodeasistenciaalclientede Maytagal telefono1-888-462-9824,EE.UU.y Canadapara
Iocalizarun proveedordeservicioautorizado.
Aseg0resedeconservarelcomprobantedecompraparaverificarelestadodelagarantia.Sidesea
obtenermasinformaci6nsobretasresponsabiiidadesdelpropietariopararecibirel serviciodegaranfia,
refierasealasecci6ndeGARANTiA.
Si el distribuidoro lacompa_iaproveedoradeserviciosnopuedenresoiverel probiema,escribaa
MaytagAppliancesSalesCompany,Attn:CAIR®Center,P.O.Box2370,Cleveland,TN37320-2370,o
Itamaral1-888-4MAYTAGpara8ervicioPriorityOne(1-888-462-9824).
NOTA:Cuandoescribaohableparaunproblemadeservicioporfavorincluyalasiguienteinformaci6n:
a. Nombre,direcci6ny nOmerodeteWono;
b. Numerode modeloy nOmerodeserie;
c. Nombrey direcci6ndeidistribuidoro proveedorde servicio;
d. UnadescripciSnclaradelproblema;
e. Comprobantedecompra(recibodeventa)
Losmanualesdelusuario,manualesdeservicioye informaci6nsobrerepuestosestandisponiblesen
MaytagAppliancesSalesCompany,Departamentodeasistenciaalclientede Maytag.
MAYTAG • 403 West Fourth Street North • P.O. Box 39 • Newton, Iowa 50208
Form No hJO5/O1 Part No 8113P293-60 _ _ http://www maytag.corn 74005918 Litho U.S.A.