Loading ...
Loading ...
Loading ...
i'l _
liWARNING:Disconnectthespark
plugbeforeperformingmaintenance,
service,oradjustmentsexceptforcar-
buretoradjustments.
CHAIN SHARPENING
Chain sharpening requires special
tools. You can purchase sharpening
tools at Sears or go to a professional
chain sharpener.
CHAIN REPLACEMENT
II_WARNING: Wear protective
gloves when handling chain. The
chain is sharp and can cut you even
when it is not moving.
It is normal for a new chain to stretch
during the first 15 minutes of operation.
You should recheck your chain tension
frequently and adjust the chain tension
as required. See CHAINTENSIONsec-
tion.
Replace the old chain when it be-
comes worn or damaged. Use only
the Low-Kickback replacement chain
specified in the repair parts list. The
correct replacement bar and chain is
also specified on a decal located on
the chain saw.
See your Sears Service Center to re-
place and sharpen individual cutters
on your chain.
TO REPLACE CHAIN:
1. Move ON/STOP switch to the STOP
position.
2. Remove chain brake nuts.
3. Remove chain brake.
Chain
Brake
Clutch Drum
4. Turn adjusting screw on bar coun-
terclockwise to move the tension-
ing rack as far as it will go toward
the front of the bar.
[ o
Tensioning Rack Zf" _',_,
5. Slide guide bar behind clutch drum
until guide bar stops against clutch
drum sprocket.
6. Remove the old chain.
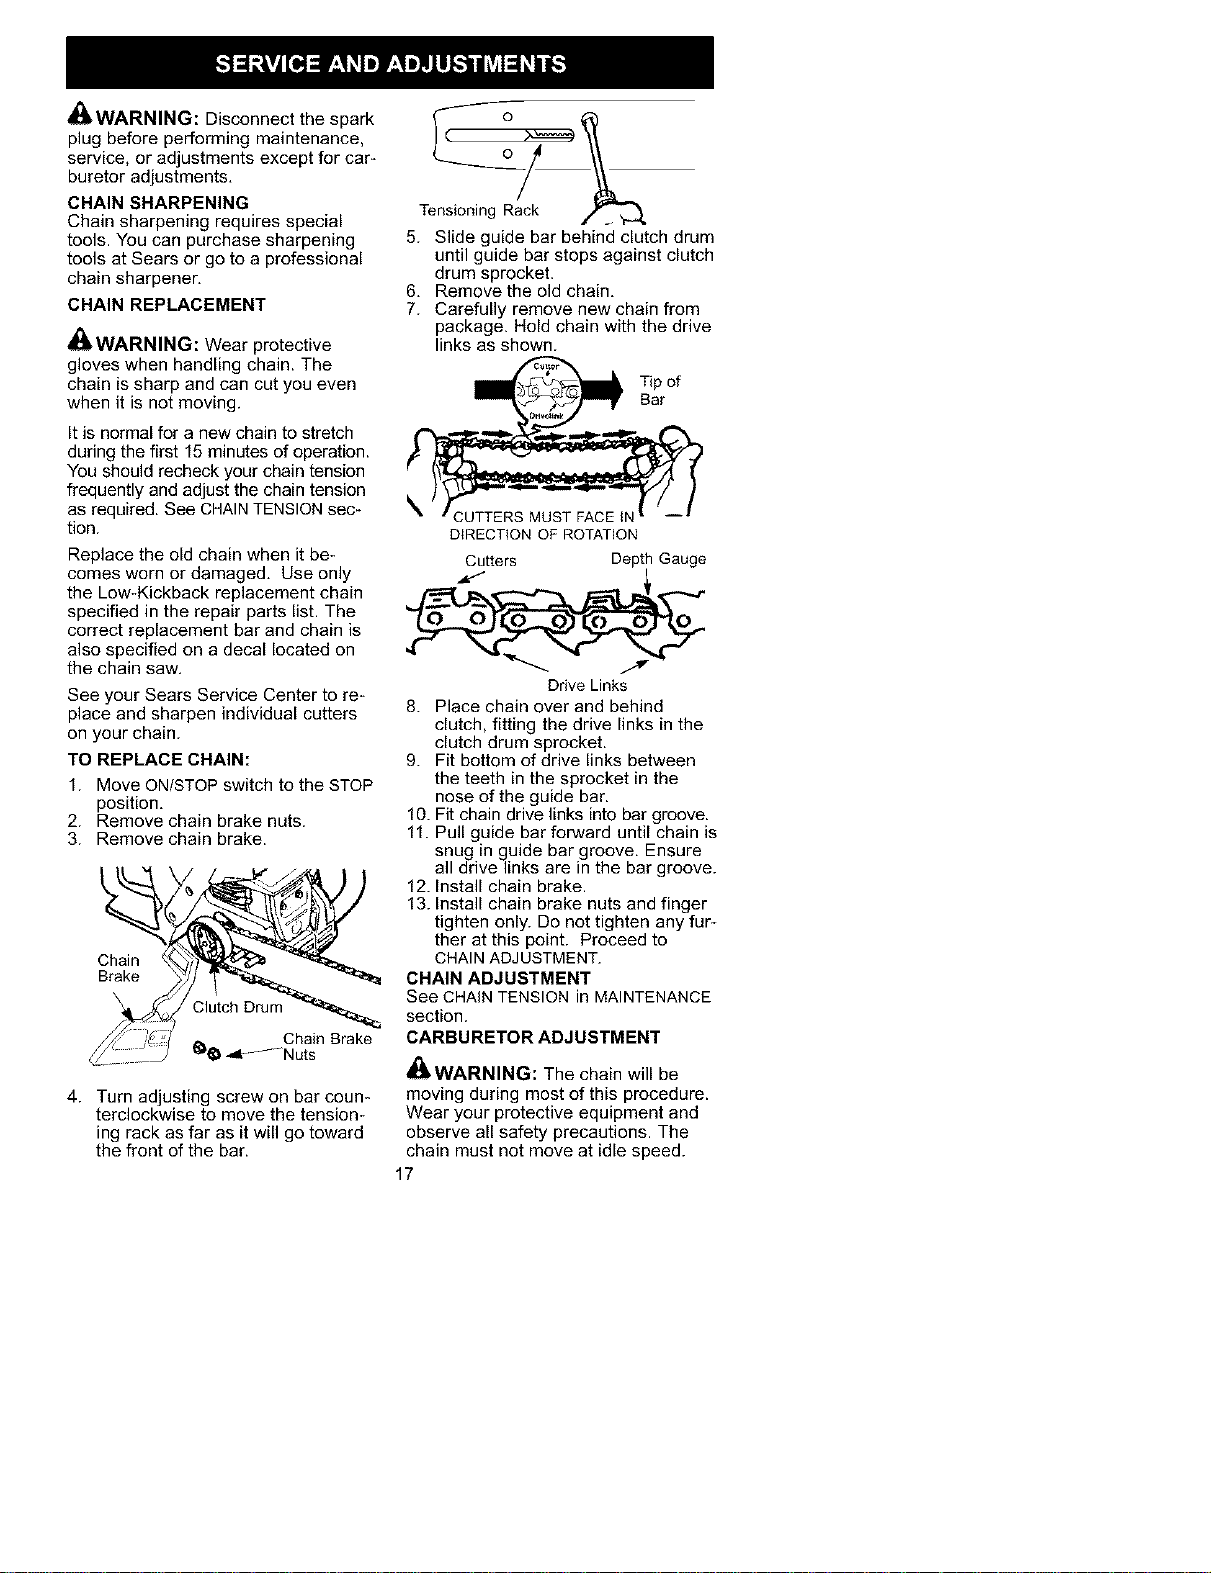
7. Carefully remove new chain from
package. Hold chain with the drive
links as shown.
TiDo'
DIRECTION OF ROTATION
Cutters Depth Gauge
Drive Links
8. Place chain over and behind
clutch, fitting the drive links in the
clutch drum sprocket.
9. Fit bottom of drive links between
the teeth in the sprocket in the
nose of the guide bar.
10. Fit chain drive links into bar groove.
11. Pull guide bar forward until chain is
snug in guide bar groove. Ensure
all drive links are in the bar groove.
12. Install chain brake.
13. Install chain brake nuts and finger
tighten only. Do not tighten any fur-
ther at this point. Proceed to
CHAIN ADJUSTMENT.
CHAIN ADJUSTMENT
See CHAIN TENSION in MAINTENANCE
section.
CARBURETOR ADJUSTMENT
IliiWARNING: The chain will be
moving during most of this procedure.
Wear your protective equipment and
observe all safety precautions. The
chain must not move at idle speed.
17
Loading ...
Loading ...
Loading ...