Loading ...
Loading ...
Loading ...
7
ASSEMBLY
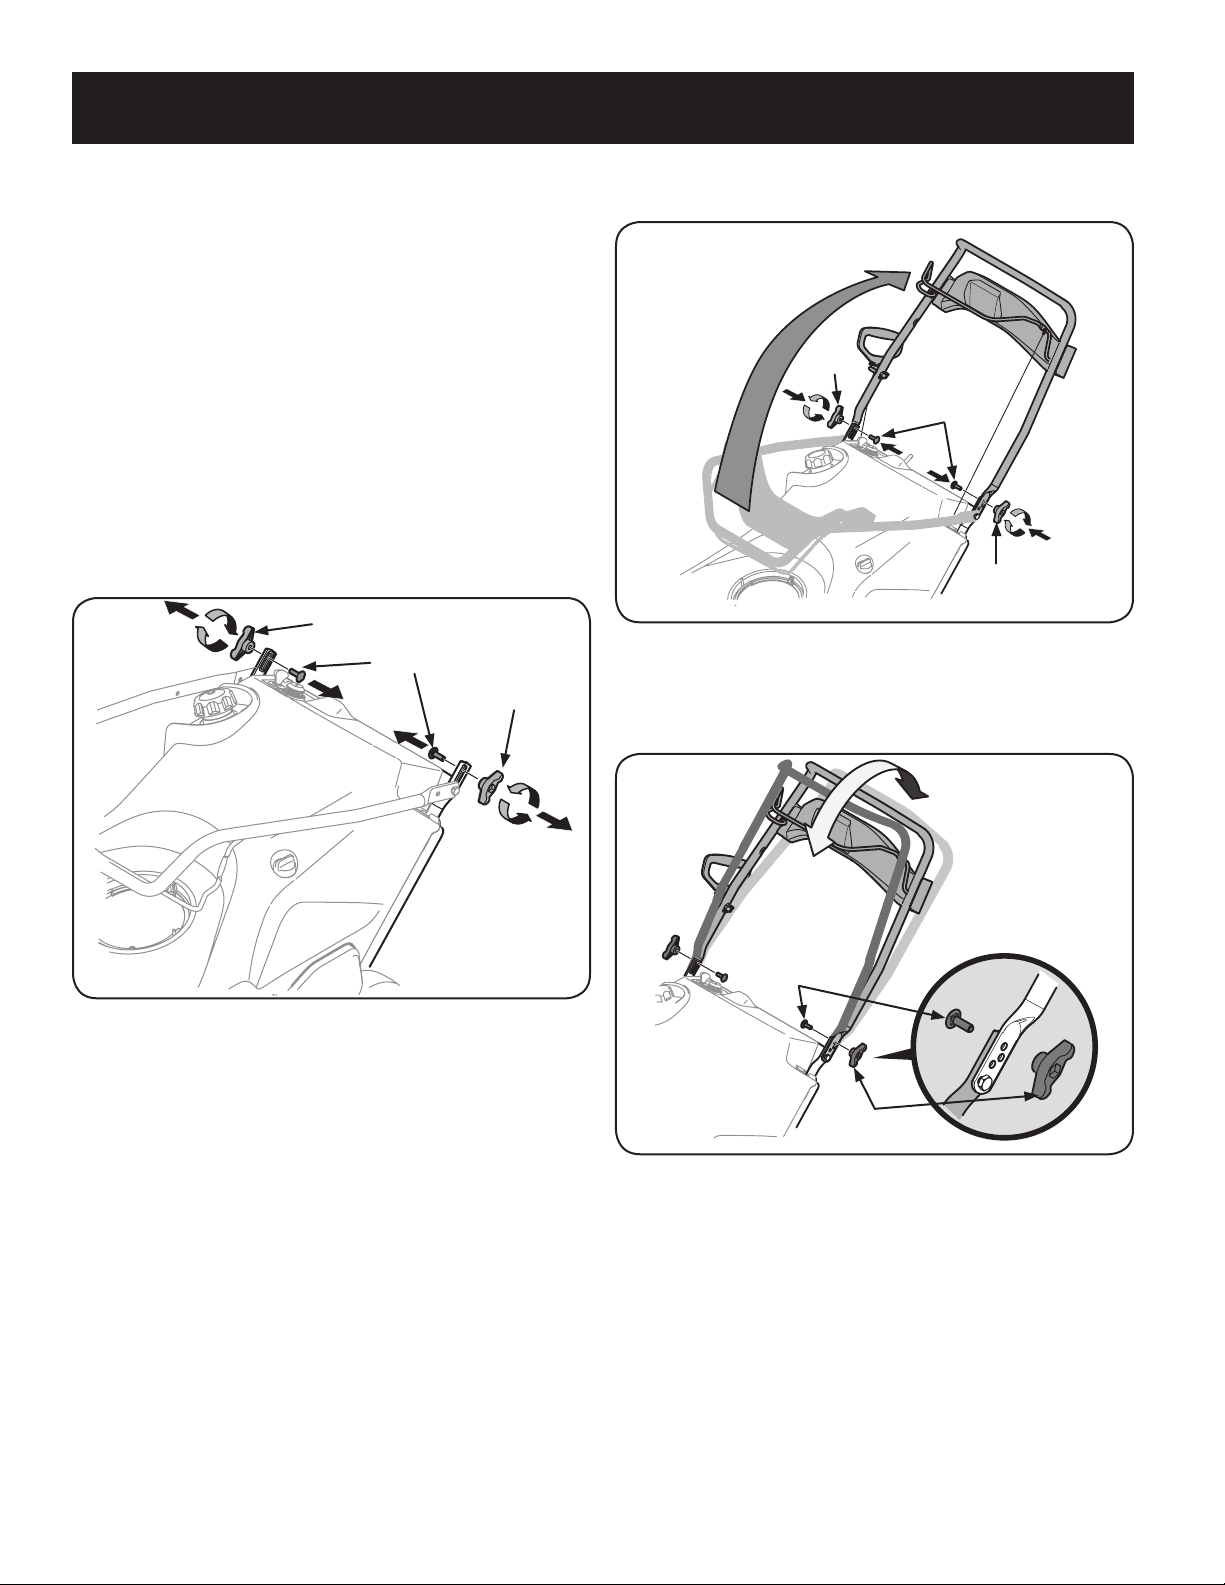
2. Pivot the upper handle into the operating position. Be sure not to pinch any
of the cables in the process. See Figure 2.
Wing
Knob
Carriage Bolts
Wing
Knob
Figure 2
3. The handle can be set in three different positions. Place the handle in the
desired position and then install wing knobs and carriage bolts in the
appropriate hole and secure the handle. See Figure 3.
Carriage Bolt
Wing
Knob
Figure 3
NOTE: All references to the left or right side of the snow thrower are from the
operator’s position. Any exceptions will be noted.
Unpacking the Snow Thrower
1. Open the top of the carton.
2. Cut down the corners on the front of the carton and fold down the front side.
3. Pull the snow thrower out of the carton. Be sure not to damage the chute,
chute rotation control assembly or any cables attached to the chute. Some
of these parts are shipped under the shroud on the backside of the carton.
Check for any cable ties securing the chute and remove if necessary.
Assembly
Positioning the Upper Handle
1. Remove the wing knob and carriage bolt from the top of the lower handle.
See Figure 1. It is not necessary to remove the shoulder screw and flange lock
nut below the wing knob and carriage bolt.
Wing Knob
Wing Knob
Carriage Bolts
Figure 1
Loading ...
Loading ...
Loading ...