Loading ...
Loading ...
Loading ...
en Before using for the first time
8
5.2 Types of heating
Here you can find an overview of the types of heating. You can find recommendations on using the types of heating.
Symbol Name Use
90–800 Microwave For defrosting, cooking and heating foods and liquids.
Microwave power settings:
¡ 90W
¡ 180W
¡ 360W
¡ 600W
¡ 800W
Programmes There are preprogrammed settings for many dishes.
5.3 Cooling fan
The cooling fan switches on and off as required.
The cooking compartment remains cold during mi-
crowave operation. Despite this, the cooling fan will still
switch on.
Note:The cooling fan may run on even if the oven has
been switched off.
5.4 Condensation
Condensation can occur in the cooking compartment
and on the appliance door when cooking. Condensa-
tion is normal and does not adversely affect appliance
operation. Wipe away the condensation after cooking.
6 Before using for the first time
Configure the settings for initial start-up. Clean the ap-
pliance and accessories.
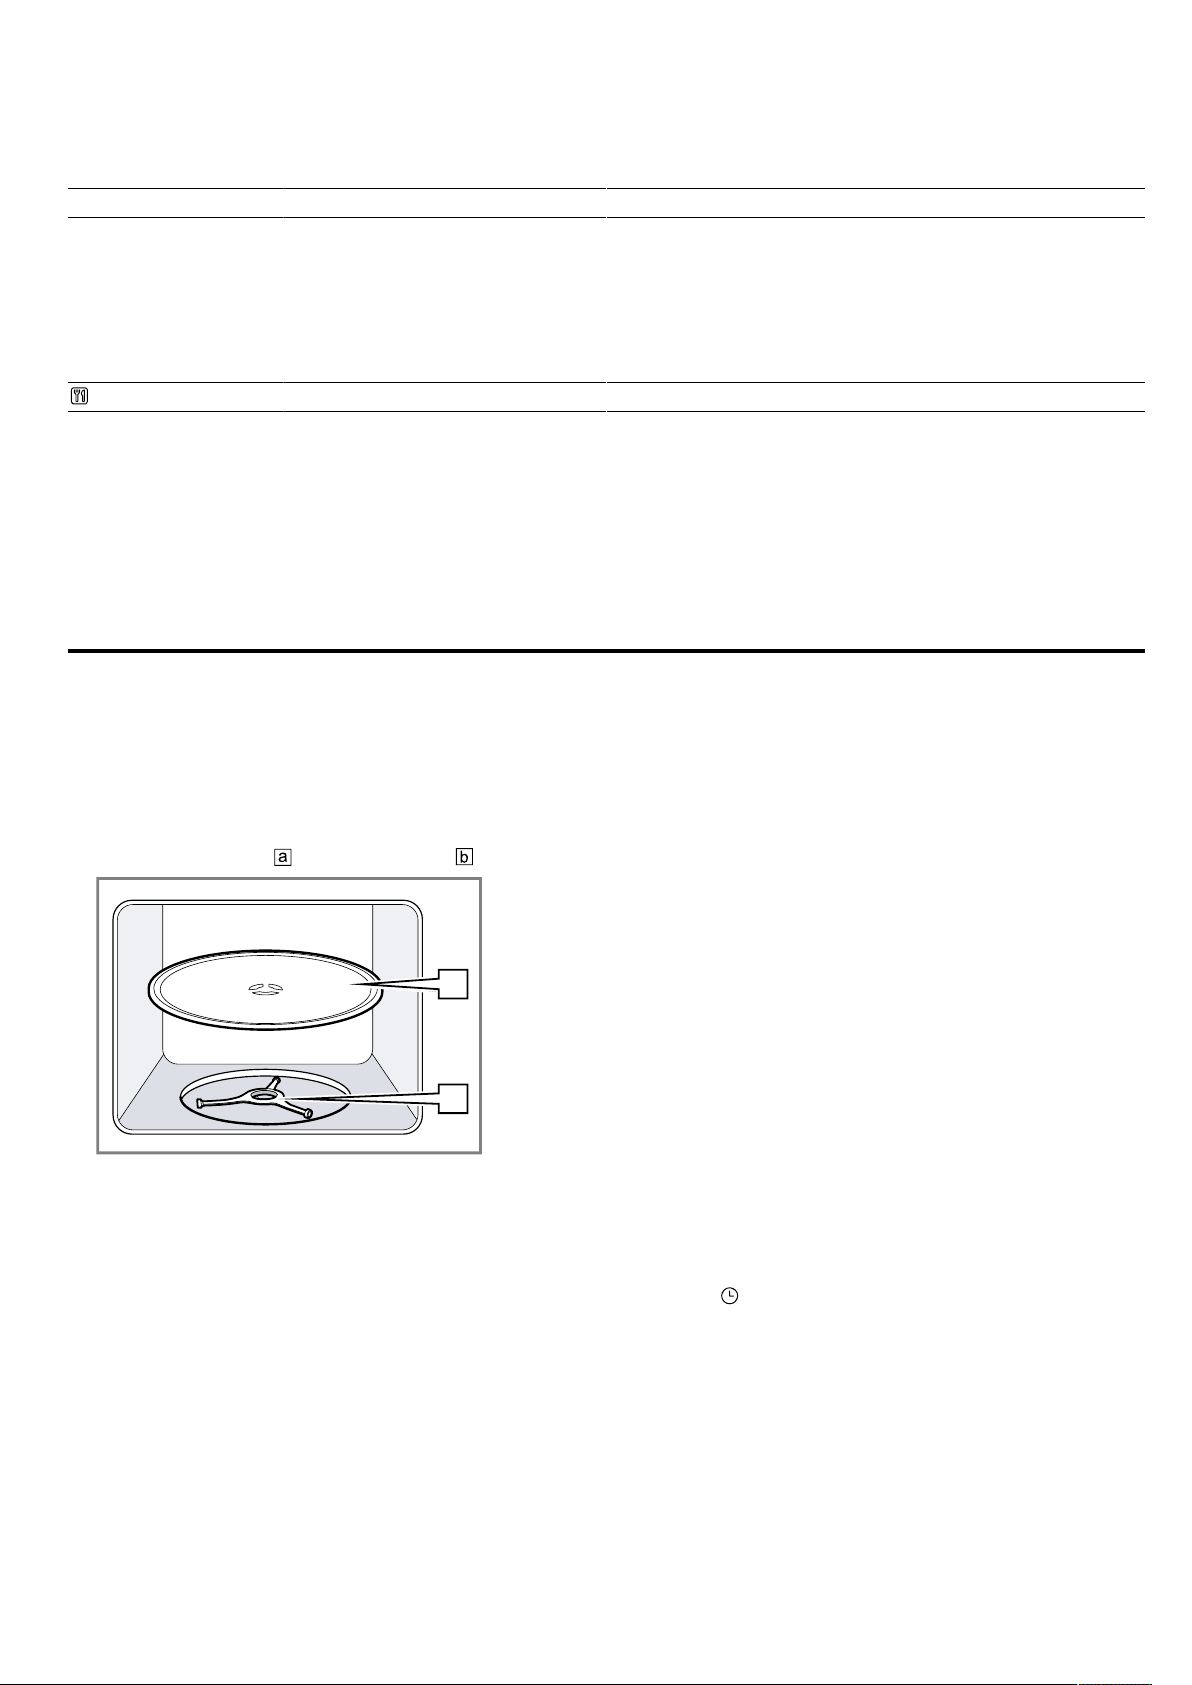
6.1 Fitting the turntable
Only use your appliance when the turntable is fitted.
▶
Place the turntable on the roller ring .
b
a
b
6.2 Cleaning the appliance before using it
for the first time
Clean the cooking compartment and accessories be-
fore using the appliance to prepare food for the first
time.
1.
Make sure that there is no leftover packaging, ac-
cessories or other objects in the cooking compart-
ment.
2.
Clean the smooth surfaces in the cooking compart-
ment with a soft, damp cloth.
3.
To eliminate the new-appliance smell, wipe the
empty cooking compartment with hot soapy water.
→"Cleaning the cooking compartment", Page13
6.3 Cleaning the accessories
▶
Clean the accessories thoroughly using soapy water
and a soft, damp cloth.
6.4 Setting the time
After connecting the appliance to the power supply or
following a power cut, the following prompt appears in
the display for the setting the time.
1.
Set the time using the rotary selector.
2.
Press to confirm the time.
Loading ...
Loading ...
Loading ...