Documents: Go to download!
User Manual
- User Manual - (English)
- Warranty - (English)

REFRIGERATOR USE
Opening and Closing Doors
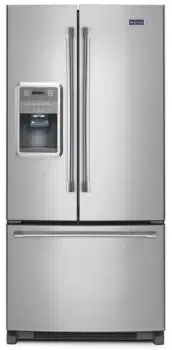
There are two refrigerator compartment doors. The doors can be opened and closed either separately or together. There is a vertically-hinged seal on the left refrigerator door.
■ When the left side door is opened, the hinged seal automatically folds inward so that it is out of the way.
■ When both doors are closed, the hinged seal automatically forms a seal between the two doors.
Using the Controls
The control center is located on the front of the ice and water dispenser.
Temperature Controls
For your convenience, your temperature controls are preset at the factory. When you first install your refrigerator, make sure the controls are still set to the recommended set points as shown.
IMPORTANT:
■ When the power is on, the temperature display shows the set point temperature of the compartment.
■ Wait 24 hours for your refrigerator to cool completely before adding food. If you add food before the refrigerator has cooled completely, your food may spoil.
NOTE: Adjusting the refrigerator and freezer temperature controls to a colder than recommended setting will not cool the compartments any faster.
■ The recommended settings should be correct for normal household refrigerator use. The controls are set correctly when milk or juice is as cold as you like and when ice cream is firm.
■ If the temperature is too warm or too cold in the refrigerator or freezer, first check the air vents to be sure they are not blocked before adjusting the controls.
Adjusting Controls
The REFRIGERATOR control adjusts the refrigerator compartment temperature. The FREEZER control adjusts the freezer compartment temperature. If you need to adjust the temperature in either the refrigerator or freezer compartment, use the settings listed in the chart as a guide.
To Adjust Set Point Temperatures:
The first touch of the up or down arrow touch pad displays the current temperature set point.
■ Press the up or down arrow touch pads until the desired temperature set point is displayed.
NOTE: Except when first turning on the refrigerator, do not adjust either temperature control more than one setting at a time. Wait 24 hours between adjustments for the temperature to stabilize.
- REFRIGERATOR too warm - REFRIGERATOR Control 1° lower
- FREEZER too warm/too little ice - FREEZER Control 1° lower
- REFRIGERATOR too cold - REFRIGERATOR Control 1° higher
- FREEZER too cold - FREEZER Control 1° higher
Cooling On/Off
IMPORTANT:
■ Depending on your model you may have a control center with an On/Off button (Style 1), or you may have a control center without an On/Off button (Style 2).
■ The On/Off control turns off cooling for both compartments and turns off the dispenser. It does not disconnect power to the refrigerator.
- Style 1 – Press and hold the On/Off button for 3 seconds. The red LED will light up to indicate that cooling is Off. Press On/Off again to turn cooling back on. The LED will turn off.
- Style 2 – Press the Freezer up arrow touch pad until OFF appears in the display. Neither compartment will cool. Press the Freezer or Refrigerator down arrow touch pad to turn cooling back on.
Additional Control Center Features
PowerCold™ Feature
The PowerCold™ feature assists with periods of high refrigerator use, full grocery loads, or temporarily warm room temperatures.
■ Press the POWERCOLD touch pad to set the freezer and refrigerator to the lowest temperature settings. Press the POWERCOLD touch pad again to return to the normal refrigerator set point.
NOTE: The PowerCold™ feature will automatically shut off in approximately 2 hours. When PowerCold™ is on, the temperature cannot be adjusted.
Humidity Control (on some models)
The Humidity Control feature turns on a heater to help reduce moisture on the door hinge seal. Use in humid environments or when you notice moisture on the door hinge seal. The refrigerator uses more energy when Humidity Control is on.
■ Press HUMIDITY CONTROL to turn on the door heater. Press Humidity Control again to turn off the heater. The LED will be illuminated when Humidity Control is on.
Temp Alarm
The Temp Alarm feature provides temperature information in the event of a power outage.
Power outage: During a power outage, if the temperatures in the refrigerator and freezer compartments exceed normal operating temperatures, the highest temperature reached will be displayed.
■ Press the TEMP ALARM touch pad until the indicator light is lit, to turn on this feature. Press and hold Temp Alarm for 3 seconds until the indicator light goes off to turn off this feature.
Temperature alarm: An alarm will sound repeatedly if the freezer or refrigerator compartment temperatures exceed normal operating temperatures for an hour or more. The temperature displays will alternately show the current temperatures and the highest temperatures the compartments reached.
■ Press the TEMP ALARM touch pad once to stop the audible alarm and alternating temperature displays. The Temp Alarm light will continue to flash until the refrigerator returns to the set temperature.
Door Alarm
The Door Alarm feature sounds a chime every few seconds when the refrigerator door has been left open for 5 continuous minutes. The chime will sound until the door is closed or Door Alarm is turned off.
■ Press the DOOR ALARM touch pad to turn this feature on or off. The indicator light will be lit when the Door Alarm feature is on.
Filter Reset
See “Water Filtration System.”
User Preferences
The control center allows you to set user preferences, if desired.
Temperature Display (F_C)
This preference allows you to change the temperature display.
- F - Temperature in degrees Fahrenheit
- C - Temperature in degrees Celsius
Alarm (AL)
This preference allows you to turn off the sound of all alarms.
- ON - You will hear the alarm sound.
- OFF - You will not hear the alarm sound.
Auto Light Level Selection (LL)
This preference allows you to adjust the dispenser light level from dimmest to brightest (settings 1 through 9).
NOTE: The Auto Light feature on the control center must be selected to activate this preference.
Sabbath Mode (SAB)
- ON - All control center lights, interior lights and alarm tones will be disabled.
- OFF - All control center lights, interior lights and alarm tones will be enabled.
NOTE: Press and hold the DOOR ALARM touch pad for 3 seconds to restore all lights.
To Access the User Preferences Menu:
1. Press and hold the Door Alarm touch pad for 3 seconds. The preference name will appear in the Freezer display and the preference status (F/C or ON/OFF) will appear in the Refrigerator display.
2. Use the Freezer up or down arrow touch pads to scroll through the preference names. When the desired preference name is displayed, press the Refrigerator up or down arrow touch pads to change the preference status.
3. Set your preferences by pressing and holding the DOOR ALARM touch pad for 3 seconds.
Crisper Humidity Control
You can control the amount of humidity in the moisture-sealed crisper. Depending on your model, adjust the control to any setting between FRUIT and VEGETABLES or LOW and HIGH.
- FRUIT/LOW (open) for best storage of fruits and vegetables with skins.
- VEGETABLES/HIGH (closed) for best storage of fresh, leafy vegetables.
Ice Maker and Ice Storage Bin
IMPORTANT:
■ Flush the water system before turning on the ice maker. See “Water and Ice Dispenser.”
■ The ice maker and storage bin are located in the upper lefthand side of the refrigerator compartment.
Turning the Ice Maker On/Off
The On/Off switch is located on the ice maker. To turn on the ice maker, press the switch to the ON position. To manually turn off the ice maker, press the switch to the OFF position.
NOTE: Your ice maker has an automatic shutoff. The ice maker sensors will automatically stop ice production, but the control will remain in the ON position.
Removing and Replacing Ice Storage Bin
To Remove the Ice Storage Bin:
1. Hold the base of the storage bin and press the release button on the lower right.
2. Pull the storage bin out until resistance is felt. Lift up the front of the ice bin and remove.
3. Press the switch to the OFF position To Replace the Ice Storage Bin:
IMPORTANT: It may be necessary to turn the auger driver, behind the ice bin, counterclockwise to properly align the ice bin with the auger driver. The ice storage bin must be locked in place for proper ice dispensing.
1. Press the switch to the ON position
2. Slide the ice bin into the guide rails located on either side of the enclosure.
3. Push the ice bin in until resistance is felt. Raise the front slightly and push the ice bin in until an audible “click” is heard.
Ice Production Rate
■ Allow 24 hours to produce the first batch of ice. Discard the first three batches of ice produced. Allow 3 days to completely fill the ice storage bin.
■ The ice maker should produce approximately 8 to 12 batches of ice in a 24-hour period.
■ To increase ice production, lower the freezer and refrigerator temperature. See “Using the Controls.” Wait 24 hours between adjustments.
Remember
■ The quality of your ice will be only as good as the quality of the water supplied to your ice maker. Avoid connecting the ice maker to a softened water supply. Water softener chemicals (such as salt) can damage parts of the ice maker and lead to poor quality ice. If a softened water supply cannot be avoided, make sure the water softener is operating properly and is well maintained.
■ Do not use anything sharp to break up the ice in the bin. This can cause damage to the ice bin and dispenser mechanism.
■ Do not store anything on top of the ice maker or in the ice storage bin.
See other models: MGC5430BDB YMED5640TQ0 MER8674AW0 MDB7100AWB MED3100DW0
