USER GUIDE AEG KDK911423T Vacuum Sealer Drawer
Safety of children and vulnerable adults
- This appliance can be used by children aged 8 years and above and persons with reduced physical, sensory or mental capabilities or lack of experience and knowledge only if they are given supervision or trained on how to use the appliance in a safe way and understand the hazards involved.
- Children should not play with the appliance.
- Keep packaging materials away from children.
- Keep children and pets away from the appliance during operation.
- Cleaning and maintenance should not be done by children without supervision.
- Children under the age of 3 years must be ket away unless constantly supervised.
Warnings on general safety
- Only qualified personnel can install the appliance and replace the cables.
- Disconnect the appliance from the power supply before carrying out any maintenance operation.
- Do not use steam cleaners to clean the appliance.
- Do not use abrasive detergents or metal scrapers to clean the appliance.
- If the power cord is damaged it must be replaced by the manufacturer, by an authorised technician or by a qualified person to prevent hazardous situations.
SAFETY INSTRUCTIONS
Installation
- Remove the packaging material.
- Do not install or use the appliance if damaged.
- Comply with the instructions supplied with the appliance.
- Always pay attention when moving the appliance. Always wear safety gloves.
- Do not turn the appliance upside down or tilt it! This may cause oil to leak from the pump and damage the equipment.
- Respect the minimum distance from other appliances.
- Make sure the appliance is installed and secured to a fixed structure.
- The sides of the appliance must be adjacent to other equipment or units having the same height.
- Use only suitable isolation devices: circuit breakers, fuses (screw type fuses must be removed from the fuse holder), earth fault current releases and relays.
- The electric system must be equipped with an isolation device that allows you to disconnect the appliance from the mains at every pole. The isolation device must have a contact opening width of a minimum 3 mm.
- This appliance complies with the EEC directives.
Electrical connection
- Make sure that all the electrical data shown on the data plate correspond to those of the system. Otherwise, contact an electrician.
- Always use an electrical outlet with a correctly installed protective contact.
- Do not use multi-plug adapters or extension cables.
- Make sure not to dam
- All the electrical connections must be made by a qualified electrician.
- The age the mains plug and the mains cable. If the power cable must be replaced, this should be carried out by our Assistance Centre.
- Shock protection devices must be fastened in such a way that they cannot be removed without tools.
- Connect the mains plug to the mains socket only once installation has been completed.
- Do not connect the mains plug if the mains socket is loose.
- Do not pull the mains cable to disconnect the appliance. Pull only the mains plug.
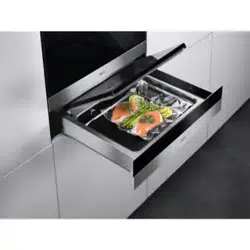
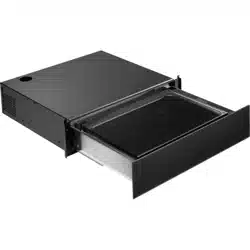
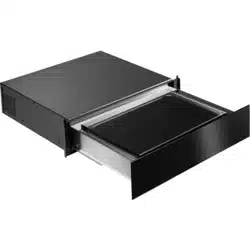
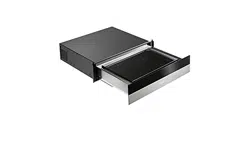
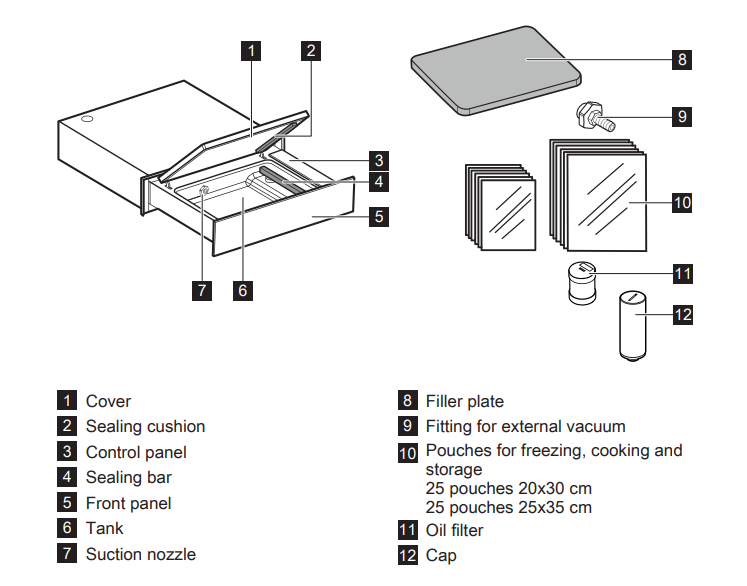
PRODUCT DESCRIPTION
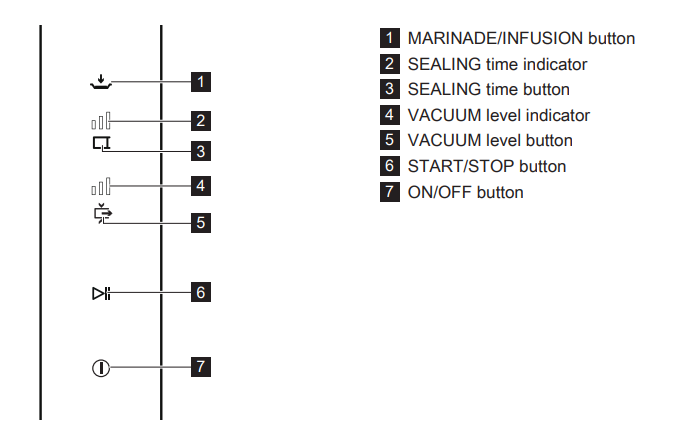
CONTROL PANEL
BEFORE USING FOR THE FIRST TIME
First use
- Turn the appliance on by holding down the button for at least 1 second
- If only the button starts flashing, run the release procedure (see installation instructions - phase 13). Otherwise run an oil reconditioning cycle as stated in par. 6.6.
Cleaning for the first time
- Refer to the “CLEANING AND
- MAINTENANCE” chapter.
- Wipe all parts with a damp cloth before the first use.
DAILY USE
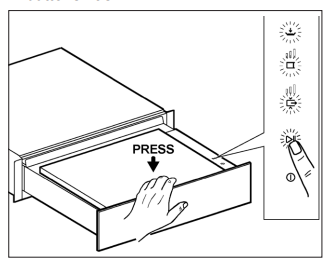
Open the drawer completely.
- Turn the appliance on by holding down the button for at least 1 second.
- If necessary, modify the vacuum level and the sealing time.
- Lift the cover and place the pouch containing the food to be packed inside the tank, leaving at least 2 cm beyond the sealing bar.
- It is important not to soil the pouch in the sealing area so as to guarantee a perfect seal. For this reason it is advisable to fold the inner side of the pouch outwards by 4-5 cm. Once the food is inserted, fold the pouch again in its initial condition.
- For small products, use the supplied filler plate, as it helps position the pouch in the correct position with respect to the sealing bar.
- Close the cover with light pressure and press the button which begins to flash. The packaging cycle will then start.
- The button stops flashing at the end of this cycle.
Open the cover and remove the pouch.
- Do not touch the sealing bar after use. Residual heat can cause burns.
- Turn the appliance off while holding down the button.
Liquid food
- If the button is pressed during operation, the cycle stops and the pouch is immediately sealed. This procedure must be used for packing liquid products, which may boil during the vacuum cycle.
- Note: Periodically, the appliance automatically performs a reconditioning cycle (see par. during which the and buttons flash.
- Allow the cycle to run without intervening on the appliance until the 2 buttons will stop flashing.
- sing the pouches
- The pouches provided are ideal for freezing, storage and cooking vacuum packed food at low temperatures.
- Pouches order code: 902979704 pouches for freezing, vacuum cooking and storage pieces, dimensions: 20x30 cm + 25 pieces, dimensions: 25x35 cm)
- Pouches order code: 9029794014 pouches for vacuum cooking and storage pieces, dimensions: 20x30 cm + 25 pieces, dimensions: 25x35 cm)
- It is recommended to use original pouches. www.aeg.com/shop
- Vacuum food packaging for “SousVide” low temperature cooking
- With this method, the food sealed in the vacuum pouch is then cooked slowly at low temperature.
The benefits provided are many:
- The flavour and texture remains unaltered.
- Both flavour and aromas are preserved, as the cooking process does not disperse them.
- The reduced loss of liquid makes the food softer and moister.
- Nutrients are preserved.
- You don’t need to add oils or fats for cooking.
- Vacuum packaging for food preservation
- Vacuum packing extends food preservation.
- If you wish to vacuum pack freshly cooked food, it must first be chilled, possibly using a blast chiller.
Marinades/infusion
- Place the food with the marinade in a generic pan/dish.
- Turn the appliance on by holding down the button for at least 1 second.
- Lift the cover and place the pan in the tank.
- Press the button, which will start to flash.
- Close the cover with light pressure.
- Press the button to start the marinade cycle. This button will start to flash.
- This button will stop flashing once the marinating cycle is completed.
- The cover can then be opened and the pan removed.
- The marinating and infusion cycle has a preset time of 8 minutes.
- Increase the infusion and repeat the cycle.
- This infusion can be deactivated at any time by pressing the button.
- You can marinate food directly in the pouch.
- In this case, set the relevant vacuum level.
Additional functions
- “Airtight sealing of glass jars” This is the function for the airtight sealing of glass jars to be used for jar-cooking or for increasing the shelf-life of the product (jars not provided with this appliance).
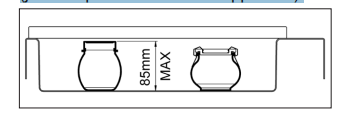
Set the maximum vacuum level and disable the sealing
• Close the jar with slight pressure and put it in the tank, close the cover exerting slight pressure, and press the button which will start to flash. The packaging cycle will then start.
• The button stops flashing at the end of this cycle
Reconditioning cycle
- This function is used in the following situations:
- Before using the appliance for the first time.
- After extensive downtime.
- After having sealed products with high humidity content (e.g. soups).
- When you notice a decrease in appliance performance (e.g. more time to vacuum or it does not vacuum at all).
- This program lasts about 15 minutes and guarantees the complete cleaning of the pump, removing any liquid emulsion that might be found in the oil.
- Do not seal any product while this program is running.
• Close the cover with light pressure.
• Press the button. The and buttons flash while the program runs.
• At the end of the cycle (15 minutes) the button will stop flashing and the appliance will be ready for use.
CLEANING AND MAINTENANCE
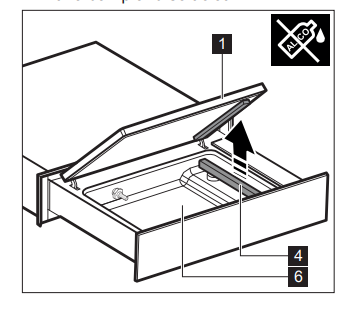
- Clean the Plexiglas cover 1 inside and out using only neutral detergents water and soap).
- Do not use abrasive products, alcoholbased detergents, abrasive sponges, solvents or metal objects.
- Follow the safety instructions indicated on the packaging when using products to clean the steel tank 6 .
- Clean the tank 6 , especially in the case of residue liquid, it is advisable to remove the sealing bar 4 upwards.
- Clean the sealing bar 4 with a dry cloth. Remove any residue that deposits on the bar.
- Clean the metal surfaces using normal detergents suitable for stainless steel.
- Keep the control panel clean and dry.
TROUBLESHOOTING
The pouch is not sealed correctly.
The sealing time is not correct.
The cover gasket is dirty or worn.
- Clean or replace the cover gasket (contact the Technical Assistance Service for a replacement).
The pouch is not placed correctly on the sealing bar.
- Position the pouch correctly.
The sealing bar is worn (the Teflon coating is burnt).
- Replace the sealing bar (contact the Technical Assistance Service for a replacement).
The blade placed under the Teflon of the sealing bar is broken.
- Replace the blade (contact the Technical Assistance Service for a replacement).
Final vacuum is poor.
The set vacuum level is not correct.
The cover gasket is dirty or worn.
- Clean or replace the cover gasket (contact the Technical Assistance Service for a replacement).
The cover is not closed correctly.
- Close the cover correctly.
Make sure that objects or dirt are not found between the cover and tank.
- Impurities contained in the pump oil. Run an oil “reconditioning cycle” (see par. 6.6).
The cover does not open.
No power supply.
- Wait until the power supply is restored.
The machine turns off and the pump activates automatically after the cover is closed
The oil reconditioning program has been automatically activated (see par. 6.6). Wait for the end of the “reconditioning cycle” (15 minutes).
- Assistance Data If it is not possible to find a solution to the problem, contact the authorised Assistance Centre.
- The information required for the Assistance Centre is found on the data plate on the left side of the appliance. Do not remove the data plate
WARRANTY
- In this warranty ‘acceptable quality’ as referred to in clause 10 of this warranty has the same meaning referred to in the ACL; ‘ACL’ means Schedule 2 to the Competition and Consumer Act ‘Appliance’ means any AEG product purchased by you and accompanied by this document; ‘ASC’ means AEG authorised service centres; AEG is the brand controlled by Electrolux Home Products Pty Ltd of 163 O’Riordan Street, Mascot NSW 2020,
- ABN 51 004 762 341 in respect of Appliances purchased in
- Australia and Electrolux (NZ)
- Limited (collectively ‘Electrolux’) of 3-5 Niall Burgess Road,
- Mount Wellington, in respect of Appliances purchased in New Zealand;) ‘major failure’ as referred to in clause 10 of this warranty has the same meaning referred to in the ACL and includes a situation when an Appliance cannot be repaired or it is uneconomic for Electrolux, at its discretion, to repair an
- Appliance during the Warranty Period;
ENVIRONMENTAL CONSIDERATIONS .
- Recycle materials that carry this symbol .
- Dispose of the packaging in special containers for recycling. Help protect the environment and human health and recycle waste deriving from electric and electronic devices.
- Do not dispose of appliances that carry this symbol together with domestic waste. Return the product to your local recycling facility or contact your municipal office.