Loading ...
Loading ...
Loading ...
A39990,RK-J40W,J40K,J40S,J90S o/m
ENGLISH
DEUTSCH
FRANÇAIS
ESPAÑOL
5
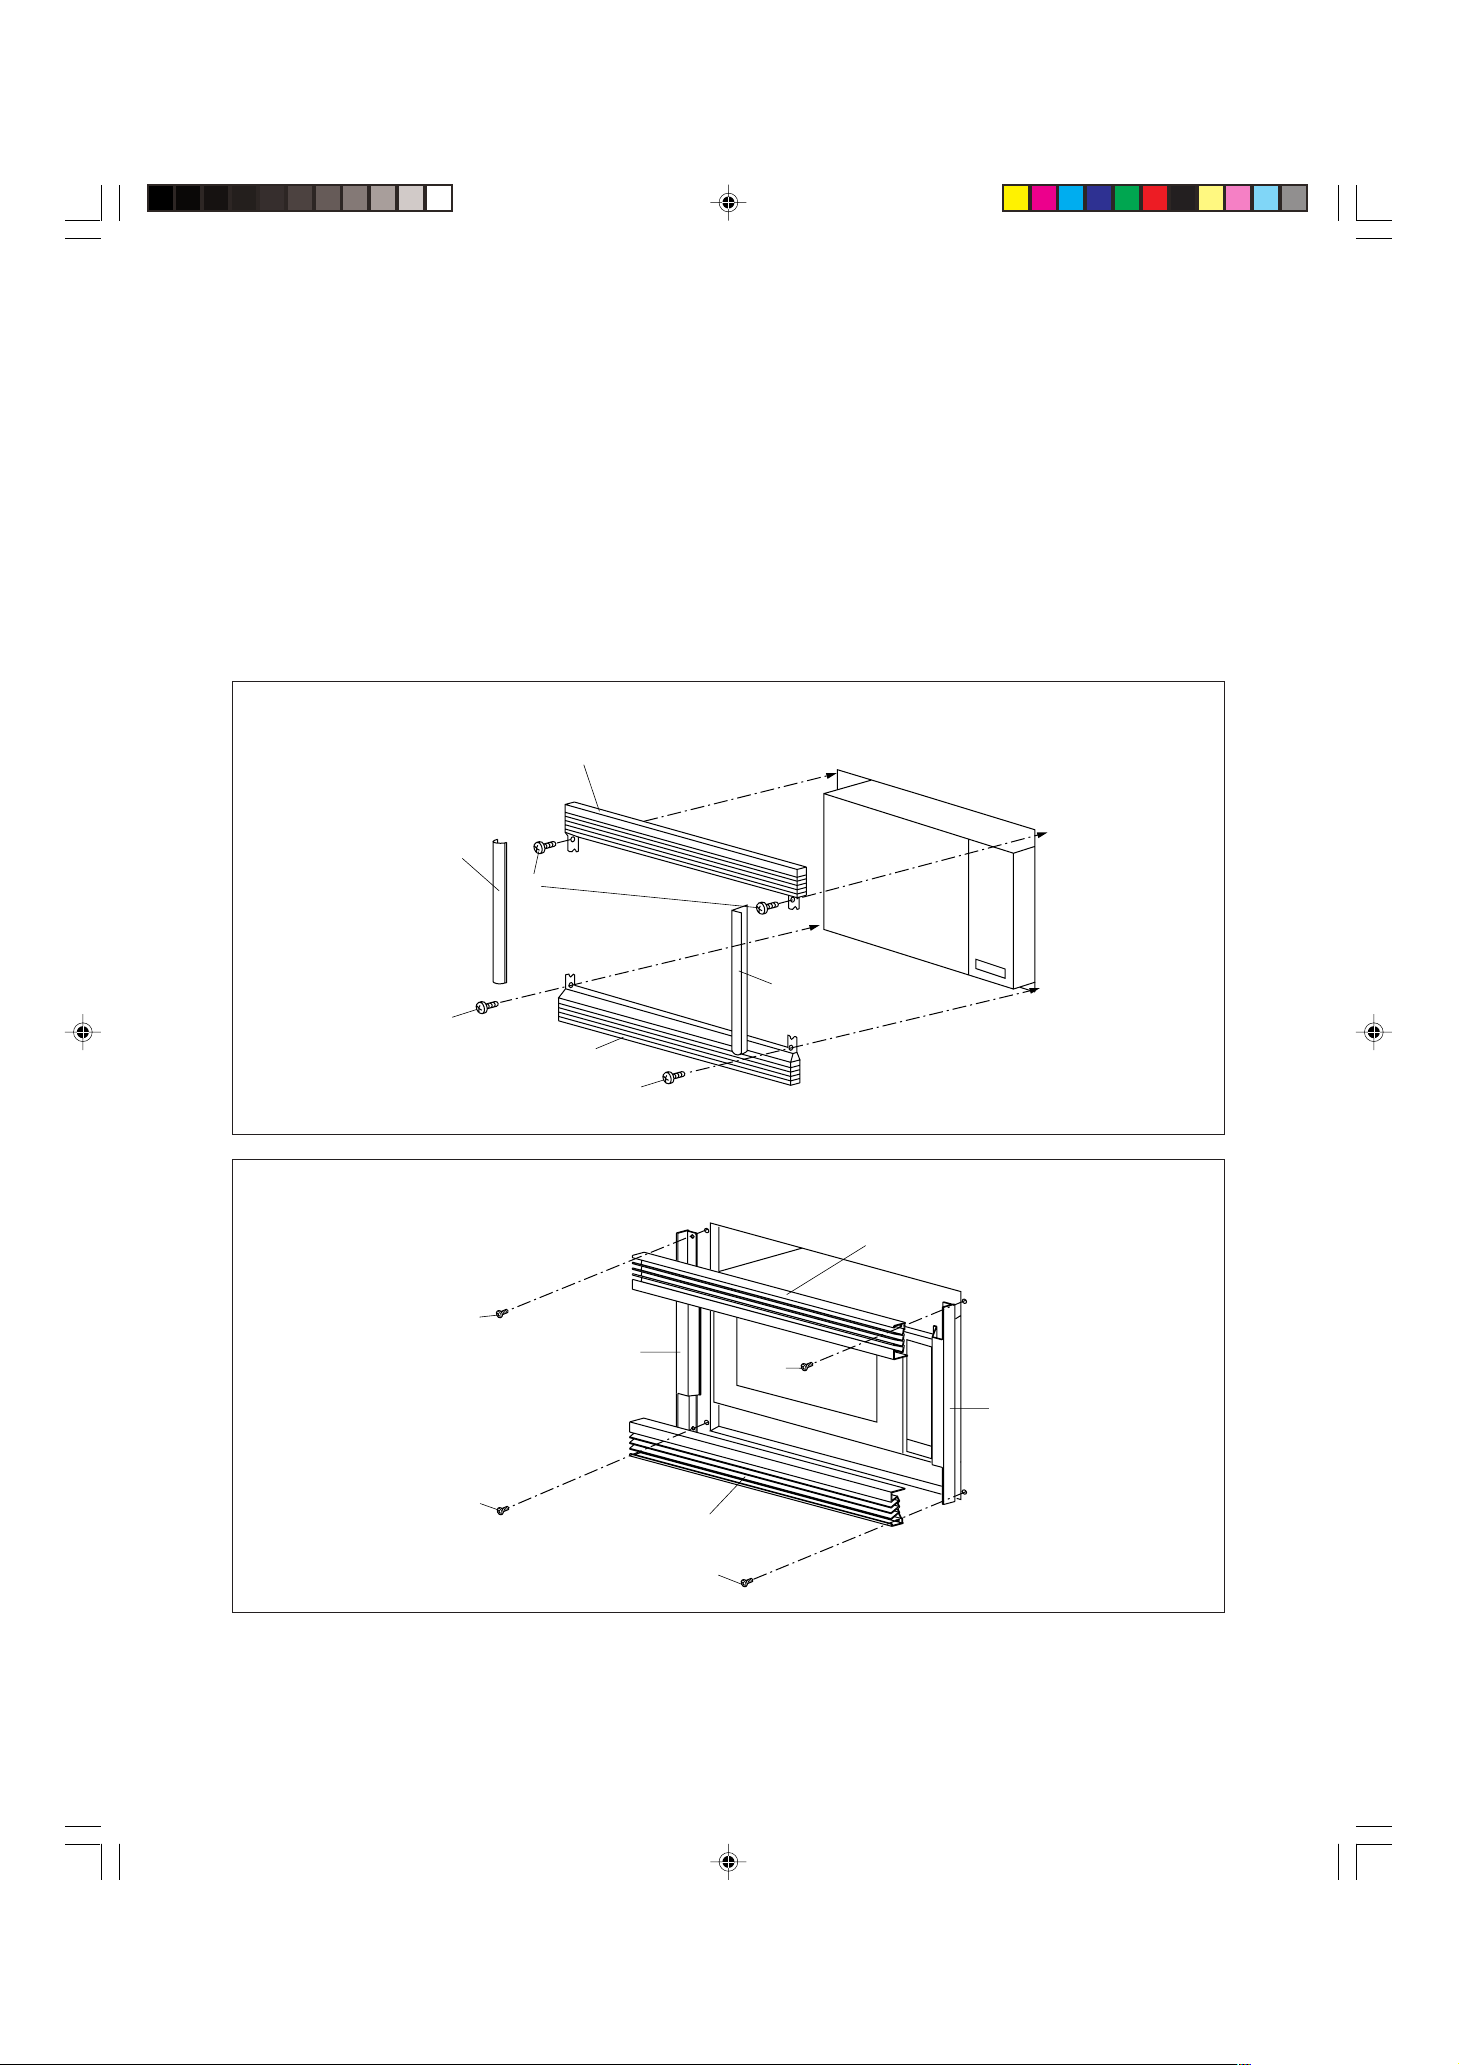
9. (For RK-J40W, RK-J40K) Place the sash 5 on top of the oven making sure that it is level both vertically
and horizontally. Secure to the kitchen cabinet with two screws 8 as shown in Fig. 5.
(For RK-J40S, RK-J90W, RK-J90S) Place the sash 5 over the sashes 6 on top of the oven making sure
that it is level both vertically and horizontally. Secure loosely to the kitchen cabinet with two screws 8
as shown in Fig. 5.
10. (For RK-J40W, RK-J40K) Place the second sash 5 at bottom edge of the oven. Check location by
measuring distance between upper and lower sashes 5 with each sashes 6. Secure to the kitchen
cabinet with two screws 8 as shown in Fig. 5. And then install two sashes 6 by snapping them into place
as shown in Fig. 5.
(For RK-J40S, RK-J90W, RK-J90S) Install the second sash 5 over the sashes 6 at bottom edge of the
oven. And secure the sash 5 to the cabinet through the holes of the sashes 6 with two screws 8 as
shown in Fig. 5. And tighten all screws.
Fig. 5 for RK-J40S, RK-J90W, RK-J90S
8
8
6
6
8
5
5
Fig. 5 for RK-J40W, RK-J40K
6
6
5
5
8
8
8
8
RK-J40W 04.6.23, 2:17 PM5
Loading ...