A39990,RK-J40W,J40K,J40S,J90S o/m
ENGLISH
DEUTSCH
FRANÇAIS
ESPAÑOL
1
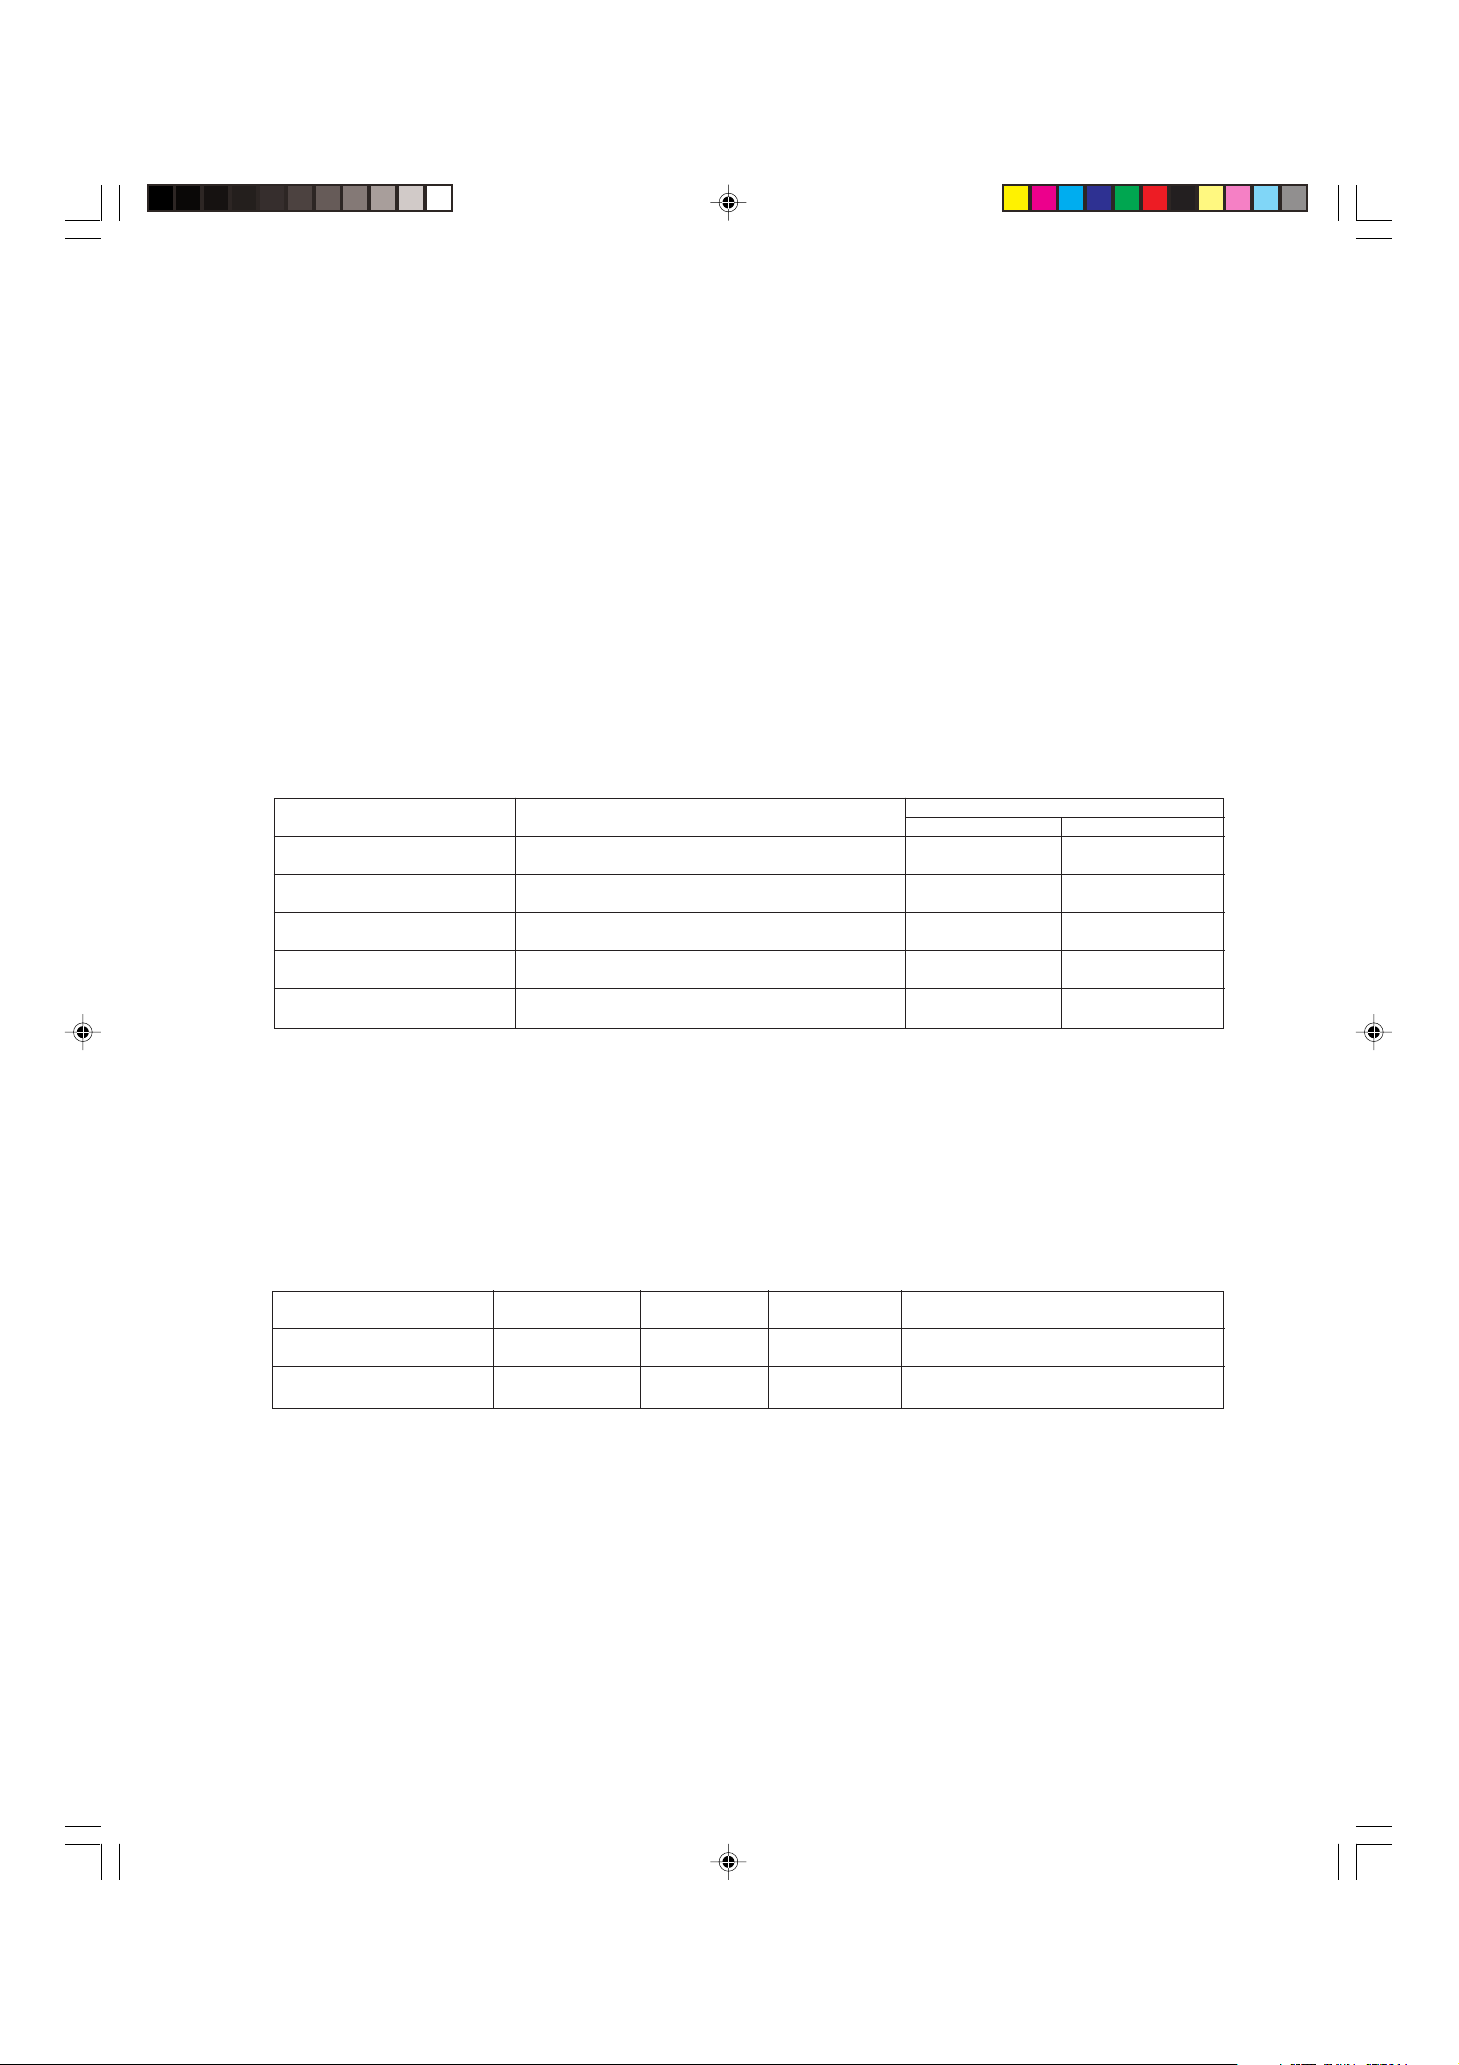
Sharp Built-in Kit Model Applicable Sharp Microwave Ovens
RK-J40W
R-450C, R-480C, R-480E, R-480F, R-450H, R-480J
596mm 446mm
RK-J40K R-480C(K), R-480E(K) 596mm 446mm
RK-J40S R-490C(S), R-490F(S) 596mm 445mm
RK-J90W
R-980A, R-9X58, R-980E, R-995E, R-980J, R-995J
758mm 511mm
RK-J90S R-990C(S), R-990J(S) 758mm 511mm
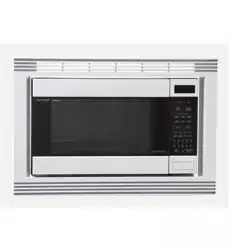
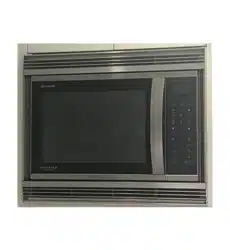
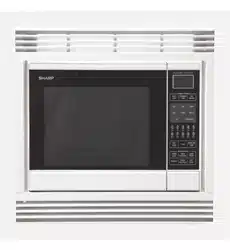
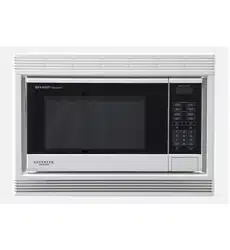
Installation Instructions for SHARP Built-in Kits
model number RK-J40W/RK-J40K/RK-J40S/RK-J90W/RK-J90S
Before installing a Sharp Microwave Oven, read and check the following points.
SAFETY INFORMATION
1. Disconnect the oven from the power supply before installation.
2. To avoid damage caused by heat, do not install directly adjacent to a conventional oven (in particular
front venting ovens). The manufacture nor the distributors can accept liability for damage to the
microwave oven or built-in kit caused by incorrect installation.
3. Surround
a. Make sure that the Sharp Built-in Kit is the correct surround for your oven.
b. The Sharp Microwave Ovens are designed to either stand neatly on a kitchen counter top or to be built
into a fitted kitchen cabinet using the Sharp Built-in Kits only. Applicable Sharp Microwave Ovens are
listed below.
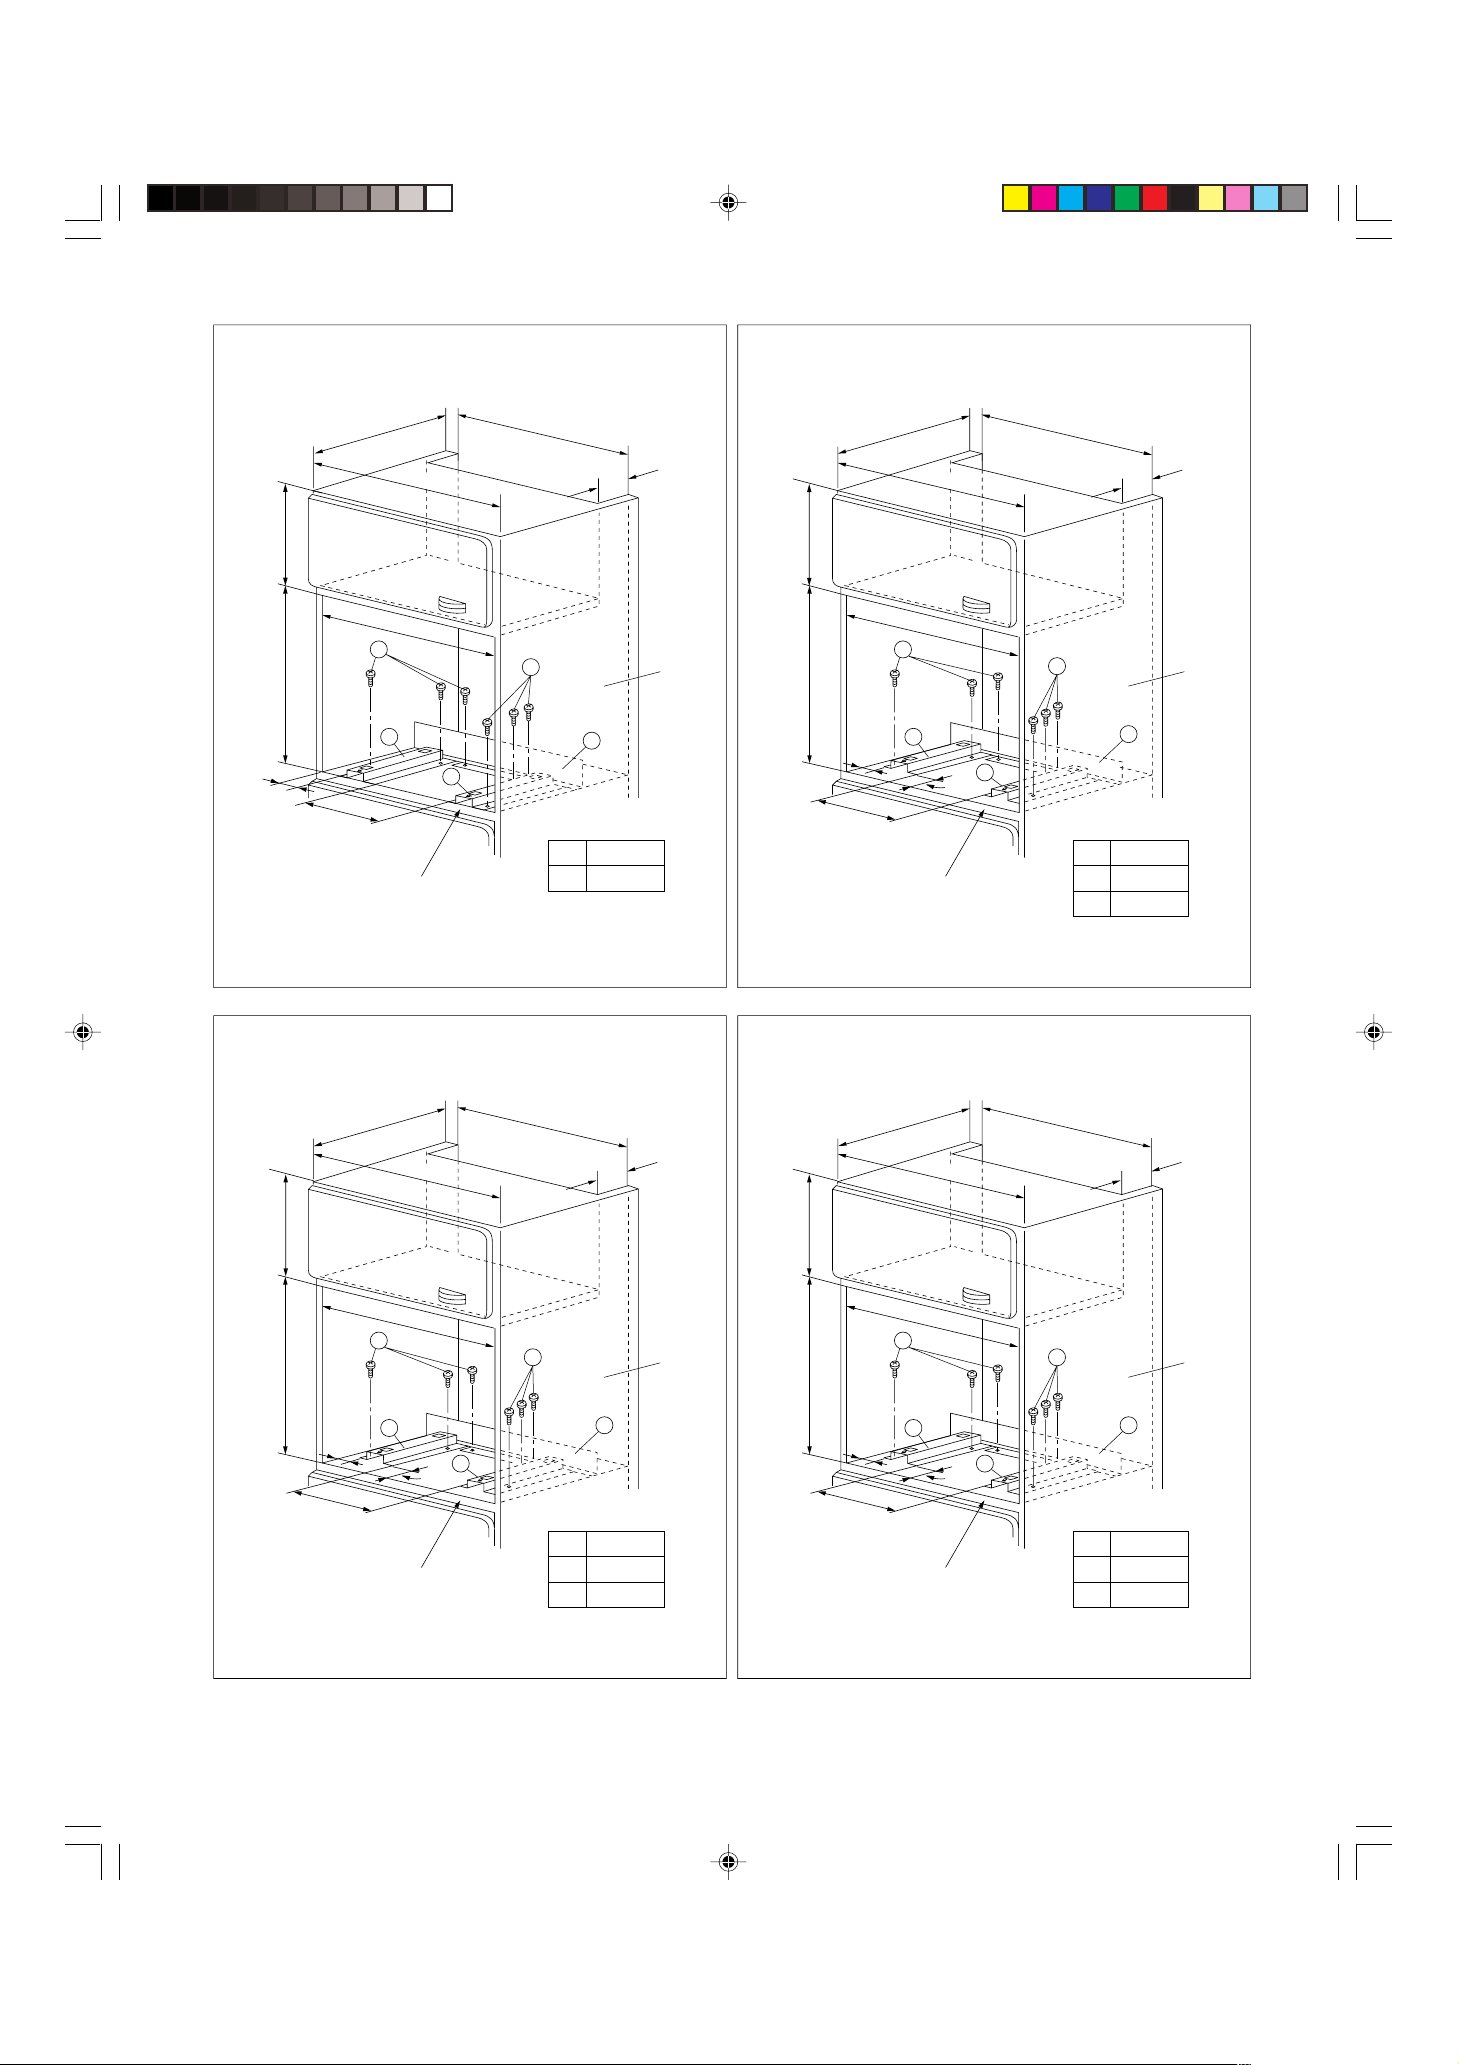
b. Make sure that the back panel (F) is always fitted to ensure correct ventilation of the oven. The
ventilation gap (D) must be 50 mm (RK-J90W, RK-J90S) or 100 mm (RK-J40W, RK-J40K, RK-J40S) as
shown in Fig. 1 and Fig. 4.
And the ventilation gap (E) must be minimum 550mm (RK-J40W, RK-J40K, RK-J40S) or 710mm (RK-
J90W, RK-J90S) as shown in Fig. 1.
5. Fixing
To avoid any possibility of the kitchen cabinet moving when the microwave oven is installed, it is
essential that the kitchen cabinet is fixed to the back wall.
If the appliance is ever removed from the cabinet it should be re-installed in accordance with these
instructions, which should be kept in a safe place for future reference.
Sharp Built-in Kit Model WIDTH HEIGHT DEPTH Applicable oven weight
RK-J40W/J40K/J40S 560-564mm 419mm 455mm (min.)
Approx. 19 kg (R-490C(S)/R-490F(S): 20 kg)
RK-J90W/J90S 714.5-720.5mm 479.5-482mm 511mm (min.)
Approx. 29 kg (R-9X58/R-995E/R-995J: 31 kg)
c. (Note for RK-J90W, RK-J90S) The surround will get hot while the convection heater is operating.
Take care to prevent burns when you use the oven.
4. Kitchen cabinet
Prepare the kitchen cabinet as follows;
a. The opening in the kitchen cabinet must be of the following dimensions as shown in Fig. 1.
The shelf of the kitchen cabinet should be made to withstand the weight of the microwave oven to
be installed and the heaviest item likely to be cooked in the microwave oven. Refer to the following
Sharp microwave oven weight.
Built-in kit surround dimensions
WIDTH
HEIGHT
RK-J40W 04.6.23, 2:17 PM1
A39990,RK-J40W,J40K,J40S,J90S o/m
2
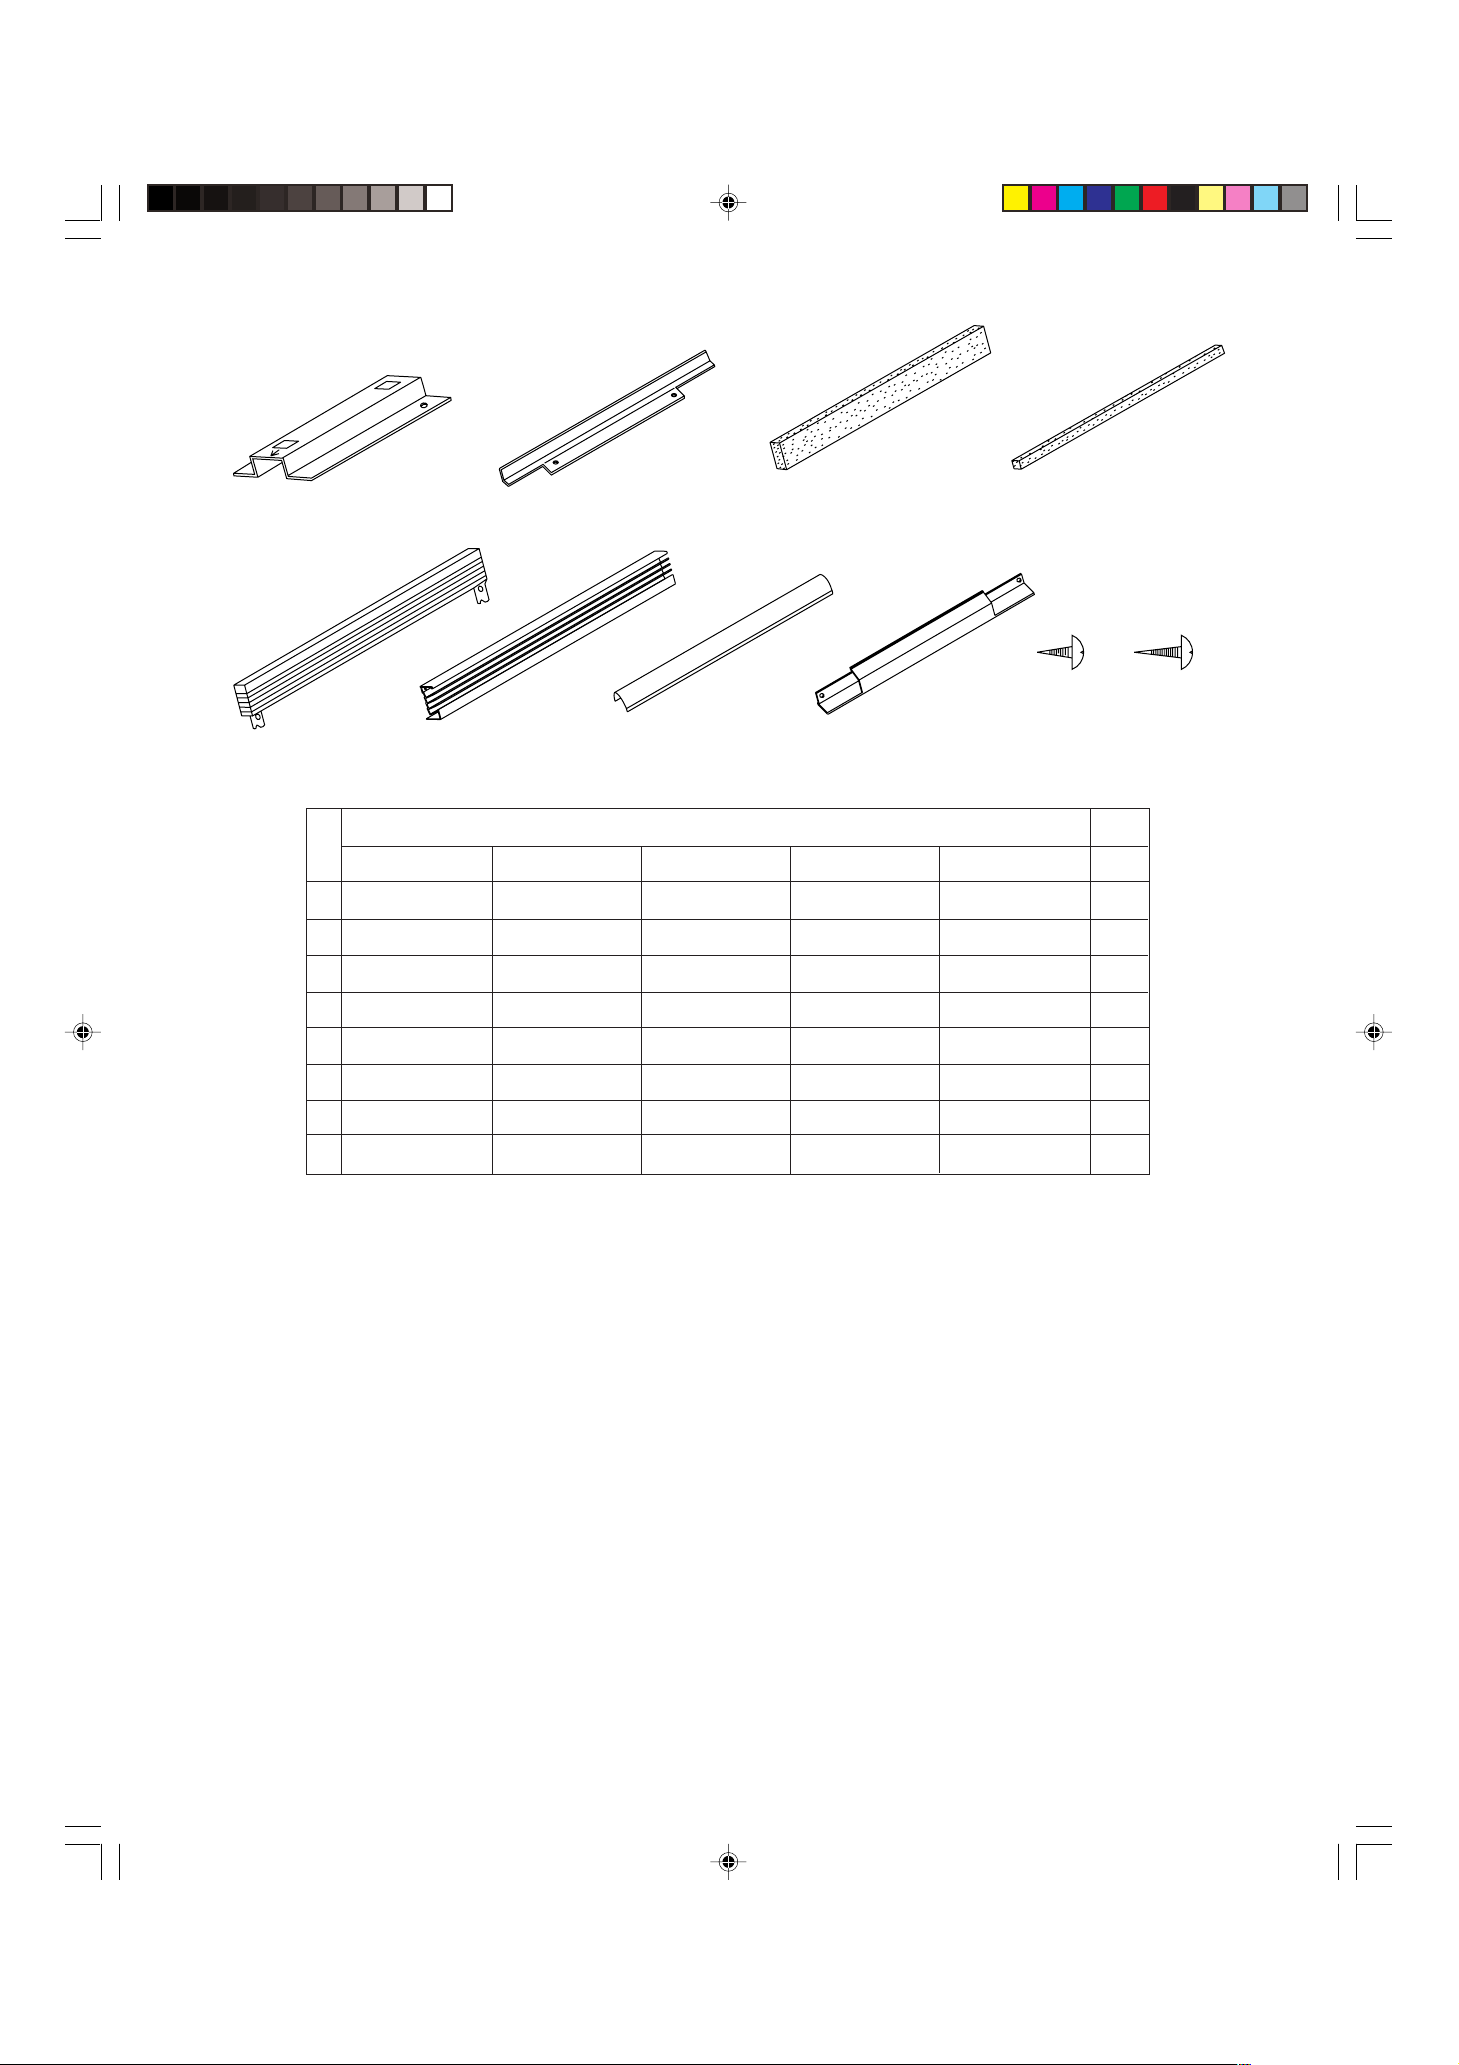
PROVIDED PARTS
8
SCREW
(LONG)
INSTALLATION INSTRUCTIONS
1.
Provide a suitable hole in the right side wall of the kitchen cabinet behind the partition angle 2 for the power supply
cord and plug. If you want to have a hole in the left wall of the cabinet, the hole should be provided down the wall.
2. Set one spacing bracket 1 on the shelf keeping a distance (A) between the left wall of the kitchen cabinet and
the spacing bracket, and a distance (B) between the front end of the shelf and the spacing bracket as shown
in Fig. 1. Attach it with the two screws 7 as shown in Fig. 1. And then attach the other spacing bracket 1 on
the shelf keeping a distance (C) between the two spacing brackets, and a distance (B) between the front end
of the shelf and the spacing bracket with two screws 7 as shown in Fig. 1.
Caution: The arrow marks on each spacing bracket should be pointing towards you.
3. Place the partition angle 2 at the end of the spacing brackets 1, and attach it with the two screws 7 as shown
in Fig. 1.
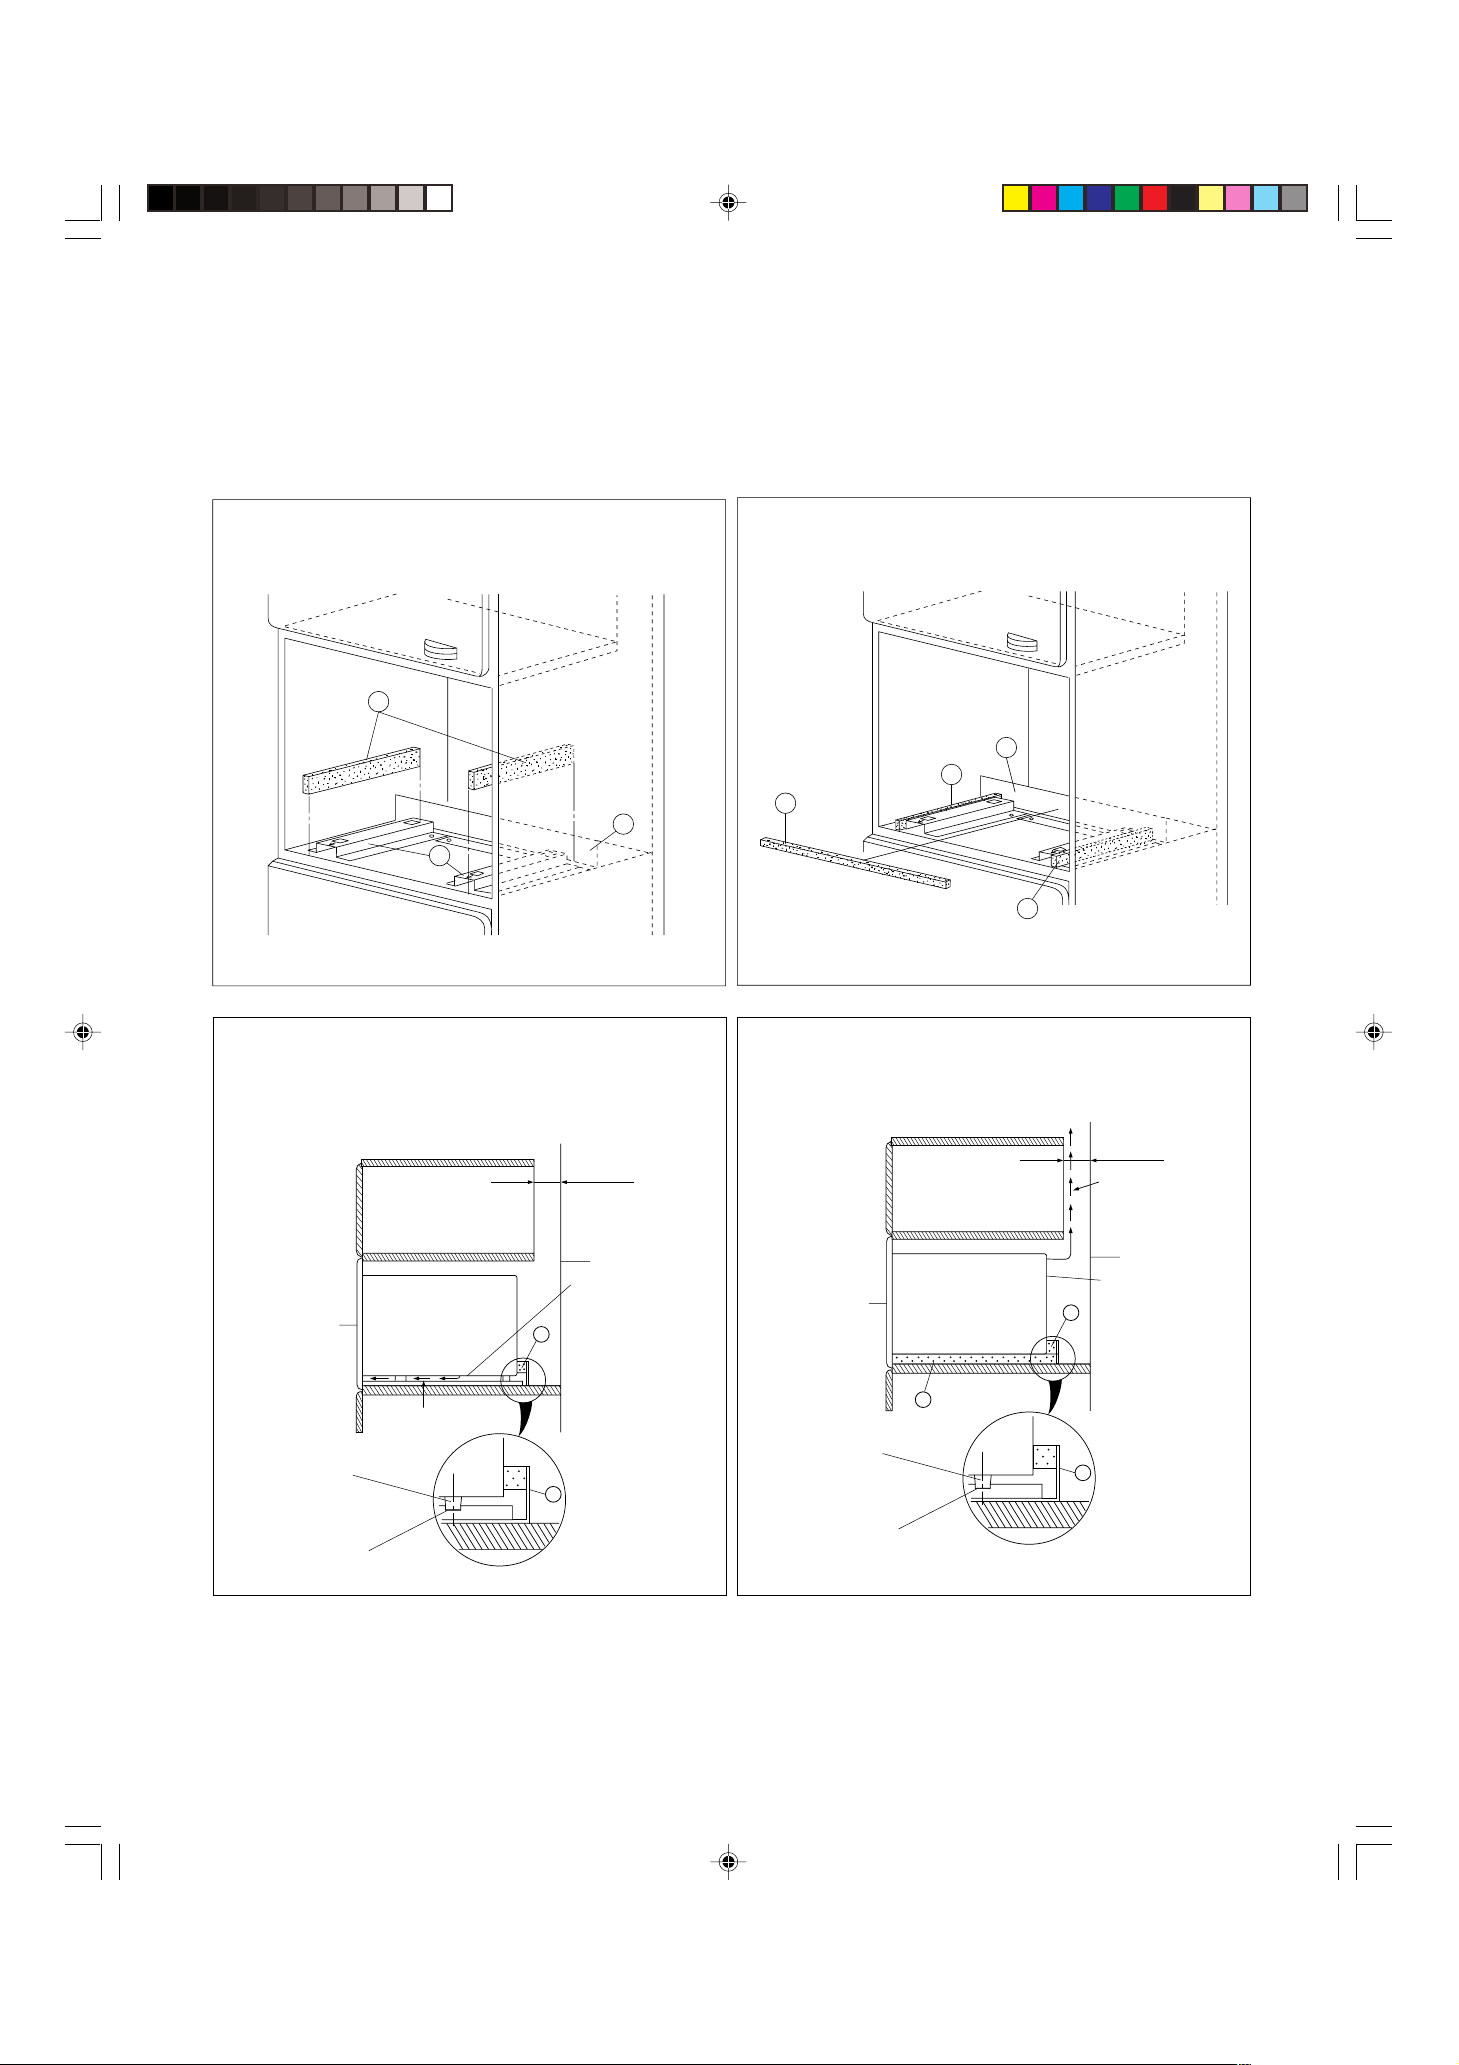
4. Remove the backing papers from the two cushions 3. Attach the cushions 3 along the spacing brackets
1 from the front end of the shelf as shown in Fig. 2.
5. Remove the backing paper from the cushion 4. Attach the cushion 4 to the partition angle 2 as shown
in Fig. 3 and Fig. 4.
7
SCREW
(SHORT)
1
SPACING BRACKET
2
PARTITION ANGLE
3
CUSHION (SIDE)
4
CUSHION (BACK)
RK-J40W
LANGKA931WRWZ
LANGKA930WRWZ
PCUSUA537WRPZ
PCUSUA536WRPZ
GWAKPA177WRF0
GWAKPA707WRFZ
XMMSD41P13000
XMMSD41P20000
PART NUMBER
RK-J40K
LANGKA931WRWZ
LANGKA930WRWZ
PCUSUA537WRPZ
PCUSUA536WRPZ
GWAKPA175WRF0
GWAKPA708WRFZ
XMMSD41P13000
XMMSD41P20000
RK-J40S
LANGKA931WRWZ
LANGKA930WRWZ
PCUSUA537WRPZ
PCUSUA536WRPZ
GWAKMA037WREZ
GWAKMA045WREZ
XMMSD41P13000
XMMSE41P20000
RK-J90W
LANGKA931WRWZ
LANGKA932WRWZ
PCUSUA534WRPZ
PCUSUA535WRPZ
GWAKMA035WREZ
GWAKMA036WREZ
XMMSD41P13000
LX-MZA002WREZ
RK-J90S
LANGKA931WRWZ
LANGKA932WRWZ
PCUSUA534WRPZ
PCUSUA535WRPZ
GWAKMA048WREZ
GWAKMA046WREZ
XMMSD41P13000
XMMSE41P20000
NO.
1
2
3
4
5
6
7
8
Q'TY
2
1
2
1
2
2
6
4
5
SASH
(for RK-J40S,
RK-J90W,RK-J90S)
5
SASH
(for RK-J40W,
RK-J40K)
6
SASH (SIDE)
(for RK-J40W,
RK-J40K)
6
SASH (SIDE)
(for RK-J40S,
RK-J90W,RK-J90S)
RK-J40W 04.6.23, 2:17 PM2
A39990,RK-J40W,J40K,J40S,J90S o/m
ENGLISH
DEUTSCH
FRANÇAIS
ESPAÑOL
3
100 mm
600mm
(E): 550mm (min.)
455mm (min.)
560~564mm
(D)
7
1
2
7
Fig. 1 for RK-J40W, RK-J40K
419mm
500mm (max.)
1
Shelf of kitchen cabinet
* (B) is not necessary for
RK-J40W, RK-J40K.
(A)
(C)
(F)
600mm
560~564mm
7
1
2
7
Fig. 1 for RK-J40S
419mm
1
Shelf of kitchen cabinet
(A)
(C)
(B)
(F)
(A) 2mm
(B) 11mm
(C) 356.5mm
(A) 2mm
(C) 356.5mm
760mm
714.5~720.5mm
7
1
2
7
1
Shelf of kitchen cabinet
(A)
(C)
(B)
(F)
760mm
7
1
2
7
1
Shelf of kitchen cabinet
(A)
(C)
(B)
(F)
Fig. 1 for RK-J90S
(A) 75.5mm
(B) 31mm
(C) 367mm
714.5~720.5mm
Fig. 1 for RK-J90W
479.5~482mm
479.5~482mm
(A) 75.5mm
(B) 26mm
(C) 367mm
100 mm
(E): 550mm (min.)
455mm (min.)
(D)
50 mm
(E): 710mm (min.)
511mm (min.)
(D)
50 mm
(E): 710mm (min.)
511mm (min.)
(D)
500mm (max.)500mm (max.)
500mm (max.)
RK-J40W 04.6.23, 2:17 PM3
A39990,RK-J40W,J40K,J40S,J90S o/m
4
1
Fig. 2
3
2
10
4
(D)
(F)
50mm
4
Fig. 4 for RK-J90W, RK-J90S
Foot
Recess
Air vent openings
Built-in frame
(Complete)
Microwave Oven
Exhaust air
*This picture does
not include the
cushion 3 for
your reference.
(D)
(F)
100mm
4
Fig. 4 for RK-J40W, RK-J40K, RK-J40S
(Note: This picture does not include the cushion 3
for your reference.)
Foot
Recess
Air vent openings
Built-in frame
(Complete)
Microwave Oven
3
Exhaust air
2
2
6. Place the oven on the spacing brackets 1 on the shelf of the kitchen cabinet.
7. Connect the oven to the power supply.
Caution: Connect the oven to the power supply 230 - 240 V, 50Hz.
8. Adjust the position of the oven so that the feet of the oven are fitted into the recesses of the spacing
brackets as shown in Fig. 4.
Fig. 3
4
3
3
2
RK-J40W 04.6.23, 2:17 PM4
A39990,RK-J40W,J40K,J40S,J90S o/m
ENGLISH
DEUTSCH
FRANÇAIS
ESPAÑOL
5
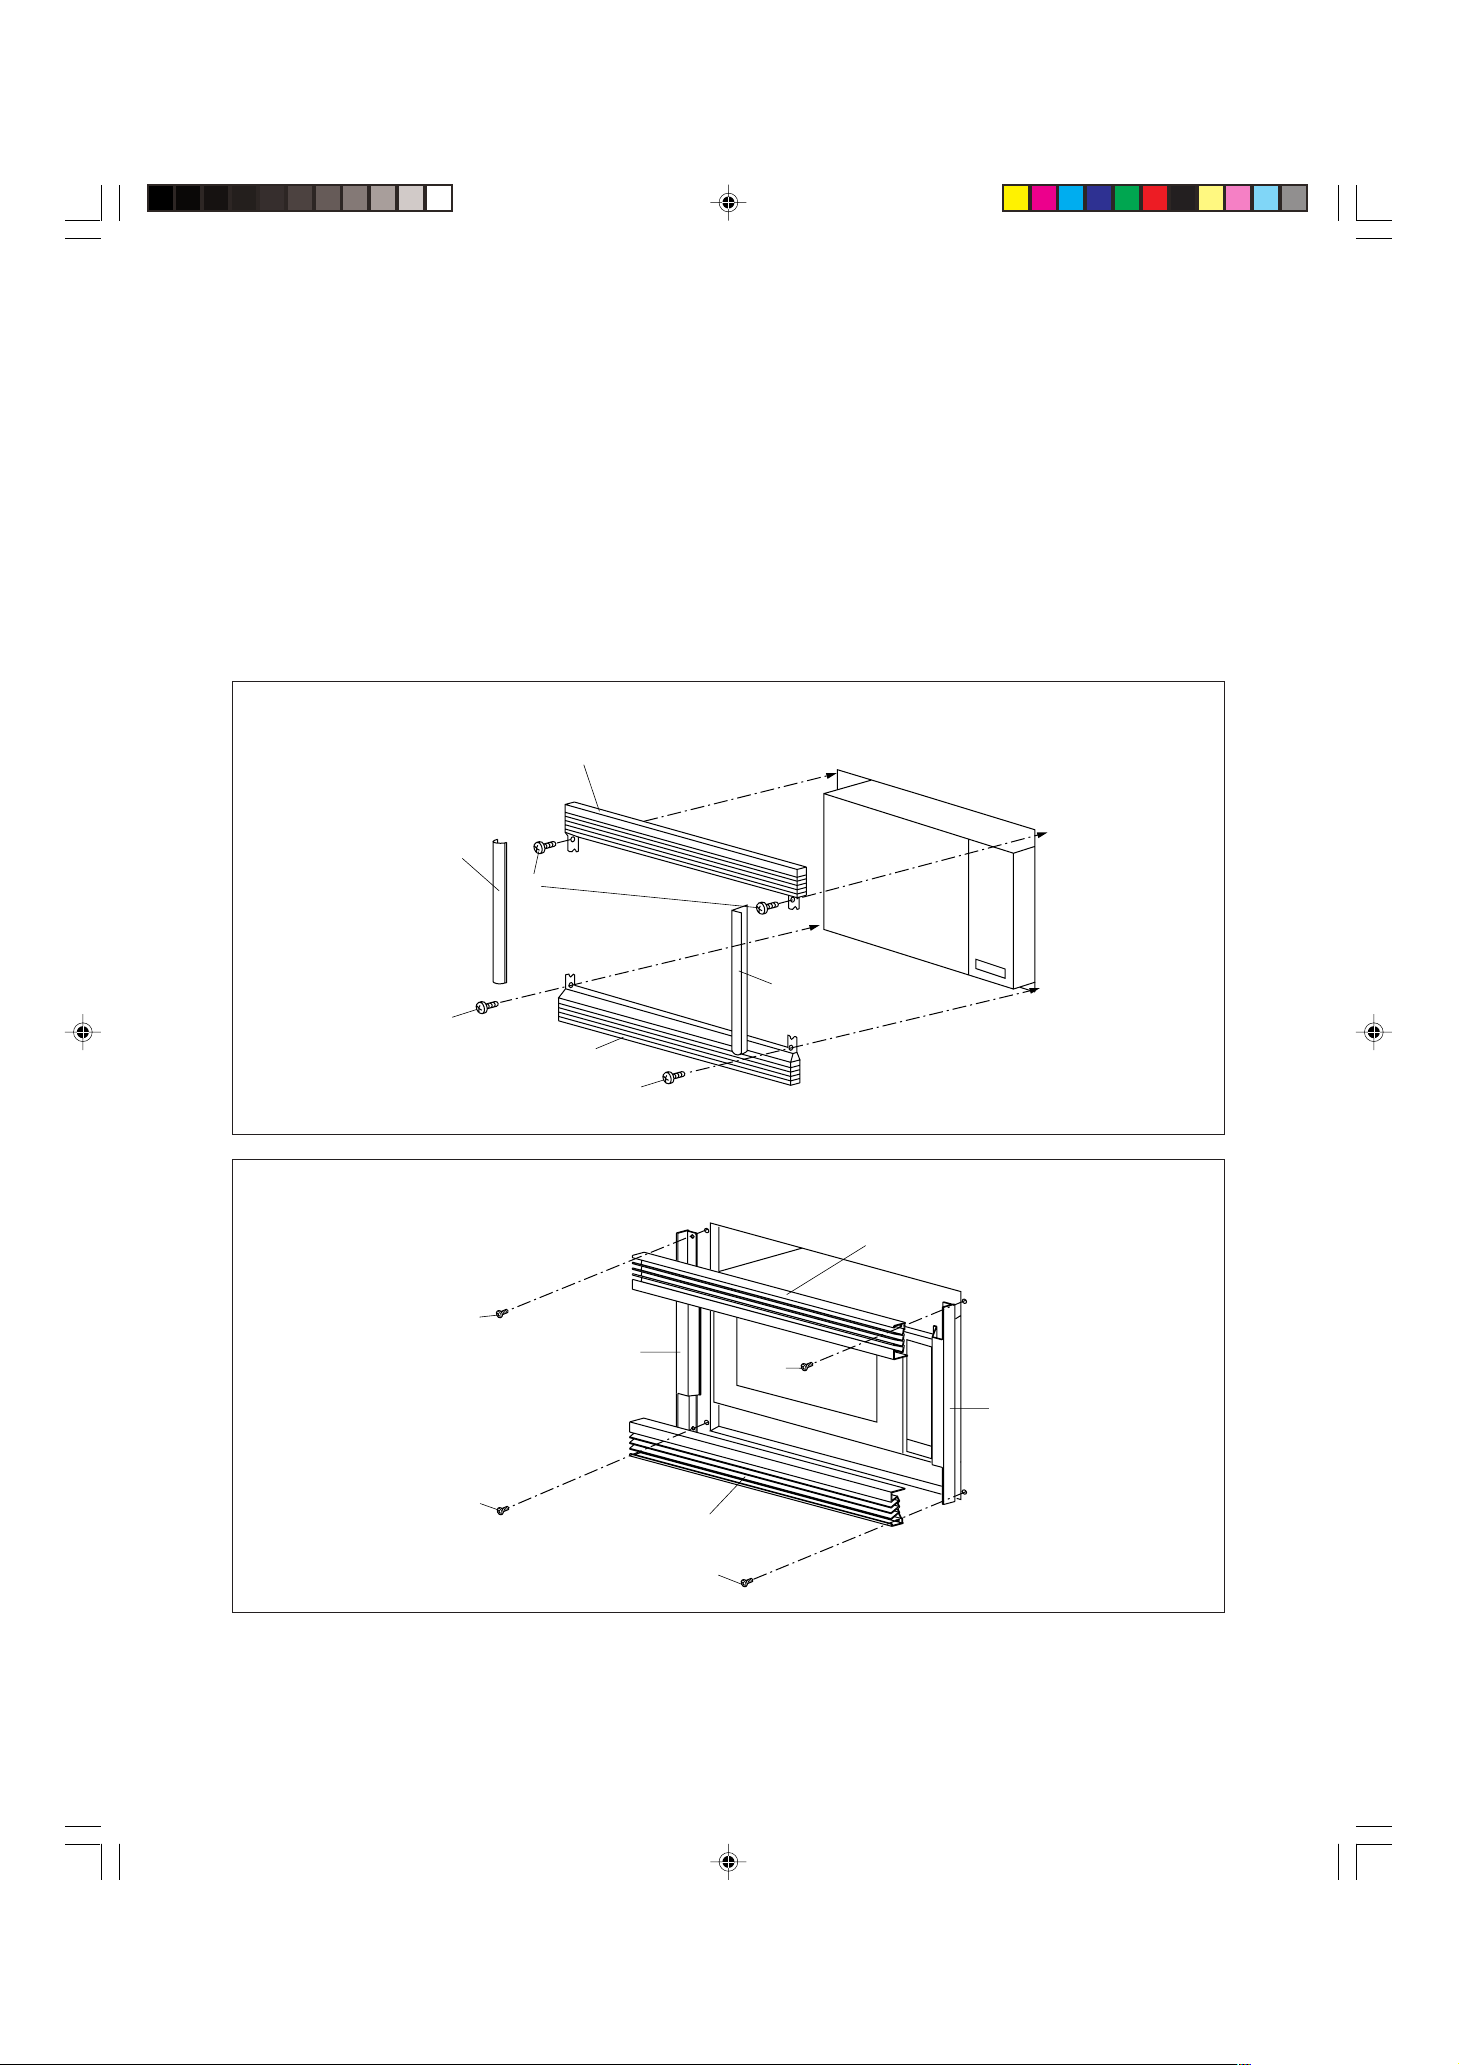
9. (For RK-J40W, RK-J40K) Place the sash 5 on top of the oven making sure that it is level both vertically
and horizontally. Secure to the kitchen cabinet with two screws 8 as shown in Fig. 5.
(For RK-J40S, RK-J90W, RK-J90S) Place the sash 5 over the sashes 6 on top of the oven making sure
that it is level both vertically and horizontally. Secure loosely to the kitchen cabinet with two screws 8
as shown in Fig. 5.
10. (For RK-J40W, RK-J40K) Place the second sash 5 at bottom edge of the oven. Check location by
measuring distance between upper and lower sashes 5 with each sashes 6. Secure to the kitchen
cabinet with two screws 8 as shown in Fig. 5. And then install two sashes 6 by snapping them into place
as shown in Fig. 5.
(For RK-J40S, RK-J90W, RK-J90S) Install the second sash 5 over the sashes 6 at bottom edge of the
oven. And secure the sash 5 to the cabinet through the holes of the sashes 6 with two screws 8 as
shown in Fig. 5. And tighten all screws.
Fig. 5 for RK-J40S, RK-J90W, RK-J90S
8
8
6
6
8
5
5
Fig. 5 for RK-J40W, RK-J40K
6
6
5
5
8
8
8
8
RK-J40W 04.6.23, 2:17 PM5
A39990,RK-J40W,J40K,J40S,J90S o/m
6
SHARP CORPORATION Osaka, Japan
TINSEA833WRRZ - J44
PRINTED IN JAPAN
Recycled paper
Printed with soy ink
RK-J40W 04.6.23, 2:17 PM6