Loading ...
A39990,RK-J40W,J40K,J40S,J90S o/m
2
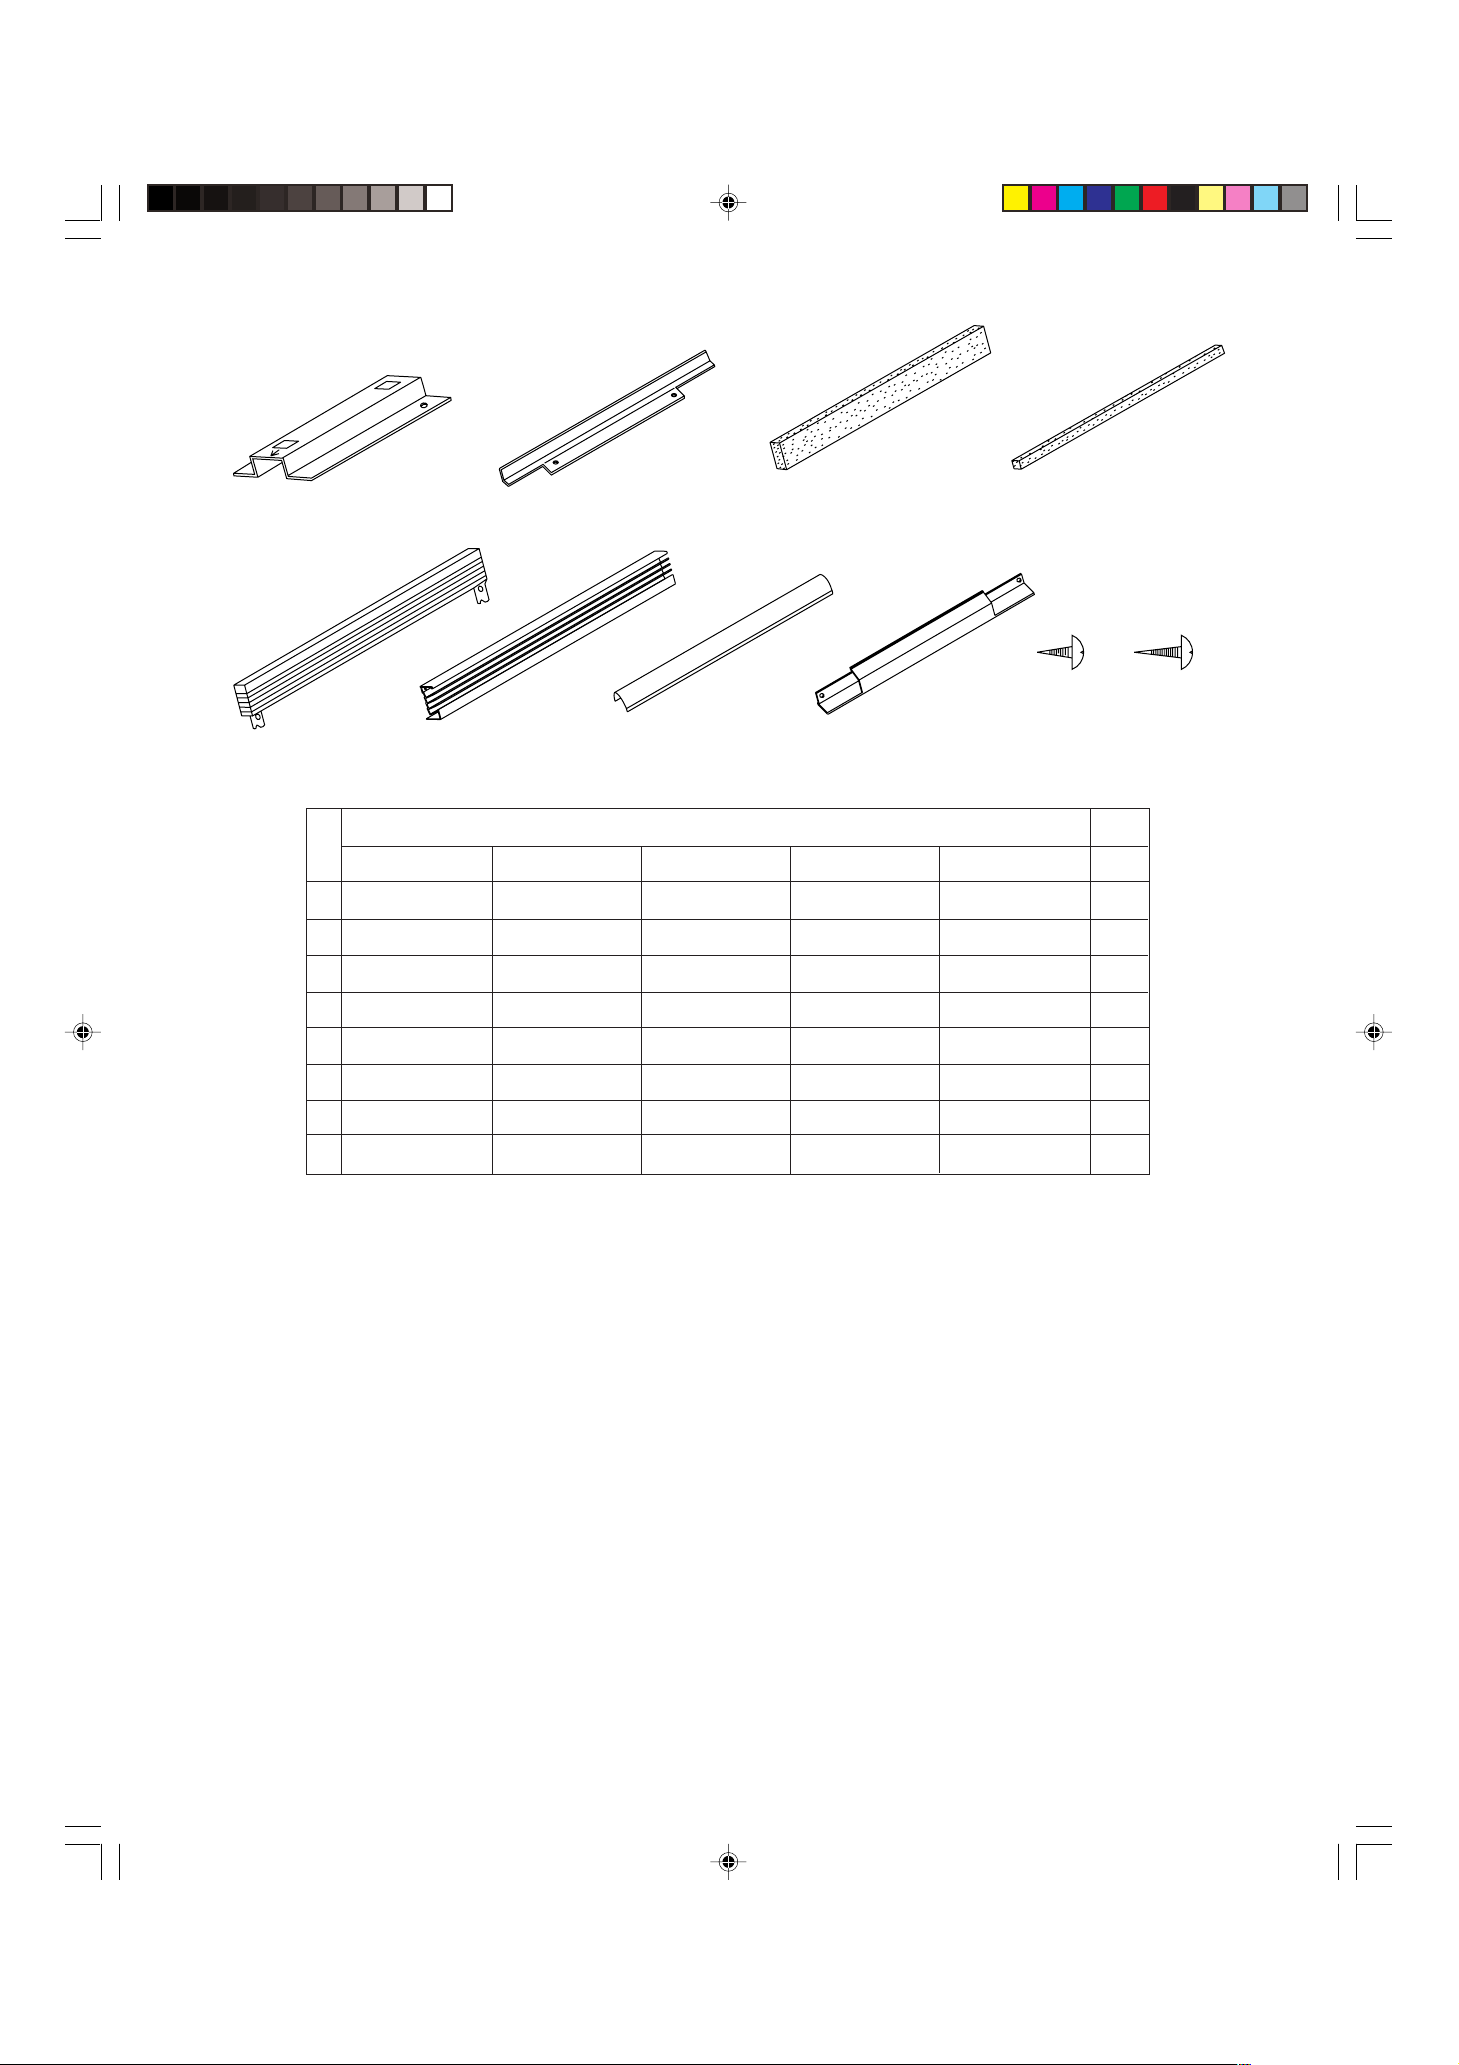
PROVIDED PARTS
8
SCREW
(LONG)
INSTALLATION INSTRUCTIONS
1.
Provide a suitable hole in the right side wall of the kitchen cabinet behind the partition angle 2 for the power supply
cord and plug. If you want to have a hole in the left wall of the cabinet, the hole should be provided down the wall.
2. Set one spacing bracket 1 on the shelf keeping a distance (A) between the left wall of the kitchen cabinet and
the spacing bracket, and a distance (B) between the front end of the shelf and the spacing bracket as shown
in Fig. 1. Attach it with the two screws 7 as shown in Fig. 1. And then attach the other spacing bracket 1 on
the shelf keeping a distance (C) between the two spacing brackets, and a distance (B) between the front end
of the shelf and the spacing bracket with two screws 7 as shown in Fig. 1.
Caution: The arrow marks on each spacing bracket should be pointing towards you.
3. Place the partition angle 2 at the end of the spacing brackets 1, and attach it with the two screws 7 as shown
in Fig. 1.
4. Remove the backing papers from the two cushions 3. Attach the cushions 3 along the spacing brackets
1 from the front end of the shelf as shown in Fig. 2.
5. Remove the backing paper from the cushion 4. Attach the cushion 4 to the partition angle 2 as shown
in Fig. 3 and Fig. 4.
7
SCREW
(SHORT)
1
SPACING BRACKET
2
PARTITION ANGLE
3
CUSHION (SIDE)
4
CUSHION (BACK)
RK-J40W
LANGKA931WRWZ
LANGKA930WRWZ
PCUSUA537WRPZ
PCUSUA536WRPZ
GWAKPA177WRF0
GWAKPA707WRFZ
XMMSD41P13000
XMMSD41P20000
PART NUMBER
RK-J40K
LANGKA931WRWZ
LANGKA930WRWZ
PCUSUA537WRPZ
PCUSUA536WRPZ
GWAKPA175WRF0
GWAKPA708WRFZ
XMMSD41P13000
XMMSD41P20000
RK-J40S
LANGKA931WRWZ
LANGKA930WRWZ
PCUSUA537WRPZ
PCUSUA536WRPZ
GWAKMA037WREZ
GWAKMA045WREZ
XMMSD41P13000
XMMSE41P20000
RK-J90W
LANGKA931WRWZ
LANGKA932WRWZ
PCUSUA534WRPZ
PCUSUA535WRPZ
GWAKMA035WREZ
GWAKMA036WREZ
XMMSD41P13000
LX-MZA002WREZ
RK-J90S
LANGKA931WRWZ
LANGKA932WRWZ
PCUSUA534WRPZ
PCUSUA535WRPZ
GWAKMA048WREZ
GWAKMA046WREZ
XMMSD41P13000
XMMSE41P20000
NO.
1
2
3
4
5
6
7
8
Q'TY
2
1
2
1
2
2
6
4
5
SASH
(for RK-J40S,
RK-J90W,RK-J90S)
5
SASH
(for RK-J40W,
RK-J40K)
6
SASH (SIDE)
(for RK-J40W,
RK-J40K)
6
SASH (SIDE)
(for RK-J40S,
RK-J90W,RK-J90S)
RK-J40W 04.6.23, 2:17 PM2
Loading ...
Loading ...
Loading ...