Loading ...
Loading ...
Loading ...
7
7. Use the two #8-18 x ¹⁄₂" screws provided to secure the
warming drawer frame to the cabinet.
Complete Installation
1. Check that all parts are now installed. If there is an extra part,
go back through the steps to see which step was skipped.
2. Check that you have all of your tools.
3. Dispose of/recycle all packaging materials.
4. For warming drawer use and cleaning, read the Use and Care
Guide.
5. Push in and turn the control knob to HI, and the light should
illuminate.
If warming drawer(s) does not operate, check the
following:
■ Household fuse is intact and tight; or circuit breaker has not
tripped.
■ Warming drawer is plugged in, and electrical supply is
connected.
If you need Assistance or Service:
Please reference the “Assistance or Service” section of the Use
and Care Guide or contact the dealer from whom you purchased
your warming drawer.
CUSTOM DRAWER FRONT INSTALLATION INSTRUCTIONS
FOR WARMING DRAWERS
Tools and Parts
Gather the required tools and parts before starting installation.
Read and follow the instructions provided with any tools listed
here.
Tools Needed
■ Phillips screwdriver
■ Drill and appropriate bits
Parts Supplied
■ 6 - #8-18 x ¹⁄₂" screws
■ Indicator light lens
Parts Needed
■ Custom drawer front
■ Custom handle (optional)
■ Adhesive recommended for plastic to wood
Install Custom Drawer Front Panel
The warming drawer has an interface that will allow a modest
range of panel sizes. The actual panel size should be selected by
the customer and the contractor to suit the desired effect. It is
recommended that a qualified carpenter make and install the
custom drawer front and handle(s) to match surrounding
cabinetry.
1. Install warming drawer unit as instructed by the installation
instructions provided with the warming drawer.
2. Create the custom drawer front. Below are the minimum and
maximum dimensions for the custom drawer front. The size
of the custom drawer front for the warming drawer will vary
according to the specific installation. The depth of the panel
will vary in order to have the custom warming drawer flush
with the surrounding cabinets.
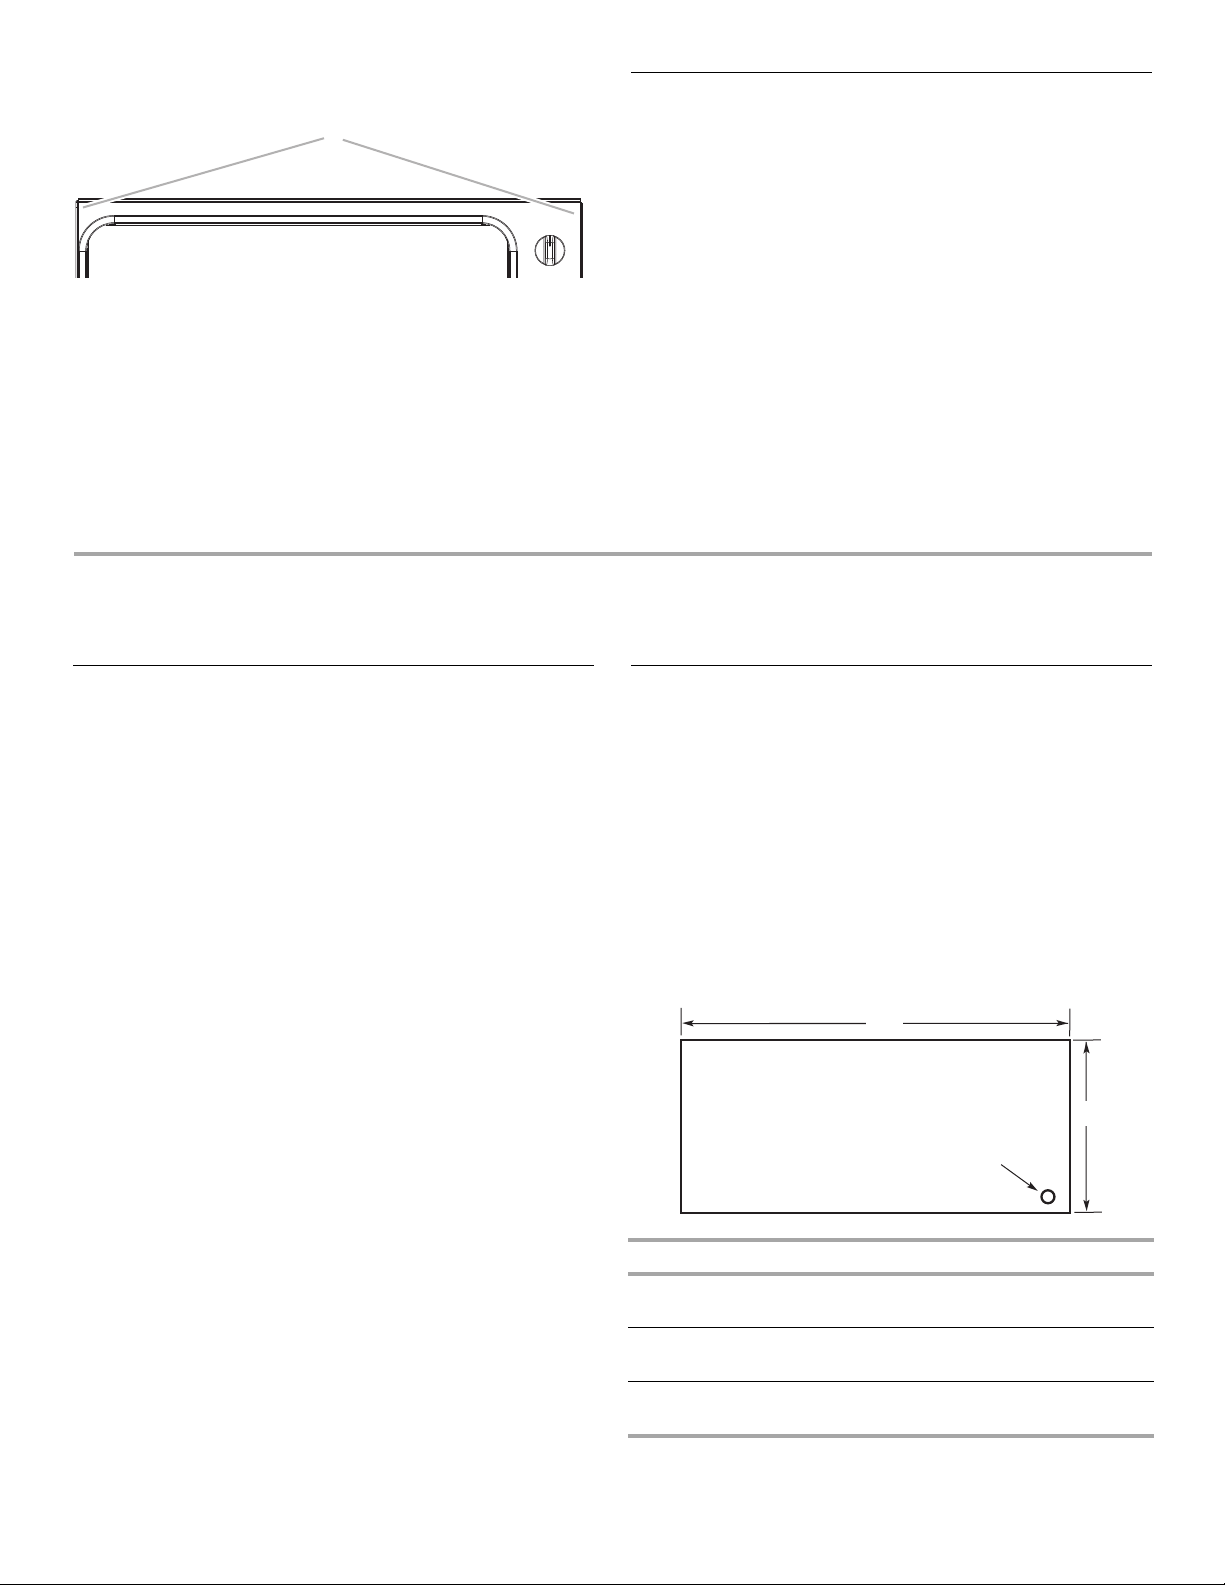
A. Two #8–18 x
¹⁄₂
" screws
A
Model A - MAX B - MAX A - MIN B - MIN
24" (61 cm)
Warming Drawer
23³⁄₄"
(60.3 cm)
10⁵⁄₁₆"
(26.2 cm)
23"
(58.4 cm)
9¹⁄₁₆"
(23.0 cm)
27" (68.6 cm)
Warming Drawer
26³⁄₄"
(67.9 cm)
10⁵⁄₁₆"
(26.2 cm)
26"
(66.1 cm)
9¹⁄₁₆"
(23.0 cm)
30" (76.2 cm)
Warming Drawer
29³⁄₄"
(75.6 cm)
10⁵⁄₁₆"
(26.2 cm)
29"
(73.7 cm)
9¹⁄₁₆"
(23.0 cm)
A
B
⁵⁄₁₆" (7.9 mm) dia. hole for
indicator light lens (provided
in this kit). Locate lens directly
in front of indicator light.
Loading ...
Loading ...
Loading ...