INSTRUCTION AND RECIPE BOOKLET
Cuisinart
®
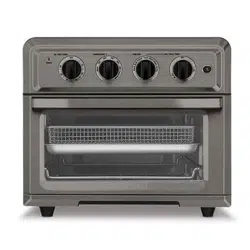
Digital AirFryer Toaster Oven
CTOA-130PC2

2
CONTENTS
Important Safeguards...........................................2
Special Cord Set Instructions ....................................3
Features and Benefits ..........................................4
Getting to Know Your Control Panel ...............................5
Before First Use ...............................................5
Setting the Clock ..............................................5
Oven Tone Volume .............................................6
General Operation .............................................6
To Change Time, Temperature, or Function..........................6
Oven Rack and Pan Position Diagrams.............................7
Tips and Hints ................................................7
Cleaning and Maintenance .....................................13
Troubleshooting ..............................................14
Warranty ....................................................15
Recipes.....................................................16
IMPORTANT SAFEGUARDS
When using an electrical appliance, especially when children are present, basic
safety precautions should always be taken, including the following:
1. Read all instructions.
2. UNPLUG FROM OUTLET WHEN NOT IN USE AND BEFORE CLEANING.
Allow to cool before cleaning or handling and putting on or taking off parts.
3. Do not touch hot surfaces. Use handles or knobs.
4. To protect against electric shock, do not place any part of the Digital AirFryer
Toaster Oven in water or other liquids. See instructions for cleaning.
5. This appliance should not be used by or near children or individuals with
certain disabilities.
6. Do not operate any appliance with a damaged cord or plug, or after the
appliance has malfunctioned or has been dropped or damaged in any way
or has been dropped in water. Return the Digital AirFryer Toaster Oven to the
store or retailer where purchased for examination or repair or adjustment.
7. The use of accessory attachments not recommended by Cuisinart may
cause injury.
8. Do not use outdoors.
9. Do not let cord hang over the edge of the table or countertop where it could
be pulled on inadvertently by children or pets, or touch hot surfaces, which
could damage the cord.
10. Do not place AirFryer Toaster Oven on or near a hot gas or electric burner or
in a heated oven.
11. Do not use this AirFryer Toaster Oven for anything other than its intended
purpose.
12. Extreme caution should be exercised when using containers constructed of
materials other than metal or glass in the oven.
13. To avoid burns, use extreme caution when removing AirFryer Toaster Oven
accessories or disposing of hot grease.
14. When not in use, always unplug the unit. Do not store any materials other
than manufacturer’s recommended ovenproof accessories in this AirFryer
Toaster Oven.
15. Do not place any of the following materials in the AirFryer Toaster Oven:
paper, cardboard, plastic and similar products.
16. Do not cover Crumb Tray or any part of the oven with metal foil. This will
cause overheating of the oven.
17. Oversize foods, metal foil packages and utensils must not be inserted in the
AirFryer Toaster Oven, as they may involve a risk of fire or electric shock.
18. A fire may occur if the AirFryer Toaster Oven is covered or touching
flammable materials such as curtains, draperies or walls when in operation.
Do not store any items on top of the appliance when in operation. Do not
operate under wall cabinets.

3
19. Do not clean with metal scouring pads. Pieces can break off the pad and
touch electrical parts, involving a risk of electric shock.
20. Do not attempt to dislodge food when the AirFryer Toaster Oven is plugged
into electrical outlet.
21. Warning: To avoid possibility of fire, NEVER leave AirFryer Toaster Oven
unattended during use.
22. Use recommended temperature settings for all cooking/baking,
roasting and AirFrying.
23. Do not rest cooking utensils or baking dishes on glass door.
24. Do not operate your appliance in an appliance garage or under a wall cab-
inet. When storing in an appliance garage, always unplug the unit from the
electrical outlet. Not doing so could create a risk of fire, especially if the
appliance touches the walls of the garage or the door touches the unit as it
closes.
25. Extreme caution must be used when moving an appliance containing hot oil
or other hot liquids.
26. To disconnect, press Start/Stop to ensure cooking is stopped, then remove
plug from wall outlet.
SAVE THESE
INSTRUCTIONS
Please read and keep these instructions handy. These instructions will help you
use your Cuisinart
®
Digital AirFryer Toaster Oven to its fullest so that you will
achieve consistent, professional results.
SPECIAL CORD SET INSTRUCTIONS
A short power-supply cord is provided to reduce the risks resulting from becoming
entangled in or tripping over a longer cord. Extension cords are available and may
be used if care is exercised in their use.
If an extension cord is used, the marked electrical rating of the extension cord must
be at least as great as the electrical rating of the appliance, and the longer cord
should be arranged so that it will not drape over the countertop or tabletop where it
can be tripped over unintentionally or pulled on by children.
NOTICE
This appliance has a polarized plug (one blade is wider than the other). To reduce
the risk of electric shock, this plug is intended to fit into a polarized outlet only one
way. If the plug does not fit fully into the outlet, reverse the plug. If it still does not fit,
contact a qualified electrician. Do not attempt to modify the plug in any way.
FOR HOUSEHOLD
USE ONLY
NOT INTENDED
FOR COMMERCIAL USE

4
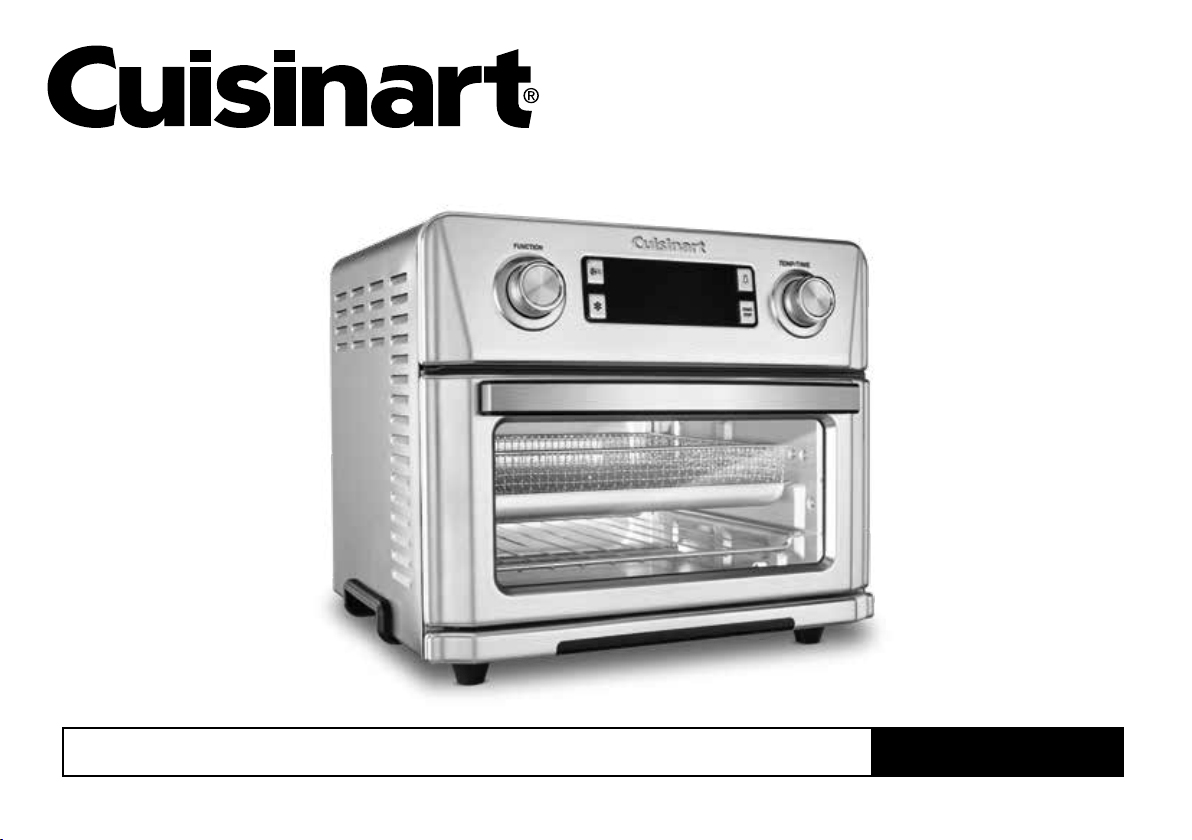
FEATURES AND BENEFITS
1. Control Panel
Large Digital Display, dials and intuitive buttons make the unit easy to use
(see details on page 5).
2. Cool-Touch Handle
Handle designed to stay cool during cooking.
3. Interior Light
Interior light to easily view food while cooking.
4. Viewing Window
Large viewing window to check progress.
5. Oven Rack
Can be used in two positions.
6. Rack Positions
A. Position 1 is the bottom position and this is recommended when cooking
larger foods (e.g., a whole chicken).
B. Position 2 has a 50% stop feature, so the rack stops halfway out of the
oven. The oven rack can be removed from Position 2 by lifting the front of the
rack and sliding it out.
NOTE: Refer to page 7 for suggested rack positions with different functions.
7. Easy-Clean Interior
The sides of the oven’s interior have a nonstick coating.
8. Pull-Out Crumb Tray
The Crumb Tray comes already positioned in your oven. The tray slides
out from the lower front of the oven to clean.
9. AirFryer Basket
Use the basket when using the AirFry, Broil or Dehydrate functions
to optimize your cooking results. We recommend setting the AirFryer
Basket in the Baking/Drip Pan.
10. Baking/Drip Pan
A Baking/Drip Pan is included for your convenience. Use alone when
Baking or Roasting. Use Baking/Drip Pan with AirFryer Basket when
AirFrying, Broiling or Dehydrating.
4
7
1
3
2
6B
6A
8
10
9
5
5
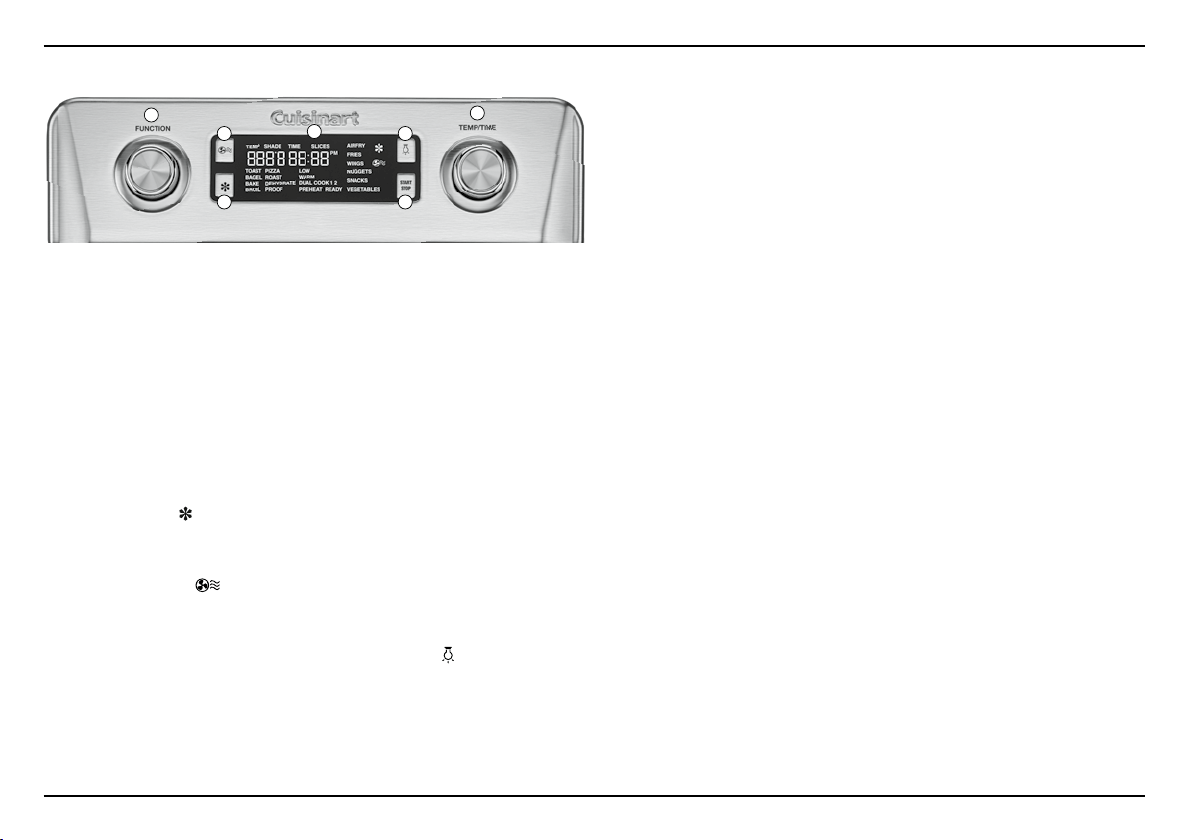
1. Function Dial
Rotate Function Dial to scroll through the function options on the Digital
Display screen. Press center of dial to confirm selection.
2. Temp/Time Dial
Rotate Temp/Time Dial to scroll through temperature, time, shade, and slice
options on the Digital Display screen. Press center of dial to confirm selection.
3. Digital Display Screen
Displays cooking functions, toast shade and slices, temperature,
cooking/countdown timer, clock time, fan speed and defrost.
4. Defrost Button
For use with Toast, Bagel, Pizza, and certain AirFry presets. When activated,
the defrost icon
will display on the Digital Display screen.
5. Fan Speed Button
To change the fan speed from Low to High, press the Fan Speed Button.
When the fan icon
is displayed on the Digital Display screen, fan speed is
set to High. Icon will disappear for Low fan speed.
6. Light Button
To turn on/off the interior oven light, press the light icon
. Interior light will
turn off automatically after 20 seconds.
7. Start/Stop Button with Indicator Light
Use to start and stop cooking. Indicator will illuminate when cooking.
BEFORE FIRST USE
1. Place your Digital AirFryer Toaster Oven on a flat, level surface.
2. Move oven 2 to 4 inches away from the wall or from any objects on
the countertop. Do not use on heat-sensitive surfaces.
NOTE: OBJECTS SHOULD NOT BE STORED ON THE TOP OF THE
OVEN. IF THEY ARE, REMOVE ALL OBJECTS BEFORE YOU TURN ON
YOUR OVEN. THE EXTERIOR WALLS GET VERY HOT WHEN IN USE.
KEEP OUT OF REACH OF CHILDREN.
3. Check that the Crumb Tray is in place and that there is nothing in the oven.
4. Plug power cord into the wall outlet.
SETTING THE CLOCK
Clock can be set when unit is first plugged in. Alternatively, the clock can only be
set when the oven is not cooking and the time is displayed on the screen.
To set the clock:
1. If Digital Display is not displaying the clock, scroll through the function menu
until clock is displayed.
2. Press and hold the Temp/Time Dial for 3 seconds.
3. The clock hour will flash; turn the Temp/Time Dial to set hour, then press
Temp/Time Dial to confirm.
4. The clock minutes will flash; turn the Temp/Time Dial to set minutes, then press
Temp/Time Dial to confirm.
5. PM will flash; turn the Temp/Time dial to select AM or PM. Be sure the
PM indicator is on if a PM time is desired. Press Temp/Time Dial to confirm.
6. Turn the Function Dial to exit clock setting and return to function menu.
NOTE: When setting clock, if nothing is pressed after 10 seconds, clock will
automatically set to currently displayed time.
GETTING TO KNOW YOUR CONTROL PANEL
4
6
2
1
3
5
7

6
OVEN TONE VOLUME
The tone volume can only be adjusted when the time is displayed on the screen.
1. Press Defrost
and Fan buttons simultaneously for 3 seconds.
2. The number 1 (default setting) or currently selected setting will display.
3. Use Time/Temp Dial to set preferred tone level: 0 (off/tones deactivated),
1 (low), or 2 (high).
4. Once your selection is displayed, press Time/Temp Dial to confirm.
GENERAL OPERATION
To operate the oven, follow these simple steps:
1. Place the appropriate rack, pan, and/or basket in the position recommended
in the chart on page 7.
2. Use the Funcion Dial to scroll through functions.
3. When desired function is flashing, press Function Dial to confirm. Start/Stop
button will flash and Digital Display screen will display the last selected or
default temperature and time (shade and slices for Toast and Bagel settings).
4. a. To use displayed settings, press Start/Stop to begin operation.
Start/Stop button will illuminate, indicating the unit is cooking.
b. To change settings:
1. Turn Time/Temp Dial to choose desired temperature (or shade)
2. Press Time/Temp Dial to confirm; time (or slices) will flash
3. Turn Time/Temp Dial to choose desired time (or slices)
4. Press Time/Temp Dial to confirm
5. If desired, press Defrost Button or Fan Speed Button
6. Press Start/Stop to begin operation. The button will illuminate,
indicating the unit is cooking.
NOTE: Bake and Pizza have a preheating stage during which display will
show “Preheat”; once preheat is complete, oven will beep and display will
show “Ready”; countdown timer will begin.
5. When countdown timer reaches 0:00, oven will beep three times and heaters
will turn off.
NOTE: Cooking process can be canceled before countdown timer reaches
0:00 by pressing Start/Stop.
NOTE: AFTER COOKING, FAN WILL REMAIN ON FOR COOLING PURPOSES.
TO CHANGE TIME, TEMPERATURE, OR
FUNCTION DURING COOKING CYCLE
To change time: During the cooking cycle, use the Time/Temp Dial to add or
decrease time. The new countdown time will be displayed, and cooking will continue.
To change temperature: During the cooking cycle, press the Time/Temp Dial
until the current temperature flashes. Turn the Time/Temp Dial to desired
temperature and cooking will continue at the new temperature.
To change function: You must press Start/Stop to stop the current program.
Then turn Function Dial and press it to select another function. Press Start/Stop
again to continue cooking cycle.

7
OVEN RACK AND PAN POSITION DIAGRAMS
Please refer to the chart below for suggested Oven Rack, Baking/Drip Pan,
and AirFryer Basket positions.
TIPS AND HINTS
AIRFRY
TIP: For best results, use the provided AirFryer Basket fitted into the Baking/Drip
Pan.
AirFry can be used at 200°F – 450°F for up to 1 hour. This function is used to
AirFry meals as a healthy alternative to deep frying in oil. A high fan speed and
multiple heating elements circulate hot air to prepare a variety of meals that can
be both delicious and healthier than traditional frying.
• Default: 400°F; 10 minutes.
• Many foods that can be fried can be AirFried without using excess amounts of
oil. AirFried foods will taste lighter and be less greasy than deep-fried foods.
• AirFrying doesn’t require oil, but a light spray can enhance browning and
crispiness. Use an oil sprayer or a nonstick olive oil cooking spray to keep it
extra light, a pastry brush to evenly coat food with oil, or pour a little oil into
a bowl, add food, and toss.
• Most oils can be used for AirFrying. Olive oil is preferred for a richer flavor.
Vegetable, canola or grapeseed oils are recommended for milder flavors.
• An assortment of coatings can be used on AirFried foods.
Some examples of different crumb mixtures include: breadcrumbs,
seasoned breadcrumbs, panko breadcrumbs, crushed cornflakes, potato
chips, and graham crackers. Various flours, including gluten-free, and other
dry foods like cornmeal work as well.
• Most foods do not need to be flipped during cooking, but larger items, like
chicken cutlets, should be turned halfway through the cooking cycle to ensure
evenly cooked and browned results.
• When AirFrying large quantities of food that fill the pan, toss food halfway
through the cooking cycle to ensure evenly cooked results and color.
• Use higher temperatures for foods that cook quickly, like bacon and chips, and
lower temperatures for foods that take longer to cook, like breaded chicken.
• Foods will cook more evenly if they are cut into same-size pieces.
• Please note that many foods release water when they cook. When cooking
large quantities for an extended period of time, condensation may build up,
which could leave moisture on your countertop.
Oven Rack
Baking/Drip Pan
AirFryer Basket
SUGGESTED RACK/PAN/BASKET POSITIONS
Position 2 Position 1
Function
Toast X
Bagel X
Bake X X X X
Broil X X X X X X
Pizza X
(fresh)
X
(frozen;
inverted
rack)
Roast X X X X
Dehydrate X
Proof X X X
Low X X X X
AirFry X X
Warm X X X X X X

8
Food Recommended Amount Temperature Time
Bacon 12 ounces, about 10 to 12 slices 400ºF 8 to 10 minutes
Chicken Wings 2 pounds, about 20 wings (max 3 pounds) 400ºF 20 to 25 minutes
Frozen Appetizers (e.g.,
mozzarella sticks, popcorn
shrimp, etc.)
1½ pounds, about 20 frozen mozzarella sticks 400ºF 5 to 7 minutes
Frozen Chicken Nuggets 1 pound, about 34 frozen chicken nuggets 400ºF 10 minutes
Frozen Fish Sticks 12 ounces, about 20 frozen sh sticks 400ºF 8 minutes
Frozen Fries 1 to 2 pounds 450ºF 15 to 25 minutes
Frozen Steak Fries 1 to 2 pounds 450ºF 15 to 25 minutes
Hand-Cut Fries
1 to 2 pounds, (2 to 4 medium potatoes), cut into
¼-inch thick pieces, about 4 inches long
400ºF
15 to 20 minutes
Hand-Cut Steak Fries
1 to 2 pounds (2 to 4 medium-large potatoes), cut
into eighths lengthwise
400ºF 15 to 20 minutes
Shrimp
1 pound, about 16 extra-large shrimp 375ºF 8 to 10 minutes
Tortilla Chips
6 ve-inch tortillas cut into fourths 400ºF 5 to 6 minutes, toss halfway through
Vegetables
1 pound, about 4 cups 400ºF
Thin slices:10 minutes
Larger cut: 15 to 20 minutes
The chart below lists recommended amounts, cooking times and temperatures for various types of food that can be AirFried in the Cuisinart
®
Digital AirFryer Toaster
Oven. If portions exceed recommendations, you can toss occasionally while cooking to ensure the crispiest, most even results. Smaller amounts of food may require
less time. For best AirFry results, use the oven light to periodically check on food.
NOTE: When AirFrying, always use the AirFryer Basket with the Baking/Drip Pan. For all foods below, we suggest using the upper position (Position 2) for best results.
AIRFRYER CHART
NOTE: AirFrying doesn’t require oil, but a light coating can enhance browning and crispiness. Use an oil sprayer or a nonstick olive oil cooking spray to keep it extra
light, a pastry brush to evenly coat food with oil, or pour a little oil into a bowl, add food, and toss.

9
USING AIRFRYER PRESETS
In addition to being able to program the temperature and time for AirFrying, the
Cuisinart
®
Digital AirFryer Toaster Oven has convenient, easy-to-use presets for
your fried favorites—French fries, chicken wings, chicken nuggets, snacks, and
vegetables. To use AirFryer presets, follow these steps:
1. Scroll through function menu and select AirFry.
2. Turn Function Dial to scroll through preset functions. When desired preset is
flashing, press Function Dial to confirm selection.
3. Preset temperature and time will display.
a. To use displayed settings, press Start/Stop to begin
b. To change settings, see General Operation on page 6
NOTE: Most presets can be used with frozen or fresh foods. See below
for details:
Fries ............... Default is for frozen fries. Fresh is for hand-cut potatoes.
Wings ............ Default is for fresh chicken wings. Frozen setting is
intended for uncooked frozen chicken wings.
Nuggets ......... Default is for frozen precooked nuggets. Fresh setting is
for uncooked nuggets.
Snacks .......... Default is for frozen precooked snacks.
Vegetables .... Default is for fresh vegetables.
NOTE: Fan speed cannot be changed for AirFryer presets; it is always on High.
TOAST
Toast shade can be set from 1 to 7 using 1 to 6 slices. This function is used to
toast bread and other items; both fresh and frozen items can be used.
• Default: Shade 4; 3 to 4 slices; no Defrost
• For best results and more evenly toasted items:
– If toasting 2 pieces, center them in the middle of the oven rack
– 4 pieces should be evenly spaced—2 in front, 2 in back
– 6 pieces should be evenly spaced—3 in front, 3 in back
• If toast is lighter than you like, time can be added by turning the Temp/Time Dial
before toasting is complete
• Shade Guide: Light (1, 2) • Medium (3, 4, 5) • Dark (6, 7)
WARNING: Always use Position 2 for toasting. Do not invert rack in Position 2 as
this may result in burning.
BAGEL
Bagel shade can be set from 1 to 7 using 1 to 6 slices. This function provides full
heat on the top and half heat on the bottom to toast both sides of bagel halves;
both fresh and frozen bagels can be used.
• Default: Shade 4; 3 to 4 slices; no Defrost
• For best results, put your bagels on the rack with the cut sides facing up
• If bagels are too light, time can be added by turning the Temp/Time Dial before
toasting is complete
BAKE
Bake can be used at 200°F – 450°F for up to 2 hours. Baking is recommended
for a variety of foods you would normally prepare in a conventional oven.
• Default: 350°F; 30 minutes
• Select Bake with Low fan speed (i.e., no fan icon displaying on screen) for more
delicate items like custards and eggs, as well as most baked goods like cook-
ies, muffins, and cakes
• Select Bake with High fan speed, also known as Convection Bake (i.e., fan icon
displaying on screen), for most baked goods that require even browning and
leavening, like heartier baked goods and breads
• When using either fan speed, cooking times and temperatures may need to
be reduced—start checking foods about 5 to 10 minutes before the end of the
suggested cooking time
• Important: All of our recipes were specially developed for the Cuisinart
®
Digital
AirFryer Toaster Oven and have been tested in our Cuisinart Test Kitchen

10
BROIL
Broil is fixed at 450ºF, for up to 2 hours. Broiling function can be used for
beef, chicken, pork, fish, and more. It also can be used to top-brown casseroles
and gratins.
• Default: 450°F; 5 minutes
• For best results, use the provided AirFryer Basket fitted into the Baking/Drip
Pan to broil
• Never use glass oven dishes to broil
• Be sure to keep an eye on food – items can brown quickly when broiling
PIZZA
Pizza can be used at 350ºF – 450ºF for up to 2 hours. This function can be used
to cook fresh or frozen pizza.
• Default: Fresh – 450°F; 10 minutes Convection (High Speed fan)
Frozen – 400°F; 10 minutes Convection (High Speed fan)
• For best results, place frozen pizza on inverted rack in Position 1, and for fresh
pizza, place the dough directly on the Baking/Drip Pan in rack Position 1
• Pizza can also be cooked on the pizza stone available for purchase at
www.cuisinart.com
• Pizza recipe ideas can also be found on the Cuisinart website
ROAST
Roast can be used at 200ºF – 450ºF for up to 2 hours.
• Default: 375°F; 45 minutes
• High fan speed works well with Roast – roasting time is significantly reduced,
and meats and poultry are perfectly cooked – browned on the outside, moist
and juicy on the inside
• Dress up vegetables by roasting them; as they caramelize, they become sweet
and delicious
• Because some foods roast faster, begin checking progress at least 5 to 10
minutes before the end of suggested cooking time
DEHYDRATE
Dehydrate can be used at 100°F – 200°F for up to 72 hours. This function turns
your Cuisinart
®
Digital AirFryer Toaster Oven into a dehydrator that lets you dry or
dehydrate food. The built-in fan and low heat are used to create a flow of hot air
that reduces the water content found in fresh foods. Dehydrated food will contin-
ue to retain the vast majority of its original nutritional value.
• Default: 130°F; 2 hours
• Lemon juice can be used to pretreat fruits and vegetables to prevent browning
• Drying times can greatly vary due to the thickness of cuts and relative humidity
(see chart on page 11)
• Check foods often for dryness
• Do not overcrowd; foods should be arranged in a single layer with little
to no overlap
PROOF
Proof can be used at 80°F – 100°F for up to 2 hours. Use this function to proof
bread or pizza dough.
• Default: 90°F; 45 minutes
• Allow dough to complete at least one rise at room temperature
• Shape dough and place on the Baking/Drip Pan or separate baking dish, such
as a loaf pan, and then put directly in the oven in Position 1. For best results,
cover pan with plastic wrap when proofing.
• Dough is ready when doubled in size. Start checking around 20 minutes
• Once time elapses, complete dough preparation and bake according to recipe

11
The chart below lists recommendations on how to dehydrate different foods. These are guidelines only. Drying times can vary due to
thickness of cuts and relative humidity.
DEHYDRATE CHART
CATEGORY FOOD PREPARATION TEMPERATURE FAN SPEED TIME
Herbs/Spices Basil, Chives, Cilantro, Dill,
Mint, Oregano, Parsley,
Rosemary, Sage, Thyme
Rinse in cold water; pat dry 100ºF–115ºF Low 3 to 6 hours until stems
are brittle and leaves
crumble easily
Herbs/Spices Garlic Peel cloves; halve lengthwise 100ºF–115ºF High 6 to 12 hours
Herbs/Spices Gingerroot Peel; grate or slice thinly 100ºF–115ºF Low 2 to 6 hours
Fruit Apples Peel and core; slice thinly 135ºF Low 4 to 10 hours
Fruit Apricots, Bananas,
Figs, Mangoes, Melons,
Nectarines, Pineapples,
Pears, Plums
Wash; core, deseed or pit fruit; remove
rinds from melons and peels from some
fruits; thinly slice
135ºF High 6 to 12 hours
Fruit Cranberries, Blueberries Dip in boiling water to burst skins 135ºF High 10 to 18 hours
Fruit Cherries Wash; pit 135ºF High 12 to 24 hours
Fruit Citrus Wash; thinly slice 135ºF Low 2 to 12 hours
Fruit Grapes Wash; leave whole 135ºF High 10 to 36 hours
Vegetables Beans (Green/Wax),
Broccoli, Cauliower,
Corn*, Mushrooms, Peas*,
Peppers, Potatoes*, Onion,
Squash, Tomatoes
Wash, peel and deseed as necessary;
blanch*; cut or slice into uniform pieces;
remove corn from cob; peas can be left
whole
130ºF–145ºF High 6 to 12 hours
Vegetables Beets Steam until tender; peel and thinly slice 130ºF–145ºF High 3 to 10 hours
Vegetables Leafy Greens (Kale,
Spinach)
Wash; dry thoroughly; remove stems, tear
leaves into small pieces if necessary
130ºF–145ºF Low 3 to 6 hours
Meat Pork/Beef Remove fat and gristle; cut into uniform
strips; marinate if desired; pat off excess
oil during drying
160ºF High 4 to 15 hours
Fish Lean sh Cut into uniform strips; marinate if desired 130ºF–140ºF High Until rm and dry

12
LOW
Low can be used at 100°F – 300F° for up to 12 hours. Use this function to cook
at low temperatures — perfect for braising, slow cooking and more.
• Default: 200°F; 2 hours
• For slow-cooked dishes with crispy exteriors and soft interiors, place ingredients
directly on the Baking/Drip Pan
• For results that are most similar to recipes cooked in a slow cooker,
place ingredients into a covered, ovenproof dish with liquid coming up
one-third of the way
WARM
Warm can be used at 150°F – 300°F for up to 2 hours. Use this function to keep
food warm once cooked.
• Default: 150°F; 30 minutes
• One great way to use the Dual Cook feature described below is to add Warm at
the end of a cooking function so your dish is held at the proper serving temperature
DUAL COOK
Dual Cook is a special feature that enables you to combine two cooking
functions or two temperatures and run them consecutively. This is ideal for those
recipes that require multiple cooking steps. Some examples are:
• Baking a casserole or a dish like nachos to heat through and then switching to
broil for a melted and browned top
• Beginning a dish on a higher heat to achieve a crispy crust and then reducing
temperature for tender results like in Low cooking
The functions that you may program using Dual Cook are Bake, Broil, Roast,
Pizza, Low, Warm and AirFry.
1. Rotate Function Dial until Dual Cook is flashing and press Function Dial to confirm.
2. The oven will display available functions for the first cooking cycle. Turn the
Function Dial to desired function and press Function Dial to set.
3. Using the Time/Temp Dial, set temperature for this function, then press
Time/Temp Dial. Time will now flash. Set time, then press Time/Temp Dial.
4. Digital Display screen will then show functions that can be selected for the
second stage. Repeat steps 2 and 3 to program second function, temperature
and time.
Start/Stop will flash, indicating you are able to initiate cooking cycle.
5. Press Start/Stop to start cooking on the first function.
6. When the first cycle is finished, the oven will beep and automatically switch
to the second cooking function.
7. When time reaches 0:00 and the second function cycle is completed, the oven
will beep and heating elements will turn off.
LOW CHART
CATEGORY FOOD AMOUNT TEMP TIME
Meat
Ribs, Short
Ribs, Shanks
2½ pounds
maximum
300ºF 2 to 4 hours
Meat
Roasts 2½ pounds
maximum
350ºF 1 to 2 hours
Poultry
Whole Chicken,
Chicken Thighs
3- to 4-pound
roaster chicken;
2½ pounds
maximum for
pieces
300ºF 4 to 4½ hours
for whole
chicken, 1½
to 2 hours for
thighs
Poultry
Duck Legs 2½ pounds
maximum
225ºF 2 to 3 hours
Fish/
Seafood
Whole Fish,
descaled and
gutted; llets,
skinned if
desired
2-pound whole
sh, 2½ pounds
maximum llet
200ºF to
300ºF
30 minutes
for llets;
1 to 2 hours
for whole sh
Vegetables
Slow-roasted
tomatoes, root
vegetables, etc.
2½ pounds 250ºF 1 to 2 hours

13
CLEANING AND MAINTENANCE
• Always unplug the oven from the electrical outlet and allow it to cool
completely before cleaning.
• Do not use abrasive cleaners, as they will damage the finish. Simply wipe the
exterior with a clean, damp cloth and dry thoroughly. Apply the cleansing agent
to a cloth, not directly onto the toaster oven, before cleaning.
• To clean interior walls, use a damp cloth and a mild liquid soap solution or a
spray solution on a sponge. Remove any residue from cleaners with a clean,
damp rag. Never use harsh abrasives or corrosive products. These could
damage the oven surface. Never use steel wool pads, etc., on interior of oven.
• Cleaning the accessories:
– Oven Rack and Crumb Tray should be hand-washed in hot, sudsy water, or
use a nylon scouring pad or nylon brush, and thoroughly rinse. These items
are NOT dishwasher safe.
– Baking/Drip Pan and AirFryer Basket are dishwasher safe or can be
hand-washed in hot, sudsy water, or use a nylon scouring pad or nylon brush,
and thoroughly rinse.
• After cooking greasy foods and once your oven has cooled, always clean top of
oven interior. If this is done on a regular basis, your oven will perform like new.
Removing the grease will help to keep toasting consistent, cycle after cycle.
• To remove crumbs, slide out the front Crumb Tray and discard crumbs. Wipe
clean and replace. To remove baked-on grease, soak the tray in hot, sudsy
water or use nonabrasive cleaners. Never operate the oven without the Crumb
Tray in place.
• Any other servicing should be performed by an authorized service
representative.

14
TROUBLESHOOTING
Operation
Why won’t my unit turn on? Make sure your unit is plugged into a functional outlet.
Make sure the oven door is closed.
Call Consumer Service at 1-800-726-0190.
Why does the fan remain on
after cooking?
The fan remains on for cooling purposes.
Why does the light turn off? The light only stays on for 20 seconds each time the light button is pressed to conserve energy. This is normal.
Programming
Can I change my cooking
function when the unit is
already cooking?
You need to rst interrupt the current cooking function by pressing Start/Stop. Then unit will go back to selection menu
and desired cooking function can be chosen.
Can I change the time or
temperature when the unit is
already cooking?
Yes. Simply turn the Temp/Time Dial during cooking to add time. To change the temperature, press the Temp/Time Dial
and, when the temperature is ashing, use the Dial to increase/decrease temperature.
Cooking
Why is my food not crispy or
fried evenly?
Some foods may require more oil than others. If not crispy enough, spray, brush or add some oil on the food.
Make sure food is spread evenly in one single layer in the AirFryer Basket with no overlap. If food still overlaps, toss or
ip food halfway through cooking cycle.
Put the food in for additional cooking time. Make sure to check periodically until food reaches desired brownness.
Do not leave oven unattended.
Why is my food undercooked? There could be too much food in the basket. Try smaller batches of food and single layers, rather than stacking food on
top of each other.
The temperature might be too low. Use the Temp/Time Dial to increase temperature.
When preparing greasy foods, oil may leak into the pan and it produces steam. This will not affect the unit or the end
result. It may fog up the viewing window on the sides or corners.
Why does condensation and
steam come out of my unit?
When preparing foods with a high moisture content, the water evaporates out of the food and causes condensation.
This will not affect the unit or the end result. It may fog up the viewing window on the sides or corners.
The pan, basket, or bottom of oven may contain grease residue from previous use. Make sure to clean the pan properly
after each use.
Cleaning
Are the parts dishwasher safe? The Baking/Drip Pan and the AirFryer Basket are dishwasher safe.
Do not put the Crumb Tray or the Oven Rack in the dishwasher; instead, hand-wash with warm, sudsy water.
How do I clean tough-to-
remove food residue from my
accessories?
To remove baked-on grease, soak the accessories in hot, sudsy water or use a nonabrasive cleaner.

15
TROUBLESHOOTING
Operation
Why won’t my unit turn on? Make sure your unit is plugged into a functional outlet.
Make sure the oven door is closed.
Call Consumer Service at 1-800-726-0190.
Why does the fan remain on
after cooking?
The fan remains on for cooling purposes.
Why does the light turn off? The light only stays on for 20 seconds each time the light button is pressed to conserve energy. This is normal.
Programming
Can I change my cooking
function when the unit is
already cooking?
You need to rst interrupt the current cooking function by pressing Start/Stop. Then unit will go back to selection menu
and desired cooking function can be chosen.
Can I change the time or
temperature when the unit is
already cooking?
Yes. Simply turn the Temp/Time Dial during cooking to add time. To change the temperature, press the Temp/Time Dial
and, when the temperature is ashing, use the Dial to increase/decrease temperature.
Cooking
Why is my food not crispy or
fried evenly?
Some foods may require more oil than others. If not crispy enough, spray, brush or add some oil on the food.
Make sure food is spread evenly in one single layer in the AirFryer Basket with no overlap. If food still overlaps, toss or
ip food halfway through cooking cycle.
Put the food in for additional cooking time. Make sure to check periodically until food reaches desired brownness.
Do not leave oven unattended.
Why is my food undercooked? There could be too much food in the basket. Try smaller batches of food and single layers, rather than stacking food on
top of each other.
The temperature might be too low. Use the Temp/Time Dial to increase temperature.
When preparing greasy foods, oil may leak into the pan and it produces steam. This will not affect the unit or the end
result. It may fog up the viewing window on the sides or corners.
Why does condensation and
steam come out of my unit?
When preparing foods with a high moisture content, the water evaporates out of the food and causes condensation.
This will not affect the unit or the end result. It may fog up the viewing window on the sides or corners.
The pan, basket, or bottom of oven may contain grease residue from previous use. Make sure to clean the pan properly
after each use.
Cleaning
Are the parts dishwasher safe? The Baking/Drip Pan and the AirFryer Basket are dishwasher safe.
Do not put the Crumb Tray or the Oven Rack in the dishwasher; instead, hand-wash with warm, sudsy water.
How do I clean tough-to-
remove food residue from my
accessories?
To remove baked-on grease, soak the accessories in hot, sudsy water or use a nonabrasive cleaner.
WARRANTY
Limited Three-Year Warranty
This warranty is available to U.S. consumers only. You are a consumer if
you own a Cuisinart
®
Digital AirFryer Toaster Oven that was purchased at
retail for personal, family or household use. Except as otherwise required
under applicable law, this warranty is not available to retailers or other
commercial purchasers or owners. We warrant that your Cuisinart
®
Digital
AirFryer Toaster Oven will be free of defects in materials and workmanship
under normal home use for 3 years from the date of original purchase.
We recommend that you visit our website, https://cuisinart.registria.com/,
for a fast, efficient way to complete your product registration. However,
product registration does not eliminate the need for the consumer to
maintain the original proof of purchase in order to obtain the warranty
benefits. In the event that you do not have proof of purchase date, the
purchase date for purposes of this warranty will be the date of
manufacture.
CALIFORNIA RESIDENTS ONLY
California law provides that for In-Warranty Service, California residents
have the option of returning a nonconforming product (A) to the store
where it was purchased or (B) to another retail store that sells Cuisinart
products of the same type. The retail store shall then, according to its
preference, either repair the product, refer the consumer to an
independent repair facility, replace the product, or refund the purchase
price less the amount directly attributable to the consumer’s prior usage of
the product. If neither of the above two options results in the appropriate
relief to the consumer, the consumer may then take the product to an
independent repair facility, if service or repair can be economically
accomplished. Cuisinart and not the consumer will be responsible for the
reasonable cost of such service, repair, replacement, or refund for
nonconforming products under warranty. California residents may also,
according to their preference, return nonconforming products directly to
Cuisinart for repair or, if necessary, replacement by calling our Consumer
Service Center toll-free at 1-800-726-0190. Cuisinart will be responsible
for the cost of the repair, replacement, and shipping and handling for such
nonconforming products under warranty.
HASSLE-FREE REPLACEMENT WARRANTY
Your ultimate satisfaction in Cuisinart products is our goal, so if your Cuisinart
®
Digital AirFryer Toaster Oven should fail within the generous warranty period,
we will repair it or, if necessary, replace it at no cost to you. To obtain a
return shipping label, email us at www.cuisinart.com/customer-care/
product-assistance/product-inquiry. Or call our toll-free customer service
department at 1-800-726-0190 to speak with a representative.
Your Cuisinart
®
Digital AirFryer Toaster Oven has been manufactured to
the strictest specifications and has been designed for use only in 120-volt
outlets and only with authorized accessories and replacement parts.
This warranty expressly excludes any defects or damages caused by
attempted use of this unit with a converter, as well as use with accessories,
replacement parts or repair service other than those authorized by
Cuisinart. This warranty does not cover any damage caused by accident,
misuse, shipment or other than ordinary household use. This warranty
excludes all incidental or consequential damages. Some states do not
allow the exclusion or limitation of these damages, so these exclusions
may not apply to you. You may also have other rights, which vary from
state to state.
Important: If the nonconforming product is to be serviced by someone
other than Cuisinart’s Authorized Service Center, please remind the
servicer to call our Consumer Service Center at 1-800-726-0190 to ensure
that the problem is properly diagnosed, the product is serviced with the
correct parts, and the product is still under warranty.

16
RECIPES
These mouthwatering recipes are just a sampling of what this appliance can do.
APPETIZERS AND SMALL BITES
Spring Egg Cups .............................................17
Spanish Tortilla Cups ..........................................17
Crispy Chickpeas .............................................18
Root Veggie Chips with Rosemary & Sea Salt ......................18
Blooming Onion . . . . . . . . . . . . . . . . . . . . . . . . . . . . . . . . . . . . . . . . . . . . . . 18
Fried Pickles.................................................19
Kale Chips ..................................................19
Ultimate Nachos .............................................20
MAIN COURSES
Crab Cakes .................................................20
Buffalo Chicken Wings ........................................21
Five-Spice Seasoning for Chicken Wings with Dipping Sauce .........21
Mini Shepherd’s Pies ..........................................22
Oven-Roasted Ribs ...........................................22
Braised Lamb Shanks .........................................23
Chicken Nuggets .............................................23
Classic Roast Chicken .........................................24
Harissa and Preserved Lemon-Glazed-Salmon......................24
Fish Tacos ..................................................25
Falafel ......................................................25
Open-Faced Croque Monsieurs..................................26
Pizza Margherita..............................................26
SIDES AND BREADS
Sweet & Salty Bacon Fried Rice .................................27
Candied Bacon...............................................27
“Fried” Brussels Sprouts .......................................28
French Fries .................................................28
Veggie Fries with Herbed Yogurt Dip ..............................28
Sweet Potato Fries with Chipotle Mayo............................29
Pimiento Mac ’n Cheese Cups ..................................30
Buttery Dinner Rolls ...........................................30
Rustic Italian Bread ...........................................31
SWEET TREATS
Pineapple Leather Roll-Ups .....................................31
Blueberry Crumble Bars........................................32
S’mores ....................................................33
Cinnamon Apples.............................................33
Dessert Wontons Two Ways.....................................33
Cinnamon Sugar Doughnut Bites ................................34
Banana Crunch Muffins ........................................35

17
APPETIZERS AND SMALL BITES
Traditionally deep-fried favorites are transformed into lighter, healthier versions
in the Cuisinart
®
Digital AirFryer Toaster Oven, which requires only a few spritzes
of oil to AirFry. Plus, we offer many interchangeable dipping sauces that can be
enjoyed with more than just the recipes they accompany.
Spring Egg Cups
Sophisticated and sure to impress your brunch guests.
Makes 6 individual servings
Nonstick cooking spray
6 slices prosciutto
5 large eggs
¼ cup half-and-half
¼ teaspoon kosher salt
Freshly ground black pepper as desired
¼ cup goat cheese, crumbled
2 teaspoons finely chopped fresh dill
2 to 3 asparagus spears, sliced lengthwise into thin ribbons using
a peeler or mandoline
1. Lightly coat a 6-cup muffin pan with nonstick cooking spray. Press one slice
of prosciutto into each muffin cup to entirely line bottom and sides, leaving
some overhang. Mend any cracks.
2. In a bowl, whisk together the eggs, half-and-half, salt and pepper. Stir in
crumbled goat cheese and the chopped dill. Divide asparagus ribbons evenly
among the muffin cups.
3. Fill each cup two-thirds of the way with the egg mixture.
4. Place the muffin pan into the Cuisinart
®
AirFryer on the Baking/Drip Pan
in rack Position 2. Select AirFry, and set the temperature to 325°F for 8 to 10
minutes, cooking until egg cups are set and no longer runny. Run a knife along
the edge of each cup to loosen from pan. Serve warm.
Nutritional information per serving (1 muffin cup):
Calories 116 (62% from fat) • carb. 1.5g • pro. 9.5g • fat 8.1g • sat. fat 3.3g
chol. 171.7mg • sod. 432mg • calc. 32mg • fiber 0.2g
Spanish Tortilla Cups
A traditional tapas recipe, these can be enjoyed with some marinated olives,
a green salad and crusty bread.
Makes 6 individual servings
Nonstick cooking spray
½ small onion, thinly sliced
1 small potato, cut into 12 thin slices
¾ teaspoon kosher salt, divided
¼ teaspoon freshly ground black pepper
5 large eggs
Chopped fresh parsley to garnish (optional)
1. Spray a 6-cup muffin pan generously with nonstick cooking spray.
2. Divide the onion slices evenly among the muffin cups. Place 2
slices of potato in each cup and sprinkle with ½ teaspoon of the salt.
Put into the Cuisinart
®
AirFryer on the Oven Rack in Position 2. Select AirFry
and set the temperature to 400°F for 10 minutes.
3. While the onions and potatoes are cooking, beat the eggs and add the
remaining salt and pepper. Once the potatoes and onions are ready, evenly
add the eggs to the muffin cups. Place the muffin pan back into the oven,
select AirFry, and set the temperature to 325°F for 8 minutes.
4. Remove from cups and serve immediately. Garnish with chopped parsley
if desired.
Nutritional information per serving (1 muffin cup):
Calories 84 (43% from fat) • carb. 6g • pro. 6g • fat 4g • sat. fat 1g
chol. 155mg • sod. 331mg • calc. 29mg • fiber 1g

18
Crispy Chickpeas
Quickly transform a plain can of chickpeas into a crispy snack.
Makes 6 servings
1 can (15.5 ounces) chickpeas, drained and blotted dry,
about 1½ cups
Olive oil, for spraying
¼ teaspoon kosher salt
¼ teaspoon ground cumin
Pinch freshly ground black pepper
1. Place the AirFryer Basket into the Baking/Drip Pan. Put the chickpeas into
basket and spray liberally with oil. Sprinkle with the salt, cumin and pepper.
2. Put the assembled basket into rack Position 2 and select AirFry. Set the
temperature to 350°F for 15 minutes, cooking until chickpeas are fragrant
and lightly browned.
3. Serve immediately.
Nutritional information per serving (¼ cup):
Calories 75 (13% from fat) • carb. 14g • pro. 3g • fat 1g • sat. fat 0g • chol. 0mg
sod. 275mg • calc. 20mg • fiber 3g
Root Veggie Chips with Rosemary & Sea Salt
Worth the effort – better than store bought!
Makes 4 to 6 servings
1½ pounds of root vegetables (beets, turnips, potatoes, yams)
Olive oil, for brushing
2 teaspoons fresh rosemary, finely chopped
2 teaspoons flaked sea salt
1. Place the AirFryer Basket onto the Baking/Drip Pan. Reserve.
2. Using a mandoline, cut vegetables into ¼-inch slices. Pat dry with paper
towels. Arrange as many slices as possible in a single layer in the AirFryer
Basket, avoiding any overlap. Brush both sides of the slices with olive oil and
sprinkle with rosemary and salt.
3. Put the basket on the tray in rack Position 2. Select AirFry and set temperature
to 250°F, cooking until crisp: beets 30 to 35 minutes, turnips 20 to 25
minutes, potatoes and yams 15 to 20 minutes. Flip halfway for best results.*
4. Serve immediately.
* AirFrying chips low and slow gives them an irresistible baked crunch;
however, if time is short, turn temperature up to 400°F for about 10 minutes.
Nutritional information per serving (based on 6 servings):
Calories 103 (19% from fat) • carb. 19.3g • pro. 2g • fat 2.3g • sat. fat 0.3g
chol. 0mg • sod. 804.7mg • calc. 33mg • fiber 1.7g
Blooming Onion
Who knew this popular restaurant appetizer was so easy to make? Serve it with
the Chipotle Mayonnaise or the Herbed Yogurt Dip (see pages 28 and 29).
Makes 1 blooming onion, about 2 to 3 servings
½ cup unbleached, all-purpose flour
1 large egg, lightly beaten
2 tablespoons buttermilk
½ cup panko breadcrumbs
½ teaspoon garlic powder
¼ teaspoon kosher salt
Pinch freshly ground black pepper
Pinch cayenne
1 large sweet onion, peeled
Olive oil, for spraying
Nonstick cooking spray
1. Place the AirFryer Basket onto the Baking/Drip Pan. Reserve.
2. Put the flour into a bowl large enough to dip the onion. Put the egg and but-
termilk into another similar-sized bowl, and the breadcrumbs and seasonings
in a third, similar-sized bowl. Reserve.

19
3. Trim the top of the onion to create a flat surface. Leave the root end intact.
Turn the onion over, so the root end faces up, and rest it on its flat surface.
4. Without piercing the root, cut the onion into 4 wedges. Also without piercing
the root, cut each wedge in half; repeat until wedges are about ¼-inch thick.
5. Turn the cut onion over and carefully, without breaking the pieces off the
root, separate the layers; the separated onion will resemble a flower with
petals.
6. Dredge the onion in the flour, and gently shake off the excess before
dipping into the egg mixture, and then finally coating each layer evenly with
the panko mixture. Evenly spray the coated onion with a generous amount
of olive oil.
7. Generously coat the AirFryer Basket with nonstick cooking spray. Put the
prepared onion into the basket in rack Position 2.
8. Select AirFry and set temperature to 400°F for 10 minutes. Onion is done
when it is crispy and golden brown in color.
Nutritional information per serving (based on 3 servings):
Calories 165 (18% from fat) • carb. 28g • pro. 6g • fat 3g • sat. fat 1g
chol. 72mg • sod. 234mg • calc. 31mg • fiber 2g
Fried Pickles
Serve these as an appetizer with the Chipotle Mayonnaise on page 29.
Makes 3 to 4 servings
½ cup unbleached, all-purpose flour
1 large egg, beaten well
½ cup finely ground cornmeal
½ teaspoon kosher salt
¼ teaspoon cayenne pepper, divided
Nonstick cooking spray
2 kosher dill pickles (about 5 ounces), cut into ¼-inch disks
Olive oil, for spraying
1. Place the AirFryer Basket onto the Baking/Drip Pan.
2. Put the flour, egg and cornmeal into individual containers large enough for
dipping the pickles. Add the salt and cayenne to the cornmeal; stir to combine.
3. Generously coat the AirFryer Basket with nonstick cooking spray. Reserve.
4. Blot the cut pickles on a paper towel. Dredge each pickle disk in the flour
and shake off the excess before dipping into the egg, and then finally coating
evenly with the cornmeal/cayenne mixture. Place pickles in one layer in
basket. Spray both sides liberally with olive oil.
5. Put the assembled basket into rack Position 2. Select AirFry and set
temperature to 400°F for 10 minutes. Cook until browned and crispy.
Let cool slightly. Serve with the Chipotle Mayo on page 29, if desired.
Nutritional information per serving (based on 4 servings):
Calories 139 (18% from fat) • carb. 24g • pro. 4g • fat 3g • sat. fat 1g
chol. 54mg • sod. 719mg • calc. 5mg • fiber 3g
Kale Chips
Kale chips make a light snack on their own, but they can also be crumbled
and used as a salad topper.
Makes 4 servings
4 stems curly kale, tough stems removed
Olive oil, for spraying
¼ teaspoon kosher salt
1. Place the AirFryer Basket onto the Baking/Drip Pan. Tear the large kale
leaves into smaller pieces and place into the basket. Spray liberally with oil
and then sprinkle with salt. Put the assembled basket into rack Position 1.
2. Select Dehydrate and set temperature to 135°F with Low fan — start checking
at 3 hours. Dehydrate until kale is bright and crispy. NOTE: Kale can take
anywhere from 3 to 6 hours.
Nutritional information per serving:
Calories 39 (27% from fat) • carb. 7g • pro. 2g • fat 1g • sat. fat 0g
chol. 0mg • sod. 171mg • calc. 58mg • fiber 1g

20
Ultimate Nachos
The key to these nachos is to layer some of the cheese between two layers
of chips. That way everyone gets a bit of cheese with every bite!
Makes 8 to 10 servings
8 cups tortilla chips (this is an estimate – you need enough to
cover the bottom of the Baking/Drip Pan, but can have more or
less, depending on how many mouths you need to feed), divided
2½ cups shredded Cheddar and/or Monterey Jack, divided
¾ cup refried beans (about ½ of a 15.5-ounce can)
2 small to medium tomatoes, seeded and chopped
1 jalapeño, halved, seeded and thinly sliced
4 scallions, thinly sliced (white and green parts)
1 can (4.5 ounces) chopped green chilies
1 cup sliced black olives (These can be purchased pre-sliced in
a 2.25-ounce can. Be sure to drain them first.)
Salsa, guacamole and sour cream for serving
Lime wedges, for serving
1. Evenly distribute half of the chips in the prepared Baking/Drip Pan. Cover with
about ½ cup of the cheese, then the remaining chips. Top with the remaining
ingredients, as evenly as possible, finishing with the remaining cheese.
2. Preheat the oven with the rack in Position 2. Select Dual Cook. First set to
Bake at 350°F for 5 minutes, and then Broil for 5 minutes.
3. Once preheated, put the nachos into oven. Keep an eye on the nachos while
they are cooking – some cheeses melt and brown more quickly than others.
4. Serve immediately with salsa, sour cream, guacamole and lime wedges.
Nutritional information per serving (based on 10 servings):
Calories 246 (54% from fat) • carb. 18g • pro. 10g • fat 15g • sat. fat 7g
chol. 30g • sod. 431mg • calc. 253mg • fiber 2g
MAIN COURSES
The Cuisinart
®
Digital AirFryer Toaster Oven, not only AirFries, but it also
bakes and broils—with convection if you’d like—to put a full meal
on your table in record time!
Crab Cakes
Makes about 18 crab cakes
16 ounces lump crab meat
1 teaspoon extra virgin olive oil
1 medium red bell pepper, finely chopped
1 jalapeño pepper, seeded and finely chopped
3 green onions, sliced
1 garlic clove, finely chopped
¼ teaspoon kosher salt
2 large eggs, lightly beaten
1 cup panko breadcrumbs, plus extra for dredging
½ cup mayonnaise
1 teaspoon Worcestershire sauce
1 teaspoon Dijon mustard
1½ teaspoons crab seasoning
Hot sauce (optional)
Oil for spraying
1. Look through crabmeat to make sure there are no shells and reserve in
refrigerator.
2. Put a large skillet over medium heat and add the olive oil. Once the pan is
hot and the olive oil shimmers across the pan, add the peppers, onions and
garlic. Sweat for at least 5 minutes, until the vegetables soften slightly; stir in
the salt.
3. Remove the vegetables from the heat and allow them to cool for a few
minutes. Once cool, add the vegetables to the crabmeat. Add the eggs,
panko, mayonnaise, Worcestershire, Dijon, and crab seasoning, and dash
or two of hot sauce, if desired.

21
4. Very carefully mix all ingredients together. The best way to mix the crab
mixture is with clean hands, however, you can mix it with a spoon. It is
important to mix carefully to keep the crabmeat intact.
5. Form the mixture into ¼-cup cakes with your hands and place them on a
clean plate, separating the layers of patties with wax paper. Cover with
plastic and refrigerate for 1 hour before cooking.
6. Once ready, dredge the crab cakes in remaining panko crumbs. Place
the AirFryer Basket onto the Baking/Drip Pan. Put the cakes into the basket
and spray liberally with olive oil.
7. Put the assembled basket in rack Position 2 and set temperature to 400°F for
10 minutes.
8. Serve immediately. Lemon wedges make a nice accompaniment.
Nutritional information per crab cake:
Calories 220 (41% from fat) • carb. 17g • pro. 15g • fat 10g • sat. fat 2g
chol. 90mg • sod. 500mg • calc. 106mg • fiber 1g
Buffalo Chicken Wings
For a healthier option than deep-frying, AirFry chicken wings. The Cuisinart
®
Digital AirFryer makes them extra crispy with no oil and little preparation.
Makes about 20 wings
Nonstick cooking spray
2 pounds chicken wings*
¾ teaspoon kosher salt
¼ cup hot sauce
1 tablespoon coconut oil
* Many wings already come separated into flats and drumettes, but if only full
wings are available, be sure to remove the tips and separate into two pieces.
1. Place the AirFry Basket into the Baking/Drip Pan.
2. Generously coat the AirFryer Basket with nonstick cooking spray. Reserve.
3. Put the chicken wings into the basket. Sprinkle with salt.
4. Put the assembled basket into rack Position 2. Select AirFry – Wings with
temperature set to 400°F for 25 minutes. Cook until golden and crispy.
5. While the wings are cooking, prepare the sauce. Put the hot sauce and
coconut oil into a large bowl. Combine.
6. When chicken wings are done, toss immediately in sauce.
NOTE: Visit Cuisinart.com for more sauce recipes to serve with chicken wings.
Nutritional information per wing (plain):
Calories 94 (39% from fat) • carb. 0g • pro. 14g • fat 4g • sat. fat 1g
chol. 39mg • sod. 127mg • calc. 7mg • fiber 0g
Nutritional information per serving of Buffalo Sauce (based on 20 servings):
Calories 6 (100% from fat) • carb. 0g • pro. 0g • fat 1g • sat. fat 1g • chol. 0mg
sod. 28mg • calc. 0mg • fiber 0g
Five-Spice Seasoning for Chicken Wings
with Dipping Sauce
DO NOT skip the sauce with these crispy spiced wings.
Any leftover sauce can be drizzled over a cup of steamed rice.
Enough seasoning for 20 wings. Makes about ²⁄
³
cup of sauce.
1 teaspoon kosher salt
1 teaspoon five-spice powder
Dipping Sauce:
¼ cup fish sauce
¼ cup granulated sugar
1 garlic clove, finely chopped
½ Thai chile, thinly sliced (or ½ jalapeño, seeded
and thinly sliced)
1 tablespoon fresh lime juice
1 tablespoon chopped cilantro
1 tablespoon chopped mint
1 tablespoon shredded carrots
2 tablespoons thinly sliced green onions

22
1. Sprinkle the salt and five-spice powder over the chicken wings. Cook as
instructed in preceding recipe.
2. While wings are cooking, prepare the dipping sauce. Put the fish sauce,
sugar, garlic and chile in a small saucepan set over medium-low heat. Cook
until sugar has dissolved. Remove to cool to room temperature. Once cool,
add the remaining ingredients and stir to combine. Transfer to a serving bowl
and serve alongside the hot wings.
Nutritional information per serving (1 teaspoon sauce):
Calories 39 (78% from fat) • carb. 2g • pro. 0g • fat 3g • sat. fat 0g • chol. 0mg
sod. 68mg • calc. 4mg • fiber 0g
Mini Shepherd’s Pies
This miniature take on a classic is almost too cute to eat.
A perfect way to use up those leftover mashed potatoes.
Makes 6 individual servings
1 refrigerated, packaged pie crust
½ pound lean ground beef, or lamb
1 carrot, diced
1 celery stalk, diced
½ small onion, diced
1 garlic clove, finely chopped
2 to 3 sprigs fresh thyme
1 bay leaf
1 tablespoon unbleached, all-purpose flour
1 cup beef stock
2 to 3 dashes Worcestershire sauce
1 teaspoon tomato paste
½ cup frozen peas, thawed
Kosher salt and white pepper to taste
1½ cups prepared mashed potatoes
Chopped parsley for garnish
1. Unroll the refrigerated pie crust, and using a 4-inch round, cut out 6 circles
of dough. Working quickly, press the circles of dough into the bottoms and
sides of a 6-cup muffin pan. Line each cup with foil and fill two-thirds full
with pie weights or dried beans. Select Bake with temperature set to 350°F
for 10 minutes. Place muffin pan on Oven Rack in rack Position 1 once oven
is preheated. Bake until golden. Allow to cool while preparing the filling.
2. In a medium nonstick skillet, cook ground beef over medium-high heat, stir-
ring frequently until cooked through, about 5 minutes. Add the carrot, celery,
onion, garlic, thyme sprigs and bay leaf to the beef, and continue to cook
over medium heat until the vegetables are sweated and tender, about 8 to
10 minutes.
3. Sprinkle the flour over the ground beef mixture and cook, stirring constantly
for 1 to 2 minutes. Add stock, Worcestershire and tomato paste and continue
to cook over low heat, stirring occasionally until the mixture is bubbly and
thick, another 5 to 8 minutes. Remove thyme sprigs and bay leaf. Stir in
thawed peas and cook for 1 to 2 minutes longer. Season to taste with salt
and white pepper.
4. Divide the mixture among the 6 cooled crusts. Top each pie with ¼ cup of
mashed potatoes. Return the muffin pan to rack Position 2, select AirFry and
set temperature to 400°F for 5 to 8 minutes, cooking until bubbly and pota-
toes are nicely browned.
5. Remove mini shepherd’s pies from the muffin pan. Garnish with chopped
parsley. Serve warm.
Nutritional information per serving (1 muffin cup):
Calories 246 (43% from fat) • carb. 24.6g • pro. 10.7g • fat 12g • sat. fat 5.4g
chol. 35.8mg • sod. 346.1mg • calc. 16.2mg • fiber 1.7g
Oven-Roasted Ribs
Makes 6 servings
Dry rub:
2 tablespoons packed light brown sugar
3 tablespoons chili powder
1 teaspoon kosher salt
½ teaspoon smoked paprika
½ teaspoon freshly ground black pepper
½ teaspoon dried oregano

23
½ teaspoon garlic powder
¼ teaspoon cayenne pepper
2 pounds St. Louis-style ribs (baby back ribs can be substituted)
1. Stir dry rub ingredients together in a small bowl.
2. Rub spices all over the ribs and refrigerate for at least 2 hours, but preferably
overnight.
3. When ready to cook, arrange ribs on the Baking/Drip Pan and put into rack
Position 1.
4. Select Low and set temperature to 200°F for 2½ hours. When cooking is
complete, cut into individual ribs and serve with barbecue sauce if desired.
Nutritional information per serving (based on 6 servings):
Calories 447 (73% from fat) • carb. 6g • pro. 24g • fat 26g • sat. fat 11g
chol. 121mg • sod. 578mg • calc. 38mg • fiber 2g
Braised Lamb Shanks
Simple flavors plus a slow cooking method make these lamb shanks irresistible.
Makes about 4 servings
4 lamb shanks
1½ teaspoons kosher salt
½ teaspoon freshly ground black pepper
4 garlic cloves, crushed
2 tablespoons olive oil
4 to 6 sprigs fresh rosemary
3 cups beef broth, divided
2 tablespoons balsamic vinegar
1. Rub the lamb shanks with the salt and pepper and place on the Baking/Drip Pan.
Take the smashed garlic and rub well over the lamb. Coat the seasoned shanks
with the olive oil and place the rosemary around and underneath the lamb.
2. Put the prepared pan with the lamb into rack Position 1. Select Dual Cook.
First, set to Roast at 425°F for 20 minutes, and then to Low at 250°F for
2 hours.
3. Turn the lamb once while roasting. Add 2 cups of the broth and vinegar
when oven switches to Low. Add remaining broth with 1 hour of cooking
time remaining.
4. Lamb is done when it easily pulls away from the bone.
Nutritional information per serving (based on 4 servings):
Calories 447 (73% from fat) • carb. 6g • pro. 24g • fat 26g • sat. fat 11g
chol. 121mg • sod. 578mg • calc. 38mg • fiber 2g
Chicken Nuggets
Kids of all ages will love this homemade version of the frozen standby.
Makes about 4 servings
¾ cup unbleached, all-purpose flour
2 large eggs, lightly beaten
1½ cups panko breadcrumbs
¾ teaspoon kosher salt, divided
¾ teaspoon freshly ground black pepper, divided
1 pound thinly sliced chicken breast or boneless thighs,
pounded even and cut into 1½-inch pieces
Olive oil, for spraying
Nonstick cooking spray
1. Put the flour, eggs and panko into individual containers large enough for
dipping the chicken. Add a pinch each of the salt and pepper to the panko;
stir to combine.
2. Sprinkle the chicken evenly on both sides with the remaining salt and
pepper. Dredge each chicken piece in the flour and shake off the excess
before dipping into the egg, and then finally coating evenly with the panko
breadcrumbs. Spray both sides liberally with olive oil.
3. Place the AirFryer Basket onto the Baking/Drip Pan. Generously coat the
basket with nonstick cooking spray. Put the prepared nuggets into the basket
and put into rack Position 2.

24
4. Select AirFry – Nuggets (not frozen) with temperature set to 400°F for 15
minutes, flipping halfway through, cooking until chicken is evenly browned on
both sides.
5. Serve immediately.
Nutritional information per serving (based on 4 servings):
Calories 191 (22% from fat) • carb. 32g • pro. 20g • fat 5g • sat. fat 1g
chol. 0mg • sod. 434mg • calc. 1mg • fiber 1g
Classic Roast Chicken
Simple spices go a long way in this roast chicken recipe.
Makes 4 to 6 servings
1 4-pound chicken
1 teaspoon kosher salt
½ teaspoon freshly ground black pepper
1 lemon, halved
1 teaspoon extra virgin olive oil
2 teaspoons herbes de Provence or other dried herbs like
rosemary and thyme
3 garlic cloves, smashed
1. Pat the chicken dry and put onto the Baking/Drip Pan. Sprinkle with salt,
pepper and the juice of half the lemon. Put the other lemon half into the
chicken’s cavity. Drizzle chicken with olive oil. Rub with herbs and garlic
cloves. Put the garlic cloves into the chicken’s cavity with the lemon.
Truss if desired.
2. Put the Baking/Drip Pan with the chicken into rack Position 1. Select Roast
with temperature set to 375°F for 60 minutes. Begin checking at 50 minutes.
Chicken is ready when the internal temperature of the thigh reaches 165°F
to 170°F.
3. Allow chicken to rest for 10 minutes; carve and serve.
Nutritional information per serving (based on 6 servings):
Calories 707 (56% from fat) • carb. 4g • pro. 73g • fat 43g • sat. fat 12g
chol. 230mg • sod. 578mg • calc. 61mg • fiber 1g
Harissa and Preserved Lemon-Glazed Salmon
North African flavors uniquely shine in this glaze, which is sure to kick up
your salmon routine.
Makes 4 servings
1 large, center-cut salmon fillet, about 1½ pounds
2 teaspoons olive oil
Kosher salt, for seasoning
¼ cup honey
2 to 3 teaspoons harissa (depending on desired spice level)
2 teaspoons preserved lemon, finely chopped
Freshly chopped herbs (parsley, cilantro, dill) and lemon
wedges for serving
1. If refrigerated, allow salmon to come to room temperature (at least 20 minutes).
Rinse salmon, pat dry, and rub all over with olive oil. Season both sides with
salt. Place skin-side down on the Baking/Drip Pan.
2. In a small bowl, whisk together honey, harissa (to taste) and preserved lemon.
Pour glaze over salmon, and using a pastry brush or spoon, spread evenly
over flesh.
3. Put the pan into rack Position 1. Select Low and set temperature to 200°F and
time to 45 minutes, checking for doneness at 30 minutes; cooking time varies
depending on thickness of fillet. Salmon is done when opaque and flakes
easily with a fork.
4. Transfer to a platter. Spoon any leftover glaze from pan over fish. Garnish with
freshly chopped herbs and lemon wedges. Serve immediately.
Nutritional information per serving (based on 4 servings):
Calories 486 (43% from fat) • carb. 17.8g • pro. 48.1g • fat 22.3g • sat. fat 4.3g
chol. 140mg • sod. 137mg • calc. 41.3mg • fiber 0g

25
Fish Tacos
Get a taste of Baja and the beach with these fish tacos – guilt free!
Makes 6 tacos
12 ounces cod, cut into ½-inch, 1-ounce strips
1 teaspoon kosher salt, divided
½ lime
½ cup unbleached, all-purpose flour
1 large egg, lightly beaten
1 cup panko breadcrumbs
Nonstick cooking spray
Olive oil, for spraying
6 corn tortillas
Shredded cabbage
Cilantro, roughly chopped
Avocado
Crema or sour cream
Lime wedges
1. Season cod with ½ teaspoon of the salt and squeeze of lime.
2. Set up 3 containers for dredging – one with flour, one with egg and the third
with the panko and remaining ½ teaspoon of salt. Dip the cod first into the
flour, shaking off any excess. Next dip in the egg and then finally, coat well
with the panko.
3. Place the AirFryer Basket onto the Baking/Drip Pan. Coat the AirFryer Basket
well with nonstick cooking spray. Spray both sides of cod with olive oil and
place into the fry basket. Select AirFry with the temperature set to 400°F and
cook for 9 minutes; flip fish pieces and cook for an additional 3 to 5 minutes,
or until evenly crispy.
4. Reserve cooked fish and then heat tortillas for about 2 to 3 minutes at 300°F,
until soft and pliable. Serve tacos, each with 2 pieces of fish. Garnish as
desired with shredded cabbage, cilantro, avocado, crema and fresh lime.
Nutritional information per taco:
Calories 249 (6% from fat) • carb. 21g • pro. 13g • fat 1g • sat. fat 0g
chol. 24mg • sod. 447mg • calc. 55mg • fiber 2g
Falafel
AirFrying lightens this Middle Eastern dish without compromising
on crunch or flavor!
Remember to soak the chickpeas the night before.
Makes 12 falafel
1 garlic clove
1 small shallot, cut into 1-inch pieces
½ cup dried chickpeas, soaked overnight, rinsed and drained
¾ teaspoon kosher salt
¹⁄8 teaspoon freshly ground black pepper
¾ teaspoon ground cumin
¼ teaspoon ground coriander
¹⁄8 teaspoon chili powder
¹⁄
³
cup packed fresh Italian parsley – stems and leaves
1 tablespoon unbleached, all-purpose flour
¼ teaspoon baking soda
1 tablespoon water
Nonstick cooking spray
Olive oil for spraying
Pita for serving
Chopped tomatoes, cucumbers, and lettuce for serving
Tahini (optional)
1. Insert the chopping blade into the work bowl of a food processor. Add the
garlic and shallot and pulse to chop, about 5 times. Add the chickpeas, salt,
pepper, spices, parsley and flour. Pulse 6 to 8 times to coarsely grind the
chickpeas. Scrape down and pulse a few more times. Remove and reserve
¹⁄
³
cup of the mixture in mixing bowl.
2. Dissolve the baking soda in the tablespoon of water. Turn the processor on,
pour through feed tube with unit running to incorporate. Combine with the
reserved ¹⁄
³
-cup mixture in the mixing bowl and stir together to combine.
3. Using a tablespoon measure, scoop chickpea mixture and shape into 12
balls. Place the balls on a tray or plate lined with wax paper and chill in the
refrigerator for 30 minutes.

26
4. Place the AirFryer Basket onto the Baking/Drip Pan and spray liberally with
nonstick cooking spray. Once chilled, transfer the falafel to the assembled
basket in a single layer. Spray evenly with oil.
5. Place the assembled tray into rack Position 2. Set to AirFry at 350ºF for 10
minutes, cooking until evenly browned.
6. Serve falafel with sliced pita and veggies. Drizzle with tahini if desired.
Nutritional information per falafel:
Calories 62 (44% from fat) • carb. 7g • pro. 2g • fat 3g • sat. fat 0g • chol. 0mg
sod. 138mg • calc. 9mg • fiber 1g
Open-Faced Croque Monsieurs
A French café favorite.
Makes 2 servings
For the béchamel:
1 tablespoon unsalted butter
1 tablespoon unbleached, all-purpose flour
½ cup milk, preferably whole
For the sandwiches:
2 slices of good quality country-style or sourdough bread
4 teaspoons Dijon mustard
4 slices smoked deli ham
4 slices Swiss or Gruyère cheese
Nonstick cooking spray
1. To make the béchamel, heat the butter in a small saucepan over low heat.
Whisk in the flour, stirring constantly for about 30 seconds until the mixture
smells nutty and is just golden. Pour in milk in a slow stream, continuing to
whisk until smooth and slightly thickened, about 3 to 5 minutes. Remove
from heat and reserve, whisking occasionally to prevent lumps.
2. Assemble the sandwiches. Lightly coat AirFryer Basket with nonstick cooking
spray and place onto Baking/Drip Pan. Place the bread slices into the basket.
Spread the top of each slice with 2 teaspoons of mustard and layer with 2
slices of ham. Spoon béchamel over the ham and top with 2 slices of cheese.
3. Put the prepared basket on pan into rack Position 2. Select Broil for 20
minutes, checking at 15 minutes. Sandwiches are done when the cheese is
melted and golden brown.
4. Serve immediately.
Nutritional information per sandwich:
Calories 435 (57% from fat) • carb. 12.3g • pro. 22.3g • fat 20.5g • sat. fat 10.6g
chol. 81.1mg • sod. 861.9mg • calc. 268.9mg • fiber 0g
Pizza Margherita
Simple and delicious—and quicker than takeout!
Makes 1 pizza, 6 slices
Nonstick cooking spray
16 ounces pizza dough, room temperature
¾ cup pizza sauce
2 tablespoons grated Parmesan
3 ounces fresh mozzarella, thinly sliced
1 tablespoon extra virgin olive oil
¼ cup tightly packed basil leaves, thinly sliced
1. Generously coat the Baking/Drip Pan with nonstick cooking spray.
Put the pizza dough on the pan. Stretch the dough to cover the entire pan.
Add sauce to the center of the dough. Leaving a 1-inch border for the crust,
spread sauce into a thin, even layer. Sprinkle with the Parmesan and top with
the mozzarella. Brush the border with olive oil.
2. Preheat the oven by selecting Pizza with temperature set to 450°F for 8 to 10
minutes. Once preheated, put Baking/Drip Pan into rack Position 1. It is
recommended to turn the tray halfway through baking time for best results.
3. Sprinkle with basil before serving.
NOTE: Baking pizza on a baking/pizza stone gives you the crispiest crust,
similar to pizza prepared in a brick oven. Go to Cuisinart.com for details.
Nutritional information per slice:
Calories 217 (29% from fat) • carb. 32g • pro. 15g • fat 8g • sat. fat 2g • chol. 7mg
sod. 402mg • calc. 46mg • fiber 5g

27
SIDES AND BREADS
Perfect accompaniments to main courses, these sides and breads are
cooked quickly with minimal ingredients and barely any cleanup.
Sweet & Salty Bacon Fried Rice
You’ll rethink ordering after trying this simple Asian takeout go-to.
Candied bacon makes it irresistible!
Makes 4 servings
1 cup cauliflower, broken into ½-inch florets
½ cup thinly sliced green onions, plus more to serve
2 teaspoons finely chopped garlic
1 tablespoon grated fresh ginger
2 tablespoons canola oil, divided
½ cup frozen peas, thawed
2 cups cooked rice
2 large eggs
2 tablespoons soy sauce, reduced sodium
1 tablespoon rice wine vinegar
1 teaspoon toasted sesame oil
1 teaspoon granulated sugar
4 slices Candied Bacon, crumbled (recipe follows)
Your favorite Asian hot sauce and lime wedges to serve
1. Combine the cauliflower, green onions, garlic and ginger with 1 tablespoon
of canola oil and spread onto Baking/Drip Pan. Put into rack Position 2 and
select AirFry with temperature set to 400°F for 5 minutes. Remove the pan
and mix in the peas; return for another 2 to 3 minutes. Transfer mixture to a
serving bowl.
2. Add rice to the pan and mix with the remaining tablespoon of oil. Create a
well in the center of the pan. Crack the eggs into the well and scramble with
a fork. Put the pan in rack Position 2 and select AirFry with temperature set
to 400°F for 5 minutes, until the eggs are set and the rice is just starting to
get crispy. Break the egg up into pieces with a fork and add to the serving
bowl along with the rice.
3. Combine soy sauce, rice vinegar, sesame oil and sugar and pour over rice
mixture. Add candied bacon and toss thoroughly. Serve immediately with
green onions, lime wedges and your favorite Asian hot sauce.
Nutritional information per serving:
Calories 306 (42% from fat) • carb. 32g • pro. 11g • fat 14.3g • sat. fat 2.4g
chol. 102.5mg • sod. 6.5mg • calc. 33.8mg • fiber 2.1g
Candied Bacon
Seriously addictive – try eating just one slice.
Makes 12 servings
Nonstick cooking spray
2 tablespoons light brown sugar
¼ teaspoon cayenne pepper
12 slices thick-cut bacon
1. Place the AirFryer Basket onto the Baking/Drip Pan. Lightly coat with cooking
spray. Reserve.
2. In a large bowl, mix together the sugar and cayenne pepper. Add the bacon
slices and toss to coat.
3. Arrange the bacon slices in a single layer in the AirFry Basket. Put the
prepared basket in rack Position 1.
4. Select AirFry with temperature set to 400°F for 8 to 10 minutes until crispy.
Let cool, then serve.
Nutritional information per slice:
Calories 43 (75% from fat) • carb. 0.7g • pro. 2g • fat 3.5g • sat. fat 1.3g
chol. 7.5mg • sod. 150mg • calc. 0mg • fiber 0g

28
“Fried” Brussels Sprouts
The tasty, sweet and spicy sauce makes these Brussels sprouts
a favorite side dish.
Makes 4 servings
Nonstick cooking spray
1 pound Brussels sprouts
¾ teaspoon kosher salt
Olive oil for spraying
2 tablespoons honey
2 teaspoons sriracha sauce
1 teaspoon fresh lime juice
1. Place the AirFryer Basket onto the Baking/Drip Pan and lightly coat with
cooking spray.
2. Trim the bottom of each Brussels sprout and then cut in half lengthwise.
Arrange the halved sprouts in the basket and then sprinkle with salt and
lightly coat with olive oil.
3. Place the prepared basket into rack Position 2. Select Dual Cook. First, set to
AirFry at 300°F for 20 minutes, and then AirFry again at 350°F for 10 minutes.
Sprouts should be soft yet crispy.
4. While sprouts are cooking, stir together the honey, sriracha and lime juice in
a medium-size mixing bowl. Once the Brussels sprouts are ready, toss in the
sauce and serve immediately.
Nutritional information per serving:
Calories 89 (13% from fat) • carb. 19g • pro. 4g • fat 2g • sat. fat 0g
chol. 0mg • sod. 443mg • calc. 48mg • fiber 4g
French Fries
These crispy fries can be served with any of your favorite seasonings or sauces.
Makes 2 to 3 servings
1 pound (about 3 medium) russet potatoes
Olive oil, for spraying
1 teaspoon kosher or seasoned salt
1. Cut potatoes into ¼-inch thick pieces, about 4 inches long. Pat dry completely.
2. Place the AirFryer Basket onto the Baking/Drip Pan. Put the dried potatoes into
the pan. Spray with oil. Sprinkle with salt and toss. Spread into a single layer.
3. Put the assembled basket into rack Position 2. Select AirFry–Fries with the
temperature set to 400°F for 15 minutes, cooking until desired crispiness is
achieved.
4. When French fries are done, transfer to a serving bowl. Taste and adjust
seasoning as desired. Serve immediately.
Nutritional information per serving (based on 3 servings):
Calories 138 (10% from fat) • carb. 27g • pro. 4g • fat 2g • sat. fat 0g
chol. 0mg • sod. 389mg • calc. 0mg • fiber 2g
Veggie Fries with Herbed Yogurt Dip
The vegetables in this recipe can be substituted with any of your favorites.
Makes 4 to 6 servings
Herbed Yogurt Dip (makes ½ cup):
1 garlic clove
1 tablespoon fresh mint leaves
7 ounces plain, nonfat Greek yogurt
1 teaspoon fresh lemon juice
¹⁄8 teaspoon kosher salt
Veggie Fries:
½ cup unbleached, all-purpose flour
2 large eggs, beaten well

29
1 cup panko breadcrumbs
1 tablespoon grated Pecorino Romano cheese
½ teaspoon dried oregano
½ teaspoon dried parsley
¹⁄
8 teaspoon kosher salt
½ medium zucchini (about 4 ounces), cut into ¼-inch thick
pieces, about 3 inches long
6 string beans (about 2 ounces), trimmed
½ avocado, pitted and cut into 8 pieces
Olive oil, for spraying
Lemon, for serving, optional
1. Prepare the Herbed Yogurt Dip: Put garlic and mint into the work bowl of a
Cuisinart
®
chopper/mini food processor fitted with the chopping blade.
Pulse until roughly chopped. Scrape down sides; add yogurt, lemon juice
and salt. Process on High until completely puréed and homogenous. Transfer
to a serving bowl, cover, and refrigerate until ready to use.
2. Make the veggie fries: Place the AirFryer Basket onto the Baking/Drip Pan.
Reserve. Put the flour, eggs and panko into individual containers large
enough for dipping the veggies. Add the cheese, oregano, parsley and salt to
the panko and stir to combine.
3. Dredge each of the vegetables in the flour, and shake off the excess before
dipping into the egg, and then finally coating evenly with the panko mixture.
Once coated, transfer to the assembled basket in a single layer. Spray liberally
and evenly with oil.
4. Place the assembled tray into rack Position 2. Select AirFry with the tempera-
ture set to 400ºF for 8 minutes.
5. When veggies sticks are done, transfer to a serving plate. Taste and adjust
seasoning with more salt or a squeeze of lemon, if desired. Serve immediately
with the reserved herbed dip.
Nutritional information per serving (based on 6 servings):
Calories 269 (41% from fat) • carb. 17g • pro. 15g • fat 10g • sat. fat 2g
chol. 90mg • sod. 500mg • calc. 106mg • fiber 1g
Sweet Potato Fries with Chipotle Mayo
More nutritious alternative to regular French fries.
Makes 2 to 3 servings
Chipotle Mayonnaise:
½ cup mayonnaise
1 chipotle chile in adobo, finely chopped
¼ teaspoon fresh lemon juice
Sweet Potato Fries:
1 pound sweet potatoes (about 2 medium), cut into ¼-inch thick
pieces, about 4 inches long
½ teaspoon kosher salt
Olive oil, for spraying
1. Prepare Chipotle Mayonnaise: Put mayonnaise, chipotle and lemon juice in
the work bowl of a mini food processor. Process on High until completely
puréed and homogenous. Transfer to a serving bowl, cover, and refrigerate
until ready to serve.
2. Make Sweet Potato Fries: Place the AirFryer Basket onto the Baking/Drip
Pan. Put the cut sweet potatoes into the basket. Spray with oil. Sprinkle with
salt and toss. Spread into a single layer.
3. Put the assembled basket into the oven in rack Position 2. Select AirFry with
temperature set to 400°F for 15 minutes, cooking until golden brown and
crispy.
4. When sweet potatoes are ready, transfer to a serving bowl. Serve immediately
with reserved Chipotle Mayonnaise on the side.
Nutritional information per serving of Chipotle Mayonnaise
(based on 1 tablespoon):
Calories 101 (99% from fat) • carb. 0g • pro. 0g • fat 11g • sat. fat 2g
chol. 10mg • sod. 93mg • calc. 0mg • fiber 0g
Nutritional information per serving of Sweet Potato Fries (based on 3 servings):
Calories 149 (11% from fat) • carb. 31g • pro. 3g • fat 2g • sat. fat 0g • chol. 0mg
sod. 434mg • calc. 57mg • fiber 5g

30
Pimiento Mac ’n Cheese Cups
Bring Southern flare to a childhood favorite. These cups are full of comfort.
Makes 6 individual servings
½ whole milk
4 ounces cream cheese
1 cup grated sharp Cheddar cheese
¹⁄8 teaspoon cayenne pepper
1 to 2 dashes hot sauce
4 ounces elbow macaroni, cooked per package instructions
2 ounces drained, diced pimiento peppers (about ¼ cup)
2 tablespoons mayonnaise
Salt and pepper to taste
¼ cup crushed saltine crackers, divided
Butter for greasing
1. In small saucepan, combine milk and cream cheese over medium-low heat,
stirring with a wooden spoon until smooth. Add Cheddar cheese, and
continue to cook, stirring constantly, until thick and creamy. Remove cheese
mixture from heat and stir in cayenne and hot sauce.
2. Add elbow macaroni, pimiento peppers and mayonnaise to cheese mixture
and stir until combined. Season to taste with salt and pepper.
3. Thoroughly grease a 6-cup muffin pan with butter and dust the inside of
each cup with half of the crushed crackers. Divide the mac ’n cheese evenly
among the cups and sprinkle with the reserved crushed crackers.
4. Preheat oven by selecting Bake with High Speed fan, and temperature set
to 350°F for 10 minutes. Once preheated, place muffin pan on the Oven Rack
in Position 1. Bake until bubbly and tops are golden brown. Allow to cool
slightly, about 5 to 10 minutes. Run a knife along the edge of each cup to
loosen from pan. Serve warm.
Nutritional information per cup:
Calories 264 (58% from fat) • carb. 18.1g • pro. 9.2g • fat 16.9g • sat. fat 9g
chol. 47mg • sod. 284.8mg • calc. 169.7mg • fiber 1g
Buttery Dinner Rolls
After your first bite, you will never go back to store-bought rolls again.
Makes 12 rolls
¹⁄
³
cup whole milk, plus 1 tablespoon for brushing
6 tablespoons unsalted butter, plus 1 tablespoon for brushing
3 tablespoons granulated sugar
1¾ teaspoons active dry yeast
3 tablespoons warm water (105°F to 110°F)
3 cups bread flour
¾ teaspoon kosher salt
1 egg, lightly beaten
1. In a small saucepan, combine the milk, butter and sugar. Warm over low heat
until the butter is melted. Remove from heat and set aside until cooled to
room temperature.
2. Dissolve the yeast in the warm water in a large measuring cup. Let stand
5 minutes, or until mixture is foamy. Put the flour and salt in the work bowl of
a Cuisinart
®
Food Processor fitted with the dough or metal chopping blade
and process for 10 seconds. Add the melted butter mixture and egg to the
yeast/water mixture. With the machine running, slowly add the liquid through
the feed tube and process until a dough ball forms. Continue processing for
45 seconds to knead the dough. Shape the dough into a smooth ball, put it
in a clean mixing bowl and cover with plastic wrap. Let rise in a warm place
until the dough has doubled in size, about 60 minutes.
3. Lightly butter a 9-inch round baking pan. Punch down the dough and divide
into 12 equal pieces (about 1½ to 1¾ ounces each). Roll into smooth rounds
and arrange in the prepared pan.
4. Put the pan onto the Oven Rack in Position 1. Select Proof with temperature
set to 90°F for 45 minutes. Rolls should about double in size.
5. Remove pan and preheat oven by selecting Bake with High Speed fan at
350°F for 15 to 20 minutes. While the oven is heating, melt the remaining
tablespoon of butter and combine with the remaining tablespoon of milk in a
small bowl. Gently brush the tops of the rolls with butter/milk mixture. Once
the oven beeps to signal that it is preheated, put the pan into the oven in

31
Position 1 and bake rolls for 15 minutes, or until golden brown and an internal
temperature of 190°F is reached.
6. Remove rolls from the pan and cool slightly before serving.
Nutritional information per roll:
Calories 183 (35% from fat) • carb. 26g • pro. 4g • fat 7g • sat. fat 5g • chol. 34mg
sod. 153mg • calc. 13mg • fiber 1g
Rustic Italian Bread
This airy and crusty loaf proves that making artisanal-style bread at home has
never been easier.
Makes 1 large round loaf (about 12 servings)
1¾ teaspoons active dry yeast
¾ teaspoon granulated sugar
1 cup warm water (105˚F to 110˚F)
3 cups bread flour
¹⁄
³
cup wheat bran
1½ teaspoons kosher salt
1½ tablespoons olive oil
Egg wash (1 large egg and 1 tablespoon cold water
whisked together)
1. In a measuring cup, dissolve the yeast and sugar in the warm water.
Let stand 5 minutes, or until mixture is foamy.
2. Put the flour, wheat bran and salt in the work bowl of a food processor fitted
with the dough or metal chopping blade and process for 10 seconds. Add
the oil. With the machine running, slowly add the liquid through the feed tube
and process until a dough ball forms. Continue processing 1 minute to knead
the dough. Shape the dough into a ball and put in a large bowl that has been
lightly floured. Cover the bowl tightly with plastic wrap and let the dough rise
for 1 hour, until doubled in size.
3. Punch down the dough, reshape into a ball and cover the bowl again with a
clean piece of plastic wrap. Let rise 1 hour.
4. Gently punch down the dough and shape into a tight, large round.
5. Line the Baking/Drip Pan with parchment paper. Put the dough round on the
prepared pan and place into the Cuisinart
®
Digital AirFryer Oven in Position 1.
Select Proof with temperature set to 90°F for 30 minutes.
6. Remove dough and preheat oven by selecting Bake with High Speed fan at
375°F for 30 minutes. Once the oven beeps to signal that it is preheated, cut
an X into the top center of the loaf with a serrated knife, brush with the egg
wash and put into rack Position 1.
7. Bread should be nicely browned and have an internal temperature between
200˚F and 207˚F. Remove bread from the oven and cool completely on a wire
rack before slicing.
Nutritional information per serving (based on 12 servings):
Calories 127 (15% from fat) • carb. 23g • pro. 4g • fat 2g • sat. fat 0g • chol. 16g
sod. 292mg • calc. 3mg • fiber 1g
SWEET TREATS
Pineapple Leather Rolls-Ups
A healthy, sweet treat for everyone’s packed lunch.
Makes 5 roll-ups
3 cups cubed, fresh pineapple
1 teaspoon, fresh lemon juice
1 to 2 tablespoons honey, to taste (optional)
Nonstick cooking spray
1. Combine pineapple, lemon juice and honey (if using) in a blender or food
processor and blend/process until smooth.
2. Line the Baking/Drip Pan with parchment paper, leaving some overhang
around the sides, and spray with nonstick cooking spray. Pour the pineapple
mixture onto the parchment and using a rubber or offset spatula, spread
evenly over the entire surface area of the pan.

32
3. Put the pan in Position 2. Select Dehydrate and set the temperature to 135°F
for 12 hours, checking for dryness at 6 hours. The fruit leather is done when
it’s no longer sticky to touch and starts to pull off parchment easily.
4. When cool to touch, place wax paper over top and turn over on flat surface.
Carefully pull off parchment. Using sharp scissors, trim the wax paper, and
cut the leather into five 2-inch wide strips. Roll up each strip and seal with
fun tape or baking twine. Store at room temperature in an airtight container
up to a week.
Nutritional information per roll-up:
Calories 49 (2% from fat) • carb. 13g • pro. 0.5g • fat 0.1g • sat. fat 0g • chol. 0g
sod. 1mg • calc. 12.4mg • fiber 1.4g
Blueberry Crumble Bars
When you cannot decide between a cookie or a crumble, this dessert satisfies
both cravings.
Makes 12 servings
Nonstick cooking spray
Crust:
8 tablespoons (1 stick) unsalted butter, softened
and room temperature
¼ cup packed light brown sugar
2 tablespoons granulated sugar
1¼ cups unbleached, all-purpose flour
¼ teaspoon kosher salt
Pinch ground cinnamon
Filling:
¼ cup granulated sugar
¼ cup packed light brown sugar
2 tablespoons tapioca starch
¼ teaspoon kosher salt
Pinch ground cinnamon
Pinch ground ginger
¼ teaspoon pure vanilla extract
4 cups fresh blueberries
Topping:
¾ cup unbleached, all-purpose flour
½ cup rolled oats (not quick cooking)
½ cup packed light brown sugar
¼ teaspoon ground cinnamon
¼ teaspoon kosher salt
6 tablespoons unsalted butter, cold and cubed
1. Lightly coat a 9-inch square baking pan with nonstick cooking spray and line
with parchment paper; reserve.
2. Put the butter and sugars into the work bowl of a Cuisinart
®
food processor
fitted with the chopping blade. Process until creamy, stopping to scrape
down the sides of the bowl as needed. Add the remaining crust ingredients
and pulse until combined.
3. Transfer the crust mixture into the prepared pan and press down firmly to
pack into the bottom of the pan. Chill in refrigerator until firm.
4. While the crust is chilling, prepare the filling. Put the sugars, starch, salt, and
spices in a small mixing bowl; whisk to combine. Add the vanilla and blueber-
ries and stir until blueberries are well coated. Using a large fork, or a potato
masher, mash the blueberries until about half have burst open; reserve.
5. Put all of the topping ingredients, except for the butter, in a medium mixing
bowl. Whisk to combine. Add the butter and, using your fingers, combine
until large crumbs form. (Alternatively, this topping can be made using a
Cuisinart
®
Food Processor fitted with the chopping blade. Put all dry
ingredients in the work bowl fitted with the chopping blade. Pulse to combine.
Add the butter and pulse until large clumps have formed.)
6. Once the crust has sufficiently chilled, preheat the Cuisinart
®
Digital AirFryer
Oven by selecting Bake with the temperature set to 350°F for 8 minutes with
the rack in Position 1. When the oven is preheated, bake until crust is firm
and golden at the edges. Remove and spread filling on top of the baked crust
and return to the oven for an additional 15 minutes, or until bubbling at the
edges. Cover evenly with the crumb topping and return to the oven for a final
15 minutes. The bars are done when the topping is evenly browned.
7. Remove from the AirFryer and allow to cool completely prior to cutting
and serving.

33
Nutritional information per bar:
Calories 282 (41% from fat) • carb. 39g • pro. 3g • fat 13g • sat. fat 8g • chol. 35g
sod. 143mg • calc. 4mg • fiber 2g
S’mores
No campfire needed with these s’mores.
Makes 4 servings
8 graham cracker sheets, each broken into two crackers
8 squares milk chocolate (about 2 ounces)
8 standard marshmallows
1. Place the AirFryer Basket onto the Baking/Drip Pan. Put 4 graham cracker
sheets in the basket. Place a chocolate square in the center of each graham
cracker and top each with two marshmallows.
2. Put the prepared basket in rack Position 2. Select AirFry with the tempera-
ture set to 350°F for 5 minutes. AirFry until the marshmallows are lightly
toasted (start checking at 4 minutes).
3. Carefully remove from the AirFryer Oven and transfer to a plate. Top with the
plain graham cracker sheets.
Nutritional information per serving:
Calories 479 (25% from fat) • carb. 87g • pro. 7g • fat 14g • sat. fat 6g • chol. 0g
sod. 317mg • calc. 54mg • fiber 2g
Cinnamon Apples
Either for a snack or a guilt-free dessert, these apples are delicious anytime.
Makes 4 servings
2 medium apples
½ teaspoon ground cinnamon
1. Peel and core apples. Cut into thin wedges, about 16 total for each apple.
Toss apples well with cinnamon to thoroughly coat.
2. Place the AirFryer Basket onto the Baking/Drip Pan. Place the apple slices
evenly on the AirFryer Basket and place in rack Position 2. Select AirFry with
temperature set to 350°F for 15 minutes. Cook apples until slightly softened
and fragrant.
Nutritional information per serving:
Calories 39 (2% from fat) • carb. 10g • pro. 0g • fat 0g • sat. fat 0g • chol. 0g
sod. 0mg • calc. 6mg • fiber 1g
Dessert Wontons Two Ways
Get everyone involved in creating their own wonton at your next party. Sure to
make a sweet memory.
Makes 24 wontons
Chocolate-Peanut Butter-Banana Filling:
¼ cup heavy cream
4 ounces good quality semisweet chocolate, finely chopped
¼ cup heavy cream
½ cup creamy natural peanut butter
24 ½-inch thick slices of banana, about 2 ripe bananas
Strawberry-Nutella
®
Filling:
1 cup sliced strawberries
2 teaspoons granulated sugar
1 cup Nutella
®
, or alternative chocolate-hazelnut spread
Wontons:
1 large egg
1 tablespoon water
24 wonton wrappers, square
Nonstick cooking spray
Powdered sugar for dusting
1. For the chocolate-peanut butter-banana filling, start out by heating heavy
cream over medium-low heat until steaming. Remove from heat, add chocolate
and let stand for about 3 minutes. Using a heatproof spatula or whisk, stir
until smooth and shiny. Allow to cool slightly.

34
2. Meanwhile, in a small bowl, mix the egg with 1 tablespoon of water. Lay out
wonton wrappers, starting with 12 (keeping the remaining 12 covered with
a damp towel). Working quickly, put one slice of banana into the center of
each wrapper, topped with 1 teaspoon of peanut butter and 1 teaspoon of
chocolate ganache. Use your finger to paint the edges of each wrapper with
the egg wash. Shape each wonton by pinching the opposing corners of each
square together. Repeat with remaining 12 wrappers.
3. If using the Strawberry-Nutella
®
filling, mix cut strawberries with 2 teaspoons
of sugar and allow to macerate for 5 to 10 minutes. Fill the center of each
wonton with 2 teaspoons of Nutella
®
and top with 2 strawberry slices.
Follow the same egg wash and shaping procedure as above.
4. Place the AirFryer Basket onto the Baking/Drip Pan. Arrange wontons in the
AirFryer Basket. Spray with cooking spray. Slide basket into rack Position 2.
Select AirFry with temperature set to 350°F for 8 minutes, cooking until
golden brown. Remove wontons from basket. Serve warm, dusted with
powdered sugar.
Strawberry-Nutella
®
nutritional information per wonton:
Calories 57 (34% from fat) • carb. 8.4g • pro. 1.1g • fat 2.2g • sat. fat 2g
chol. 2.2mg • sod. 48.8mg • calc. 10.4mg • fiber 0.4g
Chocolate-Peanut Butter-Banana nutritional information per wonton:
Calories 91 (47% from fat) • carb. 10.6g • pro. 2.5g • fat 5.1g • sat. fat 2g
chol. 4.6mg • sod. 51.3mg • calc. 6.3mg • fiber 0.7g
Cinnamon Sugar Doughnut Bites
Not that they will likely hang around, but these doughnuts are best eaten
just after cooking.
Makes 16 doughnuts
¾ teaspoon active dry yeast
½ teaspoon plus 1½ teaspoons granulated sugar, divided
1 tablespoon warm whole milk (105°F to 110°F)
¾ cup bread flour, plus more for kneading (up to ¼ cup)
2 pinches kosher salt
2 pinches ground cinnamon
1 pinch ground nutmeg
1 large egg, lightly beaten
2 tablespoons buttermilk
½ teaspoon pure vanilla extract
1 tablespoon unsalted butter, room temperature and cubed
Nonstick cooking spray
Melted butter for finishing (approximately 2 tablespoons)
Cinnamon sugar for finishing (if preparing your own, combine
¼ cup granulated sugar with 1 tablespoon ground cinnamon)
1. In a small bowl, dissolve the yeast and ½ teaspoon sugar in the warm milk.
Let stand 5 to 10 minutes, or until mixture is foamy.
2. Put ¾ cup of the flour, the remaining sugar, salt, cinnamon and nutmeg into
a large mixing bowl. Whisk to combine. Once yeast has proofed, add it to the
flour/sugar. Using a wooden spoon, stir to combine.
3. Whisk the egg, buttermilk and vanilla extract together and then slowly mix
into the flour mixture. Lightly dust a clean work surface with flour and trans-
fer dough to the surface, dusting dough lightly with flour. Using your hands
to knead, add additional flour as necessary, 1 teaspoon at a time, to keep
dough from sticking to your hands. Add the butter, 1 piece at a time, until
all pieces have been mixed into the dough. Again, continue adding flour, 1
teaspoon at a time, to keep dough from sticking to your hands. The dough
should be tender and smooth, and when pulled should not break apart.
4. Form dough into a ball and put in a clean mixing bowl, cover with plastic
wrap and allow to rest for 1 hour. After 1 hour, gently turn dough over and
press dough down (do not punch). Cover and allow to rest for another hour.
5. Place the AirFryer Basket into the Baking/Drip Pan. Lightly coat with nonstick
cooking spray. On a lightly floured surface, divide the dough into 16 pieces.
Working with one piece at a time (keeping the others covered loosely with
plastic wrap), form each into a small ball and roll between hands to ensure
that it is smooth. Once rolled, cover piece loosely with plastic wrap. Repeat
with the remaining pieces of dough.
6. Once 8 doughnuts have been formed, transfer them to the AirFryer Basket
and put into the oven in rack Position 2. Select AirFry with the temperature
set to 350°F for 5 minutes, until doughnuts just get a bit of color at the
edges. Repeat with remaining doughnuts.

35
7. While doughnuts are baking, melt additional butter in a small saucepan set
over low heat. Put cinnamon sugar in a shallow bowl. Reserve.
8. Remove doughnuts from oven and immediately brush with butter on all sides
and then gently toss in cinnamon sugar. Serve immediately.
Nutritional information per doughnut:
Calories 66 (43% from fat) • carb. 8g • pro. 1g • fat 3g • sat. fat 2g • chol. 20mg
sod. 25mg • calc. 7mg • fiber 0g
Banana Crunch Muffins
These muffins are a delicious way to use those overripe bananas.
Makes 6 muffins
Nonstick cooking spray
Crumb topping:
¼ cup unbleached, all-purpose flour
3 tablespoons light brown sugar
2 tablespoons unsalted butter, cold and cubed
½ teaspoon ground cinnamon
¼ cup pecans, toasted and chopped
Pinch kosher salt
Muffin batter:
1 cup unbleached, all-purpose flour
1½ teaspoons baking powder
¼ teaspoon kosher salt
¼ teaspoon ground cinnamon
1 small, ripe banana, mashed
¼ cup packed light brown sugar
¼ cup whole milk
¼ cup coconut oil (softened or melted and cooled to room
temperature)
1 large egg, slightly beaten
¼ cup pecans, toasted and chopped
1. Lightly coat a standard 6-cup muffin pan with nonstick cooking spray.
2. Prepare the crumb topping: In a small bowl, mix all 6 ingredients together
with a fork; reserve.
3. Make the muffin batter: Stir together the flour, baking powder, salt and
cinnamon in a small bowl. In a separate medium bowl, mix the banana,
brown sugar, milk, oil and egg together using a hand mixer on medium
speed until well blended. Add the dry ingredients and nuts and mix on
low until just combined.
4. Spoon evenly into prepared muffin cups and top with the reserved
crumb topping.
5. Adjust the rack to Position 1 and preheat by selecting Bake at 325°F for
15 minutes. Once the oven is preheated, put muffins in. Start checking
the muffins at 12 minutes so that the crumb top does not get too dark.
Muffins are done when evenly golden and a cake tester comes out clean
when pierced.
Nutritional information per muffin:
Calories 311 (48% from fat) • carb. 37g • pro. 4g • fat 17g • sat. fat 11g • chol. 42mg
sod. 211mg • calc. 39mg • fiber 1g

©2021 Cuisinart
East Windsor, NJ 08520
Printed in China
21CE076036
IB-17056