1
Automatic Power Attic Gable Ventilator
MODEL: ILG8G14-12T
120VAC, 60Hz
3.1A 210W
With THERMOSTAT CONTROL
Owner’s Manual
PLEASE READ AND
SAVE THESE INSTRUCTIONS

2
TABLE OF CONTENTS
Important Instructions………………………………………. 3
Specifications……………………..………………………….. 5
Installing Instructions……………………….…………..…… 6-8
Operating Instructions……………………….………....……. 9
Maintenance and Cleaning………………………………….. 9
Troubleshooting……………………………………………….. 10
3
IMPORTANT INSTRUCTIONS
CAUTION: Please read and save these instructions. Read carefully before attempting to
assemble, install, operate or maintain the product described. Do not use the fan if any part is
damaged or missing.
Protect yourself and others by observing all safety information. Failure to comply with
instructions could result in personal injury and/or property damage!
Retain instructions for future reference.
WARNING: To reduce the risk of electric shock, do not expose the fan to water or rain. To
reduce the risk of fire or electric shock, do not use this fan with any solid state speed control
device.
WARNING: This fan has an unguarded fan blade. Do not use in locations which are readily
accessible to children or animals. Do not let children play in an attic where this fan has been
installed. Contact with this fan while in operation can result in injury or even death.
General Safety Information
NOTE: To comply with UL507, air circulator is not to be used in unattended areas.
1. Ensure that the power source conforms to the electrical requirements of the fan. All wiring
must be in accordance with National Electrical Code (ANSI/NFPA 70-1999).
2. Use this unit only in the manner intended by the manufacturer. If you have questions,
contact the manufacturer at the address or telephone number listed in the warranty.
3. Before servicing or cleaning unit, switch power off at service panel and lock the service
disconnecting means to prevent power from being switched on accidentally. When the
service disconnecting means cannot be locked, securely fasten a prominent warning device,
such as a tag to the service panel.
4. Installation work and electrical wiring must be done by a qualified person in accordance
with appliance codes and standards, including fire-rated construction codes and standards.
5. Sufficient air is needed for proper combustion and exhausting of gases through the flue
(chimney) of fuel burning equipment to prevent excessive low pressure and to prevent back
drafting. Follow the heating equipment to guidelines and safety standards such as those
published by the National Fire Protection Association (NFPA), and the American Society for
Heating, Refrigeration and Air Conditioning Engineers
(ASHRAE), and the local code authorities.
6. When cutting or drilling into wall or ceiling, do not damage electrical wiring and other
hidden utilities.
7. The wiring must be permanent. DO NOT USE EXTENSION CORD! Although the Powered
Gable Ventilator may be wired directly to power, we advise that some type shut off switch be
installed on the line. Please see the section on electrical wiring
for suggested wiring diagrams and instructions.
8. The fan should be mounted behind louvers or in a location where the entrance of drawn in
water is unlikely.

4
9. For general ventilating use only. Do not use to exhaust hazardous or explosive materials or
vapors.
10. To avoid motor bearing damage and noisy and/or unbalanced impellers, keep drywall
spray, construction dust, etc. off power unit.
11. Attach louvers or grilles when installing the fan.
12. Ensure that the power source conforms to the electrical requirements of the fan.
13. This fan is to be operated without guards in place to prevent persons and/or objects from
contacting the revolving propeller. Do not get close to the fan after turn on. It may create
unsafe conditions.
14. Fan is intended for general air circulation ONLY. It must NOT be used in potentially
dangerous locations such as flammable, explosive, chemical-laden, or wet atmospheres.
Keep a suitable distance from the louver when installed, since rain may create an electrical
hazard.
Do not attach ductwork to the fan.
15. Fan motor is equipped with an automatically resetting thermal protector that will
disconnect power if the motor overheats. Always disconnect power before inspection or
cleaning, as motor may restart unexpectedly.
16. In cases in which property damage may result from malfunction of the fan, a suitable
alarm (air switch, temperature sensor, etc.) should be used.
WARNING: Do not depend on any switch as the sole means of disconnecting power when
installing or servicing the fan. Failure to do so may result in fatal electrical shock.
WARNING: Do not insert fingers or foreign objects into the fan. Do not block or tamper with
the fan in any manner while it is in operation.
WARNING: Do not touch motor as it may be hot enough to cause injury.
WARNING: Unplug prior to servicing unit.
WARNING: To reduce the risk of fire or electric shock, do not use this fan with any speed
control device.
SAVE THESE INSTRUCTIONS
5
E
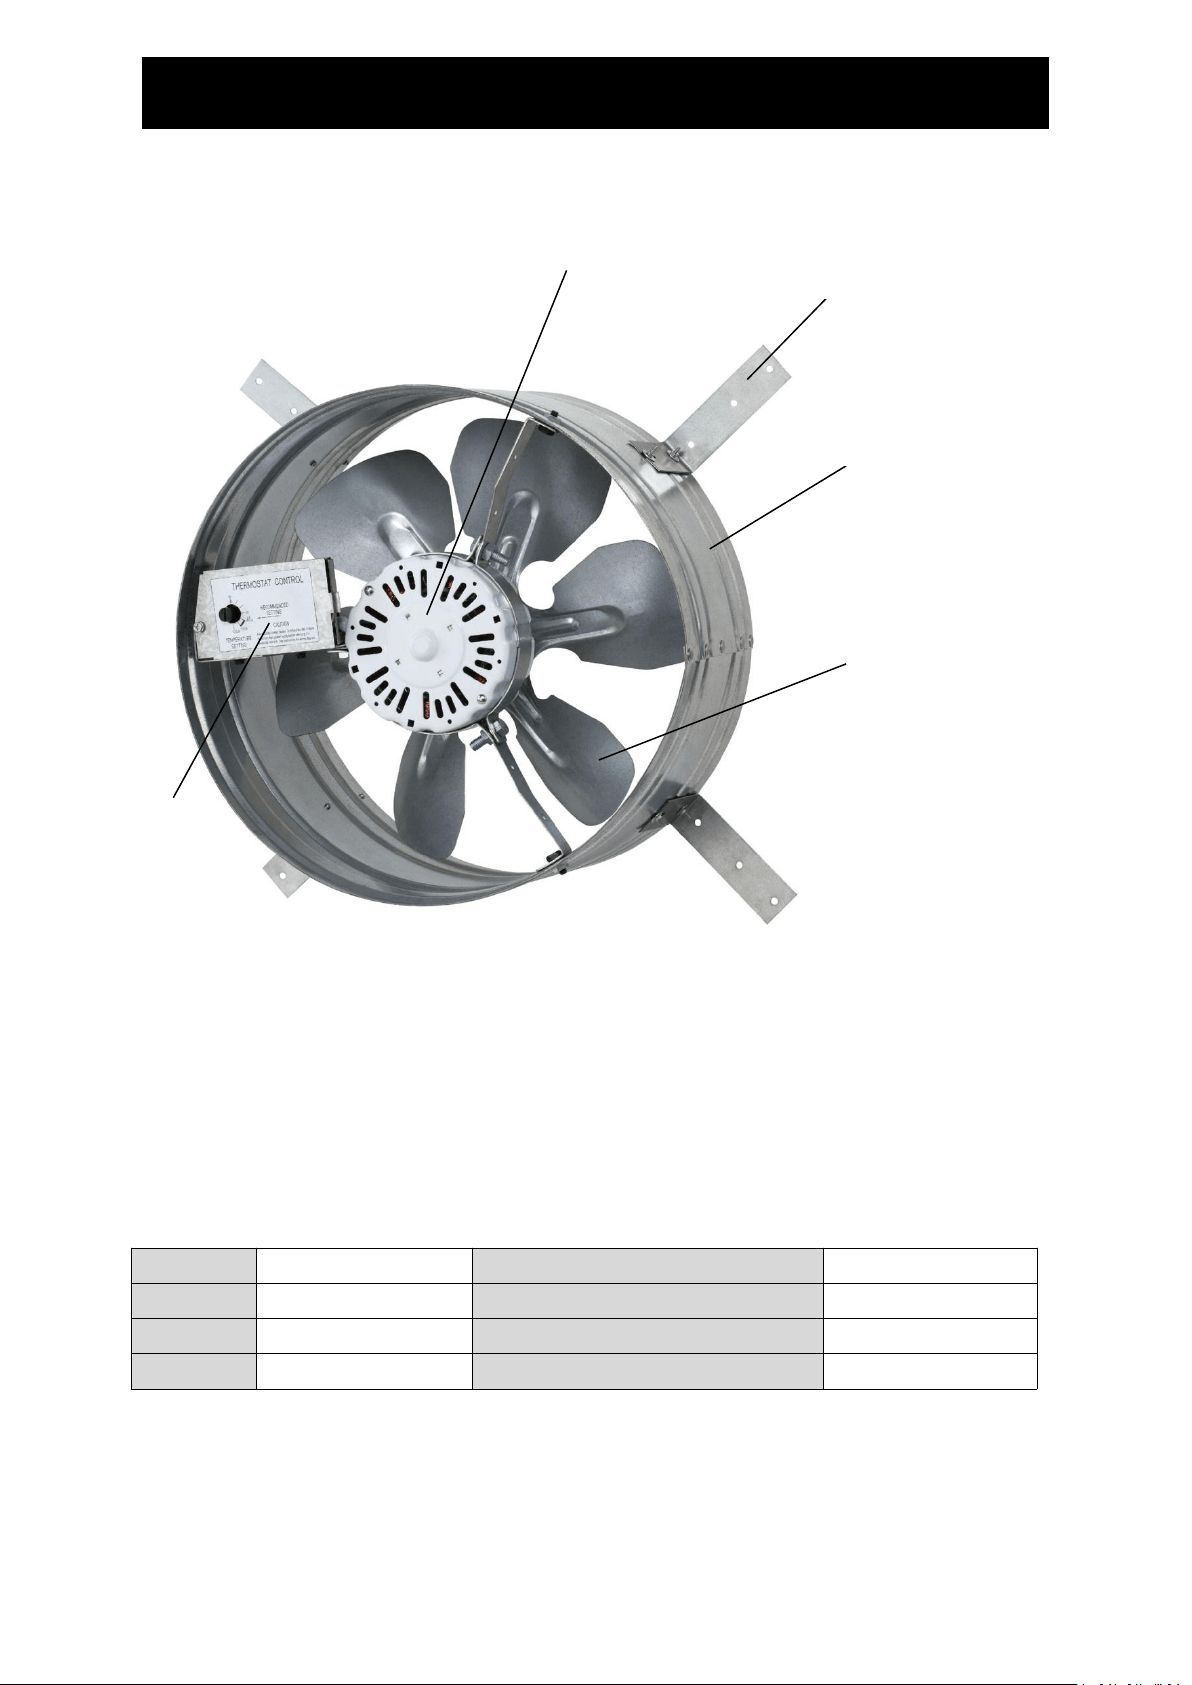
SPECIFICATION
MODEL: ILG8G14-12T
A: MOTOR
B: MOUNTING BRACKET
C: GALVANIZED STEEL DRUM HOUSING
D: PROPELLER
E: THE THERMOSTAT CONTROL
Product Specifications
Voltage
120V, 60Hz
Airflow (CFM)
1220
Current
3.1A
Recommend Sq. Ft
1600
Power
210 Watts
Temperature Control Range
60ºF – 120ºF
RPM
1050
Noise Level
<63 (dB)
A
B
C
D
E
6
INSTALLATION INSTRUCTION
WARNING: Turn off the wall switch prior to servicing the unit. To avoid personal
injury, wall switch must be turned off before servicing since the built-in thermal
protection may turn on the circulator automatically.
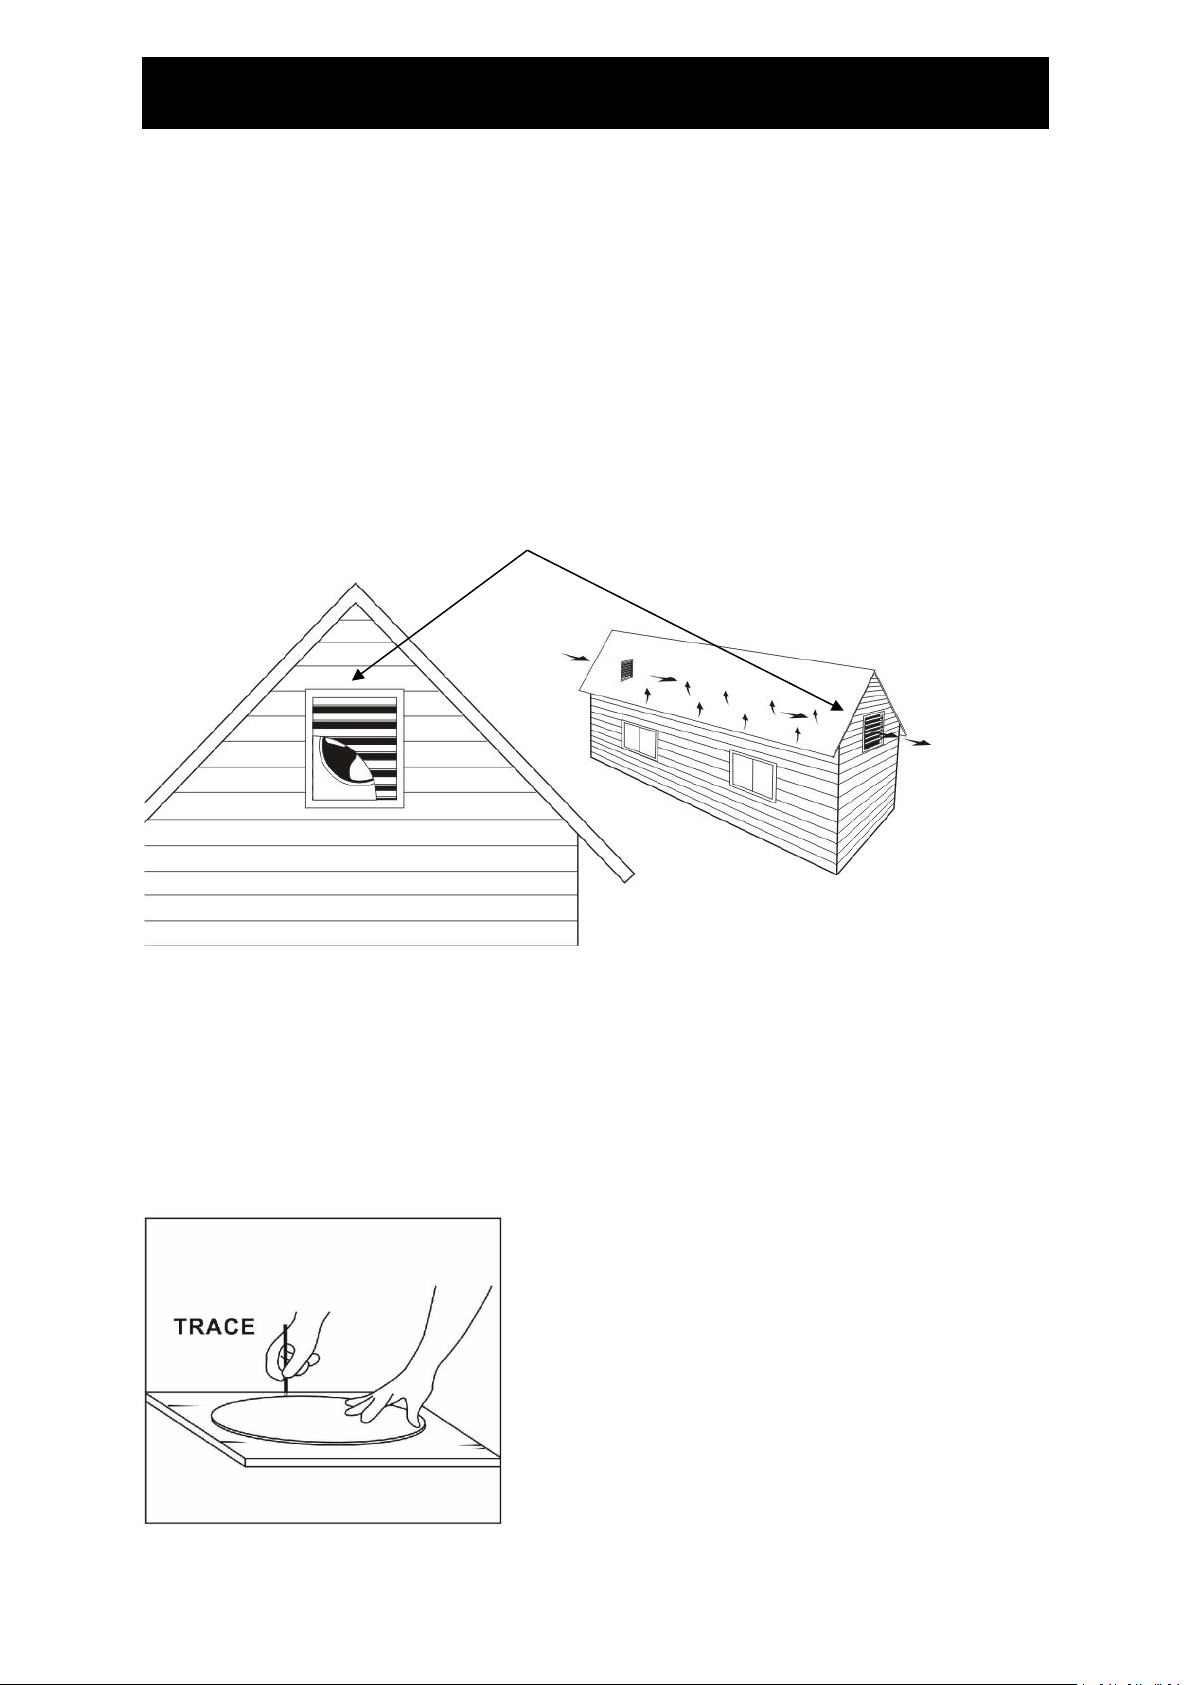
1. A gable mount ventilator is intended to be mounted in a gable wall. If your
existing gable vent is large enough, just mount the fan directly behind it. If the
gable vent is not big enough, you may need to enlarge the opening a little to
accommodate a slightly larger louver or automatic
shutter when needed.
2. Cut a piece of plywood to a size that will accommodate the attic framing that
surrounds the vent hole.
3. Cut the circle from the carton and position the cardboard template on
the plywood so the finished hole will be centered over the vent hole when the
plywood is secured to the wall. Trace around the template with a pencil.
Install location
7
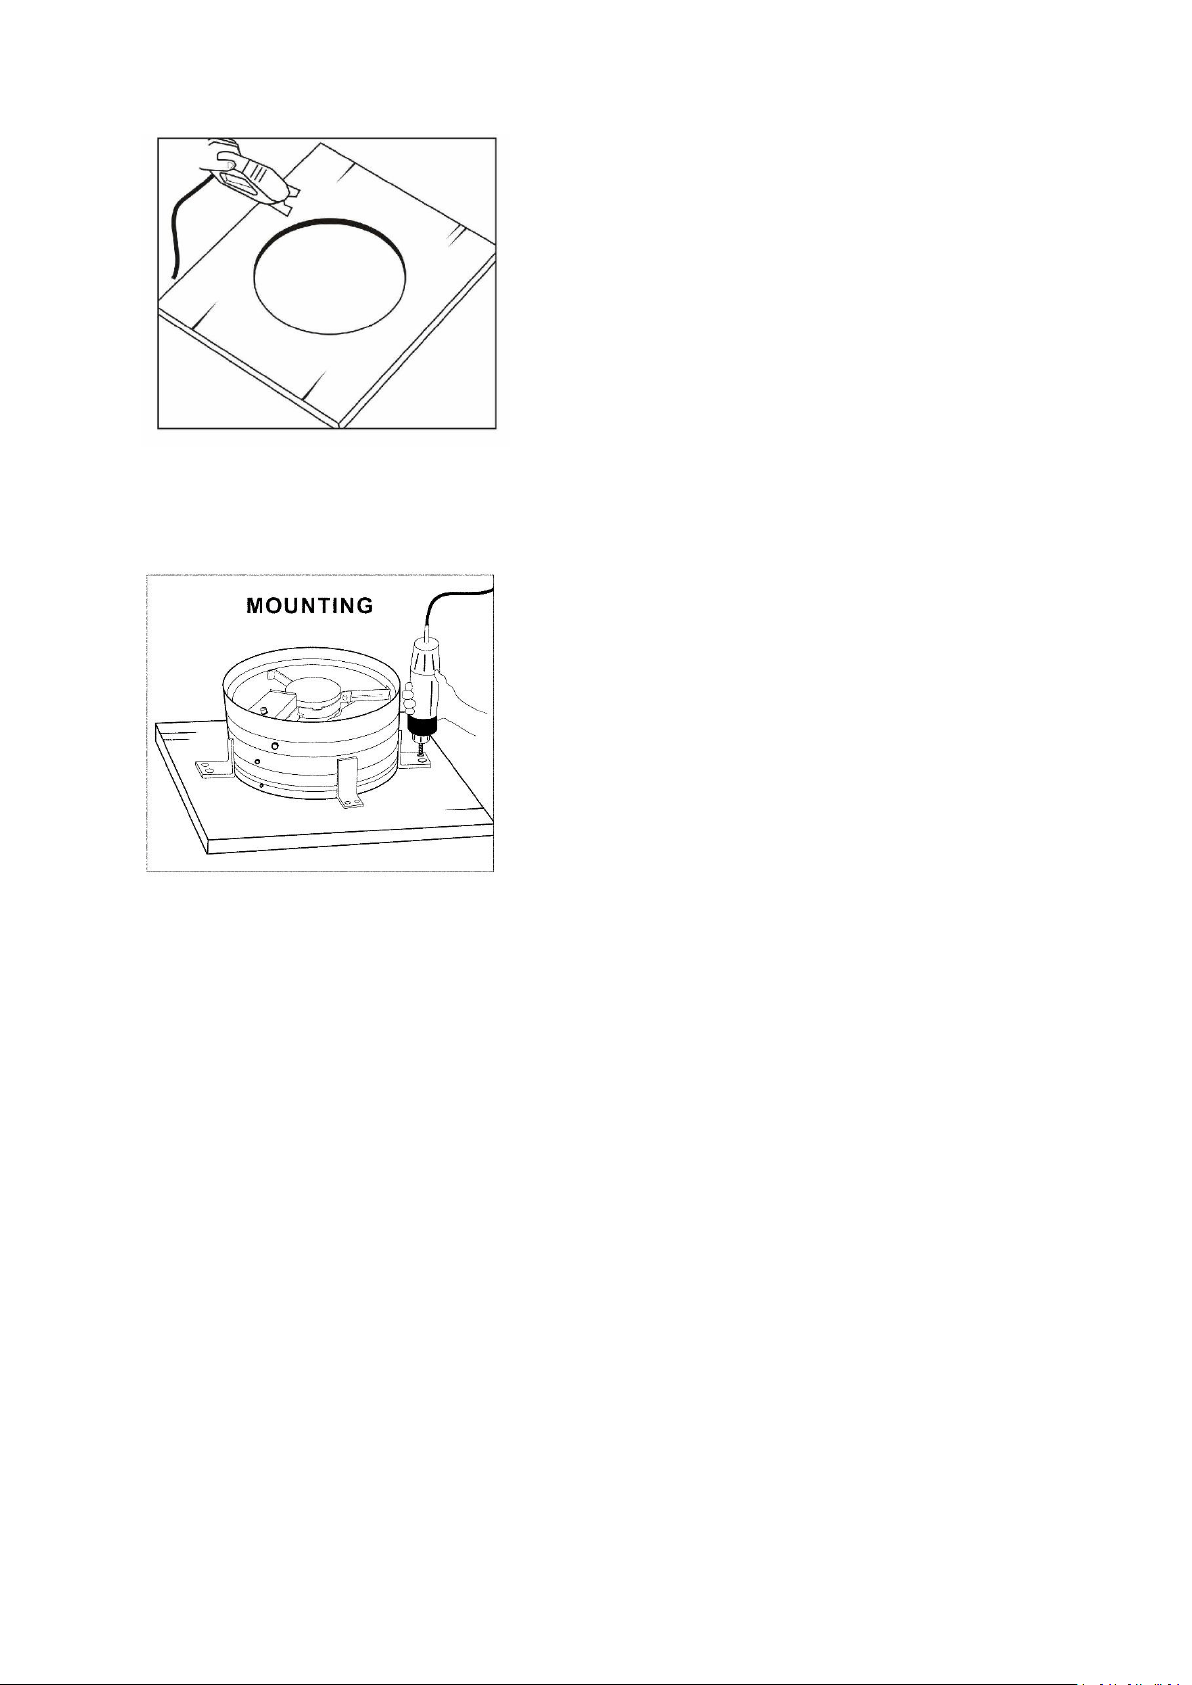
4. Use a sabre saw to cut out the airway on the plywood for mounting the gable
mount ventilator.
5. Place the fan mounting bracket on the plywood, center the fan over the
opening and screw the bracket to the plywood.
6. Carry the Gable mount Ventilator and plywood assembly into the attic,
position it behind the shutter and screw it to the gable framing.
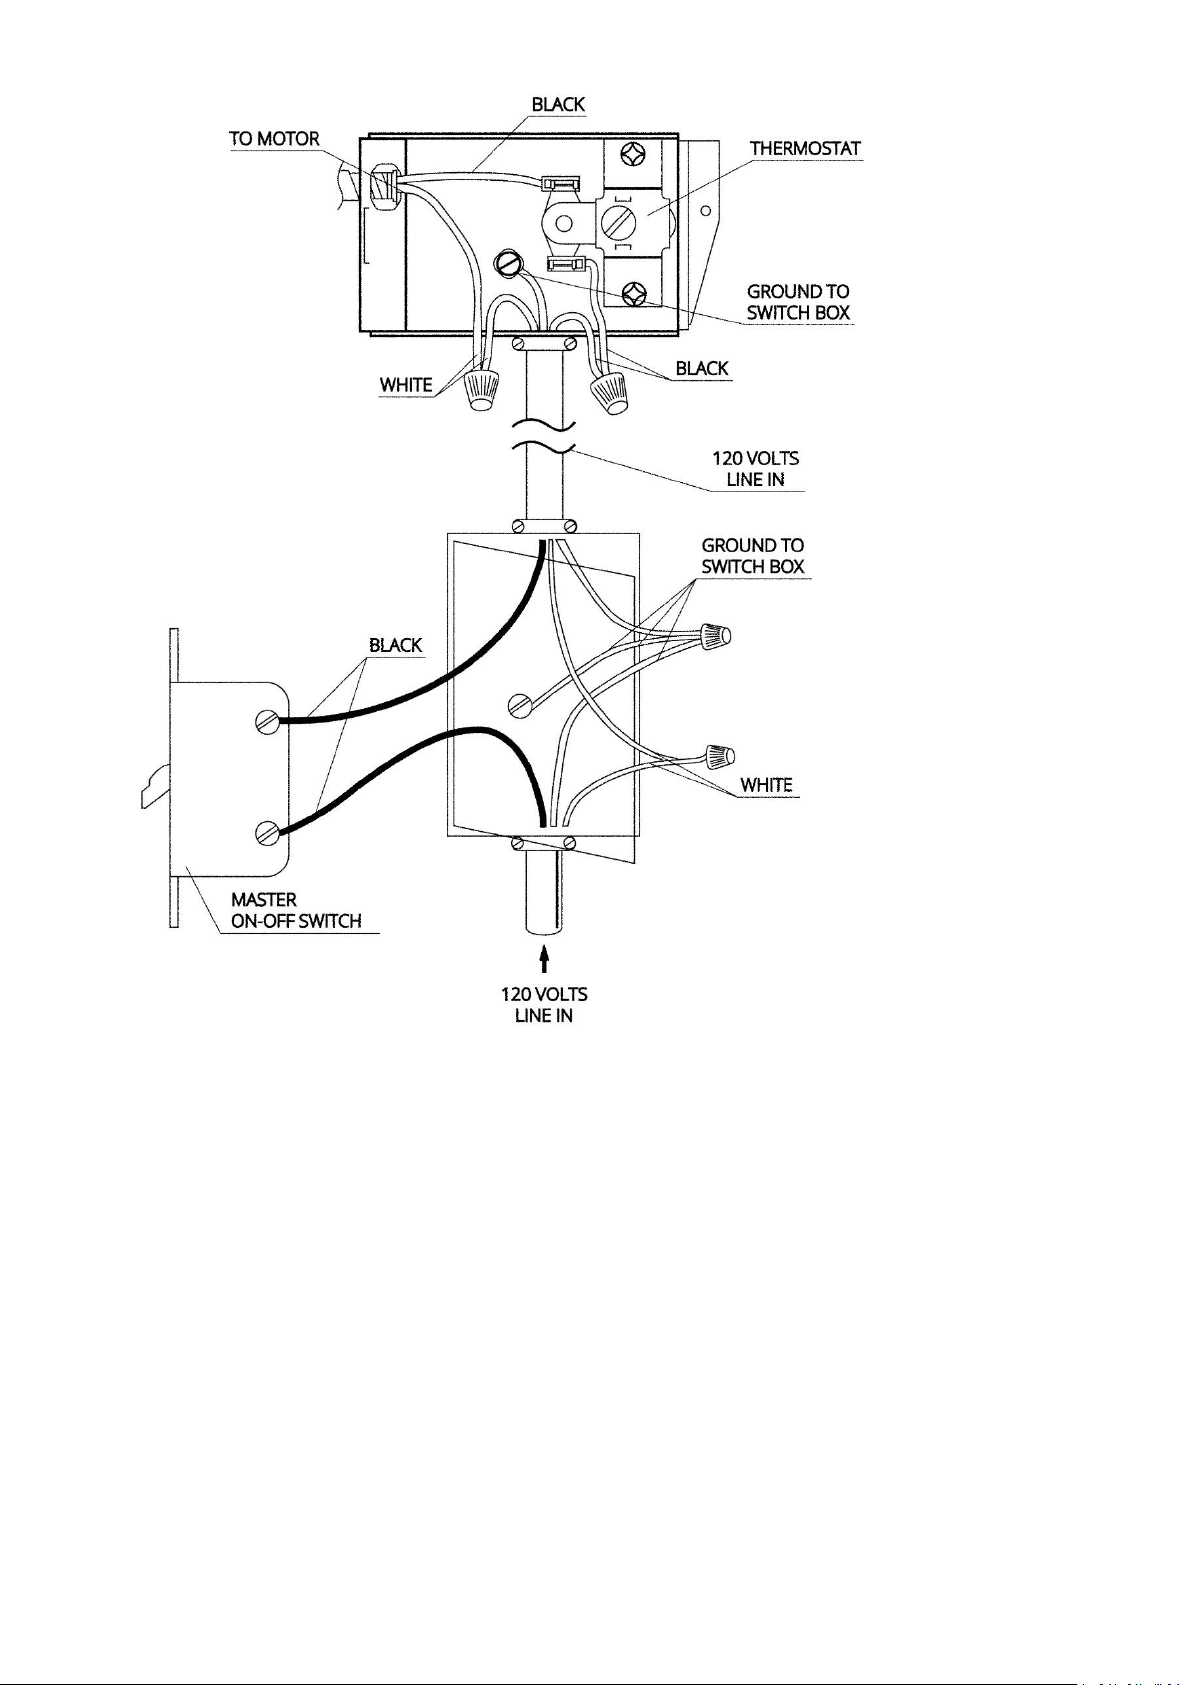
7. Connect the Black and White wire line out from the control box to the
electric lines controlled by a master On/Off switch as shown in the wiring
diagram.
8
9
OPERATION INSTRUCTION
Please set the Thermostat to a desired condition before operating. Use a
screw driver to turn the arrow of the knob to the desire temperature mark on
the panel of the control box. To avoid the possibility of overturning the fan,
operate on a stable, level surface. Do not move fan while it is in operation.
MAINTENANCE AND CLEANING
WARNING: Parts replacement and troubleshooting to be performed only by
qualified personnel.
WARNING: Do not depend on any switch as the sole means of disconnecting
power when installing or servicing the fan. Failure to do so may result in fatal
electrical shock.
WARNING: Turn off the wall switch before servicing or cleaning.
CAUTION: There is no user maintenance part except regular cleaning as
indicated below. All other servicing or maintenance should be performed by
qualified service personnel.
To clean the fan, use a soft damp cloth. Wipe down with a dry cloth.
Do not use cleaners that are harmful to paints or plastics.
CAUTION: Do not use gasoline, benzene, thinner, harsh cleaners, etc., which are
dangerous and will damage the air circulator.
The propeller, guard, and motor should be cleaned periodically to prevent
overheating, and/or operating in an imbalanced condition.
CAUTION: Do not repair propeller if it becomes damaged. The propeller is
accurately balanced at the factory and should be replaced if damaged.
Do not bend the blades.
Motor is permanently lubricated.

10
TROUBLESHOOTING
If your fan fails to operate, please follow these Instructions:
1. Make sure the fan is well connected and the electrical line-in is working
properly.
2. Check for any obstruction. If you find any object, turn the fan “OFF”.
Disconnect the fan and carefully remove the object.
Reconnect the fan and turn it on again and see if it resumes normal operation.
NOTE: IF YOU EXPERIENCE A PROBLEM WITH YOUR FAN, PLEASE DO NOT
ATTEMP TO OPEN OR REPAIR THE FAN YOURSELF. DOING SO COULD CAUSE
DAMAGE OR PERSONAL INJURY. Always consult an authorized dealer or
certified electrician for further action.
11
Warranty Information
This product comes with a 1-YEAR LIMITED COMPONENT WARRANTY. If your unit does not appear
to be working properly, please contact our service center by calling 1-800-317-1688. Prior to your call,
we encourage you to visit our service related website www.ilivingusa.com for troubleshooting tips and
service instructions if needed.
Register your product at our website:
Or visit iLivingUSA.com/register-product
Feedback
Love it? Help us make the product more for you.
Let us know with a customer review.
Please visit: https://www.amazon.com/review/review-your-purchases#
At iLiving USA, we are committed to bringing top quality products to our customers.
iLIVING USA
860 Mahler Road,
Burlingame, CA 94010
Tel: 1-800-317-1688
Email: [email protected]
