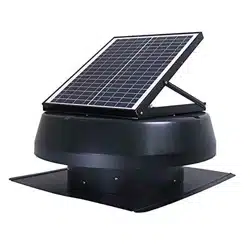
Hybrid Solar and AC Powered
Roof Exhaust Fan/Ventilator
Running Day and Night
SOLAR ONLY SOLAR & AC
Model: ILG8SF301 Model: ILG8SF301A
Owner’s Manual
PLEASE READ AND
SAVE THESE INSTRUCTIONS
1 | P a g e
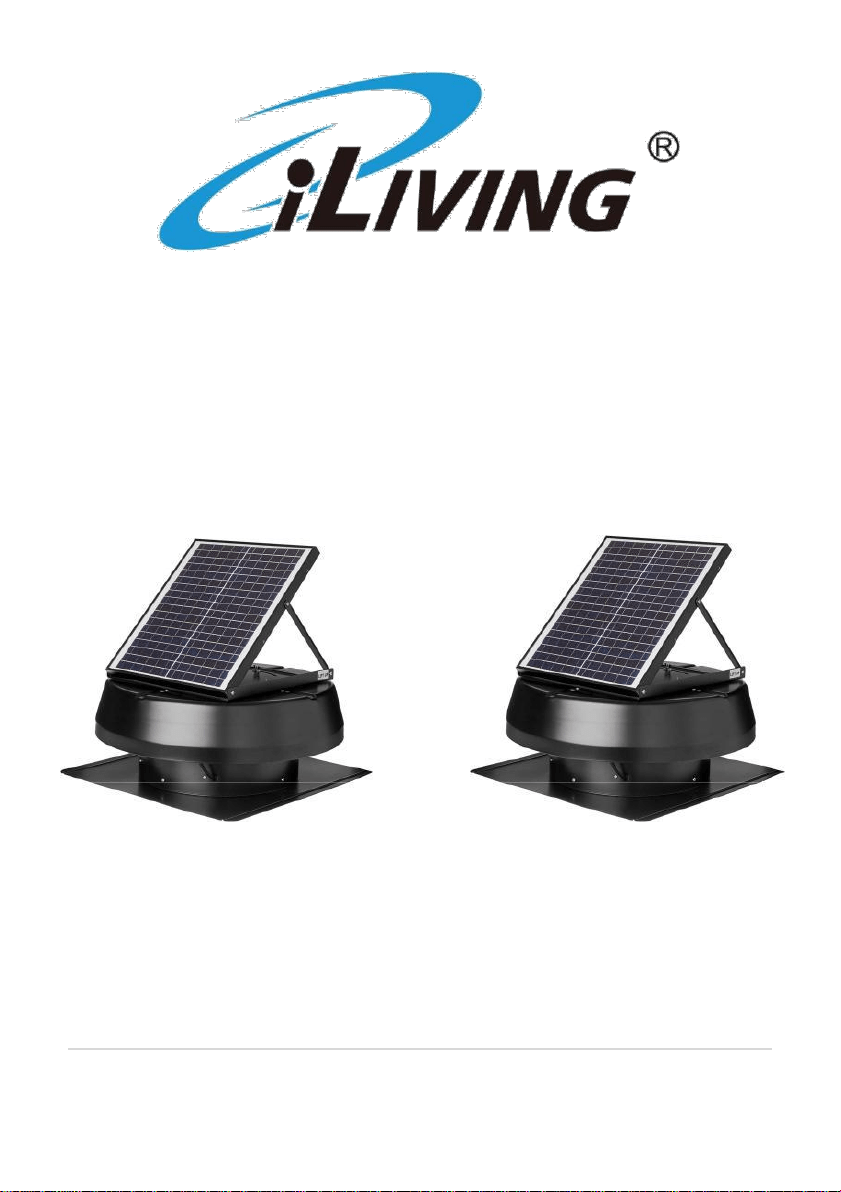
CONGRATULATIONS!
The iLIVING ventilation exhaust fans are the NO.1 selling fan on
Amazon. This smart solar attic fan is your best choice for cooling off your
home.
while helping you to save big on your cooling bills. Equipped with a
powerful 20W adjustable Polycrystalline solar panel, this fan is IP68 waterproof.
Built with a brushless motor, it provides up to 2000 sq ft of capacity cooling.
Smart thermostat with wide range control of 50-122°F and an Enable/Disable
feature allows you to have more freedom to control the fan the way you
want. The “Solar & AC”Hybrid version is fitted with solar absence operation
feature which enables non-stop running without solar power, The ventilator
also comes with an optional remote ON/OFF switch , which is sold separately.
Fan comes with 15 years warranty. Designed and engineered by iLiving in
San Francisco, California.
Before using your iLIVING ventilator, please take a few minutes to read
these instructions, review the product limited warranty.
Thank you!
WARNING! To reduce the risk of fire, electric shock, or personal injury, read all the
instructions before using this ventilator. This appliance is intended for household or
personal use only as described in this manual. Any other use including but not limited to
commercial, agricultural, or outdoor use, is not recommended by the manufacturer and may
cause fire, electric shock, injury and/or damages. The use of attachments, accessories or
extension cords not recommended or sold by iLIVING may cause hazards and void the
warranty.
IMPORTANT
INSTRUCTIONS
SAVE THESE INSTRUCTIONS
Product Specifications
Voltage Rating
18V DC (Solar) and AC(120V ac 60Hz)
Power Consumption
20W
Airflow(CFM)
1750
Shipping Weight
35.1 Ibs
2 | P a g e
Dimensions:
Coverage area (sq. ft)
2000
Product Height (in.)
10
Product Width (in.)
21
Product Depth (in.)
21
In the Box Content (ILG8SF301) In the Box Content (ILG8SF301A)
● Solar roof ventilator ● Solar roof ventilator
● User’s Manual ● User’s Manual
● Smart Thermostat ● Smart Thermostat
● AC/DC power adapter:
Special Features
• Smart Thermostat control 50-122°F with Enable/Disable feature
• IP68 waterproof brushless motor, 15 Year Warranty
• Adjustable solar panel 20W, 1750CFM, Up to 2000 cool sq ft off capacity
• AC/DC power adapter making use of grid electricity to support solar fan
runs nonstop during sunless periods
• 14 inches Nylon – Fiber-Aluminum fan blade with 1750 CFM
• Optional remote ON/OFF switch (sold separately)
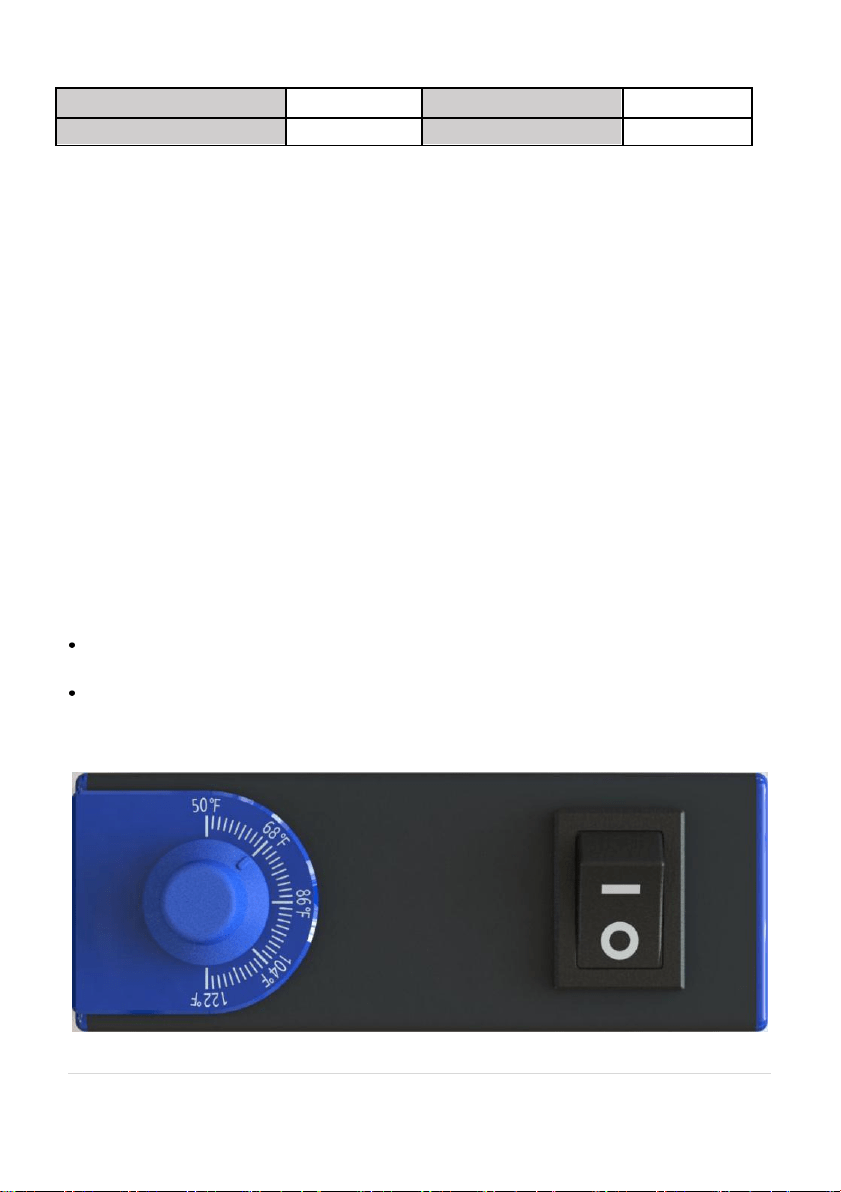
Thermostat
If switch is set to “ I ”, the thermostat is disabled. Fan will turn on when
sunlight is available regardless of the ambient temperature.
If switch is set to “ O ”, the thermostat is enabled. Fan will turn on when
ambient temperature reaches the set/desired temperature and sunlight
is present. Fan will stop running if set up to 122 ºF.
3 | P a g e

Installation and Mounting Instruction
Before beginning the installation of your new Solar Powered Roof Exhaust Fan,
please read through the entire installation instructions and contact us if you
have any questions.
Tools Required:
• Ladder
• Reciprocating saw (or jig saw)
• Power drill with a 1/2” – 1” drill bit
• 1” – 2” deck screw and screw bit
• Hammer & roofing nails (or self tapping galvanized screws)
• Caulk gun with waterproof roofing sealant
• Measuring tape
• Permanent marker (or chalk / crayon)
• Roofing knife (or box cutter)
• Flat pry bar
8 Steps Installation Instruction
It is advised that you prepare the mounting hole prior to bringing the fan up on
the roof. Always secure the fan on the roof to avoid injury or having the fan
slide off the roof and get damaged
Step 1 - Ventilation Clearance
To maximize the solar fan’s effectiveness, you’re suggested to remove or
block any existing rooftop static vents and ridge vents. If there is already a
turbine type vent, simply remove the old vent and use the same hole for the
new installation, or block it completely. (Fig. 1)
* Make sure you have proper intake ventilation at the eave or fascia. Use
a ratio of 1 sq. ft. of intake ventilation for every 600 sq. ft. of attic space.
4 | P a g e
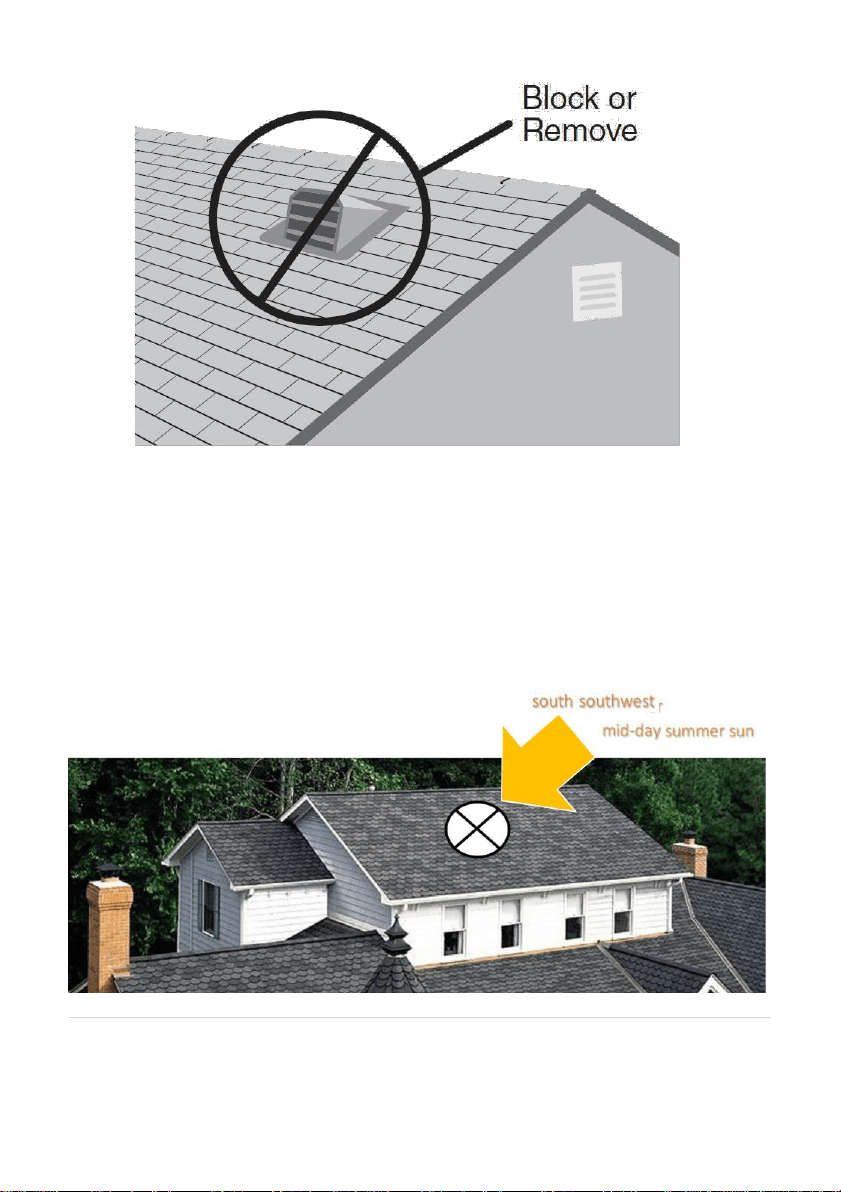
Fig. 1
Step 2 – Positioning the Solar Fan
For optimum performance, position the solar fan due south or southwest,
and position it on an area of roof where the sun is not shaded or blocked,
so as to capture direct sunlight and extended sunlight periods throughout
the day. (Fig. 2)
Then pitch upon the position that is 18 – 24 inches from top of the roof peak
and as close to the mid-point of your house as possible.
* In the case that 2 or more fans are getting installed, each fan should be
separated by at least 15 feet to optimize ventilation.
Fig. 2
5 | P a g e
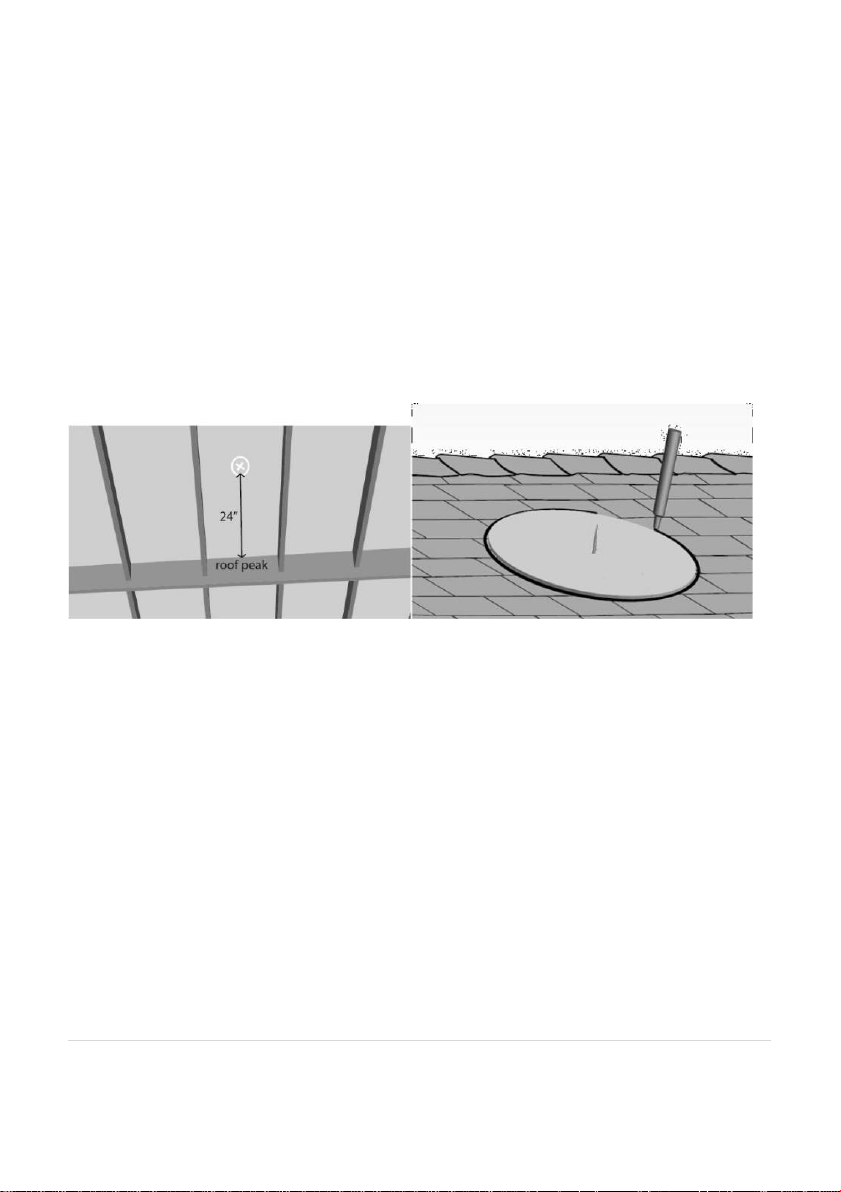
Step 3 – Marking the Ventilation Hole
From inside the attic, measure approximately 18-24 inches down from the
roof peak and center this spot between two rafters (Fig. 3-1). Through this
mark, drill a screw into the plywood and roof shingle to have it located from
on top of the roof.
Cut a template cardboard at same size as the air duct’s, then puncture it from
center hole over top of the screw, and trace a circle around outer edge of the
template with any marker for a circle at 12’’ or 14” diameter. (Fig. 3-2)
* Alternatively, you can make use of a 6’’or 7’’ cotton thread and strap a pen
at the edge of it. Then move the pen to draw a circle same at 12’’ or 14’’
diameter.
Fig. 3 -1 Fig. 3-2
Step 4 – Cutting the Hole
Bore a pilot hole with your power drill anywhere along inside of the
marked circle. Then insert the saw blade into that pilot hole, and cut a
complete hole into the roof following the circle pattern. (Fig. 4)
NOTE:
• Do not cut through any roofing rafters or framing materials. Only cut
and remove the roof sheeting and shingles.
• Prior to cutting the hole, make sure there is no any wires or waterlines
in the area that you are cutting.
• Try to secure the removed materials before completely cutting out
the circle, so that they do not fall into the attic space.
6 | P a g e
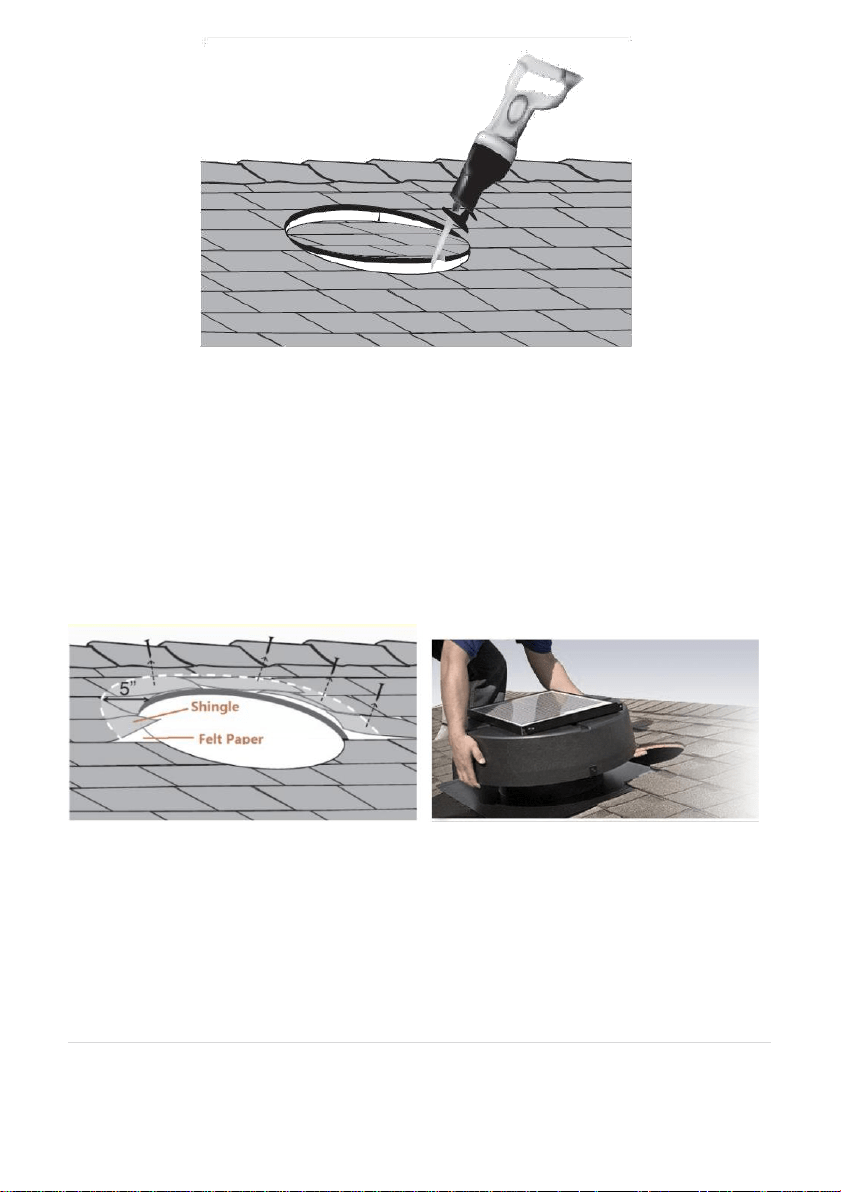
Fig. 4
Step 5 – Lifting the Shingles to Slide Up the Attic Fan
To slip the solar fan smoothly on top of felt paper and underneath shingles
on the roof, the nails located 5” above and to the side of that hole will
need to be removed. Use a pry bar or reciprocating saw to loosen or cut
those nails. (Fig. 5-1)
In some cases, the builder may have used large washers to install the felt
paper, if it does not slide easily into place when slipping the solar fan, a nail
is most likely blocking the bottom. In this case, lift up on the shroud cover
slightly to position the solar fan directly over the hole and under the
shingles. (Fig. 5-2)
Fig. 5-1
Step 6 – Securing the Solar Fan
Fig. 5-2
Mark and pre-drill some visible holes on the bottom board, then get
some proper screws or nails and drive them through those holes to
secure the solar fan to the roof. After then, apply waterproof roofing
sealant to the screw heads to prevent water percolation. (fig. 6)
Any shingles that remain loose should be fixed as well, use roofing nails to
secure them and apply waterproof roofing sealant to the backside of
7 | P a g e
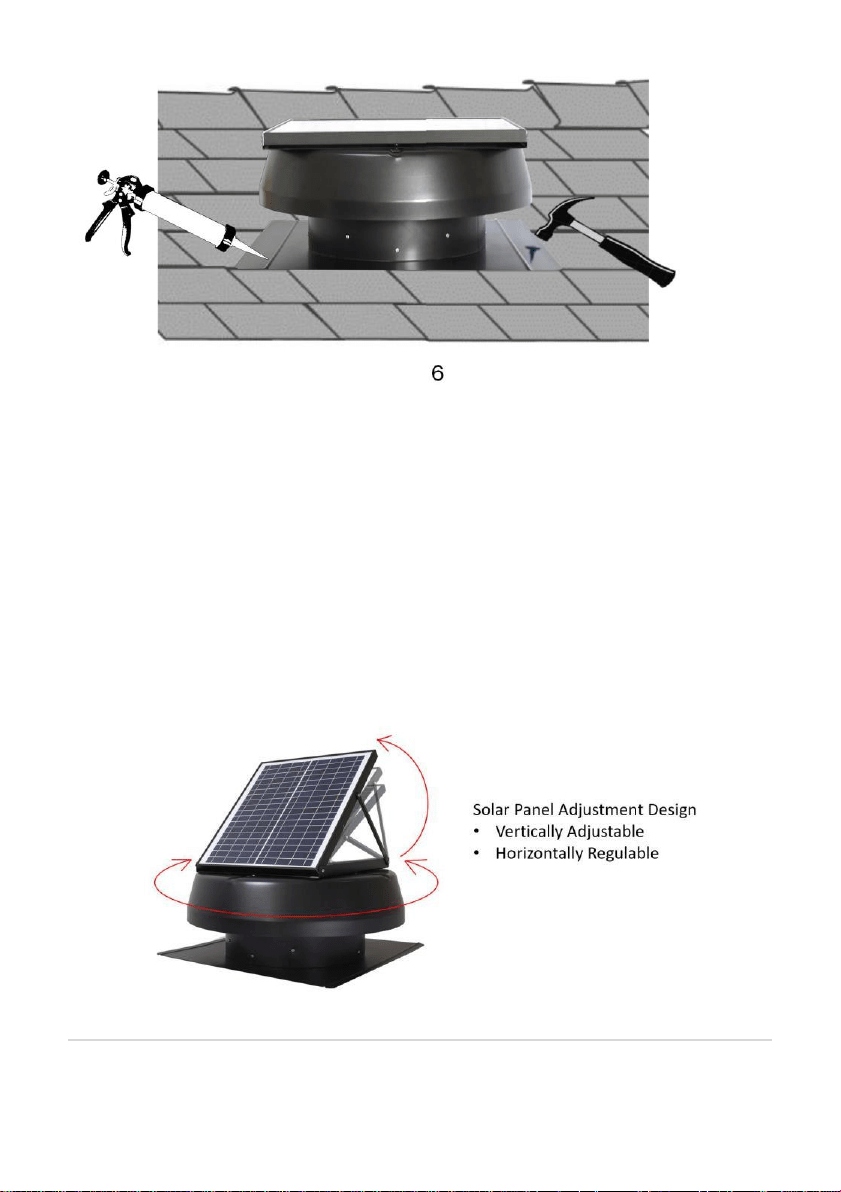
shingles or the nail heads that have been added.
Fig. 6
Step 7 (for those solar panel adjustable models only)
– Installing the Angel Adjustment Bracket
Attach the provided screws and brackets left from package box to the unit.
Install the angle adjustment brackets by securing one end to the
regulating plate and the other end to the solar panel frame. (Fig. 7)
• This fan has the solar panel adjustment design at 3 angles, to set
the angle properly to capture most direct sunlight in your area.
• The fan also has a horizontal adjustment platform design for the
solar panel turning from 1°to 90°, regulate the solar panel direction
for it to enjoy all-day sunbath.
Fig. 7
8 | P a g e

Step 8 (for those solar panel adjustable models only)
– Adjusting the Solar Panel
The fan’s solar panel should be adjusted to maximize exposure to the
sun’s path during the day. The optimal adjustment is to have the panel 90°
to the midday path of the sun.
* You can re-adjust the panel during winter or summer seasons if desired.
9 | P a g e

How long is the warranty?
This ventilator comes with a 15-YEAR LIMITED COMPONENT WARRANTY.
If your unit does not appear to be working properly, please contact our service
center by calling 1-800-317-1688. Prior to your call, we encourage you to
visit our service related website www.ilivingusa.com for troubleshooting tips
and service instructions if needed.
Warranty Information
Register your product at our website:
Or visit iLivingUSA.com/register-product
10 | P a g e
Feedback
Love it? Help us make the product more for you.
Let us know with a customer review.
Please visit: https://www.amazon.com/review/review-your-purchases#
At iLiving USA, we are committed to bringing top
quality products to our customers.
iLIVING USA
860 Mahler Road,Burlingame
CA 94010
Tel: 1-800-317-1688
Email: [email protected]
Like us on Facebook: https://www.facebook.com/ilivingusa/
Follow us on Twitter: @iLIVINGUSA
Check out our website: www.ilivingusa.com
11 | P a g