Loading ...
Loading ...
Loading ...
• Check to make sure the circuit breaker is closed (RESET) or the circuit fuses are replaced.
• Be sure power is in service to the building.
• Check to be sure that all packing materials and tape have been removed. This will include tape on the metal panel
under control knobs (if applicable), adhesive tape, wire ties, cardboard and protective plastic. Failure to remove these
materials could result in damage to the appliance once the appliance has been turned on and surfaces have heated.
• Check that the door and drawer are parallel to each other and that both operate smoothly. If they do not, see the
Owner’s Manual for proper replacement.
• Check to make sure that the Anti-Tip device is securely installed.
• Be sure all range controls are in the OFF positions before leaving the range.
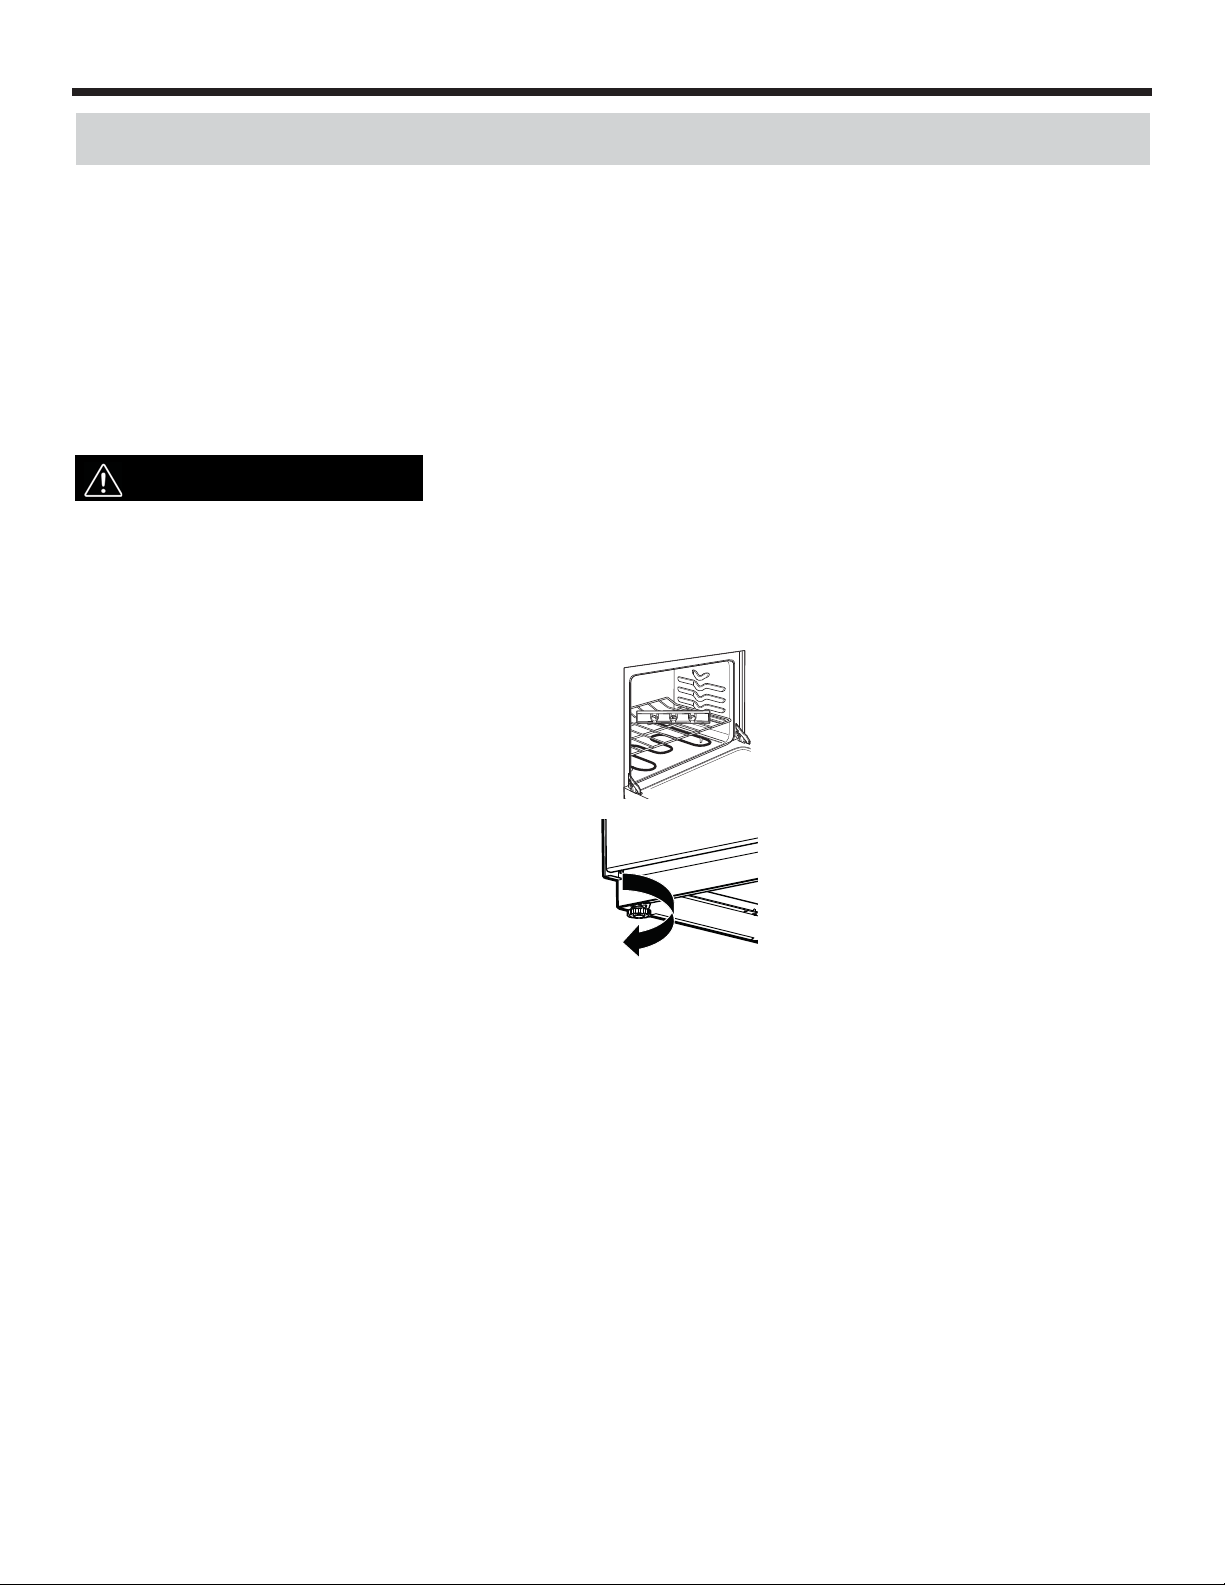
(10) LEVEL THE RANGE
For proper cooking and baking, the range must be
leveled. Leveling legs are located on each corner at
the base of the range.
(A) Install the oven shelves (see Using the oven
section for instructions). Put a spirit level or a glass
measuring cup partially fi lled with water on one of the
oven shelves. If using a spirit level, take two readings
- with the level placed diagonally, fi rst in one direction
and then the other.
(B) Turn the legs clockwise to raise the range and
counterclockwise to lower the range. Adjust the
leveling legs until the range is level.
(11) FINAL INSTALLATION CHECKLIST
INSTALLATION INSTRUCTIONS
INSTALL THE RANGE
(9) ANTI-TIP DEVICE INSTALLATION (cont’d)
STEP 3 CHECK THE BRACKET
After installing the bracket, slide the range into its fi nal location. To check if the bracket is installed and engaged properly,
look underneath the range to see that the anti-tip arm attached to side panel is engaged in the bracket. On some models,
the storage drawer or kick panel can be removed for easier inspection. If visual inspection is not possible, slide the range
forward, confi rm the anti-tip bracket is securely attached to the fl oor or wall, and slide the range back so the anti-tip arm
slides just under the anti-tip bracket. If the range is pulled from the wall for any reason, always repeat this procedure to
verify the range is properly secured by the anti-tip bracket.
IMPORTANT:
The anti-tip bracket must be PROPERLY INSTALLED to prevent the range from tipping. NEVER remove the
leveling legs. This will prevent the range from being secured to the ANTI-TIP bracket properly.
23
Loading ...
Loading ...
Loading ...