Loading ...
Loading ...
Loading ...
English - 13
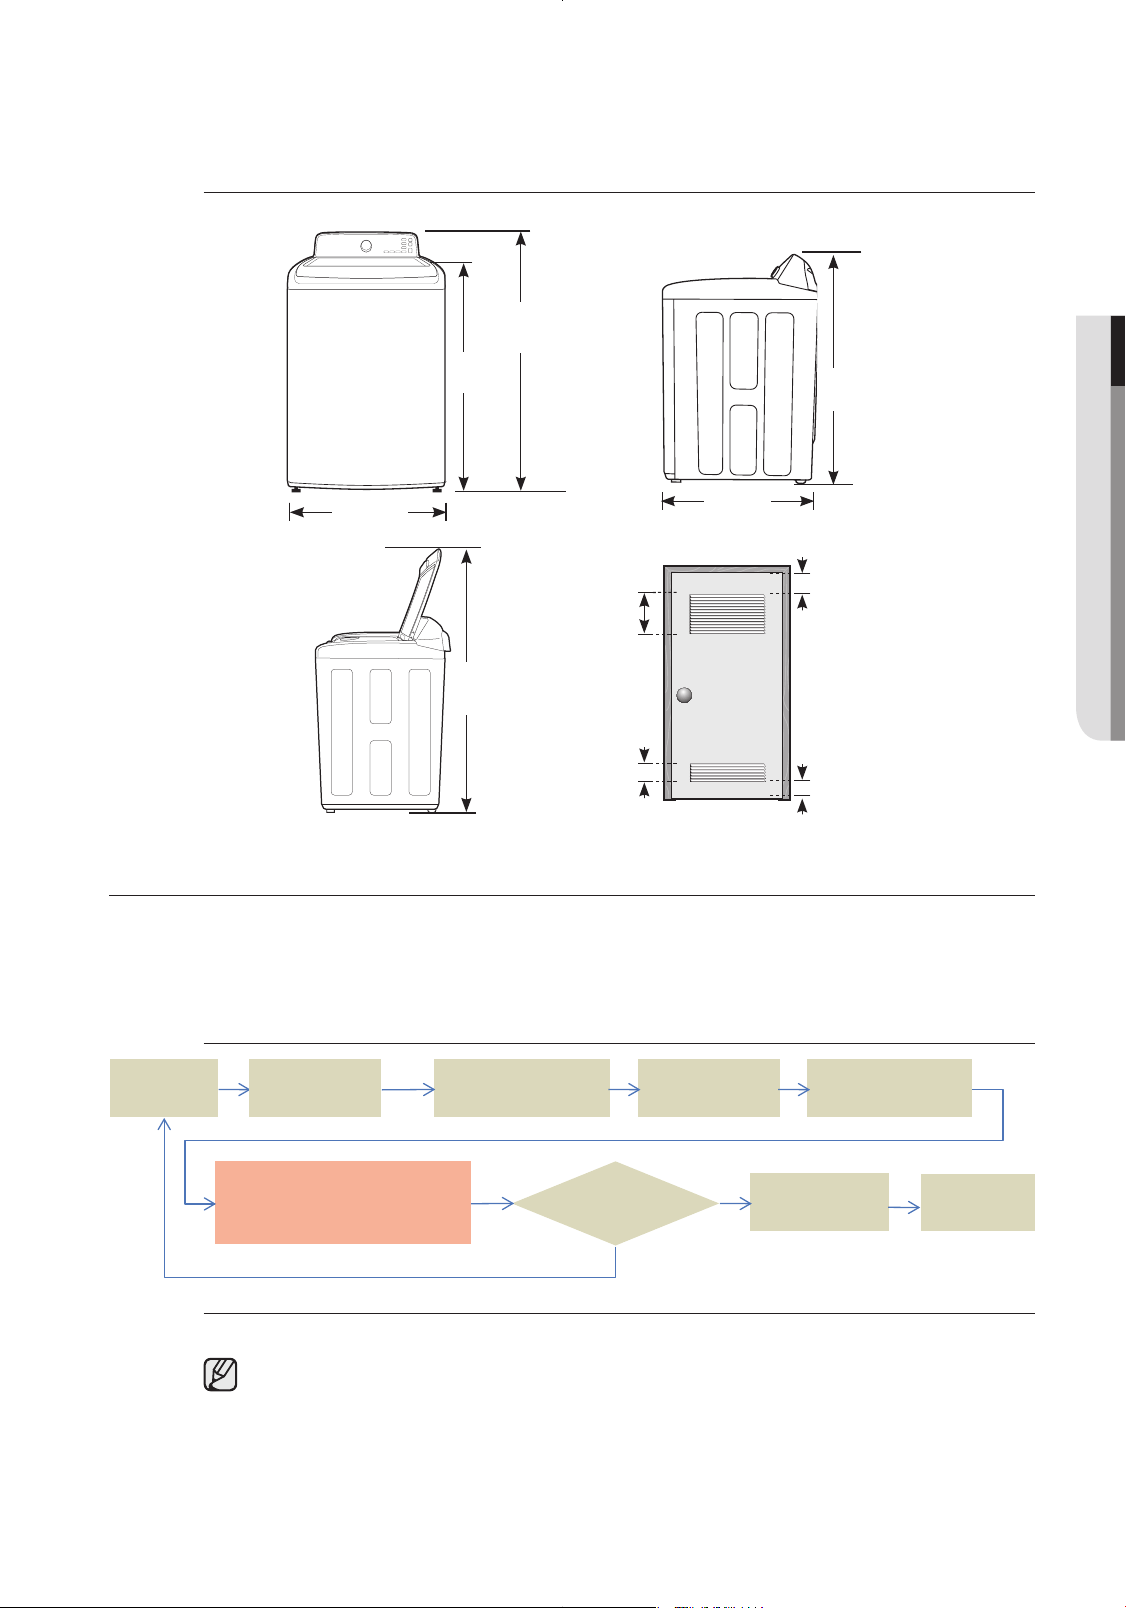
Required dimensions for Installation
importAnt note to instAller
Please read the following instructions carefully before installing your washer.
These instructions should be retained for future reference.
We recommend you hire a professional to install this washer.
Installation Flow chart
sTep 1 Selecting a Location
Before you install the washer, make sure the location:
• Hasahard,levelsurfacewithoutcarpetingorooringthatmayobstructventilation.
• Isawayfromdirectsunlight.
• Hasadequateventilation.
• Isnotexposedtofreezingtemperatures(temperaturesunder32°For0°C).
• Isawayfromheatsourcessuchasoilorgas.
• Hasenoughspacesothatthewasherdoesn’trestonitspowercord.
27.0 in.
(68.6 cm)
45.7 in.
(116.0 cm)
39.2 in.
(99.5 cm)
29.3 in.
(74.4 cm)
45.7 in.
(116.0 cm)
59.8 in.
(152.0 cm)
Closet or Door
48 in.² *
(310 cm²)
24 in.² *
(155 cm²)
3 in.
(7.6 cm)
3 in.
(7.6 cm)
*required spacing
Selecting
a location
Removing the
shipping bolts
(*Drum only)
Adjusting the
levelling feet
Connecting the water
and the drain
[Running a test cycle]
Run a test cycle(Rinse+Spin)
with small amount of laundary
(about 4~5 Towels)
Running
a Calibration
mode
Powering your
washing machine
Finish the
installation
Does a
Laundary machine
Vibrate?
No
Yes
Please check again before steps.
01 installing your washer
WA8000J_WA52J8060AW_USER MANUAL_DC68-03133Y.indd 13 2015/1/3 13:56:34
Loading ...
Loading ...
Loading ...