Loading ...
Loading ...
Loading ...
B. Remove the four (4) screws securing the thermostat access panel and
the two (2) thermostat insulation pads, exposing the thermostat. The
plastic personnel protector
should not be removed
.
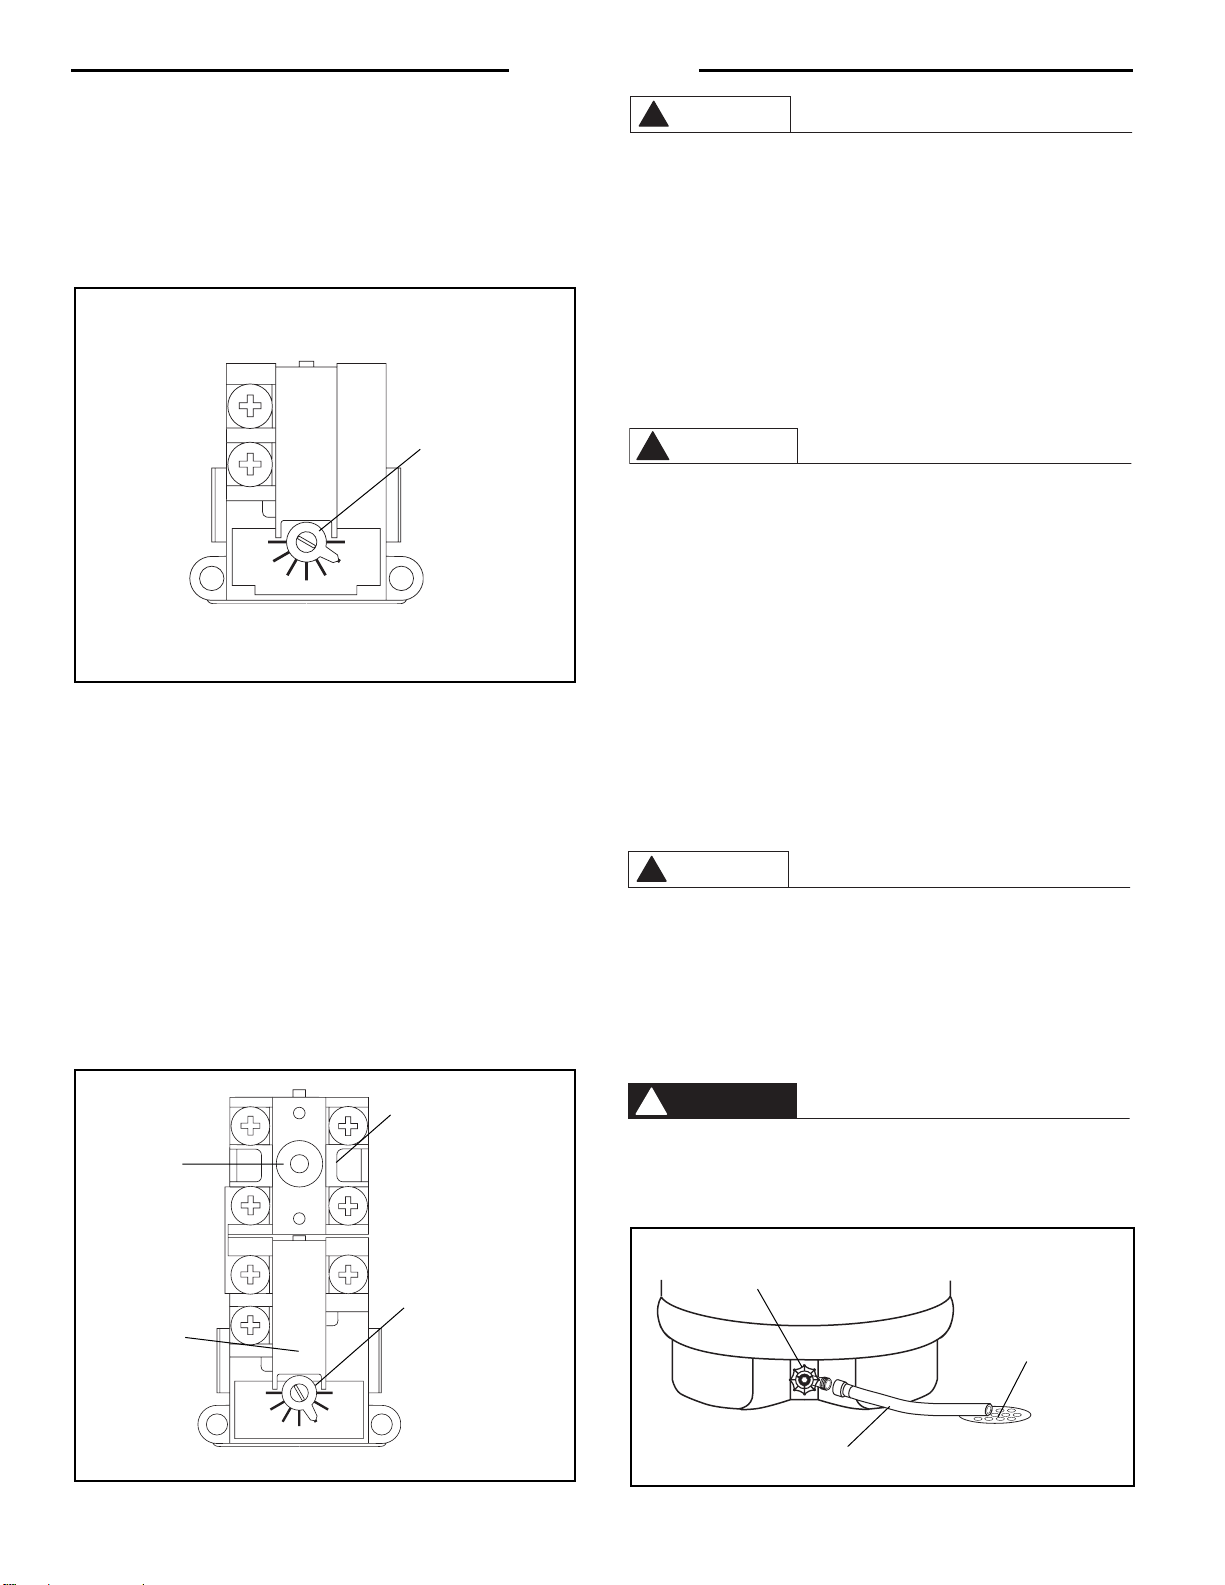
C. With a small screwdriver, adjust the thermostat setting. This thermostat
is marked in degrees from 110°F to 170°F. The thermostat is factory
set to the 120°F position (the recommended setting). (Refer to Figure
13).
D. Replace the two (2) pieces of fiberglass insulation over the thermostat
and attach the thermostat access panel.
E. Replace the single piece of fiberglass insulation inside the thermostat
access panel cover and snap in position.
NOTE: It is important that the fiberglass insulation is replaced to
maintain the water heater’s high energy efficiency performance.
3. SAFETY CONTROLS — The water heater is equipped with a combination
Thermostat and High Temperature Limit Switch that is located above the
upper heating element. If for any reason the water temperature becomes
excessively high, the Limit Switch breaks the power circuit to the heating
element. Once the control opens, it must be reset manually.
The cause of the High Temperature Condition must be investigated
by qualified service personnel and corrective action taken before
placing the water heater in service again.
To reset High Limit Switch,
turn off
power to water heater, remove upper
jacket access panel and insulation, and the access panel and insulation to
expose the Thermostat and High Limit Switch. (Refer to Figure 10.)
The
plastic personnel protesctor SHOULD NOT be removed
. Press the
“RESET” button (see Figure 14). Replace insulation and jacket access
panel(s) before turning on power to water heater.
4. EMERGENCY INSTRUCTIONS —
If water heater has been subjected to flood, fire, or physical dam-
age, turn off power and water to water heater. Do not operate the
water heater again until it has been thoroughly checked by quali-
fied service personnel.
5. VACATION AND LONG TIME SHUT-DOWN — If the water heater is to
remain idle for an extended period of time, the power and water to the
water heater should be turned off to conserve energy. The water heater
and piping should be drained if they might be subjected to freezing temper-
atures.
After a very long shut-down period, the water heater’s operation and con-
trols should be checked by qualified service personnel. Make certain the
water heater is completely filled before again placing it in operation .
6. DRAINING THE WATER HEATER —
Always shut off power to water heater before draining water.
In order to drain water heater, turn off the power supply, then turn off cold
water supply. Next, it is necessary to open a hot water faucet or lift the han-
dle on the relief valve to admit air to the tank, and KEEP OPEN. Attach a
garden hose to the drain valve on the water heater, and open the valve.
Direct the stream of water to a drain where it will do no damage. (See Fig-
ure 15).
The water drained from the tank may be hot enough to present a
SCALD HAZARD and should be directed to a suitable drain to pre-
vent injury or damage.
10
Operation
Figure 13 — Lower Thermostat temperature adjustment.
Temperature Adjustment
Screw (Shown at Factory Set-
ting of approx. 120° F.)
110
120
130
140
150
160
170
CAUTION
!
Figure 14 — Upper Thermostat & High Limit Switch
Figure 15 — Draining the Tank
Reset Button
Temperature Adjustment
Screw (Shown at Factory Set-
ting of approx. 120° F.)
LOW
MED
HI
Limit Switch
(Located at Upper Element on
Double Element Models)
Temperature
Control
Thermostat
WARNING
!
CAUTION
!
DANGER
!
Drain Valve
Garden Hose
Floor Drain
(or other suitable drain)
Loading ...
Loading ...
Loading ...