Loading ...
Loading ...
Loading ...
A
A B C
DE
A
B
C
26 – GETTING READY TO SEW
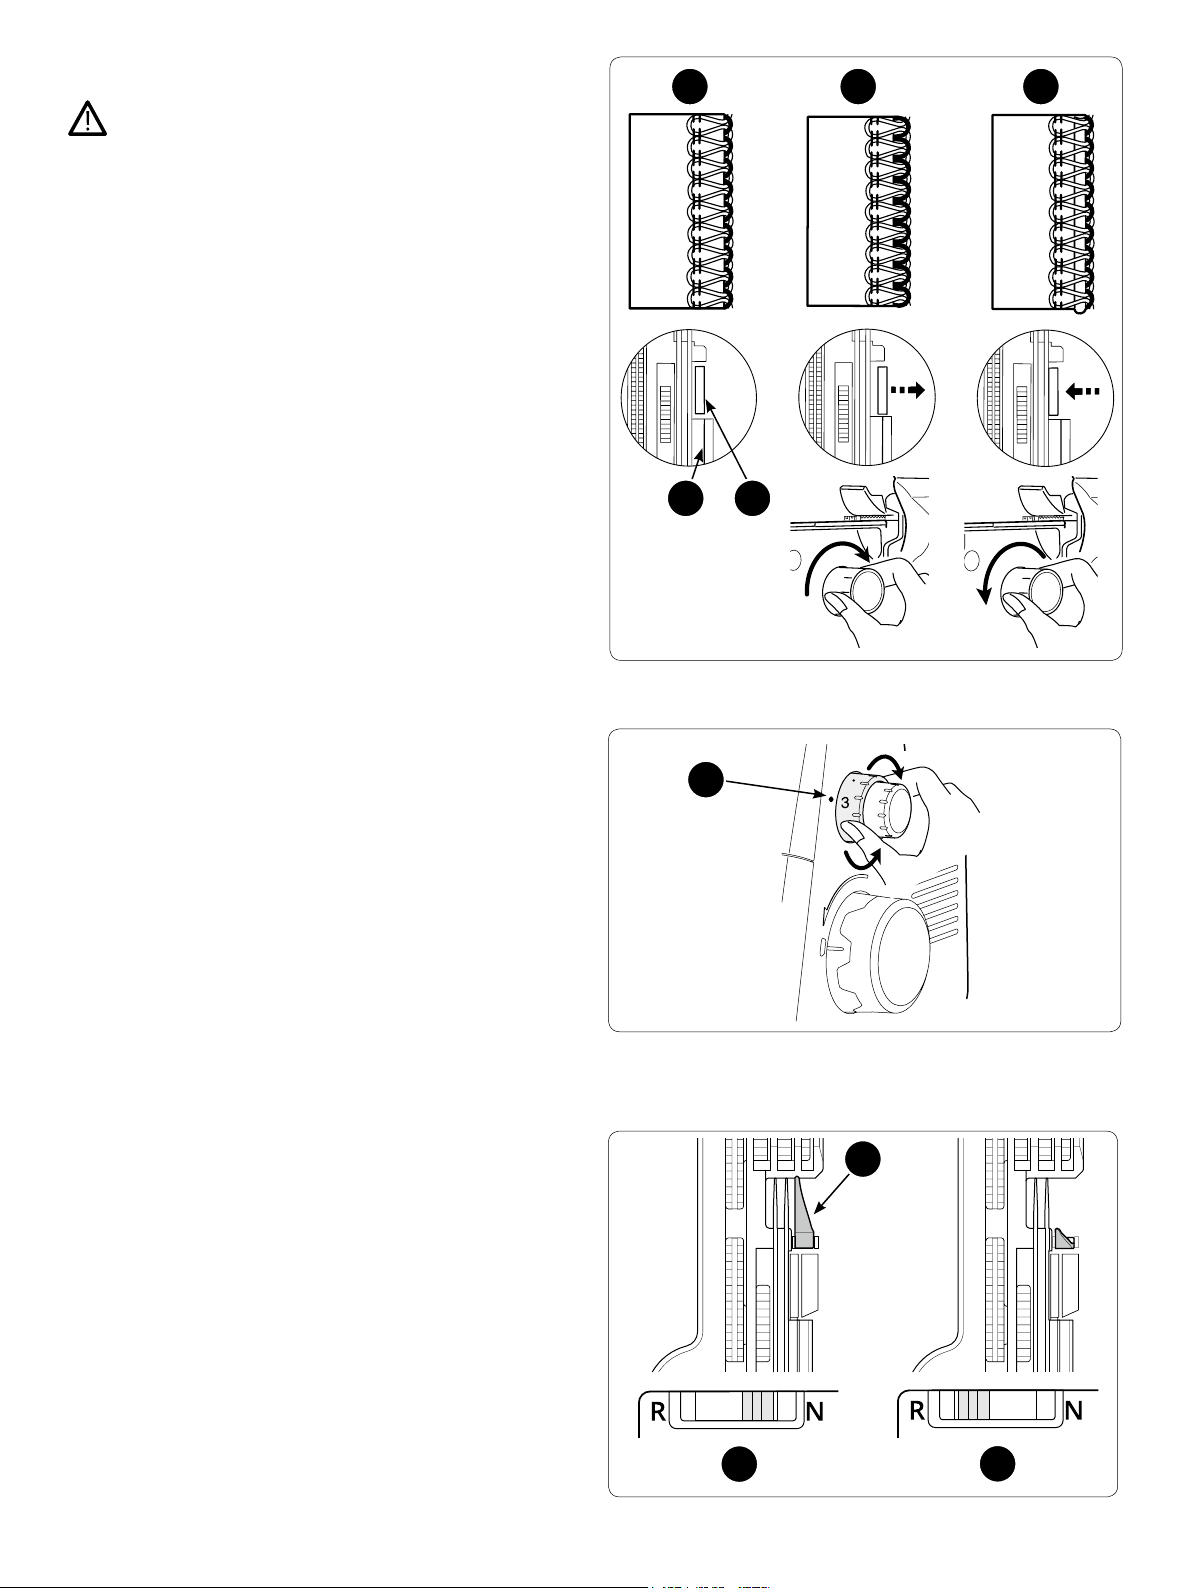
Stitch Length Adjustment
The stitch length dial (A) should be set to 3 (approximately
3 mm) for most sewing conditions. The dial clicks when you
turn the dial to 3. The stitch length can be adjusted while
sewing. The stitch length can be adjusted from 1 to 5 mm.
Adjust the stitch length to 4 mm when sewing on heavy-
weight fabrics.
Adjust the stitch length to 2.5 mm when sewing on light-
weight fabrics.
Set the stitch length to “R” for rolled and narrow hem (ap-
proximately 1.5mm).
Cutting Width Adjustment
Turn o the main power switch and unplug the machine.
When the cutting width is too narrow or too wide for the set
seam, adjust it by moving the staionary cutter.
Turn the cutting width adjustment dial to move the stationary
cutter to the right or left.
Perfect Cutting width (A) – The edge of the fabric should
align with the seam.
Too narrow cutting width (B) – there is a gap between the
edge of the fabric and the seam. Increase the cutting width
by turning the cutting width adjustment dial away from you.
Too wide cutting width (C) – the fabric gets rolled or folded
into the seam. Decrease the cutting width by turning the cut-
ting width adjustment dial towards you.
Sew and check the cutting width.
The standard position for the stationary cutter is when the
right edge of the cutter (D) is aligned wih the guide line on
the stitch plate (E).
Stitch Finger Lever Setting
The stitch nger (A) is used to stabilize the fabric edge when
forming stitches. The stitch nger lever should be set to “N”
for all standard overlock sewing (B). To sew rolled edge you
need to retract the stitch nger by setting the stitch nger le-
ver to “R” (C).
When moving the stitch nger lever, be sure to push the le-
ver as far as it will go in each direction.
Loading ...
Loading ...
Loading ...