Loading ...
Loading ...
Loading ...
Stopping the Mower
1. Stop forward motion of the mower by pulling the
drive control aHthe way back.
2. Stop the engine and blade by releasing the blade
control.
3. Remove the starter insert from the control console
(7800830).
To prevent unauthorized starting, always remove the
starter insert when leaving the mower unattended.
Handle Height Adjustment
DO NOT attempt any maintenance, adjustments or service
with engine and blade running, STOP engine and blade,
Remove starter insert. Disconnect spark plug wire and
secure away from spark plug. Engine and components are
ROT, Avoid serious burns, allow sufficient time for all com-
ponents to cool,
For greater operator comfort, the height of the mower
handle can be adjusted.
1. Remove the knobs, washers and bolts secunng
the lower handle (A, Figure 5) to the mounting
brackets (B).
2. Align the holes in the handle assembly with one
of the three handle height adjustment holes in the
mounting bracket.
3. Replace the removed hardware, tightening secure-
ly.
Cutting Height Adjustment
DO NOT attempt any maintenance, adjustments or service
with engine and blade running, STOP engine and blade,
Remove starter insert, Disconnect spark plug wire and
secure away from spark plug. Engine and components are
ROT, Avoid serious burns, allow sufficient time for all com-
ponents to cool,
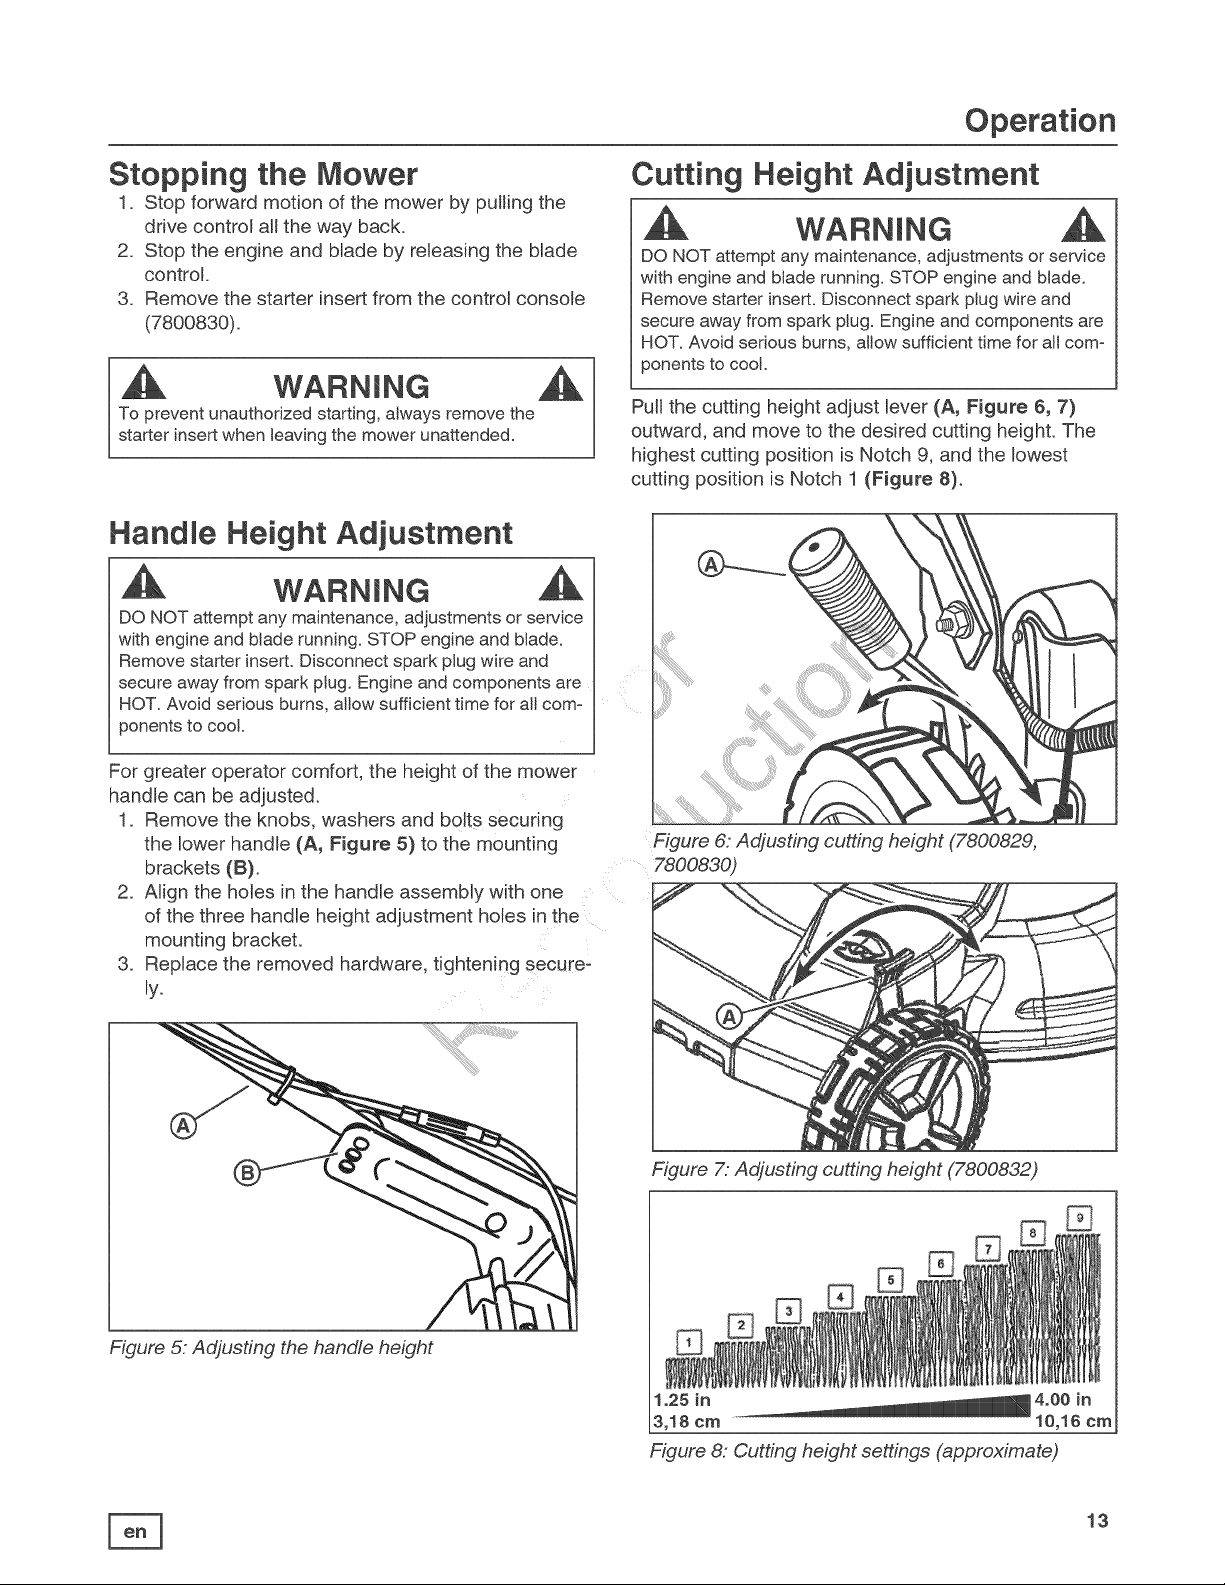
Pull the cutting height adjust lever (A, Figure 6, 7)
outward, and move to the desired cutting height. The
highest cutting position is Notch 9, and the lowest
cutting position is Notch 1 (Figure 8).
Figure 6: Adjusting cutting height (7800829,
7800830)
Figure 7: Adjusting cutting height (7800832)
Figure 5: Adjusting the handle height
1°25 in
3,18 cm
Figure 8: Cutting height settings (approximate)
13
Loading ...
Loading ...
Loading ...