Loading ...
Loading ...
Loading ...
11
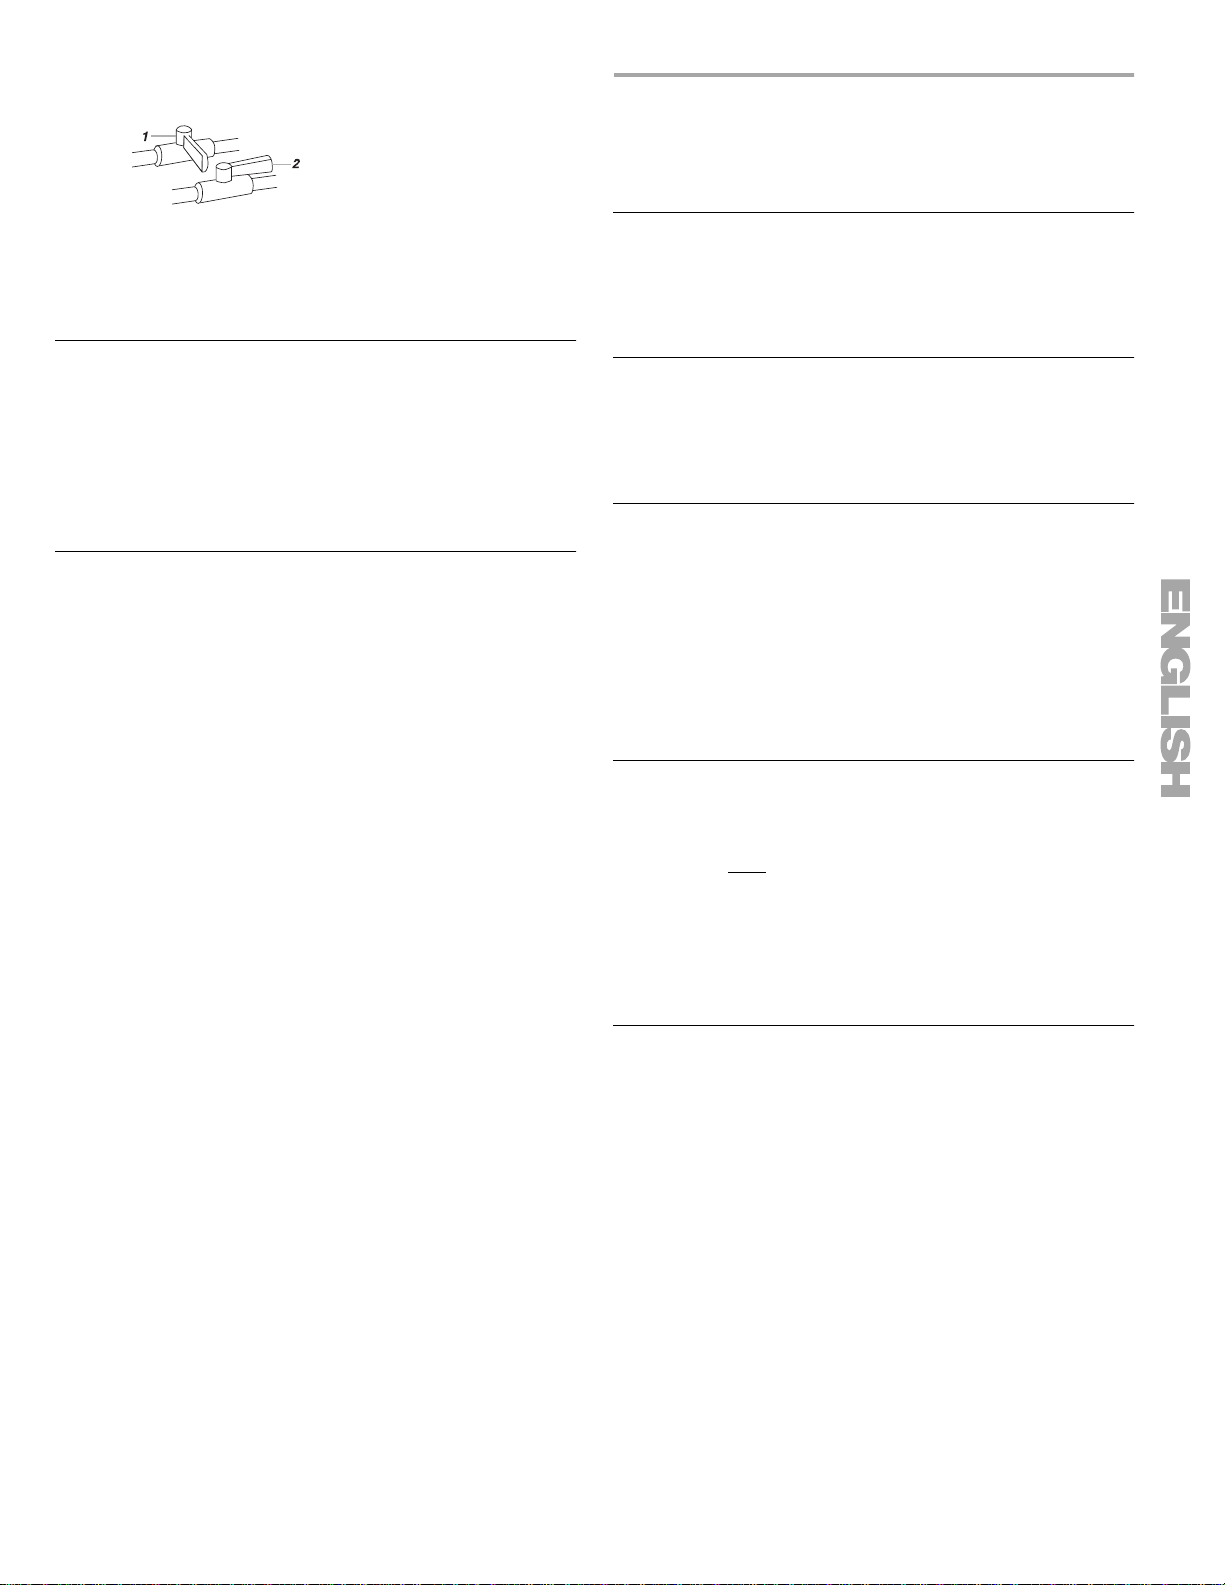
3. Open the shutoff valve in the supply. The valve is open when
the handle is parallel to the gas pipe.
1. Closed valve
2. Open valve
4. Test all connections by brushing on an approved
non-corrosive leak-detection solution. Bubbles will show a
leak. Correct any leak found.
Connect Vent
1. Using a 4 in. (10.2 cm) clamp, connect vent to exhaust outlet
in dryer. If connecting to existing vent, make sure the vent is
clean. The dryer vent must fit over the dryer exhaust outlet
and inside the exhaust hood. Make sure the vent is secured
to exhaust hood with a 4 in. (10.2 cm) clamp.
2. Move dryer into final position. Do not crush or kink vent.
Make sure dryer is level.
Complete Installation
1. Check to be sure all parts are now installed. If there is an
extra part, go back through the steps to see which step was
skipped.
2. Check to be sure you have all of your tools.
3. Dispose of all packaging materials.
4. Check the dryer’s final location. Be sure the vent is not
crushed or kinked.
5. Check to be sure the dryer is level. (See “Level Dryer.”)
6. Plug into a grounded 3 prong outlet. Turn power on.
7. Remove the blue protective film on the console and any tape
remaining on the dryer.
8. Read “Dryer Use.”
9. Wipe the dryer drum interior thoroughly with a damp cloth to
remove any dust.
10. Set the dryer on a full heat cycle (not the Air cycle) for 20
minutes to remove air from the gas line. Open the dryer door
after five minutes and feel for heat. If you do not feel heat,
turn the dryer off and wait five minutes.
Then check the following:
■ Controls are set in a running or “On” position.
■ Start button has been pushed firmly.
■ Gas supply line shutoff valve is open.
Repeat 5-minute test as outlined above. If dryer still does not
operate properly, check the following:
■ Dryer is plugged into a grounded 3 prong outlet.
■ Electrical supply is connected
■ House fuse is intact and tight; or circuit breaker has not
tripped.
■ Dryer door is closed.
■ If dryer makes an unusual noise, check that dryer is level.
FEATURES AND
BENEFITS
TOTAL CARE™ SYSTEM
The exclusive TOTAL CARE SYSTEM combines the KING SIZE™
load capacity, EVENHEAT with Auto Temp Control, WRINKLE
GUARD™
III, and the TUMBLE FREE™ heated dryer rack to
ensure total drying care for any type of fabric and load size.
Auto Temp Control
In automatic drying cycles, the temperature of the clothes is
reduced by automatically turning down the heat, as the clothes
become dry. This reduces over drying and provides better care of
the fabrics in your clothes.
EVENHEAT™
with Auto Temp
Control
Drying System
The EVENHEAT with Auto Temp Control system for drying uses
dual moisture sensing devices and SENSOR SMART™ controls.
EVENHEAT with Auto Temp Control shortens drying time and
dries the load at lower temperatures for optimal fabric care. The
EVENHEAT with Auto Temp Control system monitors the
temperature of the heated air to ensure that it is never too hot to
cause fabric damage. It also terminates the cycle when the
clothes are dry to reduce shrinkage.
“SMART” Cool Down Period
When the selected level of dryness is reached, the dryer goes
into a cool down period lasting 2-10 minutes. Unlike other dryers
that provide a fixed
10 minute cool down, the length of the
"SMART" cool down is based on the cycle time and selected
dryness setting.
■ For small loads or loads that are dried at a lower temperature,
the cool down may be as low as 2 minutes.
■ For large loads or loads that are dried at a higher
temperature, the cool down will be closer to 10 minutes.
Jeans Cycle
Auto Temperature Control monitors the temperature and moisture
of your clothes and turns down the temperature at the right time.
By sensing the temperature and moisture, jeans come out of the
dryer ready to wear. You can put them on without them being
damp or overdry.
Loading ...
Loading ...
Loading ...