Loading ...
Loading ...
Loading ...
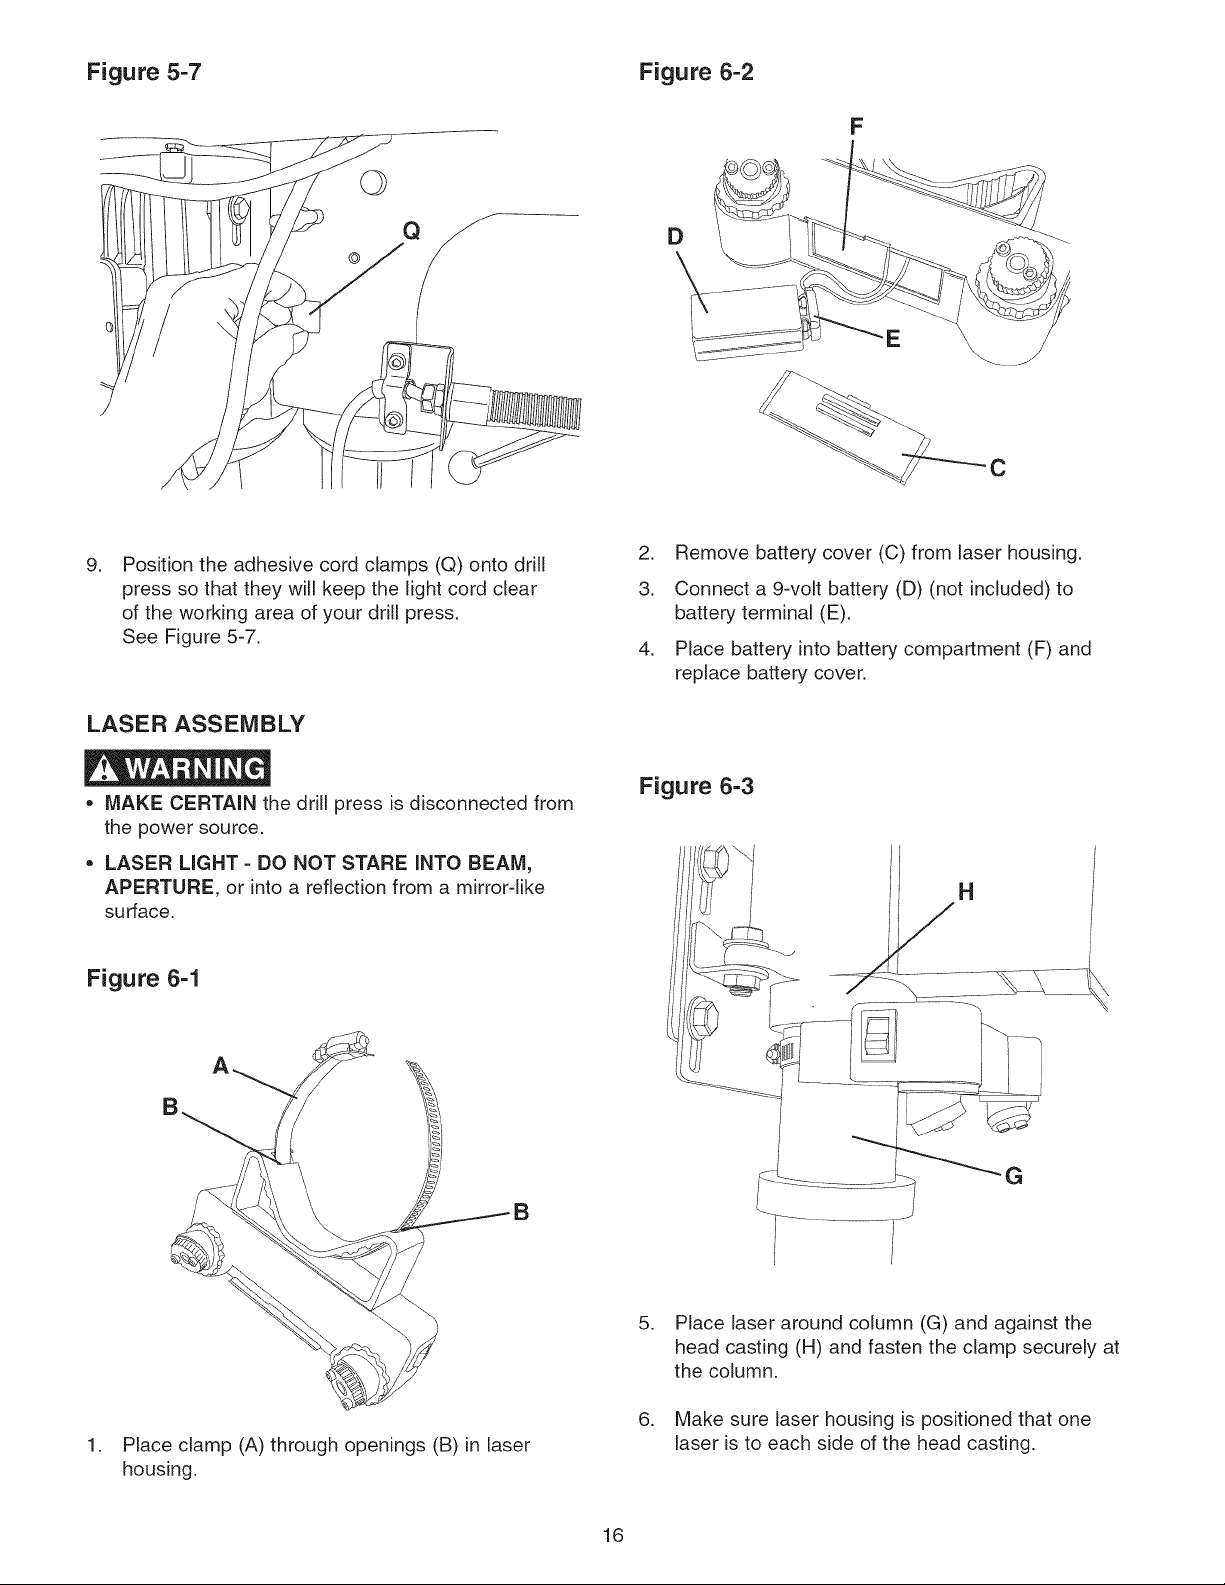
Figure 5-7 Figure 6-2
©
F
C
.
Position the adhesive cord clamps (Q) onto drill
press so that they will keep the light cord clear
of the working area of your drill press.
See Figure 5-7.
LASER ASSEMBLY
2. Remove battery cover (C) from laser housing.
3. Connect a 9-volt battery (D) (not included) to
battery terminal (E).
4. Place battery into battery compartment (F) and
replace battery cover.
• MAKE CERTAIN the drill press is disconnected from
the power source.
• LASER LIGHT = DO NOT STARE INTO BEAM,
APERTURE, or into a reflection from a mirror-like
surface.
Figure 6-1
Figure 6-3
H
.
Place clamp (A) through openings (B) in laser
housing.
.
.
Place laser around column (G) and against the
head casting (H) and fasten the clamp securely at
the column,
Make sure laser housing is positioned that one
laser is to each side of the head casting.
16
Loading ...
Loading ...
Loading ...