Loading ...
Loading ...
Loading ...
14
1
2
FRONT
FRONT
Rear stop
Front
bracket
Telescopic runners (Optional extra)
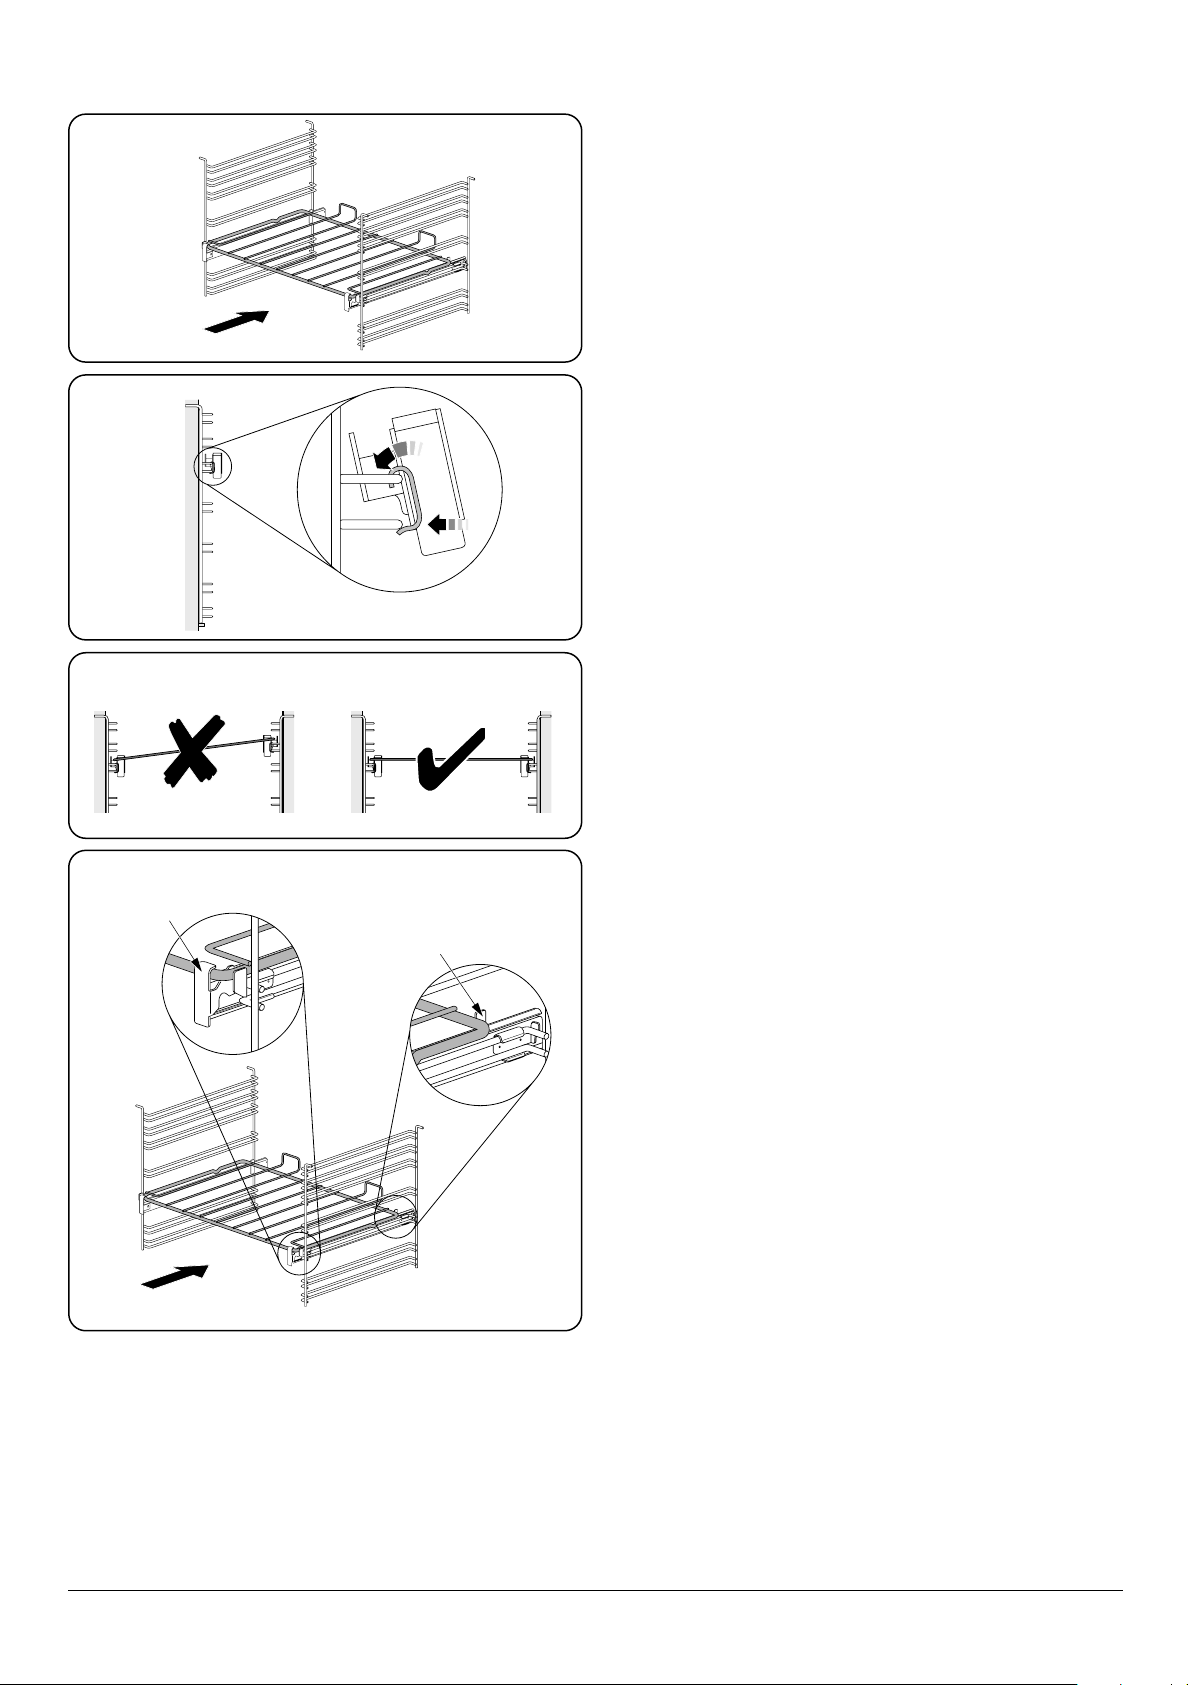
A glide-out oven shelf is available for the left-hand oven (Fig.
2.25).
Note: The Handyrack must be removed before tting the
glide-out shelf.
The rungs on the shelf supports are in pairs. The glide-out
shelf runners can be tted to any pair except the top.
To t the glide-out shelf runners
Hook the rear of the runner over the top rung of a pair of shelf
supports. Then hook the front of the runner onto the same
rung. Push to clip under the bottom rung (Fig. 2.26).
The front of the shelf runners can be identied by the bracket
(Fig. 2.28).
Ensure that the shelf runners are tted in the same position
on each side (Fig. 2.27).
To t the glide-out shelf
Check the shelf runners are secure before tting the glide-out
shelf.
Hook the front of the glide-out oven shelf onto the runners
as shown (Fig. 2.28). The rear of the shelf should rest on the
runners, in front of the rear stop (Fig. 2.28).
Ensure that the shelf sits at once in position.
DO NOT put the glide-out shelf runners in a
dishwasher
Fig. 2.25
Fig. 2.26
Fig. 2.27
Fig. 2.28
Loading ...
Loading ...
Loading ...