Loading ...
Loading ...
Loading ...
Make Gas Connection
Gas Connection to a 20 Ib LP Gas Fuel Tank
Explosion Hazard
Use a new CSA International approved "outdoor"
gas supply line.
Securely tighten all gas connections.
if connected to LP, have a qualified person make sure
gas pressure does not exceed 11" (28 cm) water
column.
Examples of a qualified person include:
licensed heating personnel,
authorized gas company personnel, and
authorized service personnel.
Failure to do so can result in death, explosion, or fire.
If converting to local LP or Natural gas, follow the instructions in
the "Gas Conversions" section.
IMPORTANT: A 20 Ib LP gas fuel tank must be purchased
separately.
IMPORTANT: The gas pressure regulator/hose assembly
supplied with the grill must be used. Replacement gas pressure
regulator/hose assembly specific to your model, is available from
your outdoor grill dealer.
To Install the 20 Ib LP Gas Fuel Tank:
1. Open cabinet doors.
2. Pull out the tank tray.
3=
Tanktray
Place the 20 Ib LP gas fuel tank bottom collar into the
mounting hole in the tank tray.
4=
5=
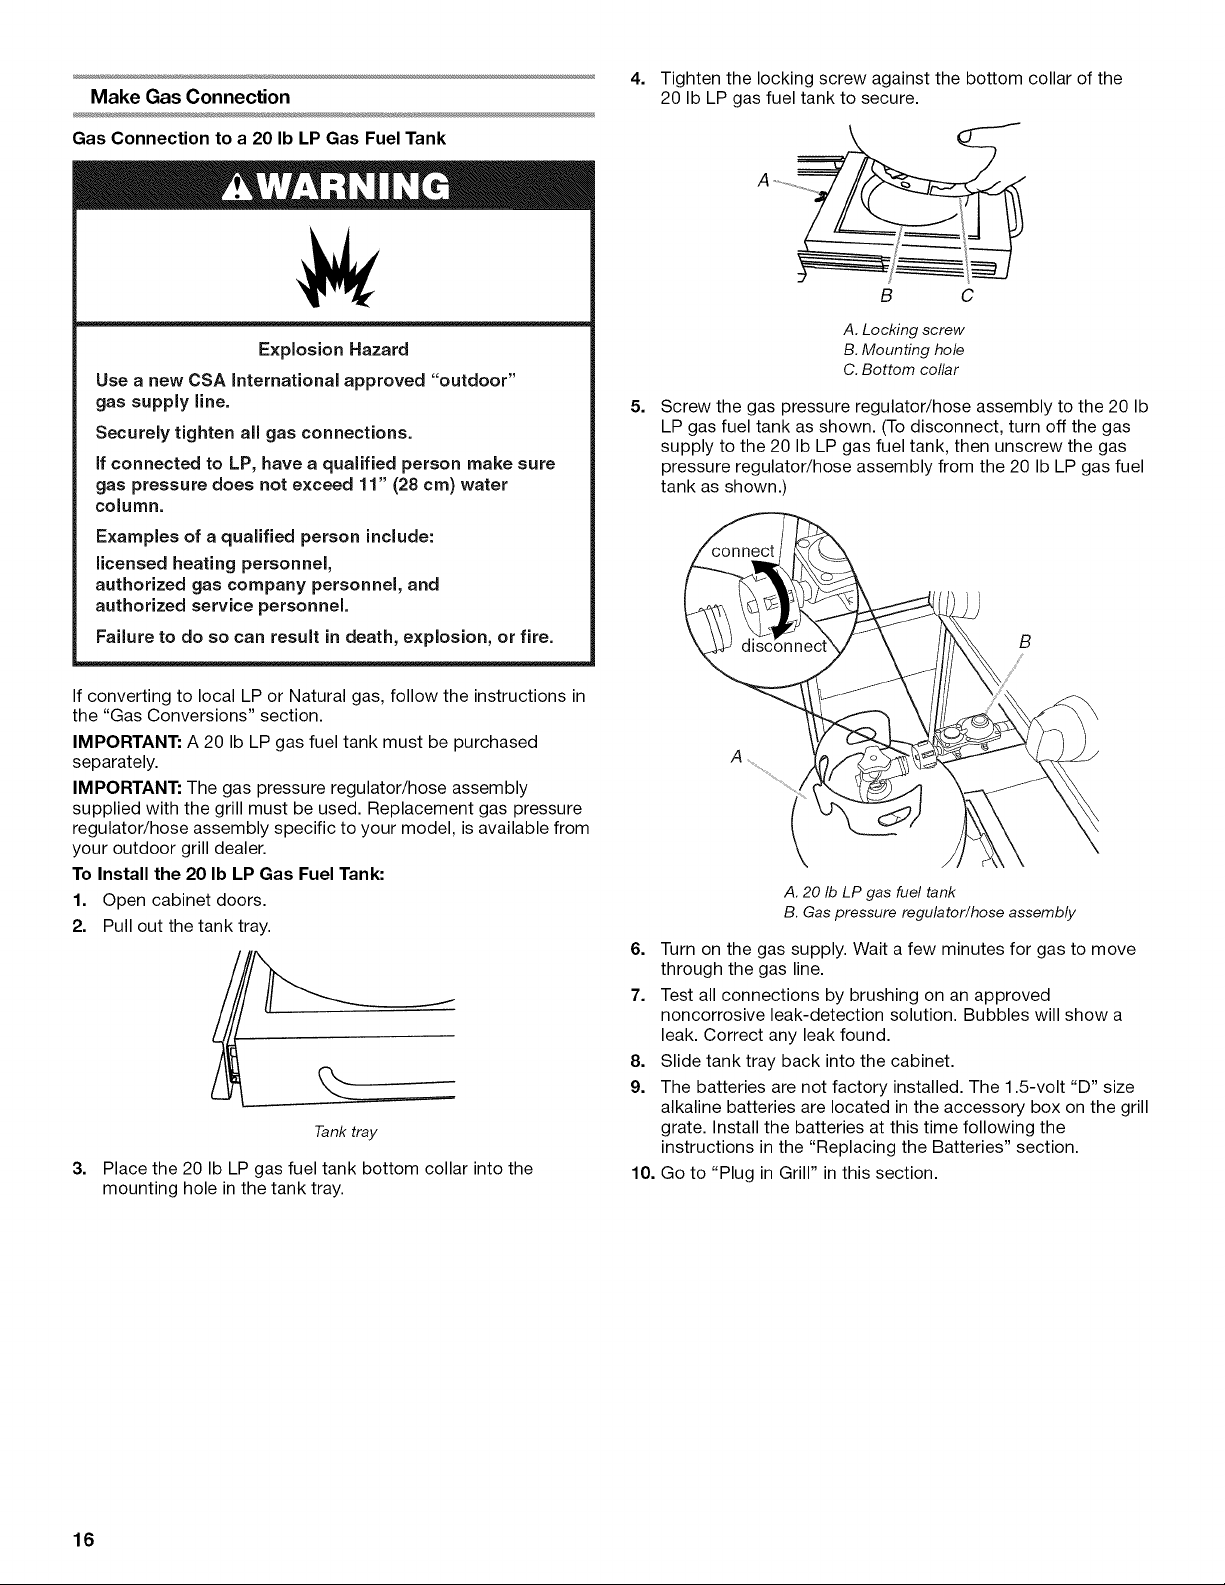
Tighten the locking screw against the bottom collar of the
20 Ib LP gas fuel tank to secure.
B C
A. Locking screw
B. Mounting hole
C. Bottom collar
Screw the gas pressure regulator/hose assembly to the 20 Ib
LP gas fuel tank as shown. (To disconnect, turn off the gas
supply to the 20 Ib LP gas fuel tank, then unscrew the gas
pressure regulator/hose assembly from the 20 Ib LP gas fuel
tank as shown.
A. 20 Ib LP gas fuel tank
B. Gas pressure regulator/hose assembly
6. Turn on the gas supply. Wait a few minutes for gas to move
through the gas line.
7. Test all connections by brushing on an approved
noncorrosive leak-detection solution. Bubbles will show a
leak. Correct any leak found.
8. Slide tank tray back into the cabinet.
9. The batteries are not factory installed. The 1.5-volt "D" size
alkaline batteries are located in the accessory box on the grill
grate. Install the batteries at this time following the
instructions in the "Replacing the Batteries" section.
10. Go to "Plug in Grill" in this section.
16
Loading ...
Loading ...
Loading ...