Loading ...
Loading ...
Loading ...
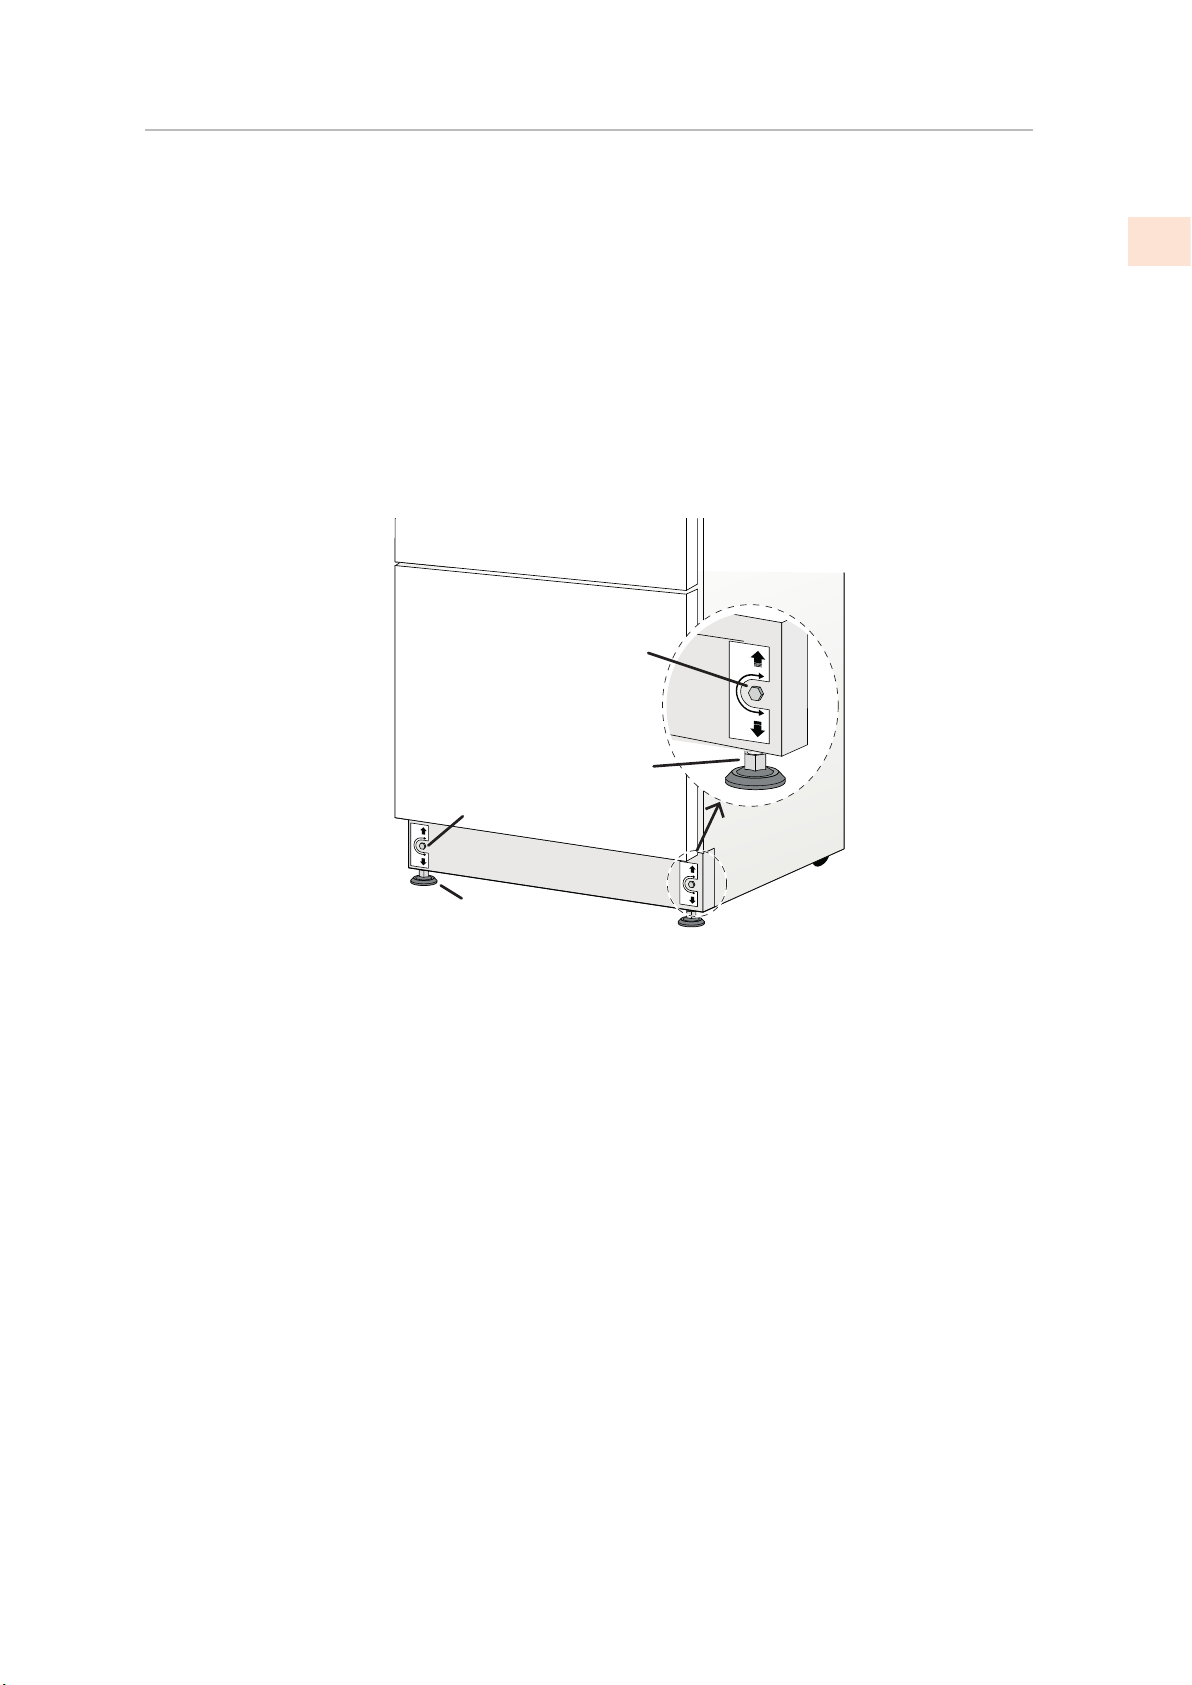
LEVELING THE APPLIANCE LEVELING THE APPLIANCE
Adjust the appliance level by means of the front leveling feet and the rear adjustable wheels.
Leveling must be done after the appliance has been moved into place.
Level as follows:Level as follows:
1) Remove the bottom grille if necessary (it is kept in position by magnets)
2) Adjust the front using the leveling feet (1) by means of a 17 mm (or 11/16") open-end or
adjustable wrench.
3) Adjust the height of the rear by turning the front adjusting bolts (2) clockwise or counter-
clockwise as required.
4) Reinstall the grill.
CHECK/ADJUST SIDE TRIMCHECK/ADJUST SIDE TRIM
The standard side trim fits an opening of the specified dimensions, as listed on page 5 and
following pages.
If the cutout is a bit wider or not perfectly square, the trim can be adjusted to fit.
The suggested method is to use spacers between the appliance and the trim strip under each of
the five screws securing each trim strip. Flat washers can be used as spacers, select thicknesses
as appropriate.
This adjustment should be done before any decorative panels are mounted to the doors.
TRIM FOR INSTALLING TWO OR MORE UNITS TOGETHERTRIM FOR INSTALLING TWO OR MORE UNITS TOGETHER
When installing units side-by-side, a special trim kit must be used on the facing sides. See
"INSTALLING TWO OR MORE UNITS TOGETHER" on page 28.
ANTI-TIP HARDWAREANTI-TIP HARDWARE
The anti-tip hardware installation is detailed on page32, and must be completed after the
appliance is in place and has been leveled.
However, you may wish to make the preparations before mounting any decorative panels.
FINAL INSTALLATION
(CONT.)
1
2
2
1
© 2020 Hestan Commercial Corporation
31
EN
Loading ...
Loading ...
Loading ...