Loading ...
Loading ...
Loading ...
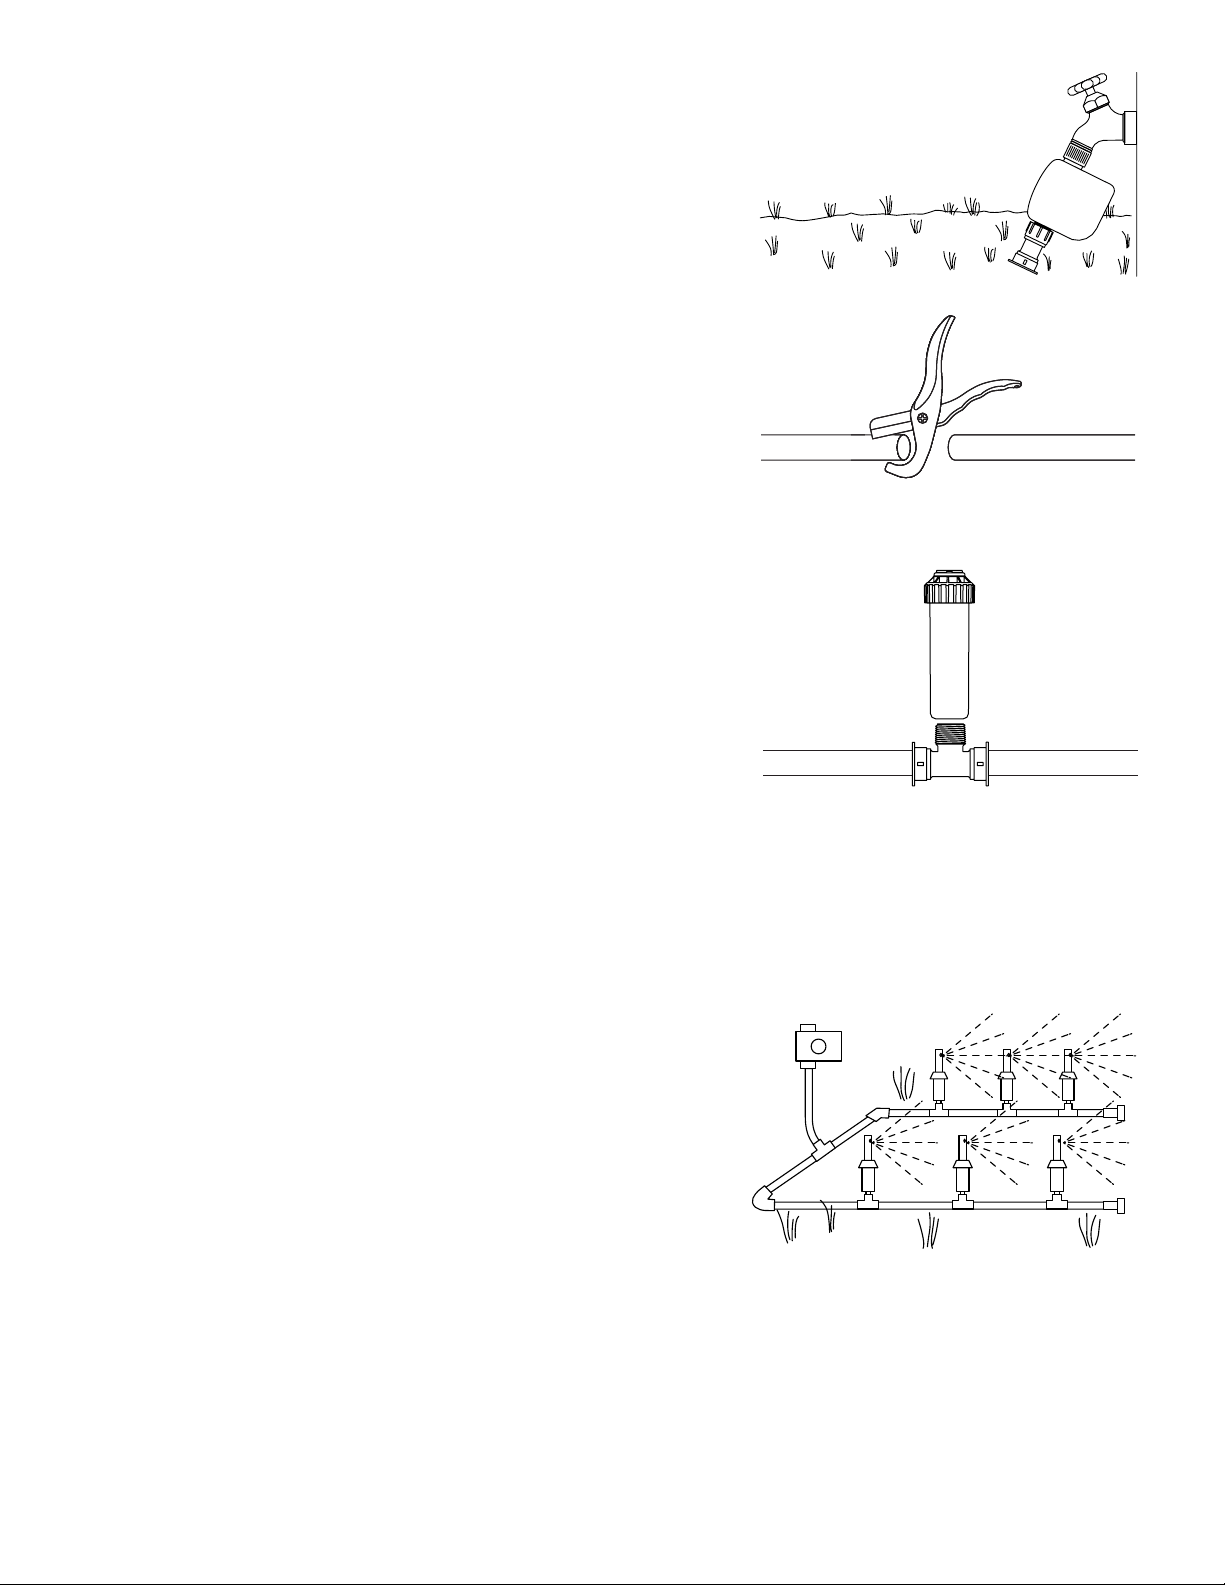
STEP 5
Connect the Timer
Connect the timer to the desired faucet and then connect
the Hose to ½" Blu-Lock adapter to the timer.
STEP 6
Cut the Pipe
Cut the pipe where tees, elbows, and couplings will be
located. Mark the Blu-Lock pipe one inch from the end before
installing the fittings. This mark will help you know how far
to push the fittings on to the Blu-Lock pipe. Don’t worry if the
pipe stays coiled, it will straighten out as fittings are attached.
STEP 7
Connect the Fittings
Connect the Blu-Lock pipe to the Hose to Blu-Lock adapter,
tees, elbows, and couplings where you made your cuts.
Make sure to push the pipe all the way into each fitting
using the marking you made in Step 6. Attach sprinkler
heads and auto-drains to the appropriate fittings.
Auto-drains allow water to purge the pipes, reducing possible
damage to your system. This does not take the place of
winterizing your irrigation system. Be sure to properly
winterize if you live in an area with freezing temperatures.
STEP 8
Test Your System
Above ground, place your pipes, sprinkler heads, and drains
in the desired location. Stake or secure your sprinkler heads
to the ground so they will not move when you turn your
water on to perform this test. Turn your water on slowly.
Look for leaks. Blu-Lock fittings are designed to be
removed in case adjustments are needed. First make
sure that your water is off, then simply pull back on
the blue tabs located at the end of the fitting, push
the pipe in, twist the pipe, then pull the pipe out.
Leave the water on. If water does not reach from
sprinkler head to sprinkler head, see Step 9.
Loading ...