Loading ...
STEP 1
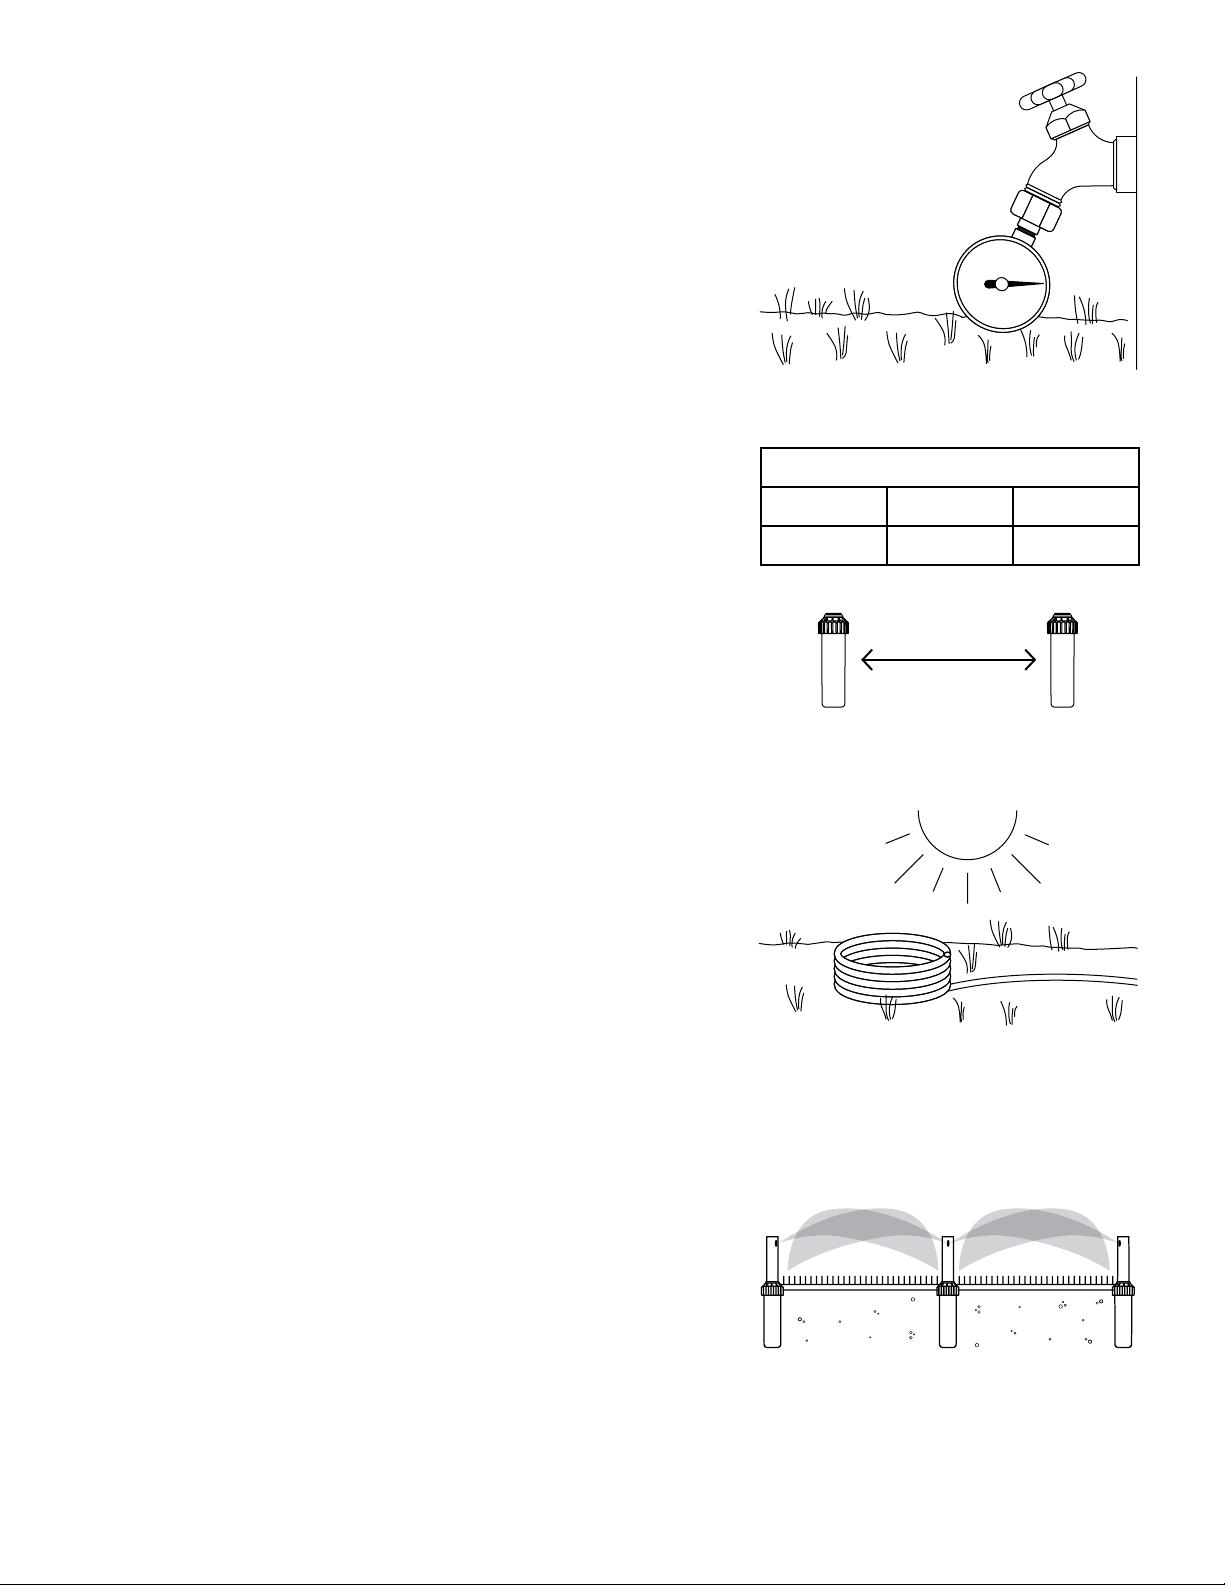
Test Your Pressure
Attach the pressure gauge to the desired hose faucet, turn
water on to find out how much pressure is available.
If pressure exceeds 80 psi it is recommended
to use a pressure reducer.
If pressure is below 35 psi, please note that
this system may not work as designed.
STEP 2
Determining Sprinkler Head Spacing
Your available pressure will determine how far your
sprinkler heads will spray water. Use this chart to help
you determine how far apart to space your heads.
Distances are approximate and based on the
Orbit recommended, U-shaped, design.
Performance will vary based on your design, and whether
or not you choose to use all of the sprinkler heads in the kit.
The spacing is based on the .75 nozzle provided with the kit.
Distance will vary if the nozzle is changed.
STEP 3
Prepare the Blu-Lock Pipe
· Unroll the 125' coil of pipe, making sure
not to kink the pipe in the process.
· Let the pipe rest in the sun for approximately one
hour (depending on how warm it is outside), which
will make the pipe easier to put into place.
While you are waiting for the pipe, you can
move on to the next few steps.
STEP 4
Design Your System
For optimal coverage and health of your plants, locate
each sprinkler so that the spray distance reaches
adjacent sprinklers. Ideally the sprinkler heads’ spray
pattern will spray over each head a short distance.
· Orbit recommends the U-shaped design shown
in this manual, but this design can be adapted
to the unique shape of your landscape.
· To ensure proper pressure and spray coverage of
your lawn, do not put any more than three sprinkler heads on any length of pipe.
· If you have the 2-zone kit, adapt this design for your second zone. It is okay to have
extra parts left over when you are done; we added parts for varying layouts.
Spacing Chart
35 psi 50 psi 75 psi
15 ft. 21 ft. 24 ft.
15–24 ft.
Design for head-to-head coverage
Loading ...
Loading ...
Loading ...