Loading ...
Loading ...
Loading ...
Installing Sewing Machine in your new Cabinet.
It may be helpful to read the directions for operating
the mechanism before proceeding with the following
steps. See page 7, and FIG. 12, on this page.
STEP 1.
STEP 2.
STEP3
STEP6.
FIG. 10
To prevent damage to Cabinet surface, place
cushioning material just to the left
of cut-out. Lay the sewing machine on its
back, on top of cushioning material.
With Platform in the flatbed position,
place Plastic insert into position, making
sure the ruler is facing front. This will aid
you in positioning the sewing machine. STEP 4
STEP 3. Feed machine receptacle cord form the __j
machine control pedal, up through the slot on
the right side of the machine platform.
STEP 4. Insert machine receptacle into terminals
provided on the right side of the machine; (this
may vary with some machines).
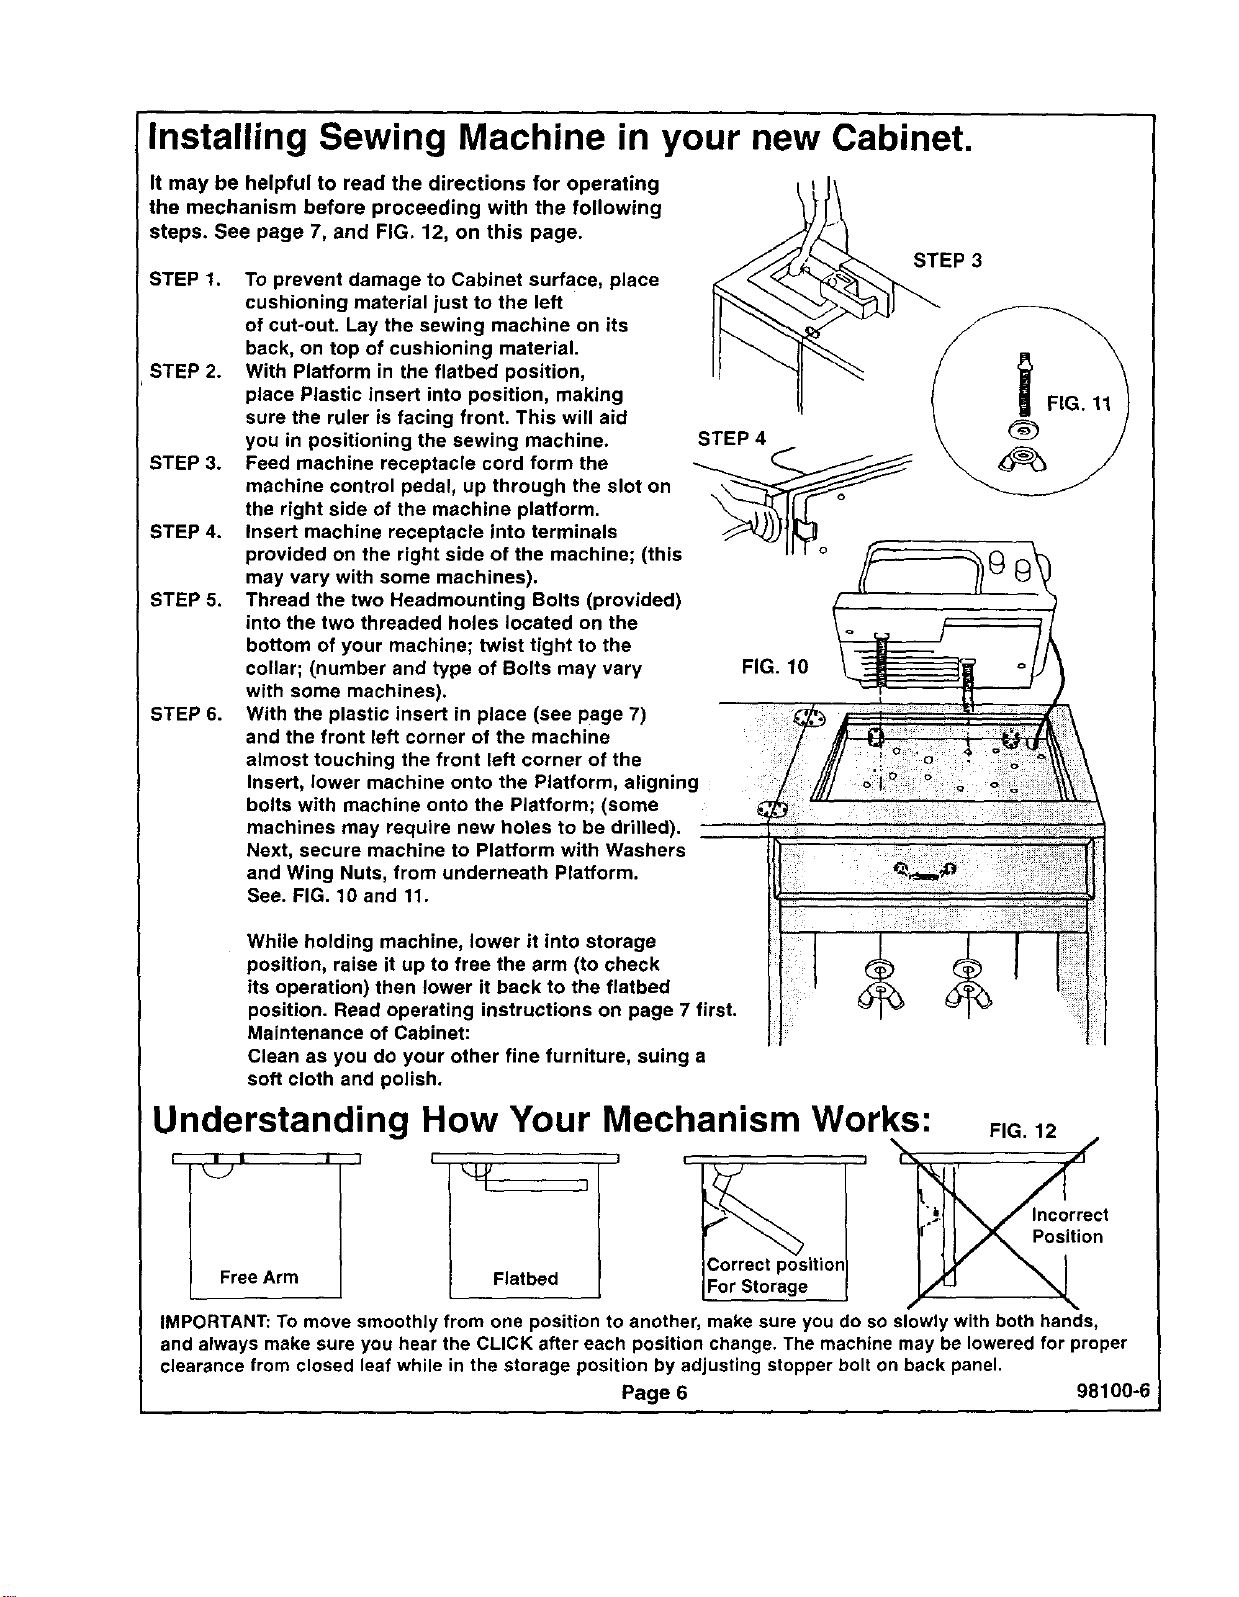
STEP 5. Thread the two Headmounting Bolts (provided)
into the two threaded holes located on the
bottom of your machine; twist tight to the
collar; (number and type of Bolts may vary
with some machines).
With the plastic insert in place (see page 7)
and the front left corner of the machine
almost touching the front left corner of the
Insert, lower machine onto the Platform, aligning
bolts with machine onto the Platform; (some
machines may require new holes to be drilled).
Next, secure machine to Platform with Washers
and Wing Nuts, from underneath Platform.
See. FIG. 10 and 11.
While holding machine, lower it into storage
position, raise it up to free the arm (to check
its operation) then lower it back to the flatbed
position. Read operating instructions on page 7 first.
Maintenance of Cabinet:
Clean as you do your other fine furniture, suing a
soft cloth and polish.
Understanding How Your Mechanism Works:
I a d i
Free Arm
Flatbed
l_:' "orrritl
FIG. 12
P_jition
IMPORTANT: To move smoothly from one position to another, make sure you do so slowl r with both hands,
and always make sure you hear the CLICK after each position change. The machine may be lowered for proper
clearance from closed leaf while in the storage position by adjusting stopper bolt on back panel.
Page 6 98100-_
Loading ...
Loading ...
Loading ...