
Loading ...
Loading ...
Loading ...
11
Washer
Safety
Operation
Requirements
Installation
Instructions
Washer Use Washer Care
Troubleshooting
NOTE: If you must transport the washer at a later date, you must reinstall
the shipping support hardware to prevent shipping damage. Keep the
hardware in the plastic bag provided.
INSTALLING THE WASHER
1. Run some water from the cold faucet to flush the water lines and
remove particles that might clog up the inlet hose.
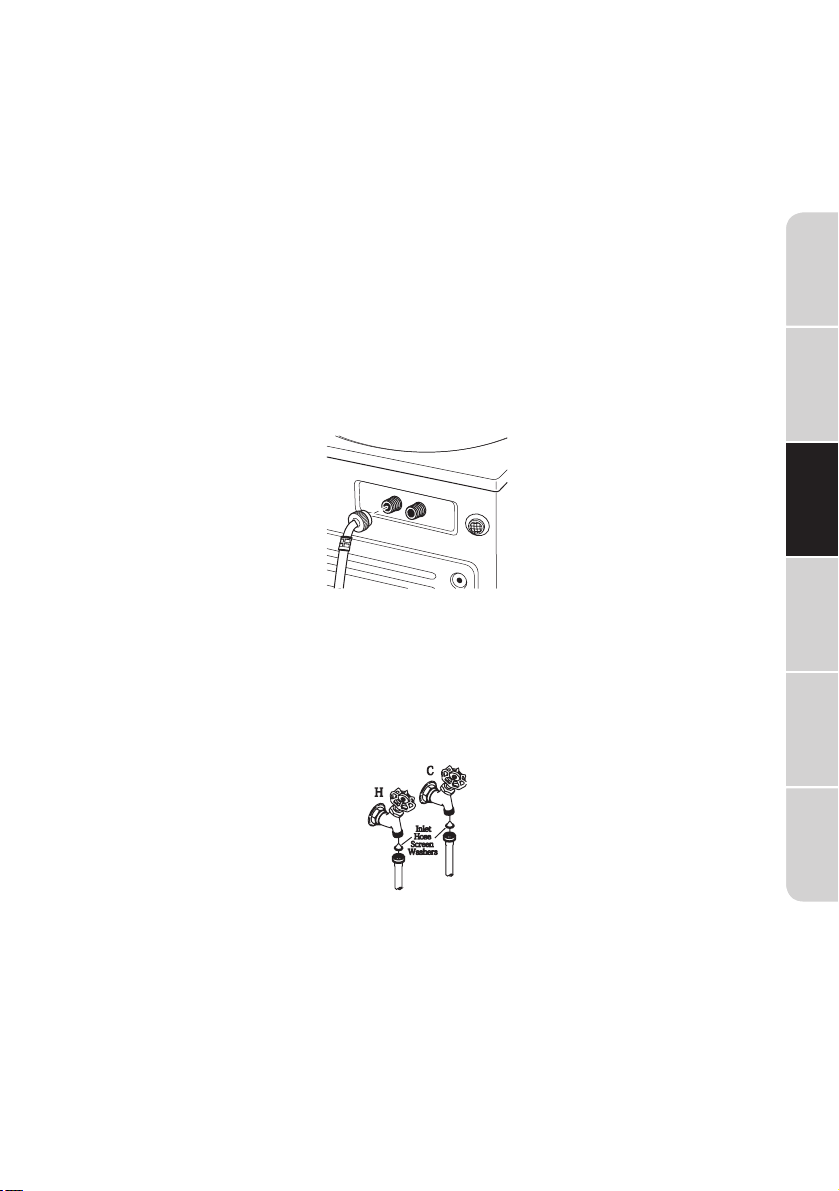
2. Ensure there is a rubber washer in the hoses. Reinstall the rubber
washer into the hose fitting if it has fallen out during shipment.
Do not crossthread or over-tighten these connections.
3. Install the screen washers by inserting them into the free ends of the
inlet hoses with protruded side facing the faucet.
4. Connect the inlet hose ends to the HOT and COLD water faucets
tightly by hand, then tighten another
2/3
turn with pliers. Turn the water
on and check for leaks.
5. Carefully move the washer to its final location. Gently rock the washer
into position ensuring inlet hoses do not become kinked. It is important
not to damage the rubber leveling legs when moving your washer to
its final location. Damaged legs can increase washer vibration. It may
be helpful to spray window cleaner on the floor to help move your
washer into its final position.
NOTE: To reduce vibration, ensure that all four rubber leveling legs are
firmly touching the floor. Push and pull on the back right and then back
left of your washer.
Carefully connect the inlet hose marked HOT to the rear “H” inlet
of the water valve.Tighten by hand;then tighten another 2/3 turn
with pliers.And COLD to the rear “C” inlet of the water valve.
Tighten by hand;then tighten another 2/3 turn with pliers.
Loading ...
Loading ...
Loading ...