OWNER’S MANUAL for Woodstock Soapstone 206
Table of Contents
- Code Approvals
- Specifications
- Tools Needed to Install the Fireplace
- Approved Venting/Chimney Materials
- Approved Clearances for Inside Locations
- Approved Venting/Chimney Configurations
- Approved Venting/Chimney Terminal Clearances .
- Unpacking the Franklin Gas Fireplace
- Pre-Installation Inspection Checklist
- Assembling the Franklin Gas Fireplace
- Connecting the Gas Supply/Testing the Flame
- Testing Check List and Warranty Registration
- Troubleshooting - Installer only
- Operating your Gas Fireplace
- Section Page
- Lighting Instructions
- Safety Instructions
- Remote Control
- Lighting the Fire for Remote Control Owners
- Wall Thermostat
- Lighting the Fire for Thermostat Owners
- Routine Maintenance
- Annual Inspection
- Troubleshooting - Owner
- Warranty
- Appendix A - Parts List
- Appendix B - Remote/Wall Thermostat Installation
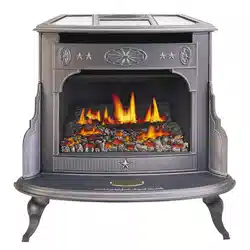
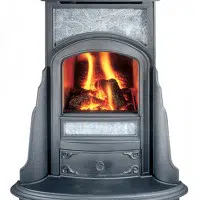
OPERATING YOUR GAS FIREPLACE
BEFORE YOU USE YOUR GAS FIREPLACE
1. Determine that the gas shut-off valve is in the open position (there may be more than one shut-off valve between the Fireplace and the main gas supply; make sure all are turned on).
2. If the Fireplace has not been used for some time, there will be air in the gas supply line. This will be automatically purged when you light the pilot.
3. Smell for gas, especially near the floor if you are using LPG (propane) as it is a heavy gas and any leaked gas would stay near the floor. Natural Gas is lighter than air and will rise. If you smell gas, do not attempt to light. Follow “What to do if you smell gas” instructions shown on the cover of the manual.
LIGHTING INSTRUCTIONS
MAIN CONTROLS
The main controls for the Franklin Fireplace are located at the back right hand corner of the top of the Fireplace. There are four main controls:
1. The Gas Control Knob (ON/OFF/PILOT - controls the flow of gas to the pilot and the main burner).
2. The Ignitor Button (used to ignite the pilot).
3. The (ON/OFF) Rocker Switch - turns the Fireplace on/off by controlling the millivolt electricity flow to the controller
4. The “Hi-Lo” adjustment Knob (controls flame height and heat output)
LIGHTING THE PILOT
1. If the pilot is lit then proceed to Lighting the Fire on page 23. See step 4 for information on how to locate the pilot.
2. Turn the rocker switch to the “OFF” position.
3. Push down slightly on gas control knob and turn it counterclockwise to “PILOT”. If the gas control knob is already in the “PILOT” position and the pilot is not lit you must turn the knob to the “OFF” position, wait to hear a “click” (up to 30 seconds) then turn the knob back to “PILOT” and go to step 4.
4. Visually locate the pilot. It is at the right side of the logset in front of the small, partial log. (see illustration 15.5)
5. Light the pilot by pushing down on the gas control knob and holding it down while repeatedly pushing the ignitor button. This sends a spark to the pilot. Keep pushing the ignitor button about once every second for up to 30 seconds.
IF PUSHING IGNITOR BUTTON DOES NOT LIGHT PILOT WITHIN 30 SECONDS, STOP TRYING. Wait five minutes before attempting to light the pilot. If it still does not light, see “Trouble Shooting” . When you see the pilot ignite, continue to hold the gas control knob in for about 15 seconds then release. The pilot should now remain lit.
Technical Note:
HOW THE PILOT SAFETY CONTROL WORKS: When lit, the pilot flame warms a thermocouple. The heated thermocouple produces a small electrical current that activates an electromagnet which keeps the pilot gas supply valve open. When you hold down the control knob after the pilot initially lights, you are manually keeping open the gas supply until the thermocouple warms up enough to automatically keep the gas supply valve open.
Should the pilot blow out, the thermocouple will cool and the electromagnet will close the gas supply valve and shut off the supply of gas. If pilot goes out after being lit long enough to warm the thermocouple, the thermocouple must cool down before the electromagnet will allow the gas valve to reopen. This can take up to 30 seconds and produces an audible “click”.
LIGHTING THE FIRE
NOTE: Remote Control or Thermostat owners see Section 18 or 20 for lighting instructions.
1. Check that the pilot is lit and turn the Gas control knob to the “ON” position. The pilot can be seen at the right side of the logset in front of the small, partial log. If it is not lit, follow the previous instructions for lighting the pilot.
2. Put the “ON/OFF” Rocker Switch to the “ON” position. The Fireplace will light up. There may be a delay in lighting as the thermopile warms to an operating temperature and permits the gas to enter the burner pan.
3. Check that the flames are evenly distributed. They will be mostly blue for the first 15 minutes and then will change to yellow/orange. There may be a slight amount of condensation on the glass. This will disappear when the fireplace heats up.
4. Adjust the flame height and heat output using the “HI-LO” adjustment knob. It adjusts the flame from 100% at “HI” to 70% at “LO”.
5. If this is the first time you have burned your new fireplace for any length of time, you may smell the fireplace paint curing. This is normal and will go away within a few hours.
6. The adhesive on the window gasket will also take a few days to cure. This process will create an unpleasant odor. This is normal and will go away after your first few fires.
TURNING OFF THE PILOT
1. To turn off the pilot, simply turn the Gas control switch to “OFF” This turns off the gas supply to both the pilot and the fire.
TURNING OFF THE FIRE
You may use any one of the following methods to shut the fire off:
1. Push the “ON/OFF” Rocker Switch to “OFF” position. This will turn off the fire, but the pilot will remain lit. Simply push it back to “ON” to re-light the fire.
2. To completely shut off the Fireplace, including the pilot, turn the Gas Control Knob to the “OFF” position. It is a good idea to turn the Gas Control Knob to “OFF” and turn the manual gas valve on the supply line to “OFF” if the stove will not be used for any length of time. This turns off the pilot, the burner, and the gas supply.
WARNING Do not attempt to decrease flame size or heat output by closing the manual gas supply valve. This valve should always be in a fully open position.
LIGHTING THE FIRE FOR REMOTE CONTROL OWNERS
1. Check that the pilot is lit and turn the Gas control knob to the “ON” position. The pilot can be seen at the right side of the logset in front of the small, partial log. If it is not lit, follow the previous instructions for lighting the pilot.
2. Put the “ON/OFF” Rocker Switch to the “ON” position.
3. You must select one of the following modes on the Remote Control Receiver to light the fire:
- a. The “ON” mode will bypass the remote transmitter functions and light the fireplace directly.
- b. The “REMOTE” mode will enable the remote transmitter functions. In this mode the remote transmitter must be turned “ON”. When the temperature of that location falls below the setting of the thermostat, built into the remote transmitter, the fireplace will light.
NOTE: When the receiver recognizes a signal from the transmitter it will produce an audible beep. (SEE THE DETAILED INSTRUCTIONS INCLUDED WITH THE REMOTE CONTROL UNIT)
4. Check that the flames are evenly distributed. They will be mostly blue for the first 15 minutes and then will change to yellow/orange. There may be a slight amount of condensation on the glass. This will disappear when the fireplace heats up.
5. Adjust the flame height and heat output using the “HI-LO” adjustment knob. It adjusts the flame from 100% at “HI” to 70% at “LO”.
6. If this is the first time you have burned your new fireplace for any length of time, you may smell the fireplace paint curing. This is normal and will go away within a few hours.
SHUTTING THE FIRE OFF FOR REMOTE CONTROL OWNERS
You may use any one of the following methods to shut the fire off:
1. Turn the remote transmitter “OFF”. This will work only if the remote receiver is in the “REMOTE” position.* To re-light the fire turn the remote transmitter “ON”. *This will turn off the fire, but the pilot will remain lit.
2. Move the remote receiver into the “OFF” position. This will turn off the fire, but the pilot will remain lit. To re-light the fire move it back into the “ON” position.
3. Push the “ON/OFF” Rocker Switch to the “OFF” position. This will turn off the fire, but the pilot will remain lit. Simply push it back to “ON” to re-light the fire.
4. To Completely shut off the Fireplace, including the pilot,turn the Gas Control Knob to the “OFF” position. It is a good idea to turn the Gas Control Knob to “OFF” and turn the manual gas valve on the supply line to “OFF” if the stove will not be used for any length of time. This turns off the pilot, the burner, and the gas supply
WALL THERMOSTAT
The Wall Thermostat allows you to (1) manually turn the Fireplace on and off from a remote location, and (2) set a thermostat so the Fireplace will maintain a pre-set temperature. The wall thermostat should be installed about 5' above the floor, in the same room as the Fireplace. Try to install the wall thermostat on an inside wall, in a location where the thermostat will not be affected by specific sources of heat and cold other than the Fireplace. (For example try to avoid installation on an outside wall, or in a direct path of heat from radiators, warm air registers, or lamps.) Installation directions are packaged with the wall thermostat, and a wiring diagram is included at the end of this manual as Appendix B.
LIGHTING THE FIRE FOR THERMOSTAT OWNERS
1. Check that the pilot is lit and turn the Gas control knob to the “ON” position. The pilot can be seen at the right side of the logset in front of the small, partial log. If it is not lit, follow the previous instructions for lighting the pilot.
2. Put the “ON/OFF” Rocker Switch to the “ON” position.
3. Turn the thermostat to the “ON” position and set it to the desired temperature. The Fireplace will light when the thermostat setting exceeds the room temperature.
4. Check that the flames are evenly distributed. They will be mostly blue for the first 15 minutes and then will change to yellow/orange. There may be a slight amount of condensation on the glass. This will disappear when the fireplace heats up.
5. Adjust the flame height and heat output using the “HI-LO” adjustment knob. It adjusts the flame from 100% at “HI” to 70% at “LO”.
6. If this is the first time you have burned your new fireplace for any length of time, you may smell the fireplace paint curing. This is normal and will go away within a few hours.
SHUTTING THE FIRE OFF FOR THERMOSTAT OWNERS
You may use any one of the following methods to shut the fire off:
1. Turn the temperature control down on the thermostat. This will turn off the fire, but the pilot will remain lit. To turn the fire back on, turn the temperature control up.
2. Put the Thermostat in the “OFF” position. This will turn off the fire, but the pilot will remain lit. Simply put the Thermostat back into the “ON” position to re-light the fire.
3. Push the “ON/OFF” Rocker Switch to the “OFF” position. This will turn off the fire, but the pilot will remain lit. Simply push it back to “ON” to re-light the fire. Note: If either the Thermostat or Rocker Switch is in the “OFF” position the Fireplace will remain off.
4. To Completely shut off the Fireplace, including the pilot, turn the Gas Control Knob to the “OFF” position. It is a good idea to use this method and shut off the valve to the supply line if the stove will not be used for any length of time. Before performing any maintenance, turn the gas control knob to the “off” position. This will extinguish both the fire and the pilot flame. Wait until the Fireplace is cold before cleaning.