Loading ...
Loading ...
Loading ...
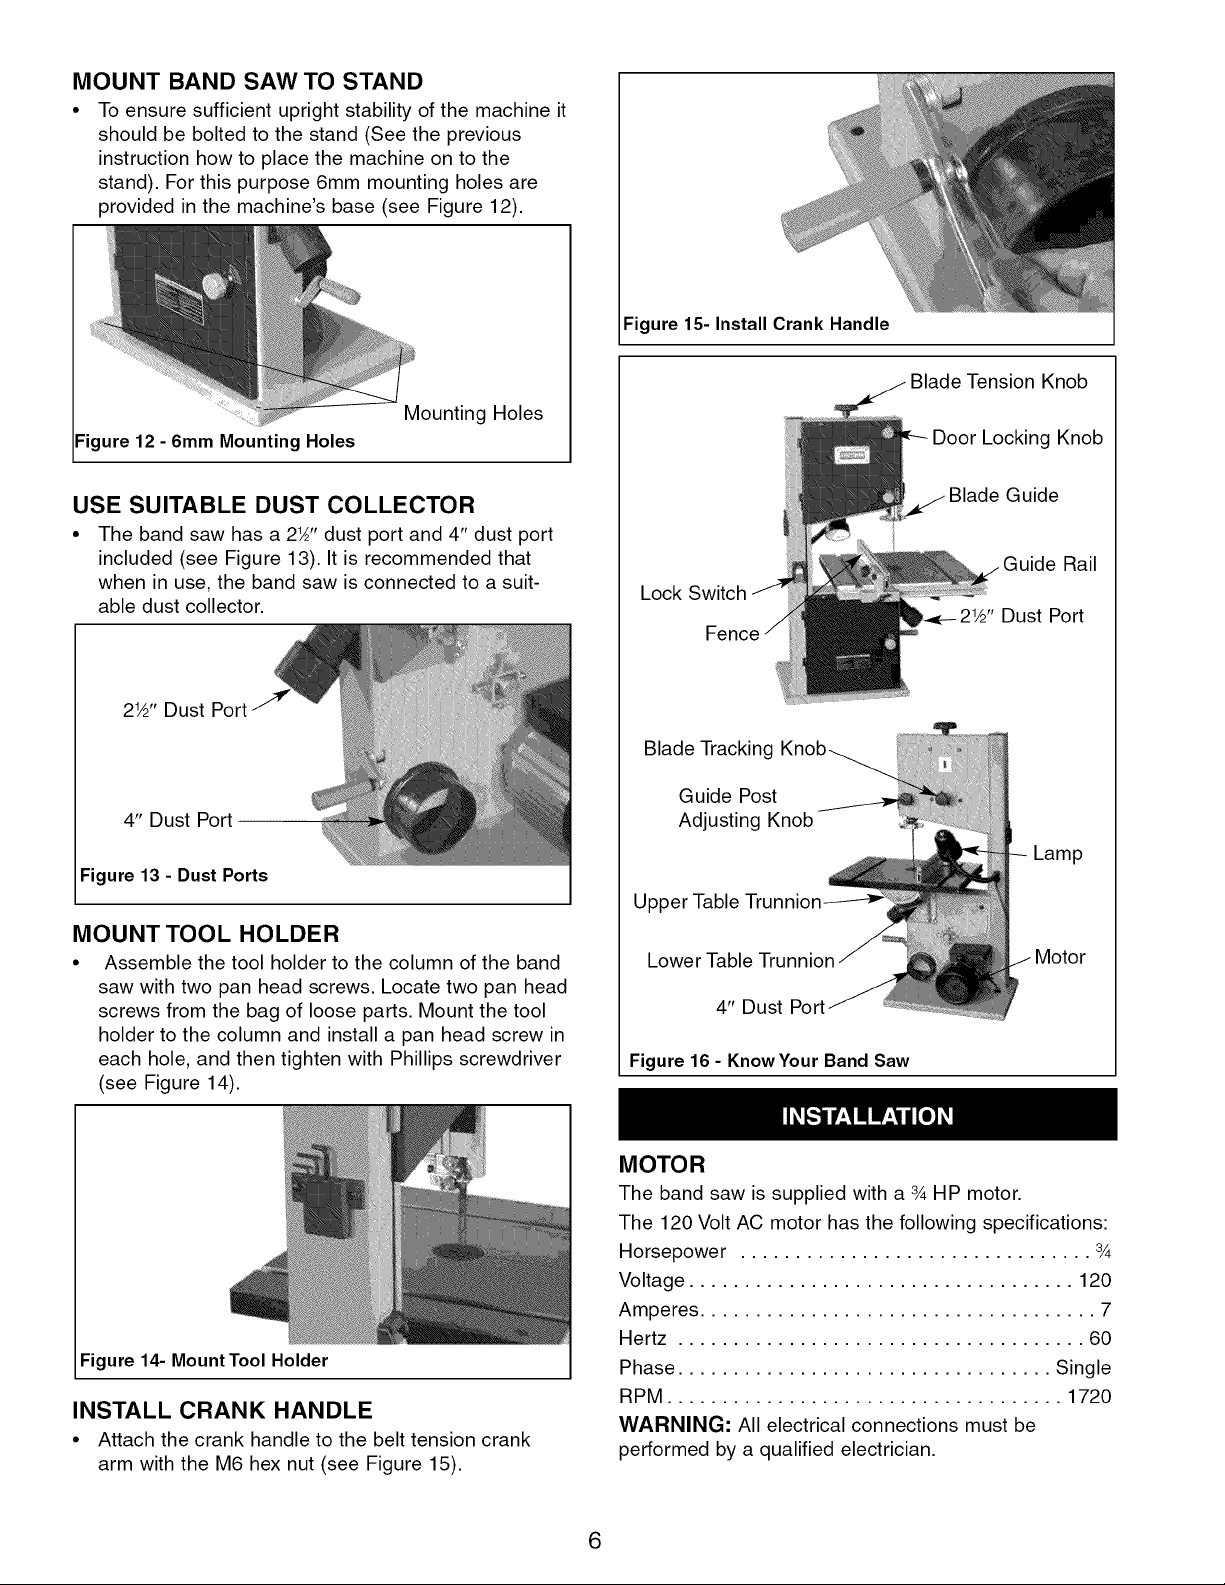
MOUNT BAND SAW TO STAND
• To ensure sufficient upright stability of the machine it
should be bolted to the stand (See the previous
instruction how to place the machine on to the
stand). For this purpose 6mm mounting holes are
provided in the machine's base (see Figure 12).
Figure 12 - 6mm Mounting Holes
Mounting Holes
USE SUITABLE DUST COLLECTOR
• The band saw has a 2_" dust port and 4" dust port
included (see Figure 13). It is recommended that
when in use, the band saw is connected to a suit-
able dust collector.
2W' Dust Port
4" Dust Port
Figure 13 - Dust Ports
MOUNT TOOL HOLDER
• Assemble the tool holder to the column of the band
saw with two pan head screws. Locate two pan head
screws from the bag of loose parts. Mount the tool
holder to the column and install a pan head screw in
each hole, and then tighten with Phillips screwdriver
(see Figure 14).
Figure 15- Install Crank Handle
Blade Tension Knob
Locking Knob
Blade Guide
Lock Switch
Guide Rail
Dust Port
Blade Tracking
Guide Post
Adjusting Knob
Upper
Lower Table Trunnion
4" Dust Port
Figure 16 - KnowYour Band Saw
Lamp
Figure 14- MountTool Holder
INSTALL CRANK HANDLE
• Attach the crank handle to the belt tension crank
arm with the M6 hex nut (see Figure 15).
MOTOR
The band saw is supplied with a 3AHP motor.
The 120 Volt AC motor has the following specifications:
Horsepower ................................ 3A
Voltage ................................... 120
Amperes .................................... 7
Hertz ..................................... 60
Phase .................................. Single
RPM .................................... 1720
WARNING: All electrical connections must be
performed by a qualified electrician.
6
Loading ...
Loading ...
Loading ...