User Manual Samsung UE50BU8500KXXU 50" BU8500 Crystal UHD 4K HDR Smart TV (2022)

Documents for Samsung UE50BU8500KXXU

The following documents are available:
User Manual Other Documents
  • Updating the Software - (English) Download
  • Statement of Compliance - (English) Download
  • Remote control - (English) Download
Installation Instruction
  • QUICK SETUP GUIDE - (English) Download
Photos
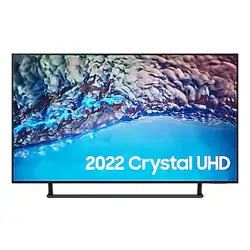
UE50BU8500KXXU photo

E-MANUAL

For UE50BU8500KXXU.

E-MANUAL
Thank you for purchasing this Samsung product.
To receive more complete service, please register your
product at
www.samsung.com
Model Serial No.
To directly go to the page that provides instructions on
how to use the manual for visually impaired users, select
the Menu Learning Screen link below.
"Menu Learning Screen
" Link
Loading ...
Loading ...
Loading ...
Summary of Contents for Samsung UE50BU8500KXXU:

Specifications

Samsung UE50BU8500KXXU Questions and Answers


#1 How to charge and use the Samsung SolarCell Remote?

Introducing the convenient and eco-friendly Samsung SolarCell Remote. Say goodbye to spending time and money replacing the batteries in your remote control.

The Samsung SolarCell Remote can easily and economically be used – anytime, anywhere. Now, use your Smart TV even smarter!

What are the benefits of a solar remote
A solar cell on the back of the remote absorbs sunlight or the light in your home to charge the internal battery. A single, fully charged battery can last up to two years, making it an economical alternative to disposable batteries. It is estimated that over the next 7 years, 99 million alkaline batteries will be used. The solar remote is well-suited for today’s eco-friendly era, and can work to reduce a part of that staggering number.
How to charge the solar remoteClick to collapse
If the battery is low, your remote control may not function properly, or may respond slowly. Use a USB port for faster charging. When the remote is not in use, remember to expose it to light. This will extend the remote`s operating time.


Option 1. Fast charging using a USB-C connector
Prior to the first use of the remote control, connect it to a USB port for fast charging.

Step 1. Connect the USB-C cable to the port on the bottom of the remote control.
Step 2. The LED on the front of the remote control will turn on once charging starts and will turn off when charging is complete.

Note:

For faster charging and maximum usage time, refrain from using the remote while it is charging.
USB-C cable and charger are not included.
Option 2. Eco-friendly charging feature using solar cells

Place the remote control face-down in direct light to expose the solar cell on the back.
Note: Please ensure that the remote control is not misplaced when charging via the solar cells.

#2 How to install software & app updates automatically on your Smart TV ?

You should ensure your Smart TV’s software and apps are up to date in order to fix any problems and ensure the smooth running of your TV. You can set your TV to update automatically, saving you time on checking and updating software and apps. Read on to find out how.

Please note:

Even if your TV is already set to automatically update software and apps, it is advisable to check if an update is available from time to time as auto updates may be disrupted if the connection is unstable. Find out more about how to manually update the software on your TV.
Before trying the steps below you should make sure your TV is connected to the internet. If you’re having problems connecting your TV to the internet you can find out more about how to troubleshoot connectivity issues.
The steps below do not apply to 2022 TV models.
Updating TV software automaticallyClick to collapse
1 Open the Settings menu on your TV
Please note: depending on your device you can get to your settings by pressing the Menu button on your TV remote, or by pressing the Smart Hub/Home button and navigating to settings from there.
Select Support
Select Software Update
Please note: a pop-up box with terms and conditions may appear when you select this option – you will need to read and agree to these before proceeding with the update.
4
Select Auto Update
Please note: if the Auto Update option is greyed out, you should “cold boot” your TV and start again. Find out more about how to “cold boot” your TV.

You can “cold boot” your TV by pointing your remote at the TV and holding the power button until it turns off and on again (this usually takes around 5 seconds).

5 When you next turn on your TV and it detects a new update, it will download and install it before you can continue to watch TV or use any of the other functions. This may take several minutes and a notification message will appear in the top right hand corner of the TV.
6 If you have selected the Auto Update option and an update becomes available while you are watching TV, the update will download in the background, then install the next time you turn on the TV.