Questions, problems, missing parts?
Before returning to your retailer, call our customer service at 1-800-887-6326
Monday – Friday 9:00 a.m. – 5:00 p.m. CST
Page 1 of 4
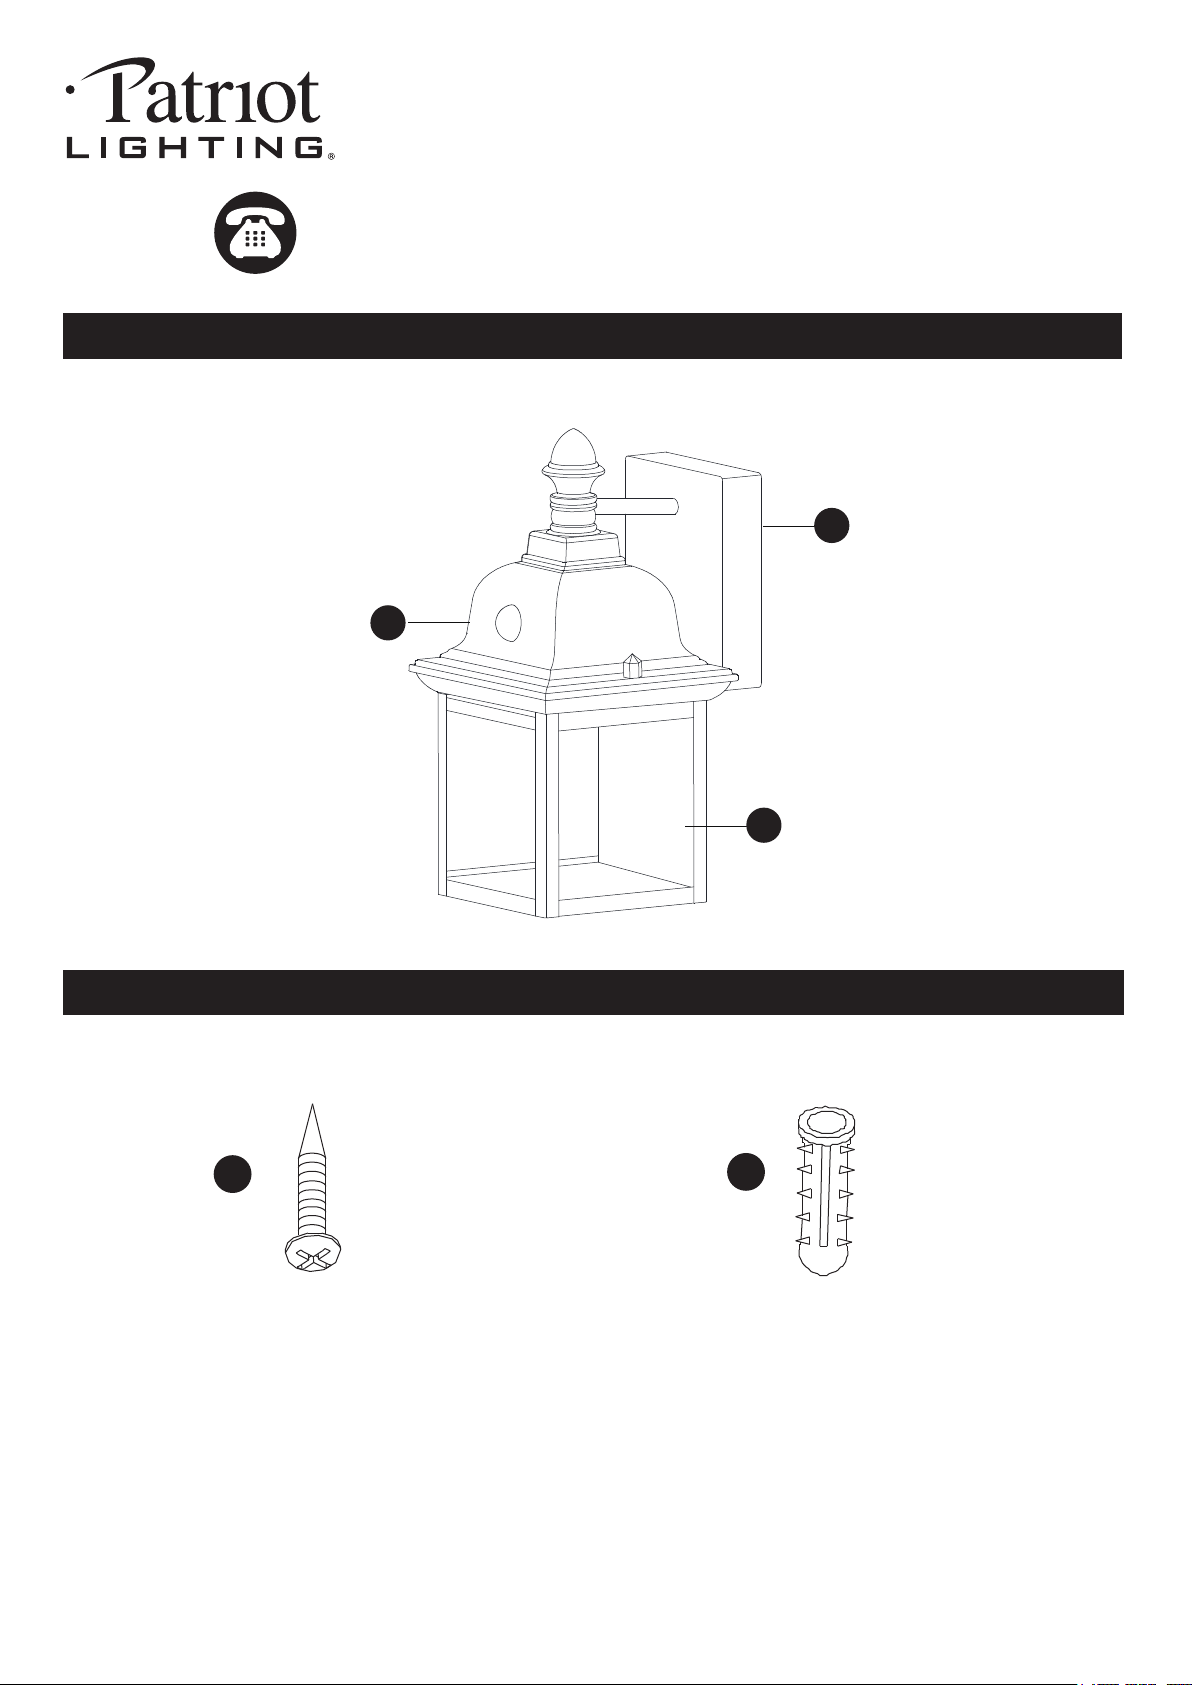
PACKAGE CONTENTS
PACKAGE CONTENTS
HARDWARE CONTENTS Note: Hardware not shown actual size.
A
C
B
AA
BB
Drywall Screw
X2
Anchor
X2
Sku Number: 356-3821
356-3822
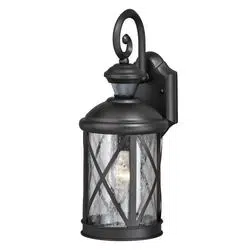
OUTDOOR SECURITY LIGHT
Model Number: DH8069BK
DH8069WH
Before beginning assembly, installation or operation of product, make sure all parts are present. Compare parts with
package contents list and diagram on previous page. If any part is missing or damaged, do not attempt to assemble,
install or operate the product. Contact customer service for replacement parts.
Tools Required for Assembly (not included): Screwdriver, Phillips Screwdriver, Pliers, Safety Glasses, Ladder,
Electric Drill.
Page 2 of 4
PREPARATION
ASSEMBLY INSTRUCTIONS
Important to know
1. No wiring required
2. Use three 1.5V AA batteries (not included)
Recommend to use Menards SKU number:
Energizer / 2105370 in Menards store or
more than 2200mAH 1.5V AA lithium battery.
3. Easy to install
4. 120 lumen LED output
5. Wall mount only
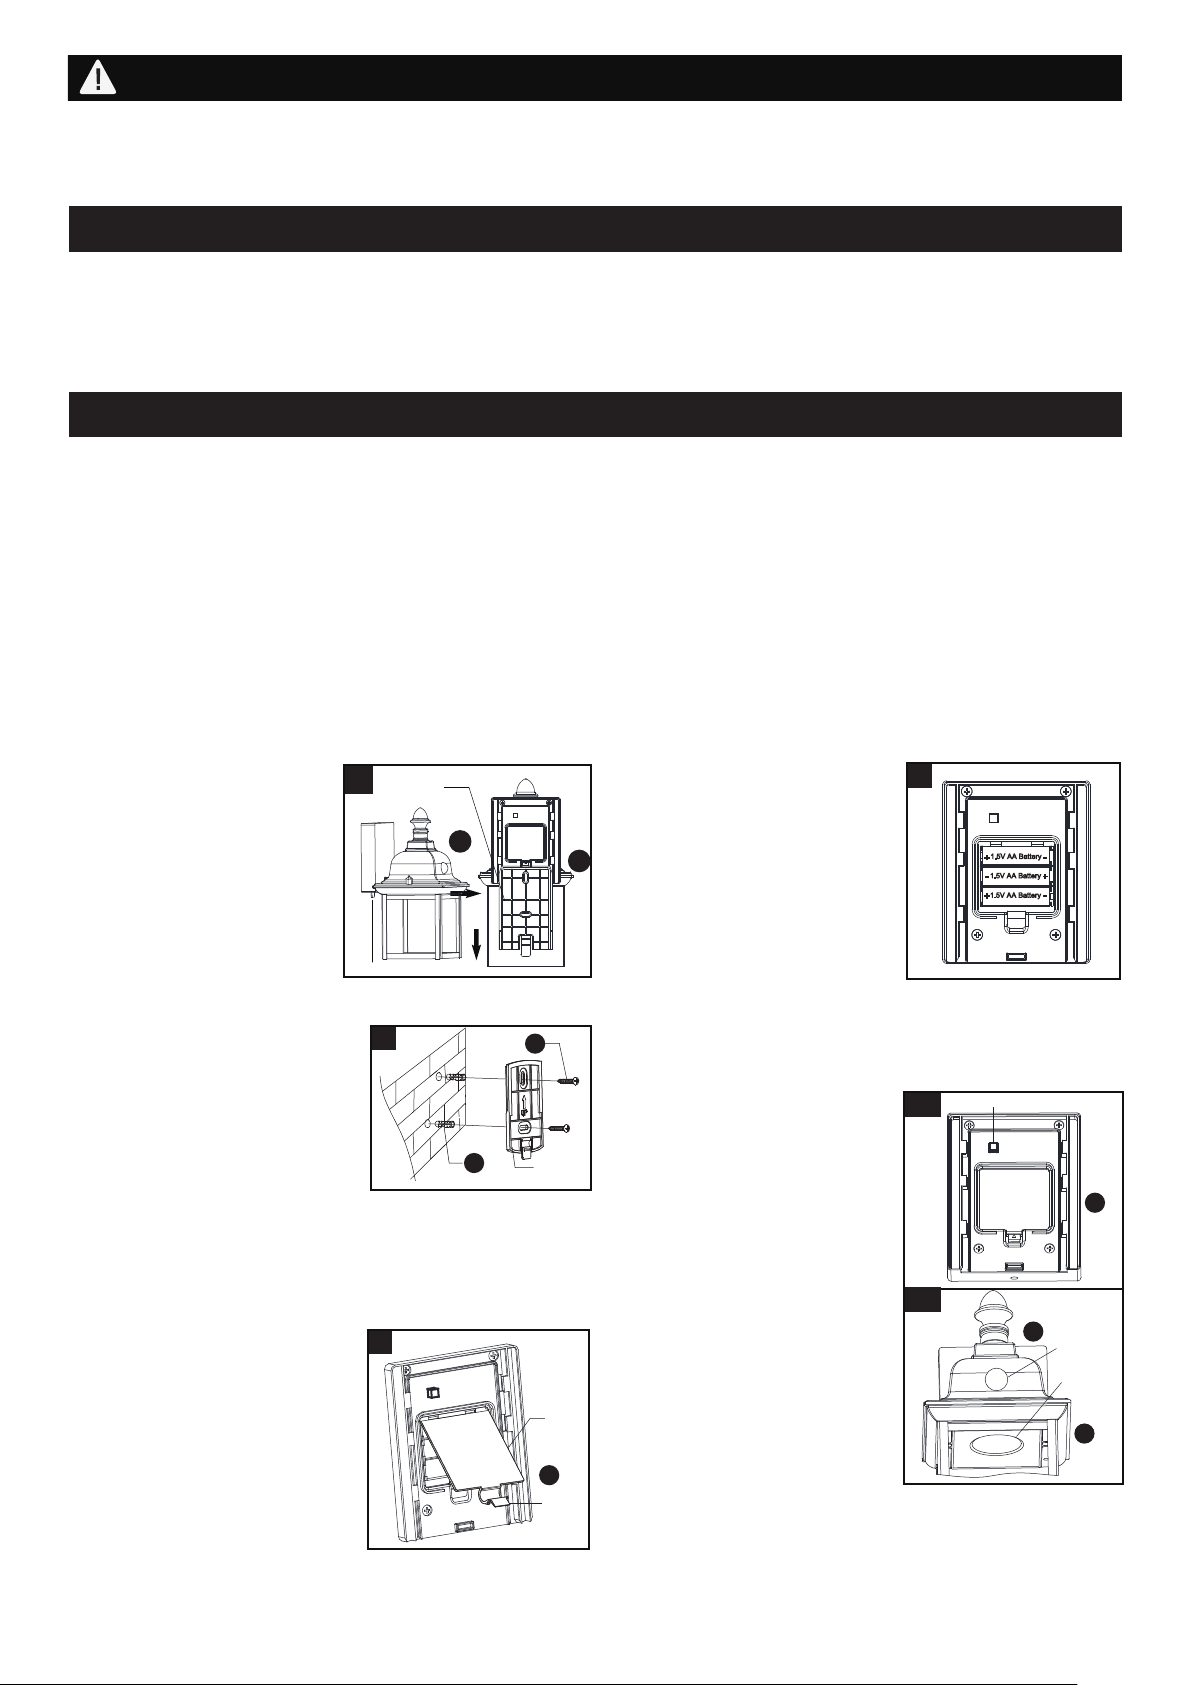
1. Press the locking tab of the
mounting plate and slide the
mounting plate from the light
fixture(A).
2. Hold the mounting plate to the
wall and mark the set holes on
the wall surface for drilling.
Remove the mounting plate
from the wall. Drill both holes.
Thread the anchors(BB) into
the holes, and then attach the
mounting plate to the wall,
secure the drywall screws(AA)
through the set holes into the
anchors(BB).
6.
Power switch setting:
a.) Set the switch to OFF position: the power turns
off.
b.) Set the switch to ON position: light turns to
sensor mode. Turn light on automatically when
motion is detected and turn it off automatically when
motion stops.Photocell keeps the light OFF during
daylight.
Installation Steps
2
Mounting
Plate
AA
BB
1
Mounting Plate
Locking Tab
A
A
3. Pull out the locking tab of
battery cover to open the
battery cover and then
remove the battery cover from
the back plate (B).
4. Install three 1.5V AA batteries
(not included) into the battery
compartment. Make sure the
polarity of the batteries is
correct. Restore the battery
cover.
NOTE: Recommend to use
more than 2200mAH 1.5V AA
lithium battery for extreme
climate and long life span.
5. Press the power switch to the
ON position to activate the
motion sensor.
Note: When power is first
applied, the light will turn
on immediately. Wait for
about 30 seconds to allow
the sensor to warm up.
When motion is detected, the
light will turn on. The light will
stay on for a period of 10
seconds after all motion has
stopped.
SAFETY INFORMATION
1. Please read and understand this entire manual before attempting to assemble, operate or install the product.
2.
Integrated LED: 3 W
Working Temperature Range of Sensor: -4ºF ~ 104ºF
B
3
Locking
Tab
Battery
Cover
4
5-a
B
ON / OFF
Power Switch
5-b
B
A
Sensor
Light
Page 3 of 4
ASSEMBLY INSTRUCTIONS (continued)
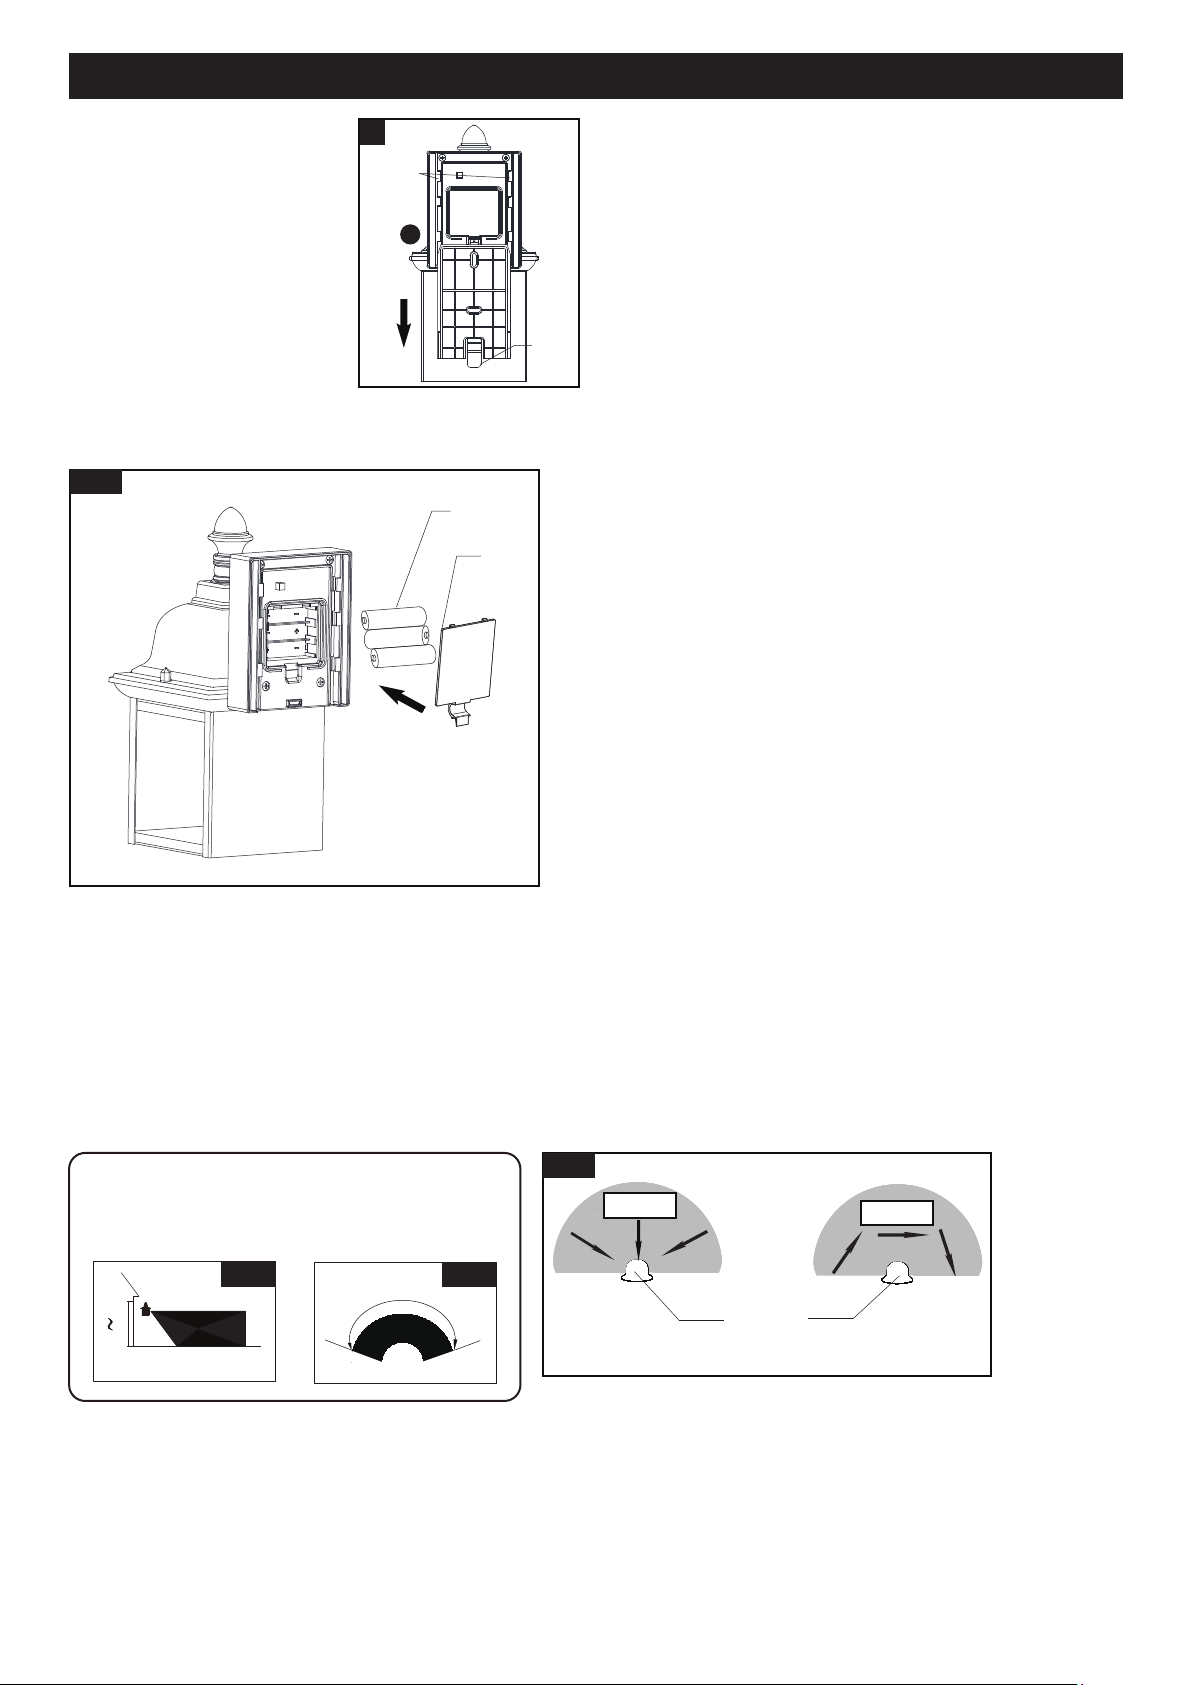
1. Press the locking tab of the mounting plate and slide the
light fixture(A) up to detach the light fixture (A) from
mounting plate.
2. Remove the battery cover on the back of the light fixture
and remove the old batteries.
3. Install three new 1.5V AA batteries into the battery
compartment. Make sure the polarity of the batteries is
correct.
4. Restore the battery cover.
5. Place the guide slot of the light fixture over the mounting
plate and slide the fixture down onto the mounting plate
until the locking tab clicks and locks the light fixture into place.
AA Battery
Battery Cover
Notes:
1. The sensitivity of the motion sensor will increase as the environmental temperature gets cooler. For best performance,
gently clean the lens with a soft cloth every 1 or 2 months to assure maximum sensitivity.
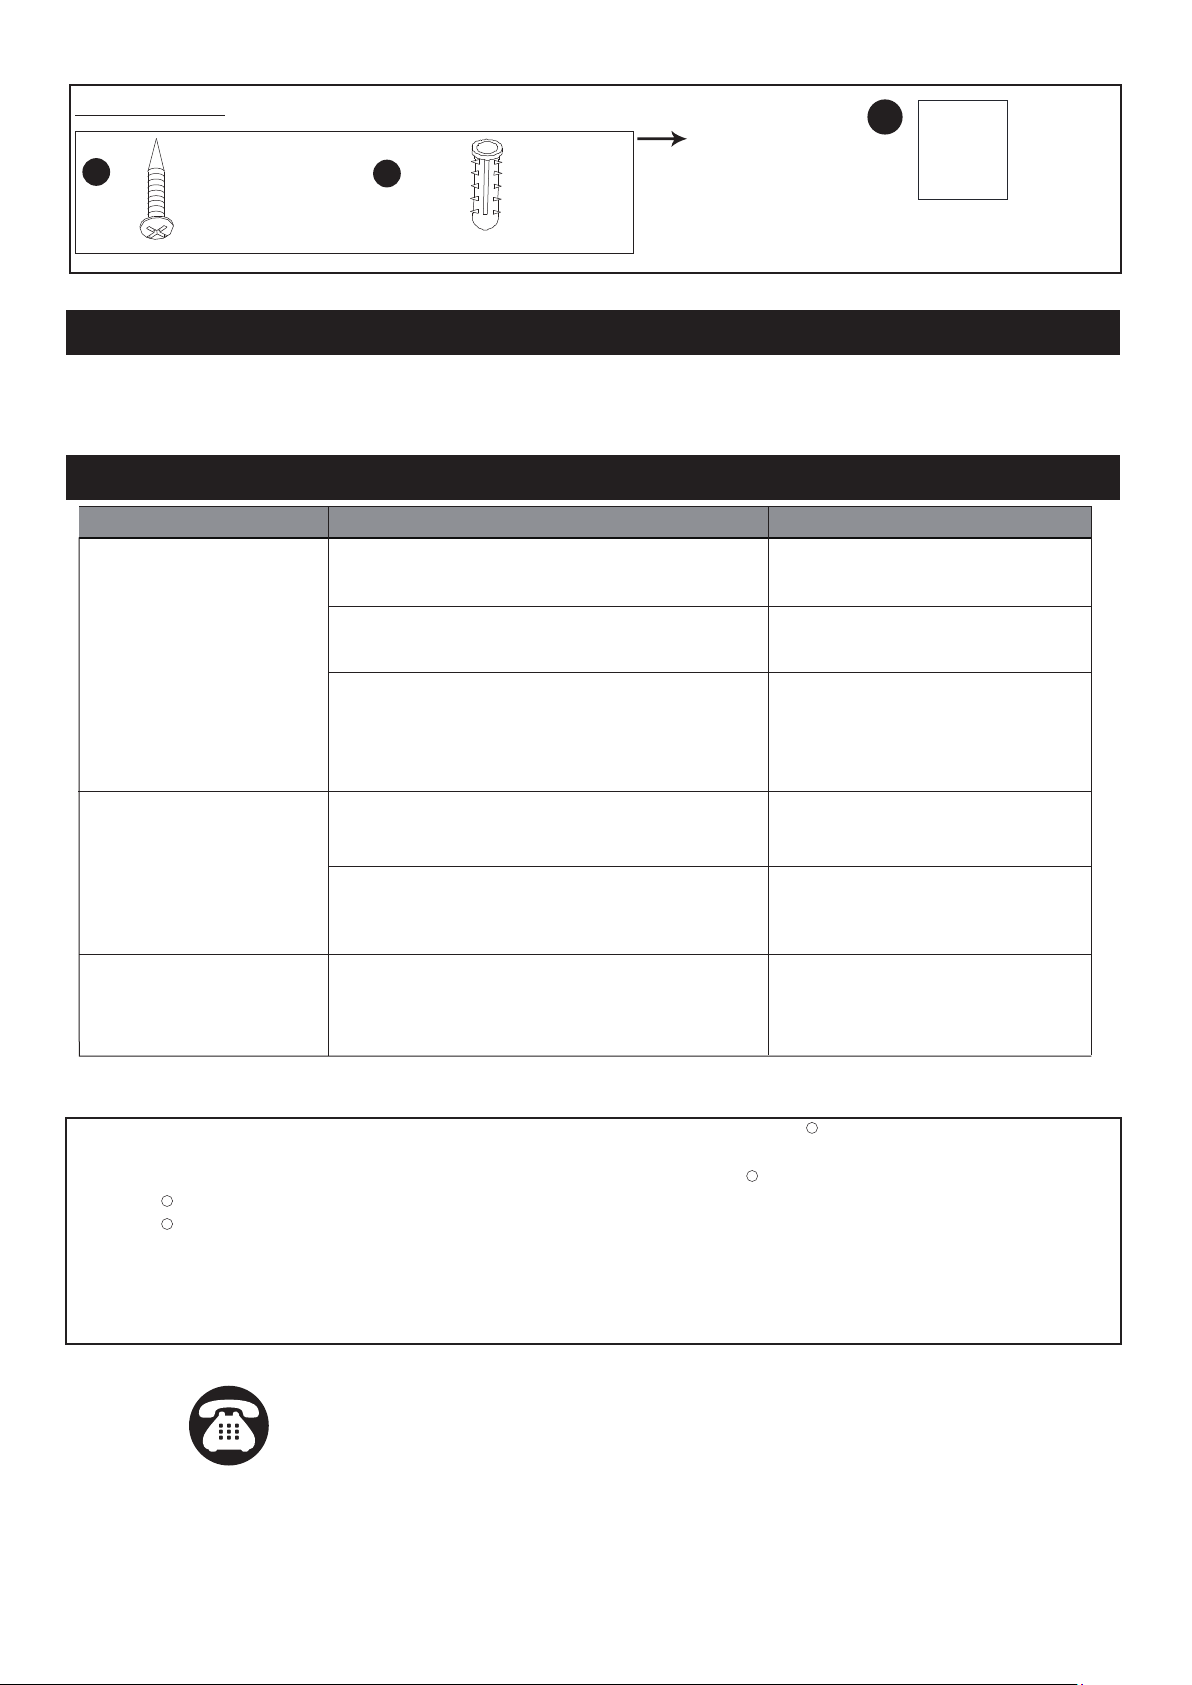
2. The fixture will provide a detection distance of up to 25 feet. (See Fig.2)
3. The sensor detects movement across a detection range of 120 degrees. (See Fig.3)
4. The sensor will be more sensitive to motion across its detection path than motion directly towards it. (See Fig.4)
5. To reduce possible nuisances, do not mount the fixture near a heat source like an air conditioner, vent or furnace
exhaust, or in a direction facing any reflecting object or other light source.
1.5V AA
1.5V AA
1.5V AA
Fig. 1
Motion
Least sensitive
Motion
Most sensitive
Sensor
Fig.4
6. Place the guide slot of the
light fixture(A) over the
mounting plate and slide the
fixture(A) down onto the
mounting plate until the
locking tab clicks and locks
the light fixture(A) into place.
Battery Replacement
Note: Properly dispose of drained batteries.
6
A
Locking
Tab
Guide Slot
5`
6`
10`
25`
Fig. 2 Fig. 3
Where you install your fixture is important:
Be sure the light is mounted straight on the wall
otherwise, the detection distance may be limited.
˚
120
Page 4 of 4
The following parts are available for re-order if damaged or missing. Call our toll free at 1-800-887-6326
TROUBLESHOOTING
CARE AND MAINTENANCE
If unable to fix any of the above issues, please consult a certified electrician.
Spare Parts List:
AA
BB
● To prolong the original appearance, clean the light fixture with clear water and a soft, damp cloth only.
● Do not use paints, solvents, or other chemicals on this light fixture. They could cause a premature deterioration of the
finish. This is not a defect in the finish and will not be covered by the warranty.
If the light will not come
on.
If the light stays on.
Light is not as bright as
normal,the light flashes
or blinks.
1. Turn power switch to the ON
position.
1. Reposition light away from the
area of movement.
1. Power switch is in OFF position.
1. Light control may be sensing small animals or
automobile traffic.
Symptom Possible Cause Solution
Assembly Kit
5912MM (1 SET)
2. Weak battery.
Weak battery.
2. Check battery charge and
replace if necessary.
3. It is possible to install where there is
bright light.
3. Confirm that light is on after
cover the sensor by hand,
move another dark position
and aviod direct sunlight.
Check battery charge and replace
if necessary.
Drywall Screw
X2
Anchor
X2
Glass Pannel X3
9996CS
Questions, problems, missing parts?
Before returning to your retailer, call our customer service at 1-800-887-6326
Monday – Friday 9:00 a.m. – 5:00 p.m. CST
FIVE-YEAR LIMITED WARRANTY: If, during normal use, this PATRIOT LIGHTING lighting fixture breaks or fails
due to a defect in material workmanship within five (5) years from the date of original purchase, simply bring this
lighting fixture with the original sales receipt back to your nearest MENARDS retail store. At its discretion, PATRIOT
LIGHTING agrees to have the product or any defective part(s) repaired or replaced with the same or similar PATRIOT
LIGHTING product or part free of charge, within the stated warranty period, when returned by the original purchaser
with original sales receipt. This warranty; (1) excludes expendable parts including but not limited to light bulbs; (2) does
not cover damage that has resulted from abuse or misuse; and (3) does not cover any losses, labor, injuries to
persons/property or costs. This warranty does give you specific legal rights and you may have other rights, which vary
from state to state.
R
R
R
R
C
2.
False triggering caused by a heat source, such
as a heater or dryer vent, or heated swimming
pool.
2.
Eliminate heat source or relocate
fixture.