Loading ...
Loading ...
Loading ...
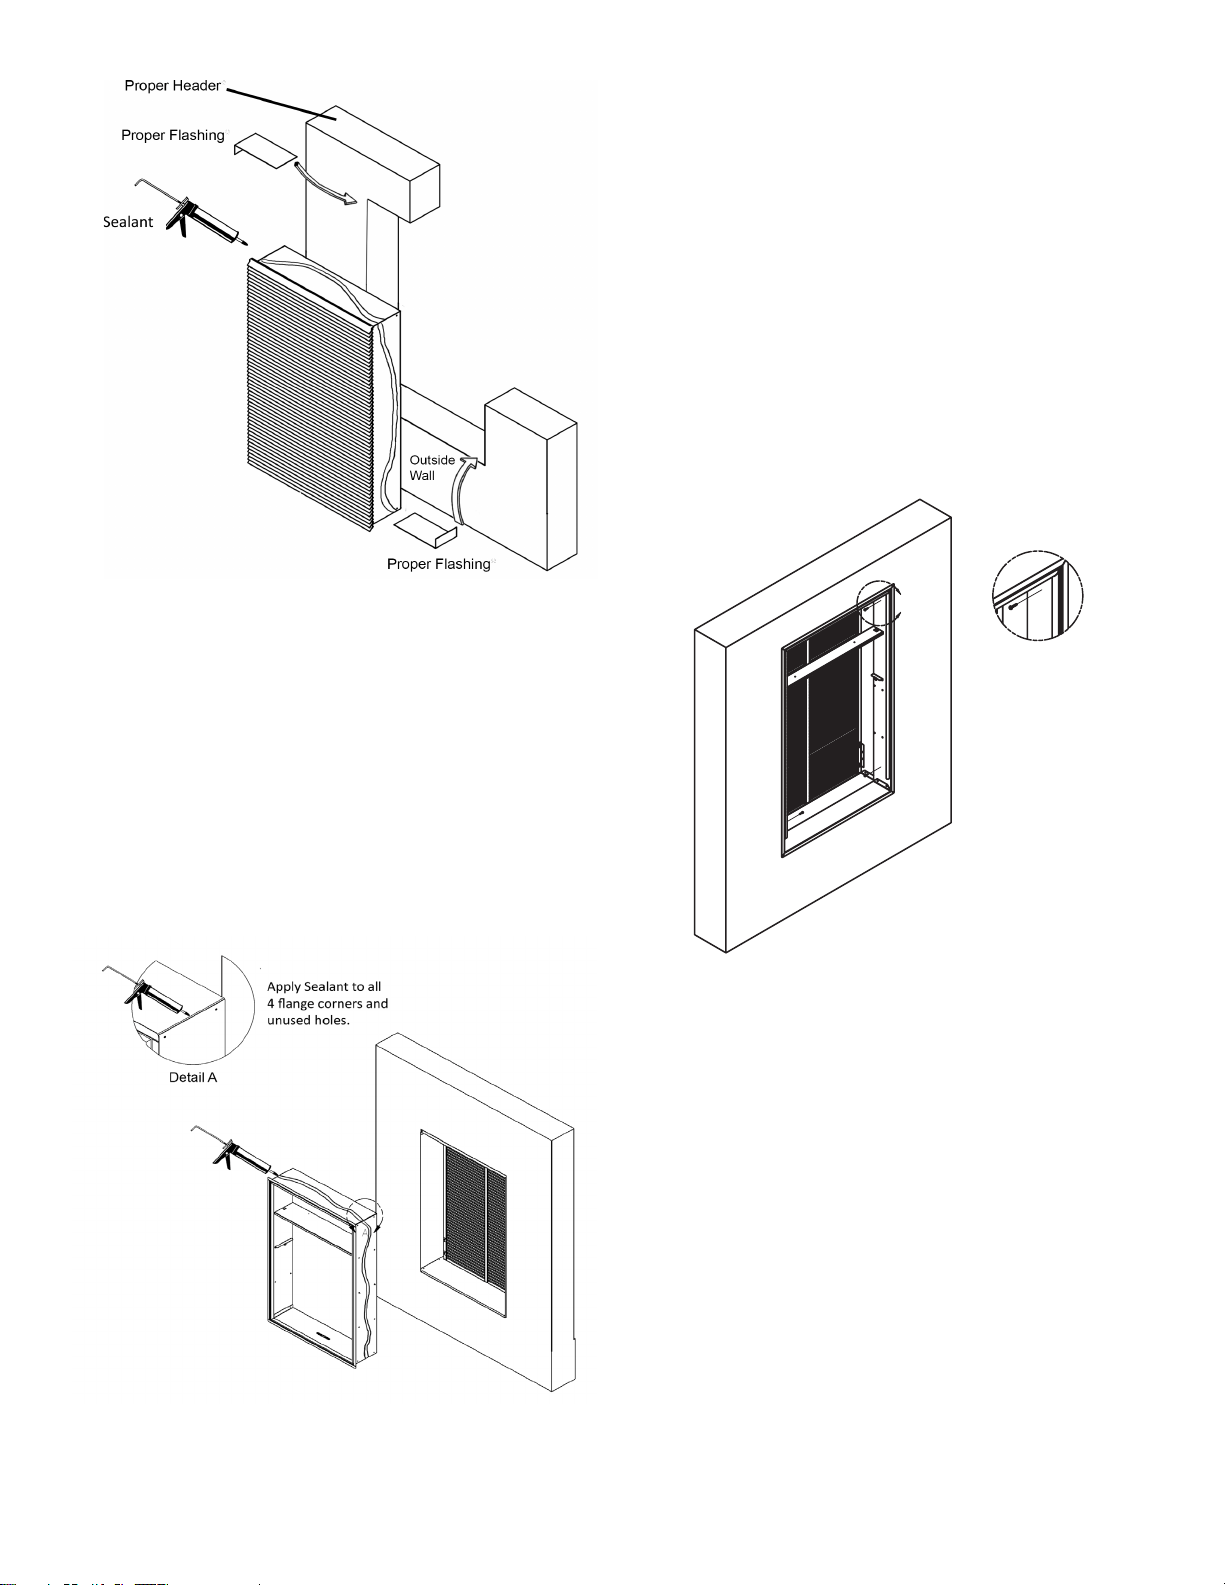
Step 2 - Inside Wall Adapter Half
1. Apply sealant to all 4 ange corners and unused
holes. See Detail A.
2. Flash the inside of the rough opening to ensure the
proper t and level.
3. Insert inside Wall Adapter half (Part B) into outside
Wall Adapter half (Part A). Ensure that Part A does
not back out of the rough opening.
4. Remove the inside Wall Adapter half.
5. Apply sealant to the outside Wall Adapter half and
insert into the rough opening to ensure a water-tight
seal.
Step 3 - Inside Wall Adapter (cont.)
NOTE: Do not place any screws, fasteners, or
penetrating holes through the top or bottom of the Wall
Adapter assembly.
1. Drill pilot holes on the interior of the inside Wall
Adapter half (Part B) as show in Detail B. Pilot holes
should be located approximately 4” from the top and
bottom of the inside Wall Adapter half, on both the
left and right sides.
2. Install fasteners through each pilot hole. Fastener
must pass through both Part A and Part B. If the
inside and outside Wall Adapter halves do not
overlap at fastening point, be certain to drill extra
holes where needed to secure both Part A and Part B
to the rough opening.
B
Detail B
Louver Installation
Installation of the louver PRIOR to Wall Adapter
installation
1. Hold the louver up to the outside Wall Adapter half
(Part A) and line up the louver top with the very top
edge of the ¾” ange.
2. Line up the Wall Adapter holes with the threaded
holes in the louver and securely tighten
fasteners.
8
Loading ...
Loading ...
Loading ...