Loading ...
Loading ...
Loading ...
6
ENGLISH
* Icemaking water must be potable water. Where scaling can be caused by water
quality:
- Installation of an external lter or softener is recommended. Contact your local
water treatment professional or Hoshizaki service agent.
- Change to the “full drain flush” mode is recommended. Contact your local
Hoshizaki service agent.
* Water supply pressure should be minimum 0.07 MPa (0.7 bar) and maximum 0.78
MPa (8 bar). If the pressure exceeds 0.78 MPa (8 bar), use a proper pressure
reducing valve. Do NOT throttle back the supply tap.
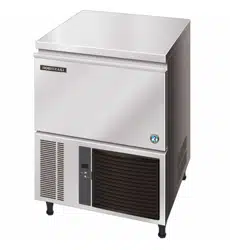
* The dual check valve must be connected in the icemaker water supply between the
main water supply outlet and the straight connection of the braided stainless steel
inlet hose as shown.
* Attach the angle end of the braided stainless steel inlet hose to the G3/4” water inlet
tting on the rear of the icemaker.
* Be sure to use the new inlet hose-sets supplied with the appliance. Do not reuse
any other inlet hose-set.
* Ensure rubber tap washers are correctly positioned. Hand tighten the dual check
valve and inlet hose sufciently to provide a leak free joint.
[Connection to the drain]
[IM-100CNE]
* By means of a suitable spanner or wrench, tighten the 3/4-3/4 nipple (accessory into the Rc3/4 tting on the bottom of the
icemaker as indicated. P.T.F.E. tape and/or a suitable sealing compound should be used to obtain a leak free joint.
[All Models]
* Hand tighten grey exible outlet hose (accessory) onto the R3/4 tting on the rear of the icemaker as
indicated, ensuring rubber washer is correctly positioned to obtain a leak free joint. The hose can be
cut to length as necessary to suit position of main drain.
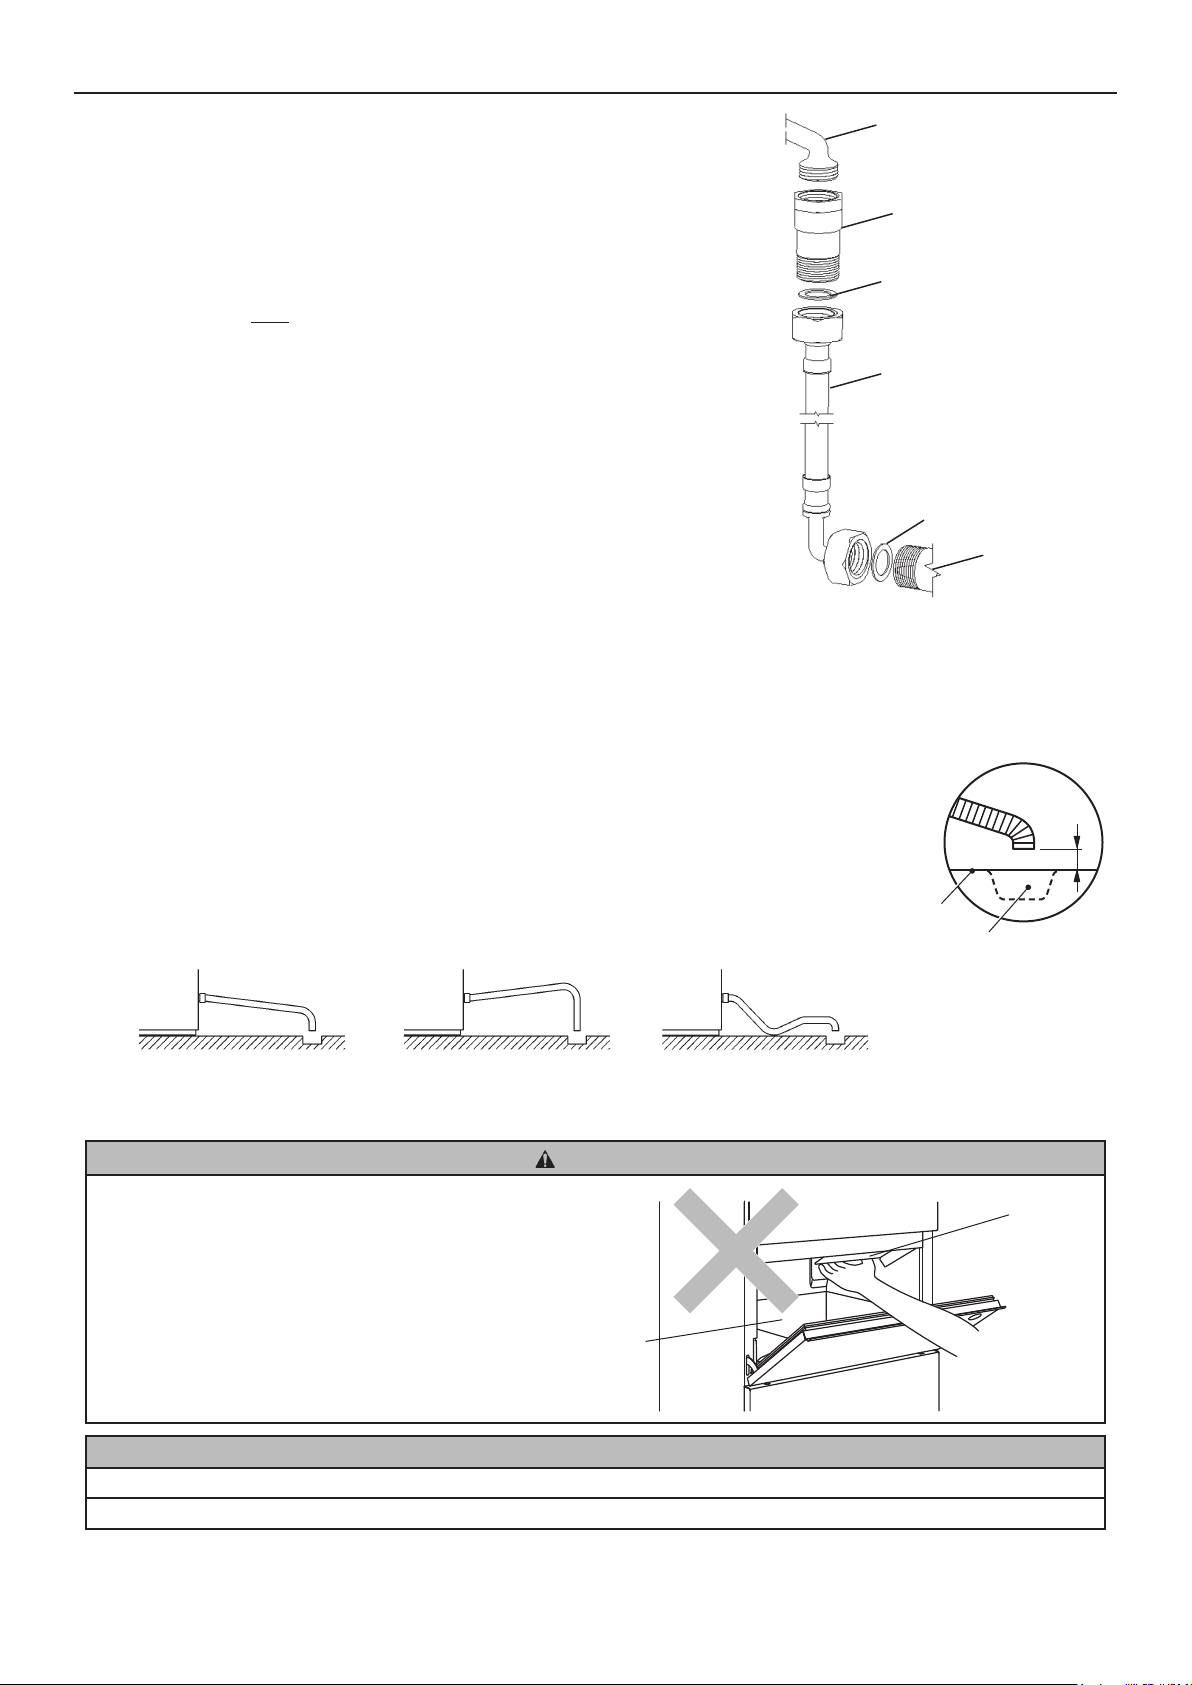
* Drain lines should not be installed directly to the sewer system. A vertical air gap of a minimum of 5
cm should be between the end of the drain hoses from the icemaker and the oor drain.
* To prevent a backow into the storage bin, the outlet hose must be laid as shown.
II. OPERATING INSTRUCTIONS
CAUTION
Do not put your hands into the back of the storage bin or the ice
chute on top of the storage bin. Ice may drop off the icemaker,
a hard block of ice may suddenly break down, or the icemaking
mechanism may suddenly move, resulting in injury.
NOTICE
All parts are factory-adjusted. Improper adjustments may result in failure.
If the unit is turned off, wait for at least 3 minutes before restarting the icemaker to prevent damage to the compressor.
Storage Bin
Ice Chute
Downgrade
GOOD BAD
Upgrade
BAD
Mains Water Supply
Dual Check Valve
Tap Washer
Braided SS
Inlet Hose
Tap Washer
Ice Maker G3/4”
Water Inlet
5cm air gap
Drain
Floor
Loading ...
Loading ...
Loading ...