Loading ...
Loading ...
Loading ...
Mounting the Front Table
!. Make sure that the front table is upside
down.
2. Place a tee nut over the leveling hole and
hammer it into place. (Figure 63 & 64)
Tee Nut
", J/_ /
Fig.63
Fig. 64 - Nut Tee
Lock
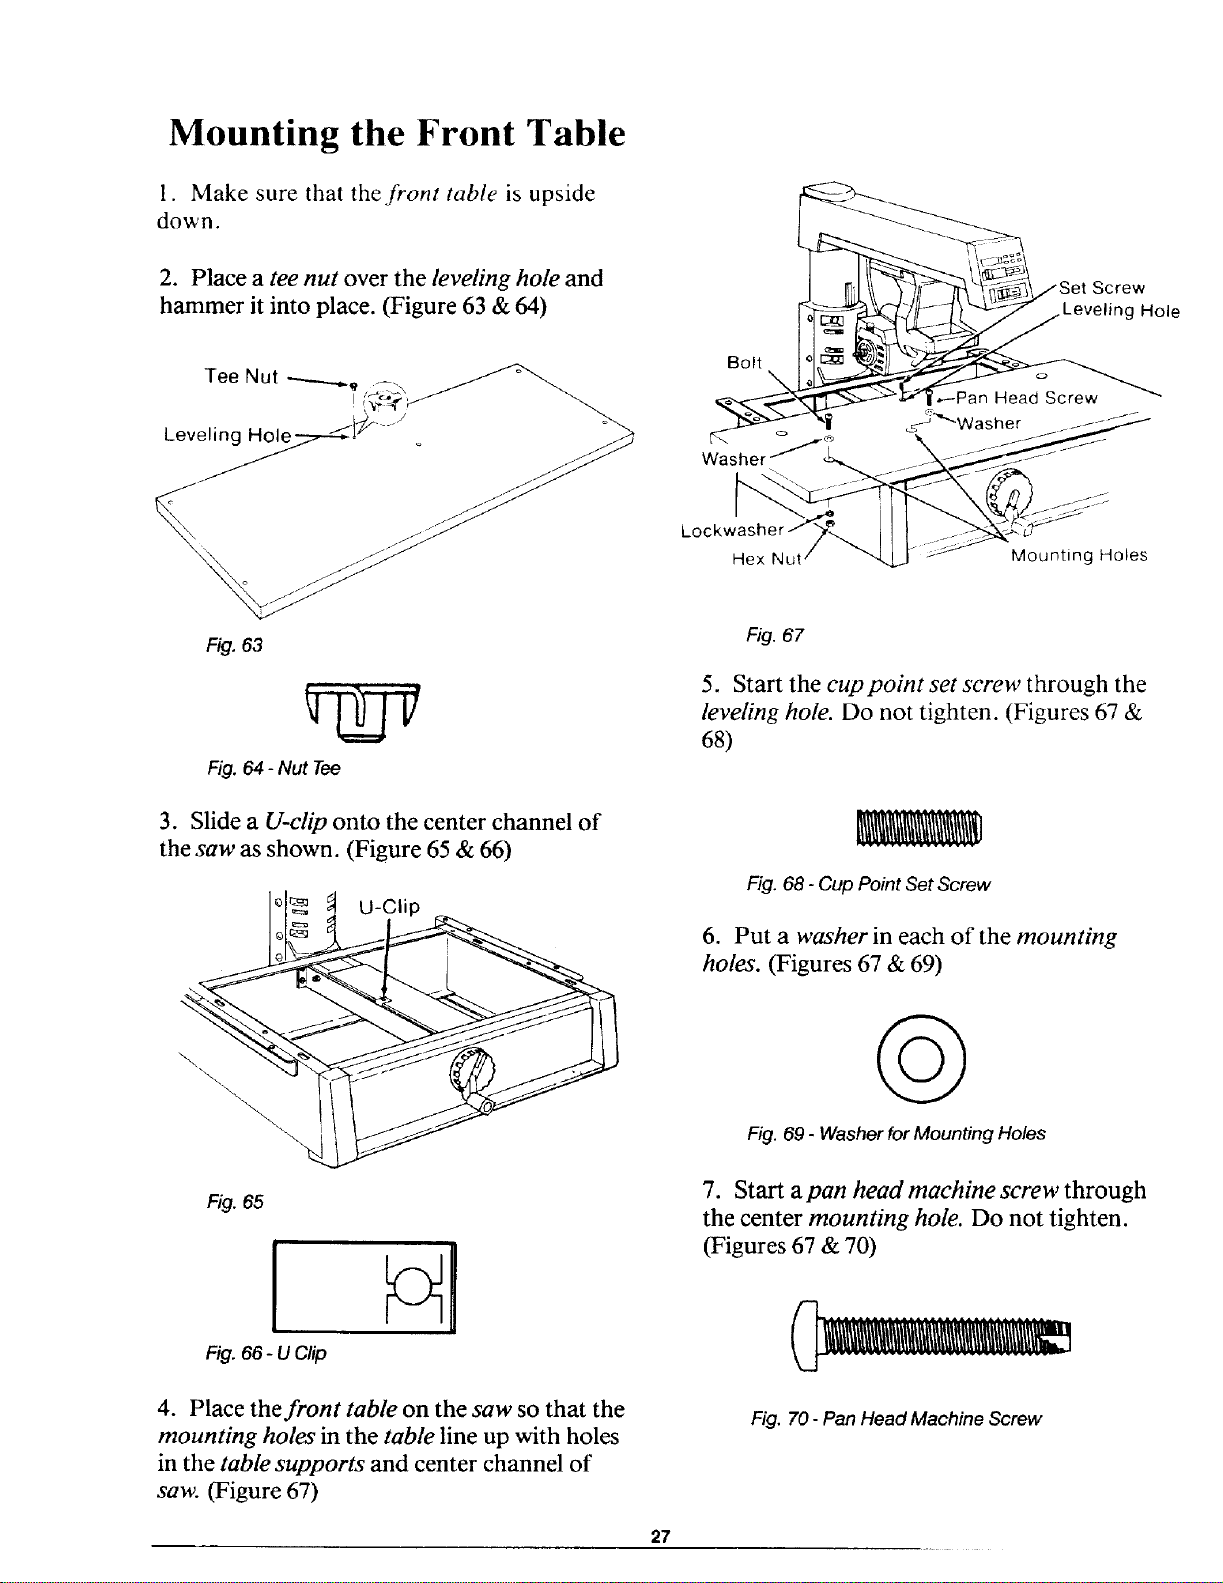
Bolt
Washer
_" Set Screw
_ Leveling Hole
'_Pan Head Screw
_5-="--Washe r
Hex Nut Mounting Holes
Fig. 67
5. Start the cuppoint set screw through the
leveling hole. Do not tighten. (Figures 67 &
68)
3. Slide a U-clip onto the center channel of
the saw as shown. (Figure 65 & 66)
U-Clip
Fig. 65
Fig. 66- U Clip
Fig. 68 - Cup Point Set Screw
6. Put a washer in each of the mounting
holes. (Figures 67 & 69)
Q
Fig. 69 - Washer for Mounting Holes
7. Start a pan head machh_e screw through
the center mounting hole. Do not tighten.
(Figures 67 & 70)
4. Place the front table on the saw so that the
mounting holes in the table line up with holes
in the table supports and center channel of
saw. (Figure 67)
Fig. 70 - Pan Head Machine Screw
27
Loading ...
Loading ...
Loading ...