Loading ...
Loading ...
Loading ...
Installation Procedure
5
4. Identify the correct placement of the LP gas orifices as
layed out on the orifice package card.
The orifice sizes are shown in the white circles
corresponding to each burner as shown in the image
above. These numbers are engraved on the top of each
orifice. It is very important install the correct orifice size for
each burner.
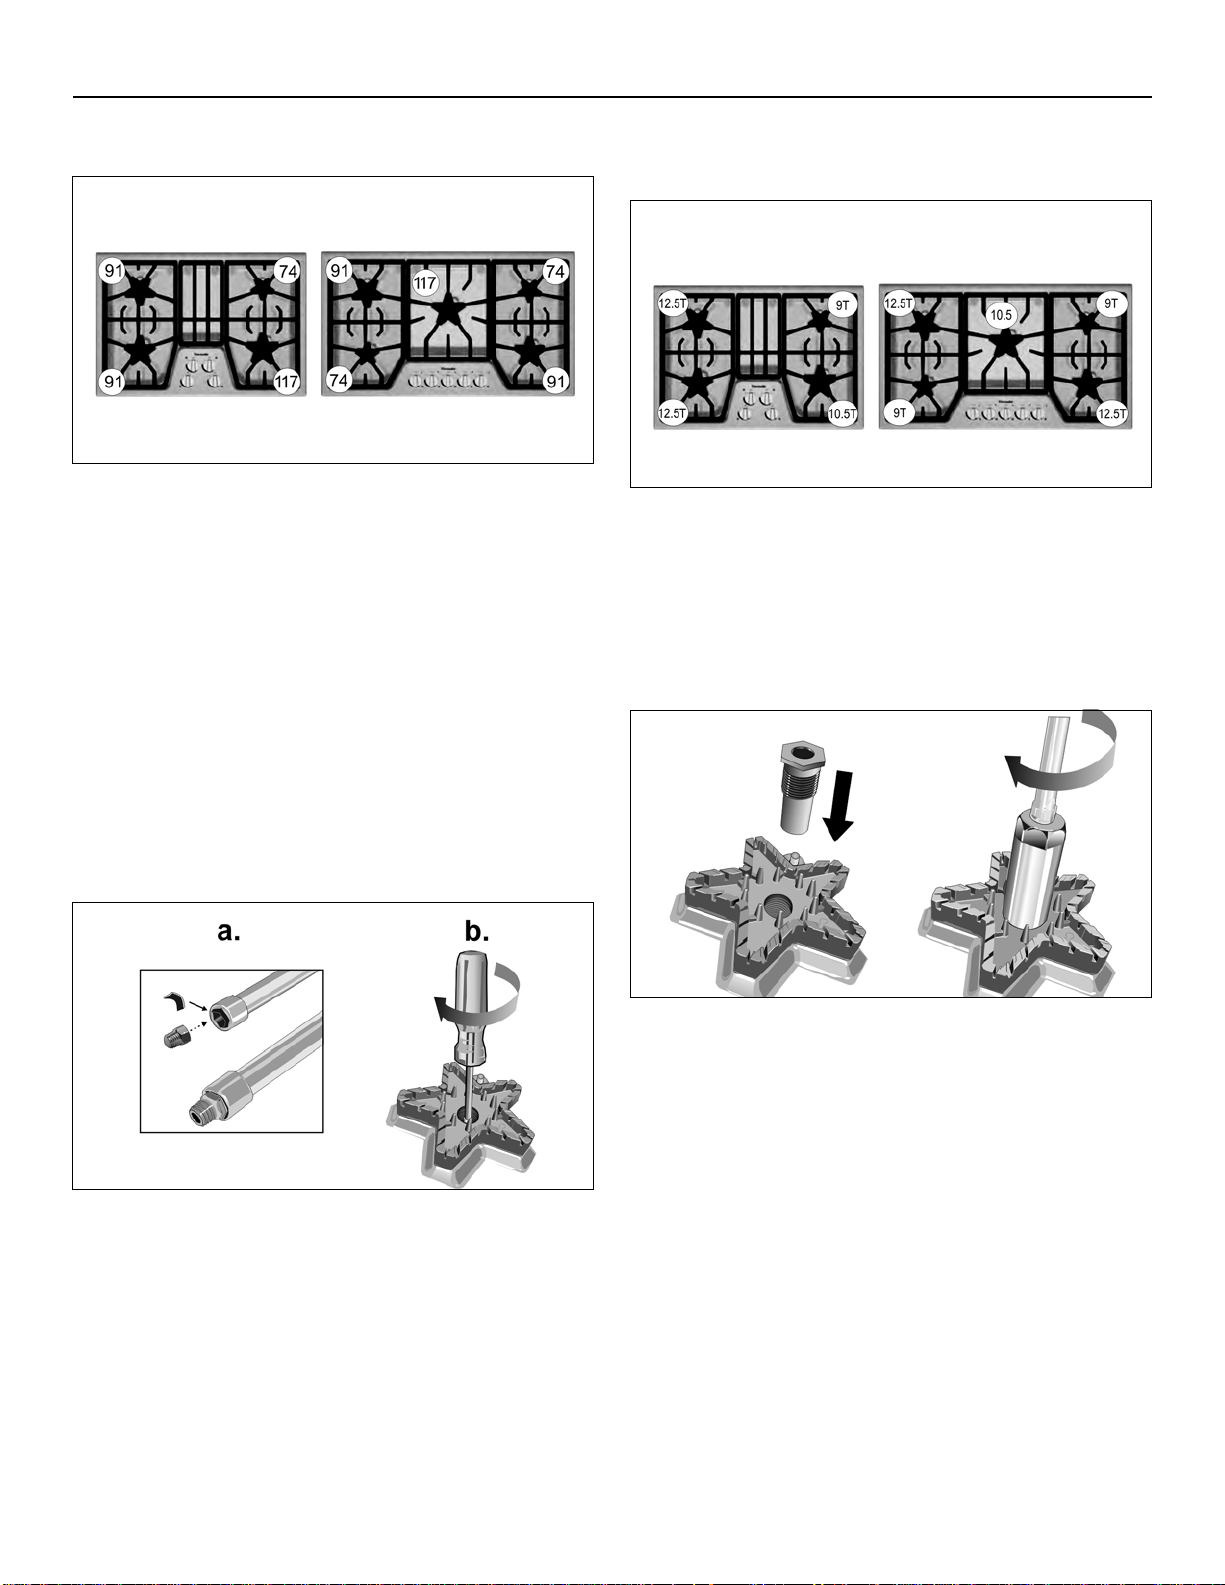
5. Insert each of the LP gas orifices provided with this kit
into the socket (using the small piece of foam tape to
assure a tight fit).
a) Check to be sure the small piece of foam tape used
earlier is fitted to wrap against one side of the
socket.
b) When pressing the socket driver onto the orifice,
the tape will help the orifice fit more snugly inside
the socket. This will help prevent the orifice from
falling out of the socket during insertion.
3. Identify the correct placement of the LP gas venturis as
layed out on the venturi package card (see image
below).
The venturi sizes are shown in the white circles
corresponding to each burner as shown in the image
above. These numbers are engraved on the top of each
venturi. It is very important install the correct venturi size for
each burner.
4. Insert each of the LP gas venturis provided with this kit.
Tighten snugly.
5. Replace burner caps and grates.
LP Orifices
4-Burner Models
5-Burner Models
LP Venturis
4-Burner Models
5-Burner Models
Loading ...
Loading ...
Loading ...