Loading ...
Loading ...
Loading ...
en Shelf supports
18
6.
Lower the appliance door and leave it open for ap-
prox. one hour to allow the surfaces in the cooking
compartment to dry thoroughly.
‒ To dry the cooking compartment quickly, heat up
the appliance for approx. fiveminutes at Circo-
Therm hot air and 50 °C while the door is
open.
15 Shelf supports
To clean the rails and the cooking compartment, or to
replace the rails, you can remove these.
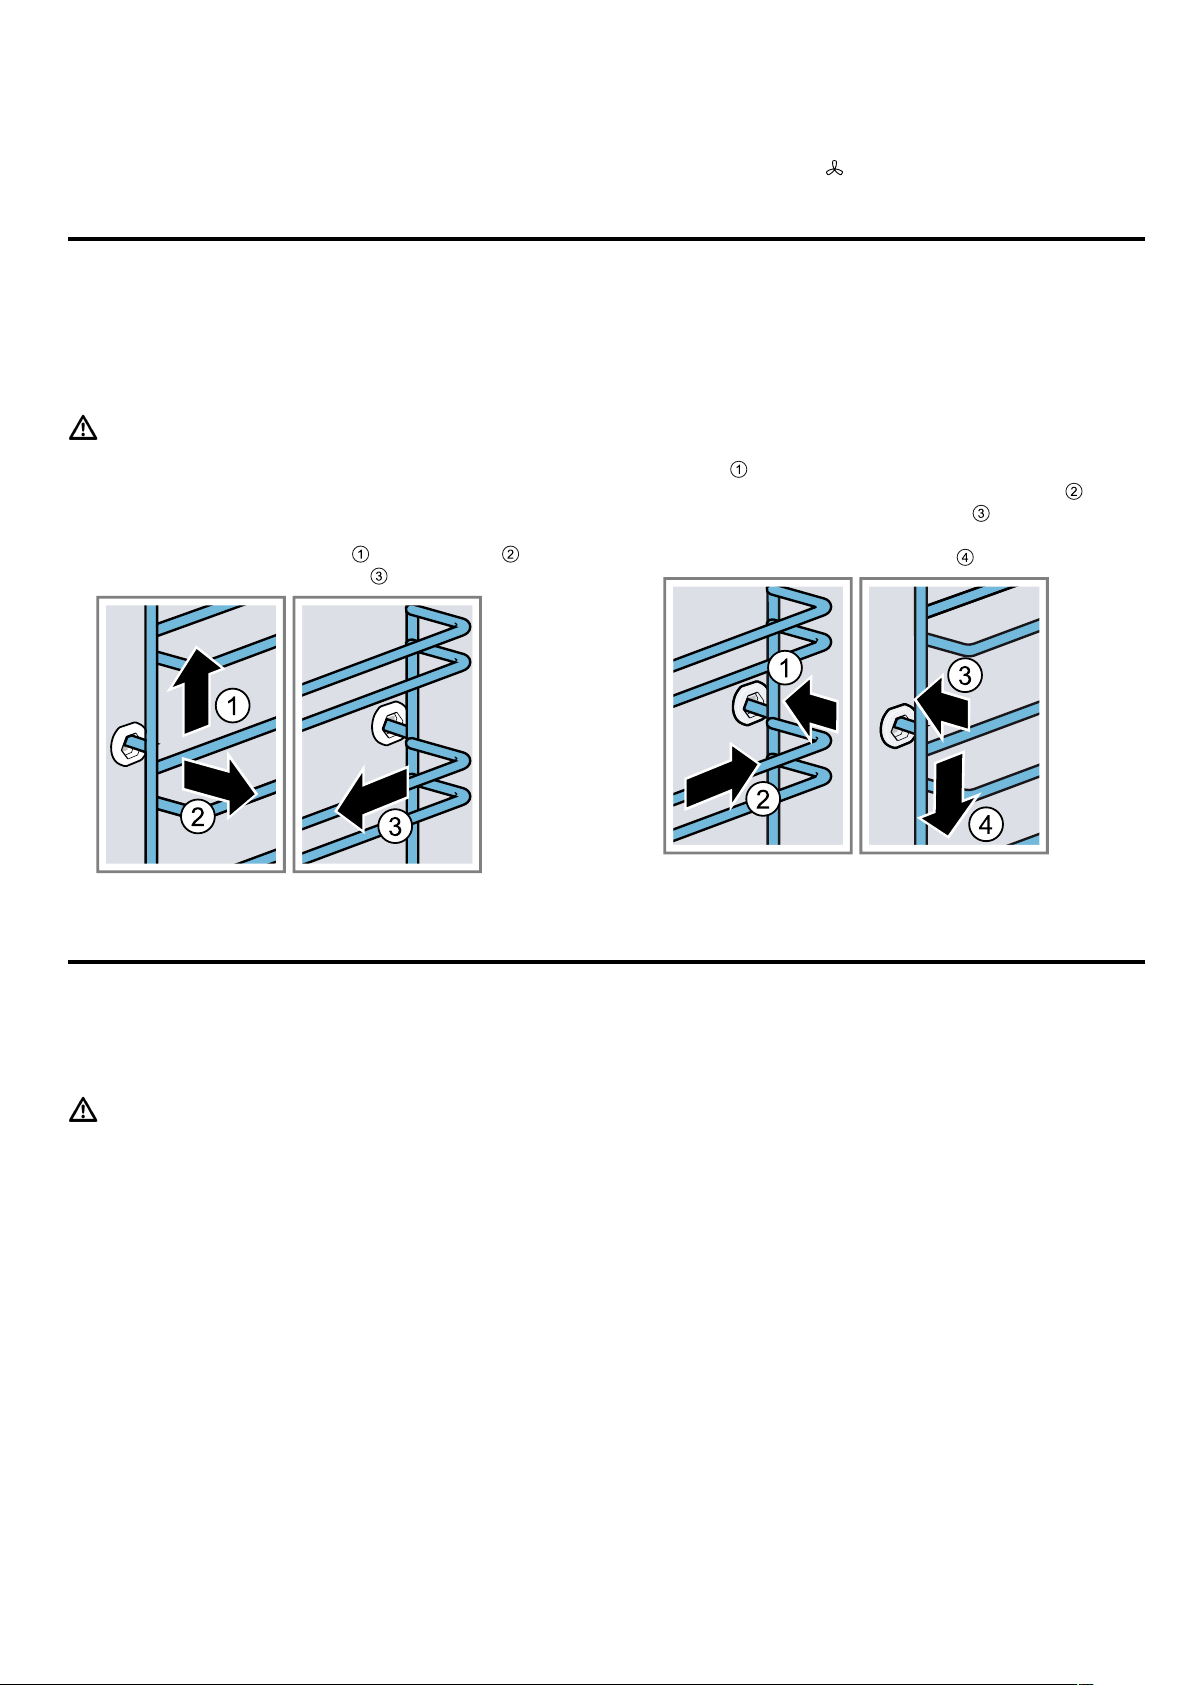
15.1 Detaching the shelf supports
WARNING‒Risk of burns!
The shelf supports get very hot
▶ Never touch the shelf supports when hot.
▶ Always allow the appliance to cool down.
▶ Keep children at a safe distance.
1.
Lift the rail forwards slightly
and detach it .
2.
Pull the whole rail to the front and remove it.
3.
Clean the rail.
→"Cleaning products", Page14
15.2 Attaching the shelf supports
Notes
¡ The rails only fit on the right or left.
¡ For both rails, ensure that the curved rods are at the
front.
1.
First, push the rail into the middle of the rear
socket
until the rail rests against the cooking
compartment wall, and then push this back .
2.
Push the rail into the front socket until the rail
also rests against the cooking compartment wall,
and then press this downwards .
16 Appliance door
To ensure that your appliance retains its appearance
and remains fully functioning for a long time, you can
detach the appliance door and clean it.
WARNING‒Risk of injury!
If the hinges are not secured due to an incomplete
lock, they can snap shut with great force.
▶ To detach or attach the appliance door, always turn
the two locks as far as they will go.
▶ If the hinge snaps closed when detaching or attach-
ing the appliance door, do not reach into the hinge
– call the after-sales service.
16.1 Detaching the appliance door
Requirements
¡ Have a torch ready.
¡ Have a screwdriver ready.
¡ Have a coin ready.
1.
To make it easier to see the door lock, shine the
torch into the gap beside the appliance door.
Loading ...
Loading ...
Loading ...