Loading ...
Loading ...
Loading ...
MAINTAINING YOUR TABLE SAW
GENERAL MAINTENANCE
For your own safety, turn the switch OFF and remove the
switch key. Remove the plug from the power source
outlet before maintaining or lubricating your saw.
1. Clean out all sawdust that has accumulated inside
the saw cabinet and the motor.
2. Polish the saw table with an automotive wax to keep
it clean and to make it easier to slide the workpiece.
3. Clean cutting blades with pitch and gum remover.
4. A worn, cut, or damaged power cord should be
replaced immediately.
All electrical or mechanical repairs should be attempted
only by a trained repair technician. Contact the nearest
Sears Service Center for service. Use only identical
replacement parts. Any other parts may create a hazard.
5. Use liquid dish washing detergent and water to
clean all plastic parts.
NOTE: Certain cleaning chemicals can damage
plastic parts.
,
Avoid use of the following cleaning chemicals or
solvents: gasoline, carbon tetrachtoride, chlorinated
solvents, ammonia and household detergents
containing ammonia.
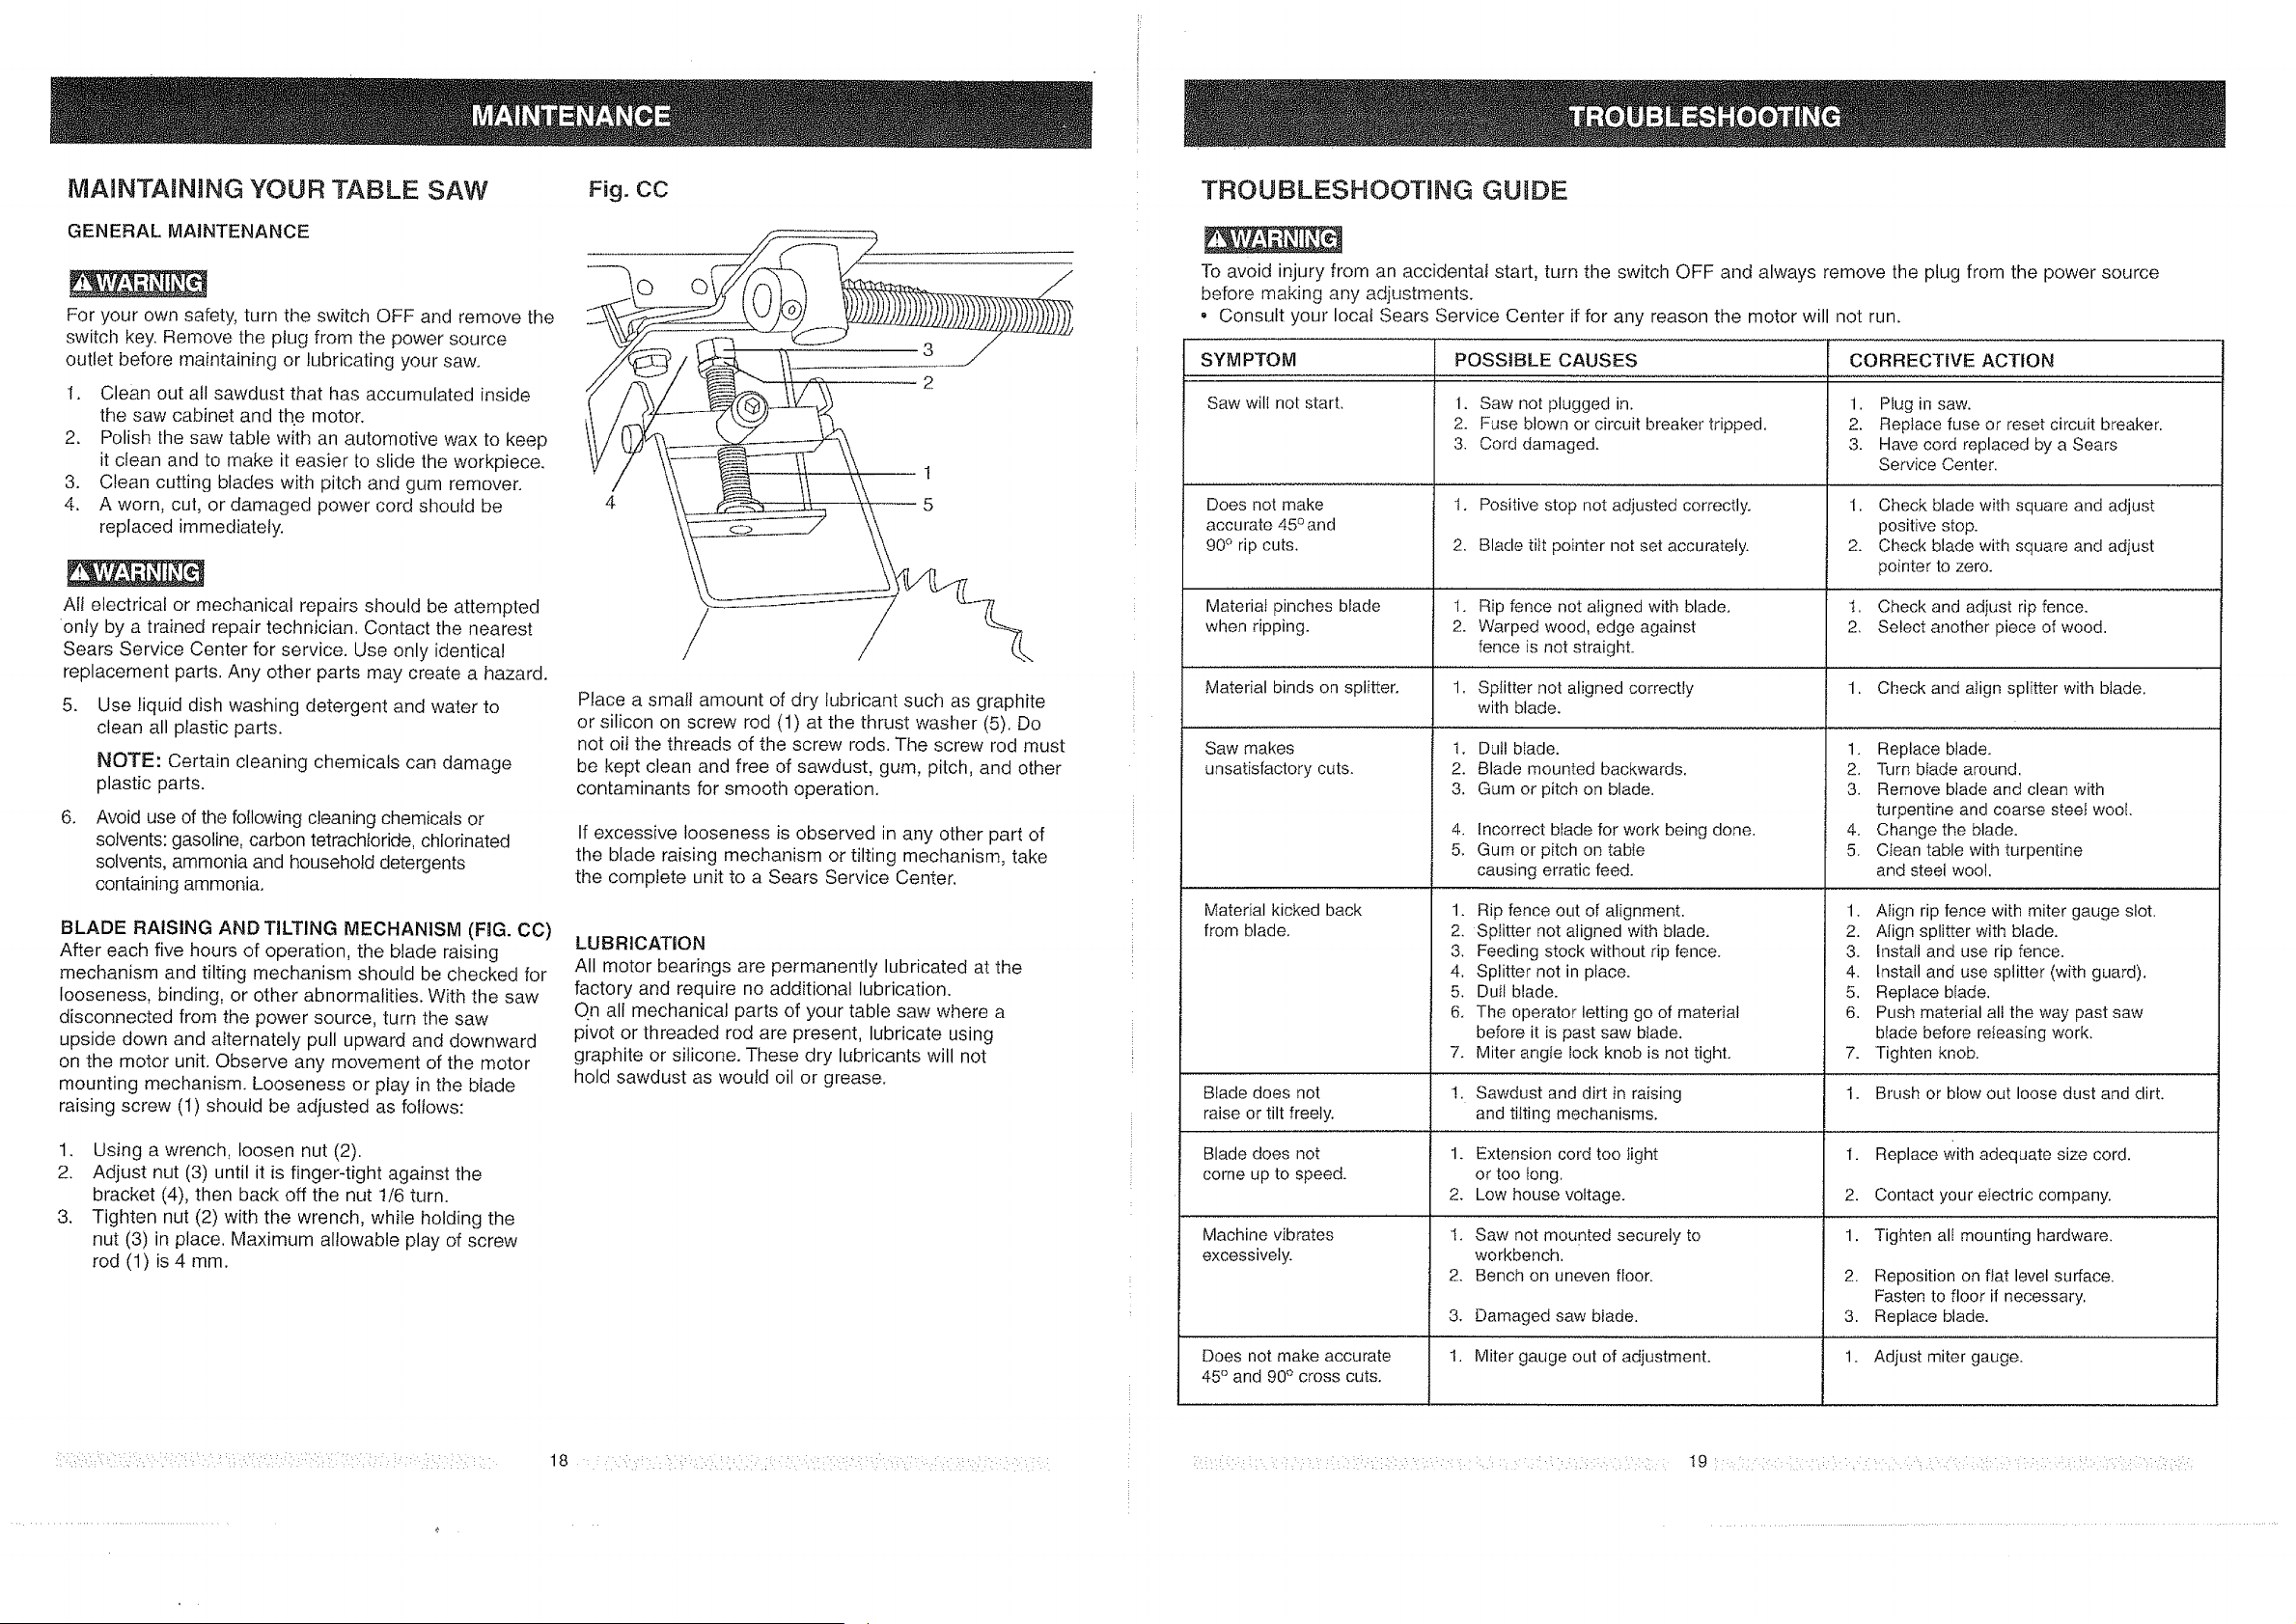
BLADE RAISING AND TILTING MECHANISM (FIG. CC)
After each five hours of operation, the blade raising
mechanism and tilting mechanism should be checked for
looseness, binding, or other abnormalities. With the saw
disconnected from the power source, turn the saw
upside down and alternately pull upward and downward
on the motor unit. Observe any movement of the motor
mounting mechanism. Looseness or play in the blade
raising screw (1) should be adiusted as follows:
1. Using a wrench, loosen nut (2).
2. Adjust nut (3) until it is finger4ight against the
bracket (4), then back off the nut 1/6 turn.
3. Tighten nut (2) with the wrench, while holding the
nut (3) in place. Maximum allowable play of screw
rod (1) is 4 ram.
Fig. CC
4
Place a small amount of dry lubricant such as graphite
or silicon on screw rod (1) at the thrust washer (5). Do
not oil the threads of the screw rods. The screw rod must
be kept clean and free of sawdust, gum, pitch, and other
contaminants for smooth operation.
If excessive looseness is observed in any other part of
the blade raising mechanism or tilting mechanism, take
the complete unit to a Sears Service Center.
LUBRICATION
All motor bearings are permanently lubricated at the
factory and require no additional lubrication.
On all mechanical parts of your table saw where a
pivot or threaded rod are present, lubricate using
graphite or silicone. These dry lubricants will not
hold sawdust as would oil or grease.
TROUBLESHOOTMNG GUIDE
To avoid injury from an accidental start, turn the switch OFF and always remove the plug from the power source
before making any adjustments.
• Consult your local Sears Service Center if for any reason the motor will not run.
SYM PTOM
Saw will not start.
Does not make
accurate 45 ° and
90° rip cuts.
Material pinches blade 1.
when ripping. 2.
Material binds on splitter.
Saw makes 1.
unsatisfactory cuts. 2.
3,
4.
5,
Material kicked back 1.
from blade. 2.
3.
4.
5.
6.
7.
Blade does not !.
raiseor tilt freely.
Blade does not 1.
come up to speed.
2.
Machine vibrates 1.
excessively.
2.
3.
1,Does not make accurate
45° and 90° cross cuts,
POSSIBLE CAUSES
1. Saw not plugged in.
2. Fuse blown or circuit breakertripped.
3. Cord damaged.
1. Positivestop not adjusted correctly.
2. Blade tilt pointer not set accurately.
Rip fence not aligned with blade.
Warped wood, edge against
fence is not straight.
1. Splitter not aligned correctly
with blade.
Dull blade.
Blade mounted backwards.
Gum or pitch on blade.
Incorrect blade for work being done.
Gum or pitch on table
causing erratic feed.
Rip fence out of alignment.
Splitter not aligned with blade,
Feeding stock without rip fence.
Splitter not in place.
Dull blade.
The operator letting go of material
before it is past saw blade.
Miter angle lock knob is not tight,
CORRECTIVE ACTION
1. Plug in saw.
2. Replace fuse or reset circuit breaker.
3. Havecord replaced by a Sears
Service Center.
1. Check blade with square and adjust
positive stop.
2. Check blade with square and adjust
pointer to zero.
1. Check and adjust rip fence.
2. Select another piece of wood.
1. Checkand align splitter with blade,
1. Replace blade.
2. Turn btadearound.
3. Removeblade and clean with
turpentine and coarse steel wool.
4. Change the blade.
5. Cfean table with turpentine
and steel wool.
1. Atign rip fence with miter gauge slot.
2. Align splitter with blade.
3. Install and use rip fence.
4. Install and use splitter (with guard).
5. Replace blade.
6. Push material all the way past saw
blade before releasing work.
7. Tighten knob.
Sawdust and dirt in raising 1. Brush or blow out loose dust and dirt.
and tilting mechanisms.
Extension cord too iight 1. Replace Withadequate size cord.
or too long.
Low house voltage. 2. Contact your electric company.
Saw not mounted securely to
workbench.
Bench on uneven floor,
Damaged saw blade.
Miter gauge out of adjustment.
1.
2.
3.
I 1-
Tighten all mounting hardware.
Reposition on fiat level surface.
Fasten to floor if necessary.
Replace blade.
Adjust miter gauge.