Loading ...
Loading ...
Loading ...
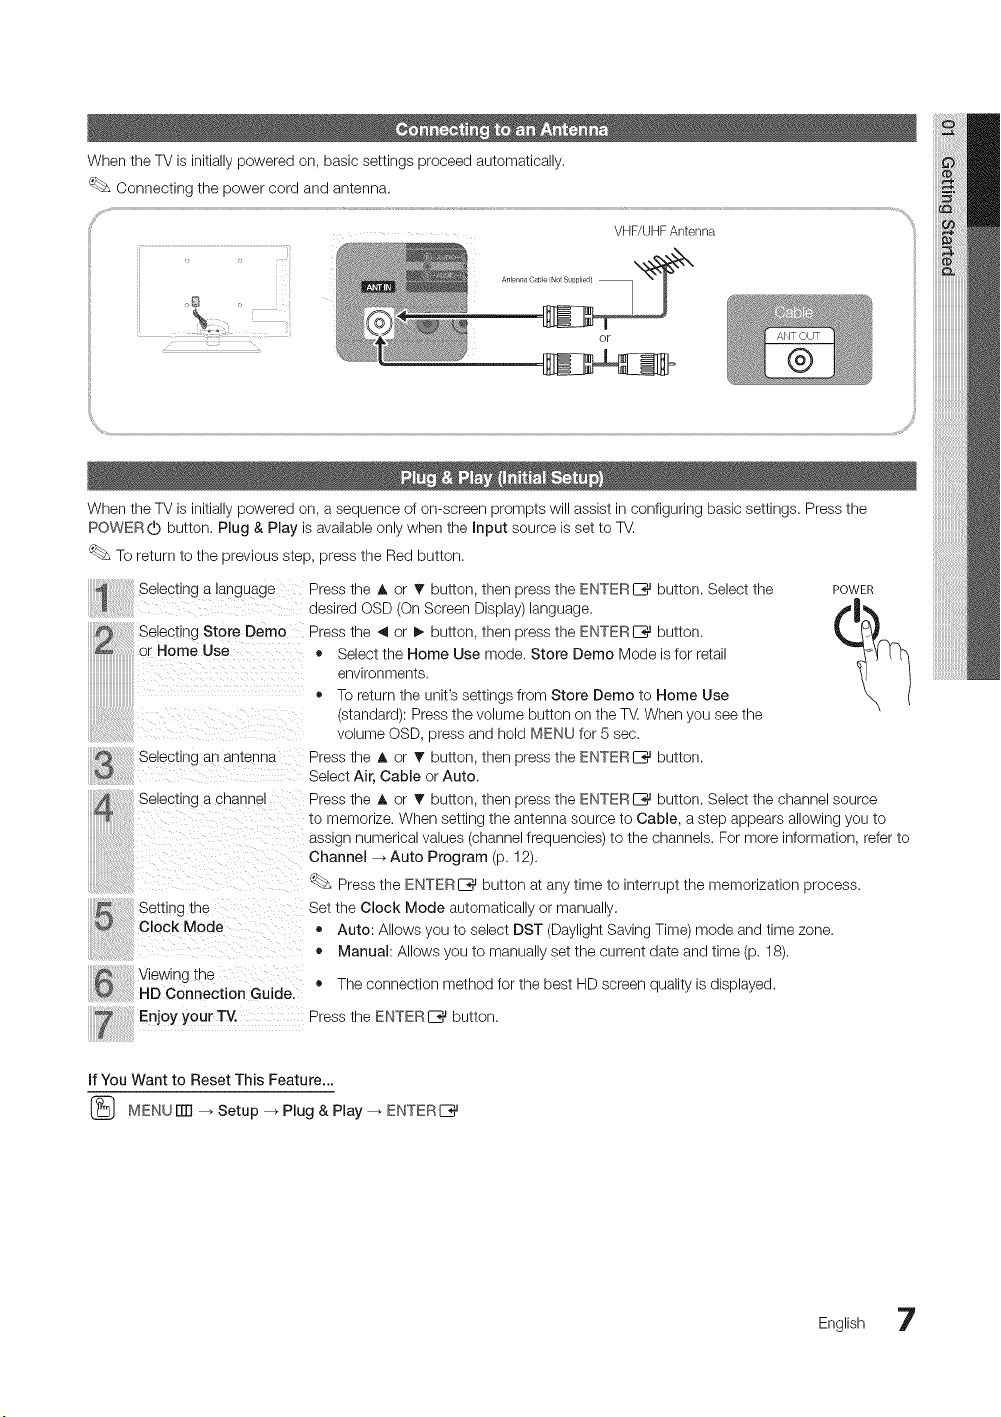
WhentheTVisinitiallypoweredon,basicsettingsproceedautomatically.
Connectingthepowercordandantenna.
.......:.....................................!N!!................................_:.....
VHF/UHFAntenna
Antenna Oabe (No_ Supplied) ] _%
o[
When the TV is initially powered on, a sequence of on-screen prompts will assist in configuring basic settings. Press the
POWER (!) button. Plug & Play is available only when the Input source is set to TV.
To return to the previous step, press the Red button.
Selecting a language
Selecting Store Demo
or Home Use
Selecting an antenna
Se,ecting a channel
Setting the
Clock Mode
Viewing l:ne
_ection Guide.
Press tne A or T button, then press the ENTERI_%_button. Select the POWER
]eslrea OSD (On Screen Display)language. f_l_
Press tne _ or I_ button, then press the ENTERE_ button.
• Select the Home Use mode. Store Demo Mode is for retail
environments
• To return the unit's settings from Store Demo to Home Use
stanaara): Press the volume button on the T_. When you see the
volume OSD, press and hold MENU for 5 sec.
Press tne A or T button, then press the ENTERI_ button.
3elect Air, Cable or Auto.
Press tne A or T button, then press the ENTERIZ_ button. Select the channel source
to memorize. When setting the antenna source to Cable, a step appears allowing you to
assign numerical values (channel frequencies) to the channels. For more information, refer to
Channel _ Auto Program (p. 12).
Press the ENTERIZ_J button at any time to interrupt the memorization process.
Set the Clock Mode automatically or manually.
• Auto: Allows you to select DST (Daylight Saving Time) mode and time zone.
• Manual: Allows you to manually set the current date and time (p. 18).
• The connection method for the best HD screen quality is displayed.
Enjoy your TV. Press the ENTER I_ button.
If You Want to Reset This Feature...
(_ MENUiTrl _ Setup --_ Plug & Play _ ENTERI_
English 7
Loading ...
Loading ...
Loading ...