Loading ...
Loading ...
Loading ...
WARNING:Toavoidinjuryfrom unexpected starting, whenever
changing the saw blade or carrying out adjustments, switch the
bandsaw off a.ndremove the power cord from the main outlet, To
avoid injury to hands when handling the saw blade, wear gloves
whenever necessary.
a. Remove the rip fence, the guide rail, the wing nut and screw
from the table.
b. ()pen the upper and lower doors by turning the door locldng
knobs.
c. Loosen the blade tension by turning the blade tension knob on
the top of the upper wheel housing counterclockwise until the saw
blade has slackened (viewed from above) (See FIG, 19).
d. Remove the saw blade from the upper and lower wheels.
e. When fitting the new saw blade ensure the blade teeth are
pob_ting downwards and towards you at the position where the
saw blade passes through the table.
h Re-tension the new saw blade and check the saw blade tracking
by turning the t._pperwheel by hand. The saw blade should run in
the center of the handsaw wheeIs.
g. If needed adjust the tracking of the saw blade, proceed as
mentioned below" TRACKING THE SAW BLADE"
h. Replace the rip fence, the guide rail, the wing nut and screw to
the table.
i. Close the upper and lower doors by turning the door locking
knobs before reconnecting the power supply.
9. TRACK_NGTHEBANDSAWBLADE
Set the tracking o[ the saw blade before setting the blade guides.
Once the saw blade is installed and tensioned, track the saw
blade by adjusting the tracking knob by hand (See FIG. 20). The
saw blade should run in the center of the baodsaw wheels. When
the correct adjustment is achieved lock the tracking knob with the
wing nut.
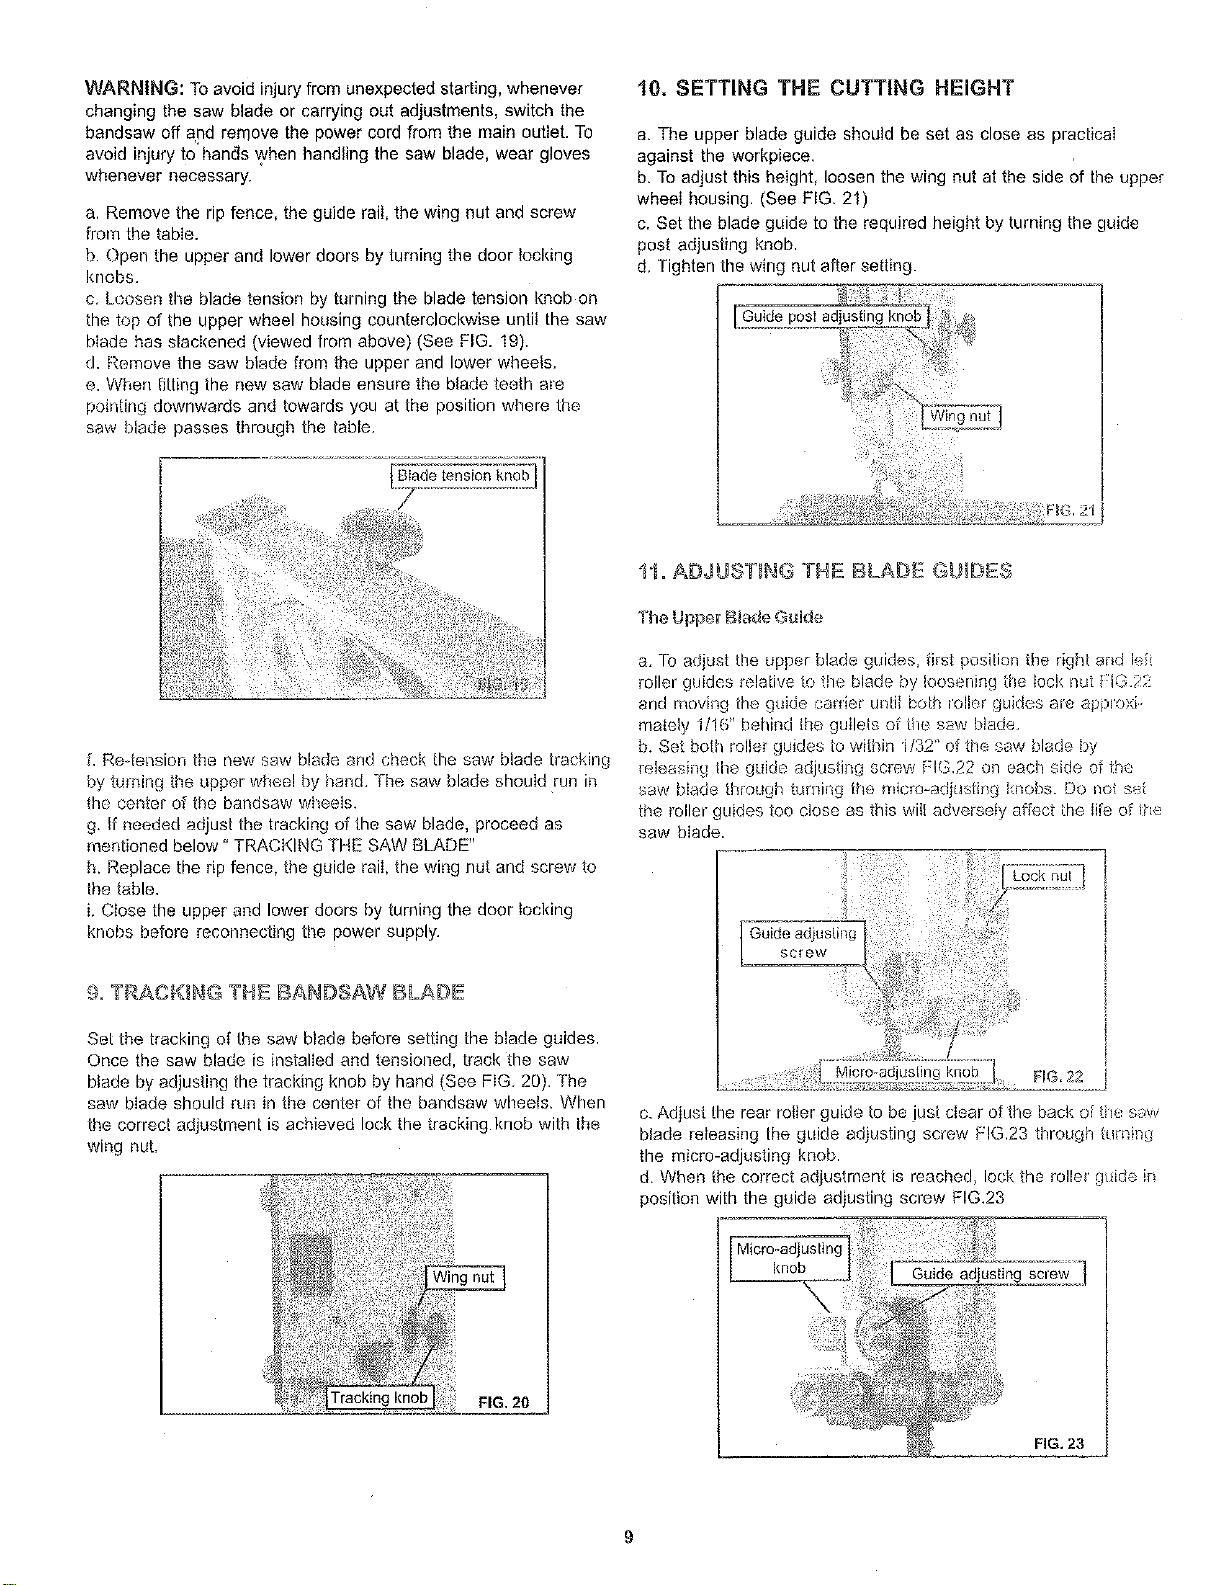
10, SETTING THE CUTTING HEIGHT
a. The upper blade guide should be set as close as practical
against the workpiece.
b. To adjust this height, loosen the wing nut at the side of the upper
wheel housing. (See FIG. 21)
c. Set the blade guide to the required height by turning the guide
post adjusting knob.
d. Tighten the wing nut after setting.
I1, ADJUST)NG THE BLAD):_ GU_Di£S
The Upper Blade Guide
a. To adjust the upper blade guides, first position the right and lei
roller guides relative to the blade by loosening gle lock nut !:1G.22
and rnoving the guide caoier until both io[ler guides are apgro;d.
ma[ely I/1(P behind [he gullets of the saw blade.
b. Set both rol)er guides to within ti32' of the saw blade by
releasing the guide adjusting screw [:1G.22 on each side of the
saw b(ade through turning tile micro-adjusting knobs. Do not sei
the roller guides too close as this wiit adversely affect the life or fl-e
saw blade.
Guide
c. Adjust the rear miler guide to be just clear of the back or tie saw
blade releasing the gL_ideadjusting screw FIG.23 through t_lrnirJg
the micro-adjusting knob.
d. When the correct adjustment is reached, lock the roller guide ir
position with the guide adjusting screw FIG.23
Micro-adjusting
[{nob
FIG, 23
Loading ...
Loading ...
Loading ...