Loading ...
Loading ...
Loading ...
........................................................................ASSE....LY .......................
LowEnHANI LE..........
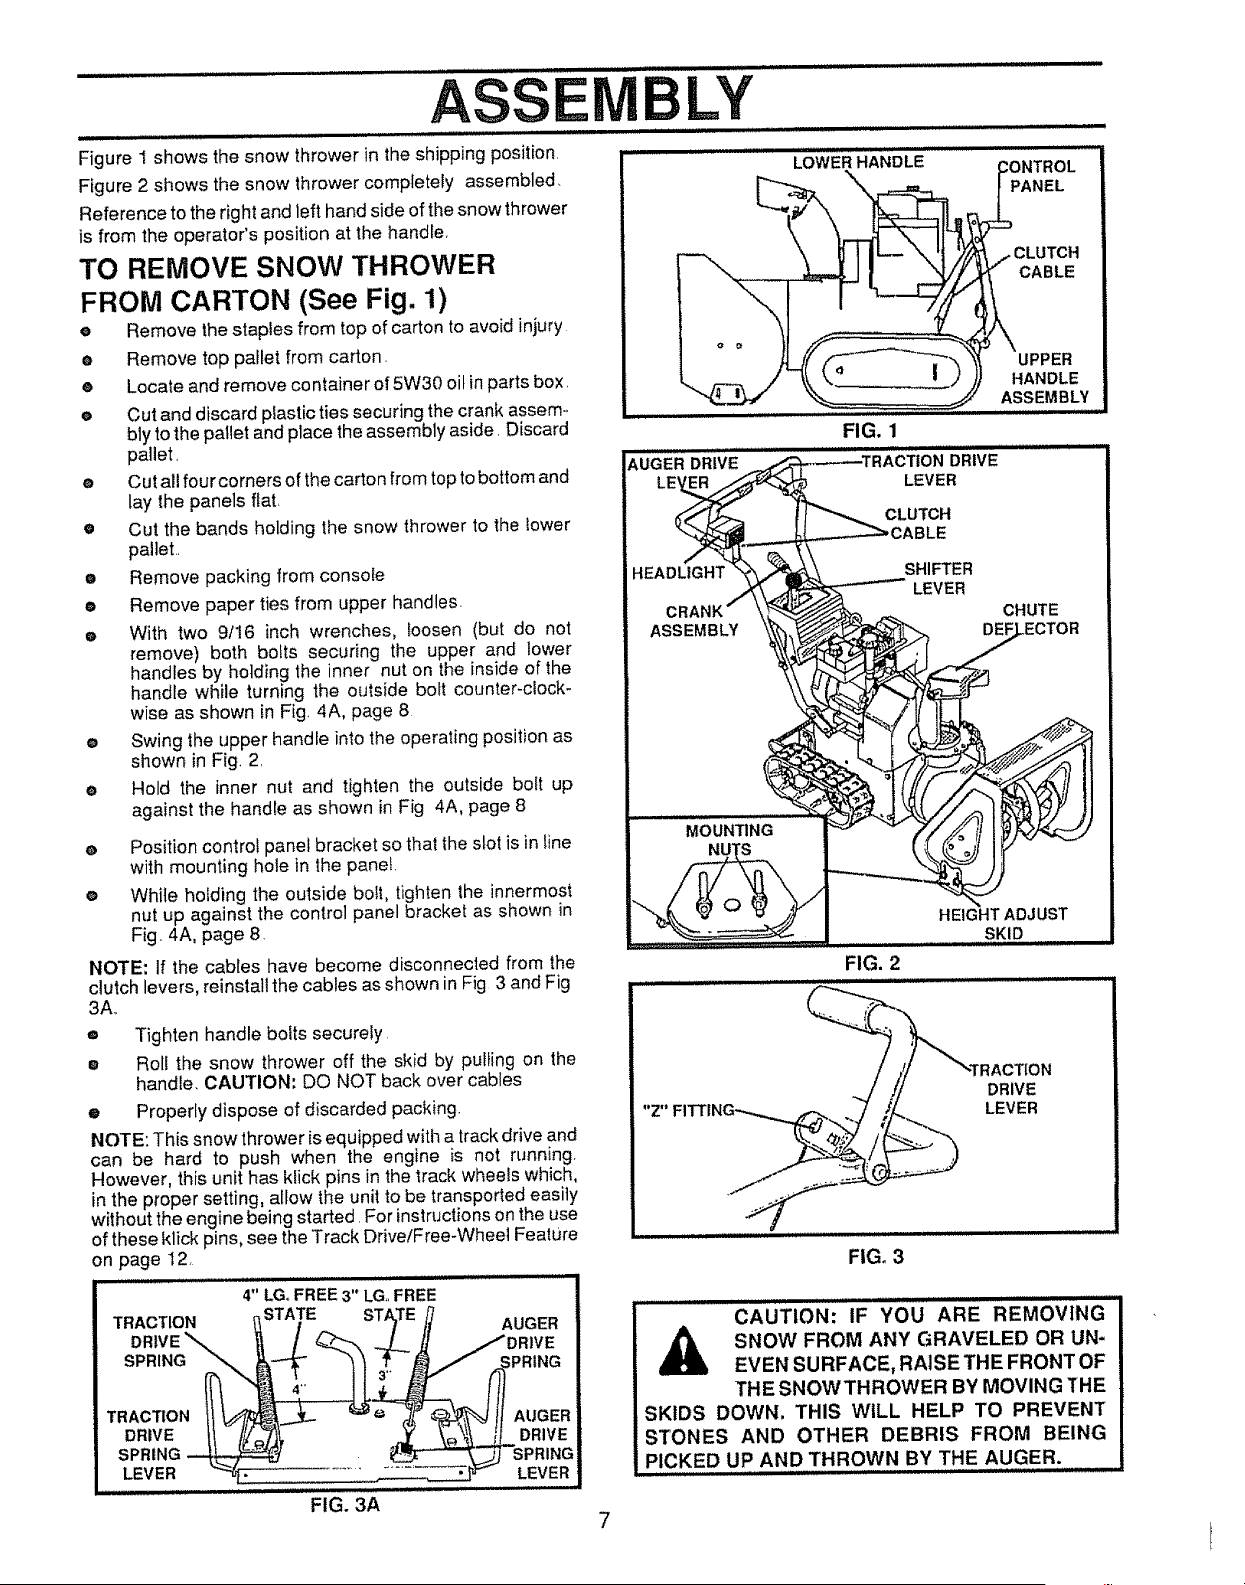
Figure 1 shows the snow thrower in the shipping position,
Figure 2 shows the snow thrower completely assembled,
Reference to the right and left hand side of the snow thrower
is from the operator's position at the handle,
TO REMOVE SNOW THROWER
FROM CARTON (See Fig. 1)
e Remove the staples from top of carton to avoid injury
e Remove top pallet from carton.
• Locate and remove container of 5W30 oil in parts box,
e Cut and discard plastic ties securing the crank assem.
bly to the pallet and place the assembly aside. Discard
pallet,
e Cut all fourcorners of the carton from top to bottom and
lay the panels flat,
• Cut the bands holding the snow thrower to the tower
pallet..
e Remove packing from console
• Remove paper ties from upper handles,
e With two 9/!6 inch wrenches, _oosen (but do not
remove) both bolts securing the upper and lower
handles by holding the inner nut on the inside of the
handle wh}le turning the outside bolt counter-clock-
wise as shown in Fig 4A, page 8
e Swing the upper handle into the operating position as
shown in Fig, 2,
e Hold the inner nut and tighten the outside bolt up
against the handle as shown in Fig 4A, page 8
PANEL
CLUTCH
CABLE
AUGERD,iV .........
UPPER
HANDLE
ASSEMBLY
FIG. 1
DRIVE
LEVER
CLUTCH
HEADLIGHT SHIFTER
LEVER
CHUTE
e Position control panel bracket so that the slot is in tine
with mounting hole in the panet.
e While holding the outside bo_t, tighten the innermost
nut up against the control panel bracket as shown in
Fig. 4A, page 8,
NOTE: If the cables have become disconnected from the
clutch levers, reinstall the cables as shown in Fig 3 and Fig
3A,,
o
O
Tighten handle bolts securely
Rol! the snow thrower off the skid by pulling on the
handle, CAUTION; DO NOT back over cables
e Properly dispose of discarded packing.
NOTE: This snow thrower is equipped with a track drive and
can be hard to push when the engine is not running,
However, this unit has kfick pins in the track wheels which,
in the proper setting, allow the unit to be transported easily
without the engine being started, For instructions on the use
of these klick pins. see the Track Drive/Free-Wheel Feature
on page I2,
4" LG, FREE 3" LG, FREE
TRACTION _STATE
DRIVE"-... /
SPR,.G
TRAOT,O.
DRWE II ///,_71_,
SPRING ---_
LEVEF_ _ .
FIG. 3A
FIG. 2
, N
DRIVE
LEVER
FIG, 3
CAUTION: IF YOU ARE REMOVING
A SNOW FROM ANY GRAVELED OR UN-
EVEN SURFACE, RAISE THE FRONT OF
THE SNOWTHROWER BY MOVING THE
SKIDS DOWN. THIS WiLL HELP TO PREVENT
STONES AND OTHER DEBRIS FROM BEING
PICKED UP AND THROWN BY THE AUGER.
Loading ...
Loading ...
Loading ...