Loading ...
Loading ...
Loading ...

7
EN
INSTALLATION INSTRUCTIONS
IMPORTANT! TURN POWER OFF AT CIRCUIT BREAKER OR FUSE BOX.
When installing the unit refer to the Installation Example Diagram on page 6.
1 If you're replacing an old floodlight, disassemble it along with any existing mounting bracket
from your junction box and disconnect the wire connections.
CAUTION: Before handling any wiring, use a circuit tester to confirm that the power is off.
2 Attach the provided mounting bracket to your junction box using the provided screws. The side
of the mounting bracket marked "GND" should be facing out.
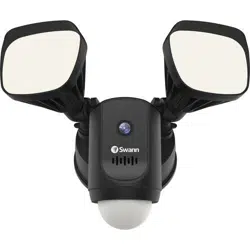
3 Peel the backing off the adhesive foam gasket and stick it to the back of the floodlight unit.
4 Connect individual supply wires from the junction box to the floodlight unit using the provided
wire nuts. Pair the black supply wire with the black floodlight wire, the white supply wire with
the white floodlight wire, and the bare or green supply wire with the green/yellow floodlight
wire. (For reference, see Power circuit wiring color codes table on the next page.) Make sure
the ground wire is also screwed to the "GND" threaded hole of the mounting bracket with the
green ground screw.
This unit is designed to be mounted on a standard wiring junction box and requires connection to a
100-240VAC power supply. For optimum results, install the unit at least 2.4m (8ft) above the ground.
Read "IMPORTANT SAFETY INSTRUCTIONS" and "PREINSTALLATION CHECK" and make sure the
installation site is Wi-Fi ready before installing the unit.
Loading ...
Loading ...
Loading ...
