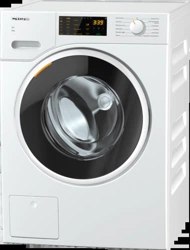
Miele WWD020 WCS 8kg Washing machines

User Manual

For WWD020 WCS.

PDF File Manual, 84 pages, Read Online | Download pdf file

WWD020 WCS photo
background
Operating instructions
for washing machines
To avoid the risk of accidents or damage to the machine, it is essen-
tial to read these instructions before it is installed and used for the
first time.
en-GB M.-Nr. 11 813 310
Loading page 2...
Loading page 3...
Loading page 4...
Loading page 5...
Loading page 6...
Loading page 7...
Loading page 8...
Loading page 9...
Loading page 10...
Loading page 11...
Loading page 12...
Loading page 13...
Loading page 14...
Loading page 15...
Loading page 16...
Loading page 17...
Loading page 18...
Loading page 19...
Loading page 20...
Loading page 21...
Loading page 22...
Loading page 23...
Loading page 24...
Loading page 25...
Loading page 26...
Loading page 27...
Loading page 28...
Loading page 29...
Loading page 30...
Loading page 31...
Loading page 32...
Loading page 33...
Loading page 34...
Loading page 35...
Loading page 36...
Loading page 37...
Loading page 38...
Loading page 39...
Loading page 40...
Loading page 41...
Loading page 42...
Loading page 43...
Loading page 44...
Loading page 45...
Loading page 46...
Loading page 47...
Loading page 48...
Loading page 49...
Loading page 50...
Loading page 51...
Loading page 52...
Loading page 53...
Loading page 54...
Loading page 55...
Loading page 56...
Loading page 57...
Loading page 58...
Loading page 59...
Loading page 60...
Loading page 61...
Loading page 62...
Loading page 63...
Loading page 64...
Loading page 65...
Loading page 66...
Loading page 67...
Loading page 68...
Loading page 69...
Loading page 70...
Loading page 71...
Loading page 72...
Loading page 73...
Loading page 74...
Loading page 75...
Loading page 76...
Loading page 77...
Loading page 78...
Loading page 79...
Loading page 80...
Loading page 81...
Loading page 82...
Loading page 83...
Loading page 84...

Other documents for Miele WWD020 WCS

The following documents are available:
User Manual Warranty
  • Warranty conditions - (English) Download
  • Waterproof warranty - (English) Download
Specification Other Documents
  • EU declaration of conformity - (English) Download
Energy Guide Photos

Specifications

User Manual - Transcript

  • Page 1 - English - : Operating instructions for washing machines To avoid the risk of accidents or damage to the machine it is essen tial to read these instructions before it is installed and used for the first time enGB MNr 11 813 310
  • Page 2 - English - : Contents Warning and Safety instructions 5 Operating the washing machine 12 Control panel 12 How the control field works 13 Caring for the environment 14 Before using for the first time 15 Removing the open spanner 15 Washing environmentally and economically 17 1 Prepare the laundry 18 2 Load the washing machine 19 3 Select a programme 20 4 Add detergent 22 Detergent dispenser drawer 22 CapDosing 24 5 Start the programme 26 Adding laundry during a programme sequence AddLoad 26 6End of programme 27 Spinning 28 Delay start 29 Programme chart 30 Extra options 34 Short 34 Water 34 Prewash 34 Preironing 34 The following extras can be selected in addition to the programmes 35 Programme sequence 36 Changing the programme sequence 38 Changing a programme safety lock 38 Cancelling a programme 38 Garment care label symbols 39
  • Page 3 - English - : Contents Detergent 40 The correct detergent 40 Water softeners 40 Dispensing aids 40 Fabric conditioner and liquid starch 40 Recommended Miele detergents 42 Recommended detergents in accordance with Directive EU Nr 10152010 43 Cleaning and care 44 Cleaning the external casing and the control panel 44 Cleaning the detergent dispenser drawer 44 Hygiene infoCleaning the drum 46 Cleaning the water inlet filter 46 Problem solving guide 47 The programme does not start 47 The programme is cancelled and a fault indicator light lights up in the control panel 48 During the programme a symbol appears in the time display 49 At the end of the programme an indicator light lights up in the control panel 49 General problems with the washing machine 50 An unsatisfactory wash result 52 The door will not open 53 Opening the door in the event of a blocked drain outlet andor power cut 54 Service 56 Contact in the event of a fault 56 Optional accessories 56 EPREL database 56 Warranty 56 Installation 57 Front view 57 Rear view 58 Installation surface 59 Transporting the washing machine to its installation site 59 Removing the transit bars 60 Fitting the transit bars 62 Levelling the machine 63 Screwing out and adjusting the feet 63 Installing under a continuous worktop 64 Washerdryer stack 64
  • Page 4 - English - : Contents The water protection system 65 Connection to the water supply 65 Water drainage 67 Electrical connection 68 Technical data 69 Consumption data 70 Programmable functions 71 Choosing and selecting a programmable function 71 Editing and saving a programmable function 72 Exit programming level 72 Sensor tone Lock code Control panel switchoff status Memory Longer prewash Cottons Gentle action Reduce temperature Water plus Water plus level Maximum rinse level Suds cooling Anticrease Low water pressure Backlight brightness dimmed Detergents and care products 77 Detergent 77 Specialist detergents 78 Fabric care 79 Additives 79 Machine care 79
  • Page 5 - English - : Warning and Safety instructions This washing machine complies with all current local and national safety requirements However inappropriate use can lead to per sonal injury and damage to property Read the operating instructions carefully before using the washing machine They contain important information on safety installa tion use and maintenance This prevents both personal injury and damage to the washing machine In accordance with standard IEC603351 Miele expressly and strongly advises that you read and follow the instructions in the chapter on installing the washing machine as well as the safety in structions and warnings Miele cannot be held liable for damage caused by noncompliance with these instructions Keep these operating instructions in a safe place and pass them on to any future owner Correct application This washing machine is intended for use in domestic households and similar working and residential environments The washing machine is not intended for outdoor use It must be used only as a domestic appliance to wash items which are specified by the manufacturer as being washable on the wash care label Miele cannot be held liable for damage resulting from in correct or improper use or operation
  • Page 6 - English - : Warning and Safety instructions The washing machine can only be used by people with reduced physical sensory or mental capabilities or lack of experience or knowledge if they are supervised whilst using it or have been shown how to use it safely and recognise and understand the con sequences of incorrect operation Safety with children Children under 8 years of age must be kept away from the wash ing machine unless they are constantly supervised Children 8 years and older may only use the washing machine un supervised if they have been shown how to use it safely and recog nise and understand the consequences of incorrect operation Children must not be allowed to clean or maintain the washing machine unsupervised Please supervise children in the vicinity of the washing machine and do not let them play with it Technical safety Please observe the instructions in Installation and Technical data Before setting up the washing machine check it for any externally visible damage Do not install or use a damaged machine Before connecting the washing machine ensure that the connec tion data on the data plate fuse rating voltage and frequency match the mains electricity supply If in any doubt consult a qualified elec trician
  • Page 7 - English - : Warning and Safety instructions Temporary or permanent operation on an autonomous power sup ply system or a power supply system that is not synchronised with the mains power supply eg island networks backup systems is possible A prerequisite for operation is that the power supply sys tem complies with the specifications of EN50160 or an equivalent standard The function and operation of the protective measures provided in the domestic electrical installation and in this Miele product must also be maintained in isolated operation or in operation that is not synchronised with the mains power supply or these measures must be replaced by equivalent measures in the installation As described for example in the current version of BS OHSAS 180012 ISO The electrical safety of this washing machine can only be guaran teed when correctly earthed It is essential that this standard safety requirement is met If in any doubt please have the wiring system of the building tested by a qualified electrician Miele cannot be held liable for the consequences of an inadequate earthing system eg electric shock Do not connect the washing machine to the mains electricity sup ply by a multisocket adapter extension lead or similar These do not guarantee the required safety of the machine fire hazard due to the risk of overheating Faulty components must only be replaced by genuine Miele ori ginal spare parts Only when these parts are fitted can Miele guaran tee the safety standards of the machine The electrical socket must be easily accessible after installation so that the machine can be disconnected from the electricity supply if necessary
  • Page 8 - English - : Warning and Safety instructions Unauthorised repairs could result in unforeseen dangers for the user for which the manufacturer cannot accept liability Repairs should only be undertaken by a Miele authorised service technician otherwise any subsequent damage will not be covered by the war ranty While the washing machine is under warranty repairs should only be undertaken by a Miele authorised service technician Otherwise the warranty will be invalidated If the electrical connection cable is faulty it must only be replaced by a Miele authorised service technician to protect the user from danger The machine must be isolated from the electricity supply when cleaning and maintaining the machine and in the event of a fault The machine must only be connected to the onsite water supply using a new hose kit Old hose kits must not be reused Check the condition of the hoses regularly so that you can replace them in good time and avoid the risk of any water damage The water flow pressure must be at least 100kPa and should not exceed 1000kPa In areas which may be subject to infestation by cockroaches or other vermin pay particular attention to keeping the machine and its surroundings in a clean condition at all times Any damage which may be caused by cockroaches or other vermin will not be covered by the warranty The machine must not be used in a nonstationary location eg on a ship Do not make any alterations to the machine unless authorised to do so by Miele
  • Page 9 - English - : Warning and Safety instructions Correct use Do not install the washing machine in a room where there is a risk of frost Frozen hoses may burst or split The reliability of the elec tronic control unit may be impaired at temperatures below freezing point Before using the machine for the first time check that the transit bars at the rear of the machine have been removed see Installation Removing the transit bars During spinning a transit bar which is still in place may result in damage to both the machine and adjacent furniture or appliances Turn off the stopcock if the machine is to be left for any length of time eg holiday especially if there is no floor drain gully in the im mediate vicinity Flooding danger If hooking the drain hose into a wash basin check that the water can drain off quickly enough to prevent the sink from overflowing Make sure the drain hose is secure so that the force of the water flowing out of the hose does not dislodge it Take care to ensure that foreign objects eg nails pins coins pa per clips do not find their way into the machine with the laundry These may damage components of the machine eg suds con tainer drum which in turn can result in damage to the laundry
  • Page 10 - English - : Warning and Safety instructions Take care when opening the drum door after using the steam function Danger of burning due to escaping steam and the high temperature of the surface of the drum as well as the porthole glass Stand back away from the machine and wait until the steam has dis sipated The maximum load for this washing machine is 80 kg dry weight See the Programme chart for the maximum recommended loads for individual programmes If the correct amount of detergent is dispensed the machine should not need to be descaled If however you do wish to descale it only use a proprietary natural citric acid based descaling agent Miele recommends using Miele descaling agent which is available to order online at wwwmielecouk or from Miele Strictly observe the instructions on the packaging Textiles which have been pretreated in solvent based cleaning agents must be thoroughly rinsed in clean water before being washed in the machine Do not use solvent based cleaning agents eg those containing benzine in this machine as this may result in damage to component parts and create toxic fumes Such agents also pose a fire and ex plosion hazard Do not use solvent based cleaning agents eg those containing benzine to clean the surfaces of the machine They can cause dam age to plastic surfaces Only use dyes specified by the manufacturer as being suitable for use in a domestic washing machine Always observe the manufac turers instructions carefully
  • Page 11 - English - : Warning and Safety instructions Colour run and dye removers contain sulphur compounds which can cause damage such as corrosion Do not use these products in this machine If detergent comes into contact with the eyes rinse them thor oughly with lukewarm water immediately If swallowed seek medical assistance immediately and retain the packaging or label for refer ence Those with skin problems or sensitive skin should avoid their skin coming into contact with detergent Accessories and spare parts Only use original Miele accessories If other parts are used war ranty performance and product liability claims will be invalidated A Miele tumble dryer can be stacked on top of a Miele washing machine using the appropriate stacking kit available as an optional accessory Please make sure you order the correct one for the Miele washing machine and Miele tumble dryer If installing the machine on a Miele plinth available as an optional accessory depending on country please make sure you order the correct one for this washing machine Miele will guarantee to supply functional spare parts for a min imum of 10years and up to 15years following the discontinuation of your washing machine Miele cannot be held liable for damage caused by noncompliance with these Warning and Safety instructions
  • Page 12 - English - : Operating the washing machine Control panel a Control field The control field consists of a time display and various sensor controls The individual sensor controls are explained in the following sections b Sensor controls temperature for selecting the temperature c Sensor controls spin speeds for selecting the spin speed d Sensors for extra options You can supplement wash pro grammes with extra options If a wash programme has been se lected the sensor controls for the possible Extras light up dimly e Indicator lights lights up if there are faults af fecting the water inlet and drainage lights up if excess detergent was used lights up as a reminder about hygiene information The Add laundryfunction can not be selected f Sensor controls CapDosing CapDosing of fabric care products eg fabric condi tioner proofing agent CapDosing of additives eg detergent enhancer CapDosing of detergent for the main wash only
  • Page 13 - English - : Operating the washing machine g Time display After the programme has started the programme duration will appear in the display in hours and minutes When Delay start is being used the programme duration will appear after the Delay start time has elapsed h Sensor controls The Delay start time selected will ap pear in the time display After the programme has started the Delay start time will begin to count down Once the Delay start time has elapsed the programme begins and the estimated programme duration appears on the time display After touching the sensor control a later start time for the programme Delay start can be selected Once selected lights up brightly The duration of the Delay start period is increased by touching the sensor control The duration of the Delay start period is reduced by touching the sensor control i StartAdd laundrysensor control The programme can be started as soon as the sensor control is flashing on and off Touching theStartAdd laundry sensor control starts the selected pro gramme The sensor control lights up constantly Once the programme has been started theStartAdd laundry sensor control allows you to add laundry j Optical interface This is used by the Service depart ment as a transmission point k Programme selector for selecting programmes and for switching off the appliance The washing machine is switched on when you select a programme and switched off by turning the pro gramme selector to the position How the control field works The and sensor con trols react to fingertip contact If a sensor control is illuminated it can be selected If a sensor is brightly lit this means currently selected If a sensor is dimly lit this means it can be selected
  • Page 14 - English - : Caring for the environment Disposal of the packing mater ial The packaging is designed to protect the appliance from damage during transportation The packaging materials used are selected from materials which are environmentally friendly for disposal and should be recycled Recycling the packaging reduces the use of raw materials in the manufactur ing process and also reduces the amount of waste in landfill sites Disposing of your old appli ance Electrical and electronic appliances of ten contain valuable materials They also contain specific materials com pounds and components which were essential for their correct function and safety These could be hazardous to hu man health and to the environment if disposed of with your domestic waste or if handled incorrectly Please do not therefore dispose of your old appliance with your household waste Please dispose of it at your local com munity waste collection recycling centre for electrical and electronic ap pliances or contact your dealer or Miele for advice You are also respons ible for deleting any personal data that may be stored on the appliance being disposed of Please ensure that your old appliance poses no risk to children while being stored prior to disposal
  • Page 15 - English - : Before using for the first time Damage resulting from incorrect installation and connection Installing and connecting the wash ing machine incorrectly will cause serious property damage See Installation Removing the open spanner Take out the open spanner for remov ing the transit bars from the bottom left of the transport packaging Removing the protective foil and stickers Remove Any protective film from the door Any stickers from the front and the lid Please do not remove any labels eg the data plate which are visible when you open the door Remove the drain hose elbow from the drum An elbow piece for the drain hose is stored in the drum Pull open the door Remove the elbow piece Shut the door with a gentle swing This washing machine has undergone a complete functional test at the fact ory and there will be some residual water in the drum from this process
  • Page 16 - English - : Before using for the first time Running the first programme For optimum water and energy con sumption and excellent wash results it is important to calibrate the washing machine To do this the Cottonsprogramme must be run without laundry and without detergent Open the stopcock The washing machine is now switched on and in the control field the temper ature 40C lights up The programme will start After 10minutes the indicators dim except for theStartAdd laundry sensor control Opening the door at the end of the programme The door remains locked during the anticrease phase The control field lights up for the first 10minutes The control field then goes out and theStartAdd laundry sensor control flashes Turn the programme selector to the position appears on the timer display and the indicator light goes out The door unlocks Tip After the anticrease phase the washing machine will have switched off and the door unlocked automatically The control field will be completely dark Take hold of the door and pull it open Tip Leave the door slightly open to al low the drum to dry Initial commissioning is now complete
  • Page 17 - English - : Washing environmentally and economically Energy and water consumption To get the most out of your machine load the maximum dry load size for the wash programme you are using This will keep the energy and water consumption to a minimum in relation to the size of the load Programmes that are more efficient with regard to energy and water con sumption generally have a longer run ning time By extending the pro gramme running time the wash tem perature that is actually reached can be reduced while still providing the same wash results For example the ECO 4060programme has a longer running time than the Cottons40C or 60C programme The ECO 4060programme is more effi cient in terms of energy and water consumption but has a longer run ning time Use the Express 20programme for small lightly soiled loads Modern detergents make it possible to wash at lower temperatures eg 20C Using lower temperature set tings will save energy Hygiene in the washing ma chine Washing at low temperatures andor us ing liquid detergents can cause bacteria and odours to build up in the washing machine Miele therefore recommends cleaning the washing machine once every month When the indicator light appears in the control field the washing machine must be cleaned Information about subsequent tumble drying The spin speed selected affects the re sidual moisture in the laundry and the sound emissions of the washing ma chine The higher the spin speed the lower the residual moisture in the laundry However the sound emissions of the washing machine will increase Select the highest possible spin speed for the wash programme to save energy in the subsequent tumble dryer cycle Detergent Do not exceed the amounts of deter gent recommended by the manufac turer on the packaging Adjust the dosage to the degree of soiling of the laundry Reduce the amount of detergent with smaller loads approx ⅓ less than the amount recommended can be used when washing a half load
  • Page 18 - English - : 1 Prepare the laundry Empty all pockets Damage due to foreign objects Nails coins paper clips and so on can cause damage to garments and components in the machine Check the laundry before washing and remove any foreign objects Sort the laundry Sort the laundry by colour and by care label Most garments have a tex tile care label in the collar or side seam Tip Dark textiles often contain excess dye and should be washed separately several times before being included in a mixed load Always wash whites and coloureds separately Pretreating stains Badly soiled areas and stains should be cleaned as soon as possible preferably whilst still fresh Spillages should be carefully dabbed off using a soft colourfast cloth Do not rub Tip Stains eg blood egg coffee tea can be pretreated using some handy tricks which can be found in the Miele guide to laundry care Damage due to solventbased cleaning agents Cleaning agents containing benzine stain remover etc can damage plastic parts When pretreating textiles make sure that any plastic parts eg buttons do not come into contact with clean ing agent Risk of explosion due to solvent based cleaning agents When using solventbased cleaning agents an explosive mixture may develop Never use solventbased cleaning agents in the washing machine General tips Curtains Remove lead weights first or place in a laundry bag Underwiring and collar stiffeners Any loose wiring in bras shirt collar stiffeners etc should be removed or sewn in Close any zips attach velcro fasten ers fasten hooks and eyes etc be fore washing Fasten duvet covers pillow cases etc to prevent small items from being rolled up inside them Do not wash any items in this washing machine which are specified by the manufacturer as not washable on the care label symbol
  • Page 19 - English - : 2 Load the washing machine Open the door Take hold of the door and pull it open Check the drum for pets or foreign objects before loading it with laun dry The most efficient use of energy and water is achieved when a full load is washed However do not overload as this reduces cleaning efficiency and causes creases Unfold the laundry and load loosely into the drum Mixing both large and small items gives better wash results and also helps distribute the load evenly during spinning Tip Please note the maximum load for different wash programmes Close the door Make sure that no items are caught between the door and the seal Shut the door with a gentle swing
  • Page 20 - English - : 3 Select a programme Programme selection The washing machine is switched on by turning the programme selector to a wash programme Turn the programme selector to the required programme The likely wash time is shown in the time display and the preset temperat ure and spin speed light up in the con trol panel Selecting a temperature and spin speed The wash programmes preset tem perature and spin speed light up brightly The choice of available tem peratures and spin speeds for the wash programme light up dimmed The temperatures reached inside the washing machine might not be the same as the temperatures selected Perfect wash results are achieved through a combination of energy use and wash duration Touch the sensor for the desired tem perature It will then light up brightly Touch the sensor for the desired spin speed It will then light up brightly
  • Page 21 - English - : 3 Select a programme Selecting Extras The selection of extras available for the wash programme lights up dimly Touch the sensor for the extra you want It then lights up brightly Tip You can select multiple extras for a wash programme Please refer to Extras for more in formation
  • Page 22 - English - : 4 Add detergent Detergent dispenser drawer Any detergent suitable for automatic front loading washing machines can be used Please observe the instructions for use and dosage on the detergent packaging Adding detergent Pull out the detergent drawer and add detergent to the compartments Detergent for the prewash Detergent for the main wash Fabric softener liquid starch or capsules Adding fabric conditioner Add fabric conditioner or liquid starch to the compartment Do not ex ceed the maximum level mark It will be automatically dispensed in the final rinse At the end of the programme a small amount of water remains in the compartment If starching frequently thoroughly clean the dispenser compartment especially the siphon tube regularly
  • Page 23 - English - : 4 Add detergent Tips on dosing Adjust the detergent dosage to the level of soiling of the laundry and the size of the load Reduce the amount of deter gent with smaller loads eg reduce the amount of detergent by ⅓ when wash ing a half load Too little detergent Results in laundry not being cleaned properly and may cause it to become grey and hard to the touch over time Can lead to a buildup of mould in the washing machine Results in grease not being com pletely removed from the laundry Can lead to limescale deposits on the heater elements Too much detergent Causes poor wash rinse and spin results Causes higher water consumption as an extra rinse cycle is automatically activated Is a greater burden on the environ ment Using liquid detergent with a pre wash Liquid detergent cannot be used for the main wash if the prewash has been se lected Use powder detergent for the main wash Using detergent tablets or pods Always put detergent tablets or pods directly in the drum with the laundry They cannot be added via the detergent dispenser drawer
  • Page 24 - English - : 4 Add detergent CapDosing Three different types of capsule are available Fabric care eg fabric condi tioner proofing agent Additives eg detergent en hancer Detergent for the main wash only Each capsule contains the correct amount for one wash cycle Caps are available to order from Miele or from the Miele online shop see the end of this booklet for contact details Capsules pose a health risk The ingredients of capsules can be hazardous to health if they are swal lowed or come into contact with skin Keep capsules out of the reach of children Activating CapDosing Touch the sensor for the capsule you want to use Sensor control Capsule for for for Inserting a capsule Open the detergent dispenser drawer Open the lid of the compart ment Press the capsule in firmly
  • Page 25 - English - : 4 Add detergent Close the lid and press it firmly shut Close the detergent dispenser drawer The capsule is opened by the act of inserting it in the detergent dispenser drawer The contents can run out of the capsule if you then remove it from the drawer before it is used Dispose of opened capsules The wash programme will dispense the contents of the capsule at the correct time Water intake to the compartment is solely via the capsule Do not add any additional fabric con ditioner to the compartment Remove the empty capsule at the end of the programme For technical reasons a small amount of water will remain in the capsule Switching offchanging Cap Dosing In order to switch off CapDosing touch the brightly lit sensor In order to change CapDosing touch one of the other capsule sensors
  • Page 26 - English - : 5 Start the programme Starting a programme Touch the flashingStartAdd laundry sensor control The door locks and the programme starts If a Delay start time has been selected this counts down on the time display At the end of the Delay start time or imme diately after the programme has started the programme duration appears on the time display Energy savings After 10minutes the indicators dim The sensor controlStartAdd laundry flashes To reactivate the indicators Touch theStartAdd laundry sensor control this does not have any effect on a programme that is running Adding laundry during a pro gramme sequence AddLoad Laundry can be added or removed at any time provided that the symbol is not illuminated on the control field Touch theStartAdd laundry sensor control Rotating bars are shown on the time display If the word appears on the time dis play the door can be opened Open the door and add or remove laundry Close the door Touch theStartAdd laundry sensor control The programme will continue Laundry cannot usually be added or re moved if The suds temperature is above 55C The water inside the drum is above a certain level
  • Page 27 - English - : 6End of programme Opening the door and remov ing the laundry The door remains locked during the anticrease phase The control field lights up for the first 10minutes The control field then goes out and theStartAdd laundry sensor control flashes Turn the programme selector to the position appears on the timer display and the indicator light goes out The door unlocks Tip After the anticrease phase the door will have unlocked automatically Take hold of the door and pull it open Remove the laundry Items left in the drum could discolour other items in the next wash or be come discoloured themselves Remove all items from the drum Check the door seal for any foreign objects Tip Leave the door slightly open to al low the drum to dry If applicable remove the used cap sule from the detergent drawer Tip Leave the detergent drawer slightly open to allow it to dry
  • Page 28 - English - : Spinning Final spin speed in wash pro grammes When a programme is selected the sensor control for the optimum spin speed for that programme will be brightly lit up in the control field A faster spin speed can be selected for certain wash programmes The highest selectable spin speed is in dicated in the table Programme rpm ECO 4060 1400 Cottons 1400 Minimum iron 1200 Delicates 900 Woollens 1200 Shirts 900 Express 20 1200 Dark garmentsDenim 1200 Outerwear 900 Proofing 1200 DrainSpin 1400 Separate rinseStarch 1200 Rinse and interim spin There is a spin after the main wash and between the rinses A reduction in the final spin speed will also reduce the in terim spin speed If a spin speed of less than 700 rpm is selected for the Cot tons programme an additional rinse is introduced Selecting Rinse hold final spin Touch the sensor control Rinse hold The laundry is not spun after the final rinse and remains in the rinse water This helps to prevent creasing if the laundry is not going to be removed from the drum immediately after the end of the programme Ending a programme with a spin cycle The sensor control for the optimum spin speed lights up on the control field You can change the spin speed Touch theStartAdd laundry sensor control Ending a programme without a spin cycle Reduce the spin speed to 0 Touch theStartAdd laundry sensor control To omit rinse and interim spin and the final spin Touch the sensor After the last rinse the water will be pumped away and the anticrease phase will switch in In some programmes an additional rinse is introduced with this setting
  • Page 29 - English - : Delay start With Delay start you can choose when you want the programme to start You can delay the start of the programme by 30minutes up to a maximum of 24 hours allowing you to make use of nighttime economy electricity rates for example Selecting Delay start Delay start is not possible in the Drain Spin and Proofingprogrammes Select the programme required Touch the sensor control The sensor control lights up brightly Touch the or sensor control re peatedly until the required Delay start time appears on the time display In the case of settings below 10hours the Delay start time changes in increments of 30minutes In the case of settings above 10hours the Delay start time changes in increments of 1hour Starting Delay start Touch the flashingStartAdd laundry sensor control The Delay start process starts and counts down on the time display Changing or cancelling a started Delay start If the selected Delay start function has started it is no longer possible to change the time Turn the programme selector to the position Turn the programme selector to any programme Rotating bars or are shown on the time display The door lock is released Select a programme and a new Delay start time
  • Page 30 - English - : Programme chart ECO 4060 Max load 80kg Items For normally soiled cotton garments Tip A laundry load consisting of mixed cottons that are intended for washing at 40C or 60C can be washed in the same wash cycle This programme is the most efficient in terms of energy and water consumption for washing cottons Note for test institutes Test programme for compliance with EU legislation regarding ecodesign No 20192023 and energy labelling in accordance with Regulation No 20192014 Cottons 90C to cold Max load 80kg Items Cotton linen or mixed fibre fabric eg table linen underwear T shirts etc Tip Where particularly high levels of hygiene are required please select a temperature of 60C or higher Minimum iron Cold to 60C Max load 35kg Items Synthetic and mixed fibre textiles as well as easy care cotton Tip Reduce the spin speed for fabric that creases easily
  • Page 31 - English - : Programme chart Delicates Cold to 40C Max load 20kg Items Delicate garments made from synthetic fibre mixed fibre and vis cose Performance outerwear eg jackets and trousers made from mem brane fabric such as GoreTex SYMPATEX WINDSTOPPER etc Curtains specified as machinewashable by the manufacturer Tip On outdoor clothing fasten zips or close Velcro fasteners and do not use fabric conditioner If required these items can also be reproofed using the Proof ingprogramme Proofing after each wash cycle is not recommen ded Dust in curtains usually means that a programme with Prewash is advisable Deselect the spin speed for items which crease easily Woollens Cold to 40C Max load 20kg Items Wool or wool blend fabric Tip Reduce the spin speed for fabric that creases easily Shirts Cold to 60C Max load 10kg20kg Items Shirts and blouses made of cotton and mixed fibre Tip Pretreat collars and cuffs depending on the level of soiling Wash silk shirts and blouses in the Delicatesprogramme If the preset Preironingextra is switched off the maximum load capacity is increased to 20kg
  • Page 32 - English - : Programme chart Express 20 Cold to 40C Max load 35kg Items Cotton garments that have hardly been worn or are only very lightly soiled Tip The Shortextra option is activated automatically Dark garmentsDenim Cold to 60C Max load 30kg Items Black and dark items made of cotton mixed fibre or denim Tip Wash inside out Denim often contains excess dye and may run during the first few washes Therefore wash light and coloured items separately Outerwear Cold to 40C Max load 25kg Items Performance outerwear eg jackets and trousers made from mem brane fabric such as GoreTex SYMPATEX WINDSTOPPER etc Tip Zip up or close any jackets with Velcro before washing Do not use fabric conditioner If required these items can also be reproofed using the Proof ingprogramme Proofing after each wash cycle is not recommen ded Proofing 40C Max load 25kg Items Treating microfibre fabric ski wear or table linen made from mainly synthetic fibres to provide a finish which is resistant to water and dirt Tip The items must be freshly laundered and spun or dried before proofing For best results the items should be heattreated afterwards This can be achieved by drying them in the tumble dryer or ironing them
  • Page 33 - English - : Programme chart DrainSpin Tip Drain only Set spin speed to Make sure you select the appropriate spin speed Separate rinseStarch Max load 80kg Items Rinsing handwashed items Table cloths serviettes and workwear requiring starching Tip Reduce the spin speed for fabric that creases easily Laundry that is to be starched should be washed but not treated with fabric conditioner Items will be rinsed very effectively with 2 rinses by activating the Water extra
  • Page 34 - English - : Extra options You can use the extra options buttons to augment the wash programmes Extras are selected and deselected us ing the relevant sensors on the control panel Touch the sensor for the extra you want The relevant sensor will light up brightly Not all the extra options are suitable for use with every programme An extra that is not permitted for the wash programme is not lit dimly and cannot be activated by touch Short For textiles with light soiling with no vis ible staining The wash duration is reduced Water The water level in the main wash and the rinses will be increased A second rinse cycle is carried out in the Separate rinseStarchprogramme You can select other functions for the Water sensor control These are de scribed under Programmable func tions Prewash For laundry with large amounts of dirt eg dust and sand Preironing In order to reduce creasing the laundry undergoes a smoothing process at the end of the programme Reducing the maximum load by 50 will achieve a better result Small loads achieve a bet ter result The garments must be suitable for dry ing in a tumble dryer and suitable for ironing
  • Page 35 - English - : Extra options The following extras can be selected in addition to the pro grammes Short Water Prewash Preironing ECO 4060 Cottons Minimum iron Delicates Woollens Shirts Express 20 Dark garmentsDenim Outerwear Proofing Separate rinseStarch can be selected activated automatically cannot be selected
  • Page 36 - English - : Programme sequence Main wash Rinses Spinning Water level Wash rhythm Water level Rinses ECO 4060 23 Cottons 25 123 Minimum iron 24 23 Delicates 24 23 Woollens 2 Shirts 34 Express 20 1 Dark garmentsDenim 35 23 Outerwear 34 Proofing 1 DrainSpin Separate rinseStarch 01 Please see the next page for a description of the symbols
  • Page 37 - English - : Programme sequence low water level medium water level high water level intensive rhythm normal rhythm sensitive rhythm handwash rhythm carried out not carried out This washing machine has fully elec tronic controls with automatic load con trol The washing machine takes in the right amount of water required for the programme depending on the amount of laundry and its absorbency rate The programme sequences outlined in the chart are based on the basic pro gramme with a full load Special features in the pro gramme sequence Anticrease At the end of the programme the drum continues to turn at intervals for up to 30minutes to help prevent creasing Exception there is no anticrease phase in the Woollensprogramme The washing machine can be opened at any time 1 If a temperature of 60C or higher is selected two rinses are carried out If a temperature of less than 60C is selected three rinses are carried out An additional rinse is carried out if there is too much foam in the drum a spin speed lower than 700rpm has been selected An additional rinse is carried out if the Water extra option has been se lected and the optionsor have been activated in Programmable functions An additional rinse is carried out if theWater extra option has been se lected
  • Page 38 - English - : Changing the programme sequence Changing a programme safety lock A programme temperature spin speed or selected options cannot be changed once the machine has been success fully started This prevents the machine being operated unintentionally eg by children If the washing machine is switched off during active programme operation the standby function does not switch the washing machine off completely after 15minutes Safety functions continue to be active because there may still be water inside the drum Cancelling a programme You can cancel a programme at any time after it has started Turn the programme selector to the position Turn the programme selector to any position Rotating bars or are shown on the time display The water is pumped away and the door lock is then released Selecting a new programme Turn the programme selector to the required programme Check that there is still detergent in the detergent drawer Add more de tergent if there is none left Touch theStartAdd laundry sensor control
  • Page 39 - English - : Garment care label symbols Washing The figure quoted in the bucket is the maximum temperature at which the garment can be washed Normal agitation Reduced agitation Much reduced agitation Hand wash Do not wash Programme selection examples Programme Garment care label symbols Cottons Minimum iron Delicates Woollens Express 20 Drying Normal temperature Low temperature Do not tumble dry Ironing Approx 200C Approx 150C Approx 110C Ironing with steam can cause ir reversible damage Ironingrotary ironing prohibited Professional cleaning Dry clean only The letters indic ate the type of cleaning agent required Wet cleaning Dry cleaning prohibited Bleaching Any oxidation bleach can be used Use oxygen bleach only Do not bleach
  • Page 40 - English - : Detergent The correct detergent All detergents produced for automatic washing machines are suitable Follow the manufacturers instructions and dosage recommendations on the pack aging For users in Asia please use a low foaming detergent suitable for use in frontloading ma chines The right amount to dispense will depend on the following the soiling level of the load the quantity of the laundry the water hardness level Check with your local water supplier if you do not know the hardness level in your area Water softeners A water softener can be used to cut down on the use of detergents in areas with water hardness levels II and III Dispense according to the amount spe cified on the packaging First add deter gent and then the water softener You can then use the recommended amount of detergent for water hardness level I Water hardness levels Hardness scale Hardness level in mmoll German scale d I soft 0 15 0 84 II medium 15 25 84 14 III hard above 25 above 14 Dispensing aids Use dispensing aids eg balls if these are supplied with the detergent particu larly when using liquid detergent Refill packs of detergent When purchasing detergent buy refill packs wherever possible This helps re duce the amount of waste packaging Fabric conditioner and liquid starch Fabric conditioner makes garments soft to handle and helps prevent static cling when tumble drying Starch stiffens and gives body to items of laun dry eg shirts tablecloths and bed linen
  • Page 41 - English - : Detergent Using fabric conditioner or starch separately Prepare the starch in accordance with the manufacturers instructions on the packaging Tip When adding fabric conditioner activate the Water extra Add fabric conditioner to the com partment or insert the appropriate capsule Add liquid starch to the compart ment and powder or viscous starch to the compartment Select the Separate rinseStarch pro gramme Change the spin speed if necessary Activate the Cap sensor control if using a capsule Touch theStartAdd laundry sensor control Colour run and dye removers dyes Damage due to colour rundye removers Colour run and dye removers can cause corrosion in the washing ma chine Do not use colour run or dye re movers in this washing machine Dyes suitable for use in domestic wash ing machines can be used However please note that the salt used in the dyeing process can cause corrosion to stainless steel components in the ma chine if you use dye frequently Always follow the dye manufacturers instruc tions carefully
  • Page 42 - English - : Detergent Recommended Miele detergents Miele detergents have been specially designed for daytoday use in Miele wash ing machines See Detergents and care products for more information about these detergents Miele detergents Miele capsules UltraWhite UltraColor ECO 4060 Cottons Minimum iron Delicates Woollens Shirts Express 20 Dark garmentsDenim Outerwear Proofing Separate rinseStarch Recommendation Specialist detergents eg WoolCare No recommendation Fabric care eg fabric conditioner Additive eg booster
  • Page 43 - English - : Detergent Recommended detergents in accordance with Directive EU Nr 10152010 The recommendations apply to the temperature ranges given in the Programme chart Universal Coloureds Delicates and woollens Specialist detergent ECO 4060 Cottons Minimum iron Delicates Woollens Shirts Express 20 Dark garmentsDenim Outerwear Recommendation Liquid detergent No recommenda tion Powder detergent
  • Page 44 - English - : Cleaning and care Cleaning the external casing and the control panel Risk of electric shock Mains voltage is present when the washing machine is switched off Disconnect the machine from the electricity supply before cleaning or maintenance Risk of damage due to ingress of water The pressure of a water jet can cause water to get into the washing machine resulting in damage to components Do not spray the washing machine with a water jet Clean the casing and control panel with a mild cleaning agent or soap and water and dry both with a soft cloth The drum can be cleaned using a suitable stainless steel cleaning agent following the manufacturers instruc tions on the packaging Damage caused by cleaning agents Solvent based cleaning agents ab rasive cleaners glass cleaners or multipurpose cleaning agents can cause damage to plastic surfaces and other parts Do not use any of these cleaning agents Cleaning the detergent dis penser drawer Washing at low temperatures and the use of liquid detergent can lead to a buildup of mould and bacteria in the detergent dispenser drawer For hygiene reasons clean the entire drawer at regular intervals Removing the dispenser drawer Pull out the detergent dispenser drawer until a resistance is felt Press down the release button and at the same time pull the drawer right out of the machine Clean the detergent drawer with warm water
  • Page 45 - English - : Cleaning and care Cleaning the siphon and the compartment channel Liquid starch results in clogging If clogged the siphon in the compartment will not work and the compartment can overflow Clean the siphon particularly thor oughly after using liquid starch a few times 1 Remove the siphon from com partment and clean under warm run ning water Clean the siphon tube in the same way 2 Replace the siphon Clean the fabric conditioner channel using a brush and warm water Cleaning the detergent dispenser drawer compartment Use a bottle brush to remove deter gent residues and limescale from the jets inside the detergent dispenser drawer compartment Replace the detergent dispenser drawer Tip Leave the detergent dispenser drawer slightly open to allow it to dry
  • Page 46 - English - : Cleaning and care Hygiene info Cleaning the drum Washing at low temperatures andor us ing liquid detergent can cause bacteria and unpleasant odours to build up in the washing machine Use the Cot tons90Cprogramme to clean the washing machine Clean the drum when the indicator light comes on at the latest Cleaning the water inlet filter The washing machine has 2 filters to protect the inlet valve Check these fil ters every 6 months or so Perform this check more often if there are frequent interruptions to the external water sup ply Cleaning the filter in the inlet hose First turn off the stopcock Unscrew the inlet hose from the stop cock Remove the rubber seal 1 from the recess Using pointed pliers take hold of the plastic filter slat 2 and remove the plastic filter Clean the filter Reassemble in reverse order Cleaning the filter in the inlet valve Using pliers carefully loosen the ribbed plastic nut on the inlet valve and unscrew it Use pointed pliers to withdraw the plastic filter by the slat Clean the filter Reassemble in reverse order The two filters must be put back in place after cleaning Screw the screw connection securely back onto the stopcock Open the stopcock Make sure there is no water leaking from the threaded union Tighten the threaded union
  • Page 47 - English - : Problem solving guide Many malfunctions and faults that can occur in daily operation can be easily remedied Time and money will be saved because a service call will not be needed The following guide may help you to find the reason for a malfunction or a fault and to correct it The programme does not start Problem Cause and remedy The control panel re mains dark There is no power to the machine Check whether the mains plug is plugged in and switched on Check whether the fuse or circuit breaker has tripped The washing machine has switched off automatically to save energy Switch the washing machine on again by turning the programme selector and alternately ap pear in the time display The door is not closed properly The door lock could not engage Close the door again Start the programme again If the fault message appears again contact the Service Department
  • Page 48 - English - : Problem solving guide The programme is cancelled and a fault indicator light lights up in the control panel Problem Cause and remedy The fault indicator light lights up and ap pear alternately in the time display and the buzzer sounds The water outlet is blocked or restricted The drain hose has been fixed too high Clean the drain filter and the drain pump The maximum delivery head is 1m The fault indicator light lights up and ap pear alternately in the time display and the buzzer sounds The water inlet is blocked or restricted Check whether the stopcock is opened properly Check whether the inlet hose is kinked Check whether the water pressure is too low The filter in the water inlet is blocked Clean the filter The fault indicator light lights up and appear alternately in the time display and the buzzer sounds The water protection system has reacted Close the stopcock Call the Service Department and appear altern ately on the time display and the buzzer sounds There is a fault Disconnect the washing machine from the electri city supply Switch off at the wall and withdraw the plug from the socket or disconnect the fuse Wait at least 2minutes before reconnecting the washing machine to the electricity supply Switch the washing machine on again Restart the programme If the fault message appears again contact the Miele Customer Service Department
  • Page 49 - English - : Problem solving guide During the programme a symbol appears in the time display Message Cause and remedy lights up The programme selector was moved to a different position after the programme had started Turn the programme selector back to the original position At the end of the programme an indicator light lights up in the control panel Problem Cause and remedy The indicator light lights up Excessive foam has built up during washing Use less detergent next time and follow the man ufacturers recommended dosage amounts on the packaging The indicator light lights up When washing a wash programme using a temperat ure above 60C has not been run for a long time Run the Cottons90C programme using Miele machine cleaner or a universal powder detergent This will clean the washing machine and prevent a buildup of bacteria and odours and appear altern ately on the time dis play The Preironingextra which runs at the end of the programme could not be carried out properly Check whether the washing machine is aligned correctly see Installation Levelling the ma chine Check whether the maximum drainage head height of 1m has been exceeded If the fault message appears again contact the Miele Customer Service Department The washing machine can still be used but without the Preironing extra
  • Page 50 - English - : Problem solving guide General problems with the washing machine Problem Cause and remedy The washing machine smells The indicator light was ignored A wash pro gramme using a temperature above 60C has not been run for a long time In order to prevent bacteria and unpleasant odours building up in the washing machine run the Cot tons 90C programme using Miele machine cleaner or a universal powder detergent The door and the detergent dispenser drawer were left shut after washing Leave the door and the detergent dispenser drawer slightly open to allow them to dry The machine shakes during the spin cycle The machine feet are not level Level the machine and adjust the feet correctly The laundry has not been spun properly and is still wet The machine detected an imbalance during the final spin cycle and reduced the spin speed automatically Include both large and small items in the load as this will give better distribution during spinning Strange pump noises can be heard This is not a fault These slurping noises occur at the end of the pump sequence as a normal part of operation Large amounts of deter gent residue remain in the detergent dispenser drawer The water pressure is too low Clean the water inlet filter It may be useful to select the Water extra option Powder detergent used in conjunction with water softeners tends to become sticky In future add washing powder into the dispenser drawer first and then add the water softener