Loading ...
Loading ...
Loading ...
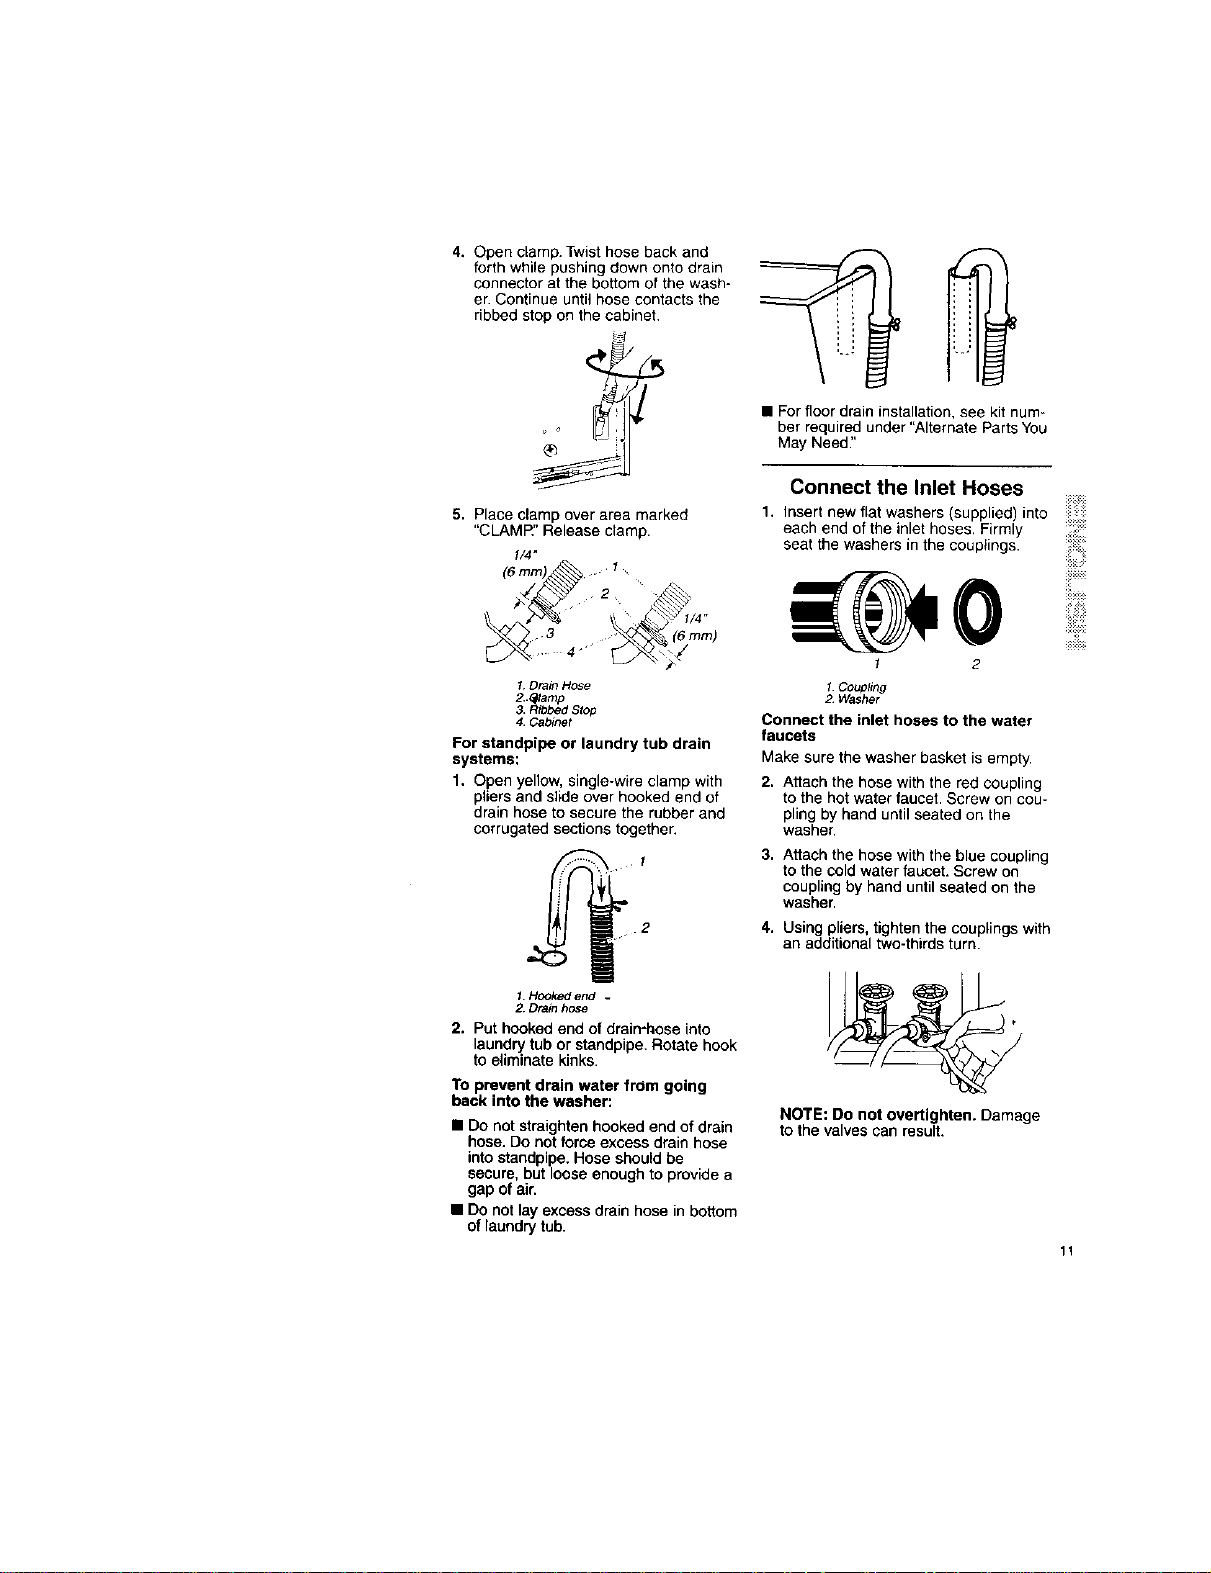
4.Openclamp.Twisthosebackand
forthwhilepushingclownontodrain
connectoratthebottomofthewash-
er.Continueuntilhosecontactsthe
ribbedstoponthecabinet
o o
®
5. Place clamp over area marked
"CLAMR" Release clamp.
1/4"
(6 ram)
I, Drain Hose
2..(_lamp
Ribbed Stop
4. Cabinet
For standpipe or laundry tub drain
systems:
1. Open yellow, single-wire clamp with
pliers and slide over hooked end of
drain hose to secure the rubber and
corrugated sections together.
2
1.Hookedend -
2. Drainhose
2. Put hooked end of drain4_oce into
laundry tub or standpipe. Rotate hook
to eliminate kinks.
To prevent drain water from going
back into the washer:
• Do not straighten hooked end of drain
hose. Do not force excess drain hose
into standpipe. Hose should be
secure, but loose enough to provide a
gap of air.
• Do not lay excess drain hose in bottom
of laundry tub.
• For floor drain installation, see kit num-
ber required under "Alternate Parts You
May Need."
Connect the Inlet Hoses
1. Insert new flat washers (supplied) into !
each end of the inlet hoses. Firmly _::::_::
seat the washers in the couplings.
::::::
I 2
I Couphng
2 Washer
Connect the inlet hoses to the water
faucets
Make sure the washer basket is empty.
2. Attach the hose with the red coupling
to the hot water faucet. Screw on cou-
pling by hand until seated on the
washer.
3. Attach the hose with the blue coupling
to the cold water faucet. Screw on
coupling by hand until seated on the
washer.
4. Using pliers, tighten the couplings with
an additional two-thirds turn.
NOTE: Do not overtighten. Damage
to the valves can result,
Loading ...
Loading ...
Loading ...