Loading ...
Loading ...
Loading ...

5
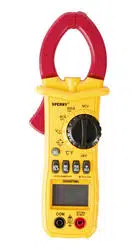
3-3. Accessories
• 1 red & 1 black 1000V, 20A test lead
• 1 K-type thermocouple (Temperature probe)
• 3 AAA batteries
• Carrying case
4. PREPARATION FOR MEASUREMENT
4-1. Check the condition of the meter
Do not use a meter with visible signs of damage. Examine the meter housing before you use the product. Look for
cracks, missing plastic or exposed metal. Carefully examine the insulation around the Common and Input terminals.
4-2. Check the battery voltage
Start with the dial in the “OFF” position then rotate the dial to any position. Confirm that the low battery symbol
is not displayed on the LCD screen. If the low battery symbol is displayed follow the instructions in Section 7,
Battery Replacement. (It is important to start from the "Off" position to ensure that a blank screen is not due to the
auto off feature.)
4-3. Check the battery cover
The battery cover must be in place and securely fastened before powering on the meter or connecting test leads
to a circuit. See Section 7, Battery Replacement
4-4. Check test lead condition, continuity and rating
Do not use damaged test leads. Examine the test leads for worn or cracked insulation. Check test lead continuity.
Do not use test leads in applications that exceed their CAT rating. Check the CAT rating of the test lead and
refer to Figure 3.
4-5. Checking the switch setting & operation
Confirm the dial is set to the correct position for the measurement function being performed. Confirm that the
symbols displayed on the LED screen match the measurement function. (Refer to Figure 2). Ensure that the
Data Hold feature is disabled.
5. MEASUREMENT
5-1. Temperature
1. Remove the test leads
2. Connect the supplied K-type thermocouple (Temperature probe) to the common and input terminals.
Ensure that the red positive (+) side is connected to the input terminal.
3. Rotate the dial to the °C °F position
4. Contact the sensor (metal part) of K-type temperature probe to the object under test.
5. The temperature of the object will be displayed on the LCD screen
6. Press the SEL button to toggle between Celsius and Fahrenheit
3-2. General Specification
• The maximum voltage allowed between terminal and ground: 1000 VDC or 750 VAC
• Altitude: Maximum 2000m
• Display: 5999 count Backlit LCD
• Sampling time: ~ 3 times / sec
• Automatic power off: 15 Minutes (Unless disabled)
• Power: DC 4.5V
• Battery type: (3) 1.5V AAA
• Temperature coefficient: <.1 x (specified accuracy) / °C
• Operating temperature: 18˚C ~ 28˚C
• Storage temperature: -10˚C ~ 50˚C
• Size: 2.75” x 8.25” x 1.55”
• Weight: ~266 grams (Including batteries, excluding leads)
Loading ...
Loading ...
Loading ...