Loading ...
Loading ...
Loading ...
Device Care
NOTICE
Avoid extreme shock and harsh treatment, because it can degrade the life of the product.
Avoid pressing the keys under water.
Do not use a sharp object to clean the device.
Never use a hard or sharp object to operate the touchscreen, or damage may result.
Avoid chemical cleaners, solvents, and insect repellents that can damage plastic components and finishes.
Thoroughly rinse the device with fresh water after exposure to chlorine, salt water, sunscreen, cosmetics,
alcohol, or other harsh chemicals. Prolonged exposure to these substances can damage the case.
Keep the leather band clean and dry. Avoid swimming or showering with the leather band. Exposure to water or
sweat can damage or discolor the leather band. Use silicone bands as an alternative.
Do not store the device where prolonged exposure to extreme temperatures can occur, because it can cause
permanent damage.
Cleaning the Watch
CAUTION
Some users may experience skin irritation after prolonged use of the watch, especially if the user has sensitive
skin or allergies. If you notice any skin irritation, remove the watch and give your skin time to heal. To help
prevent skin irritation, ensure the watch is clean and dry, and do not overtighten the watch on your wrist.
NOTICE
Even small amounts of sweat or moisture can cause corrosion of the electrical contacts when connected to a
charger. Corrosion can prevent charging and data transfer.
1 Wipe the watch using a cloth dampened with a mild detergent solution.
2 Wipe it dry.
After cleaning, allow the watch to dry completely.
TIP: For more information, go to www.garmin.com/fitandcare.
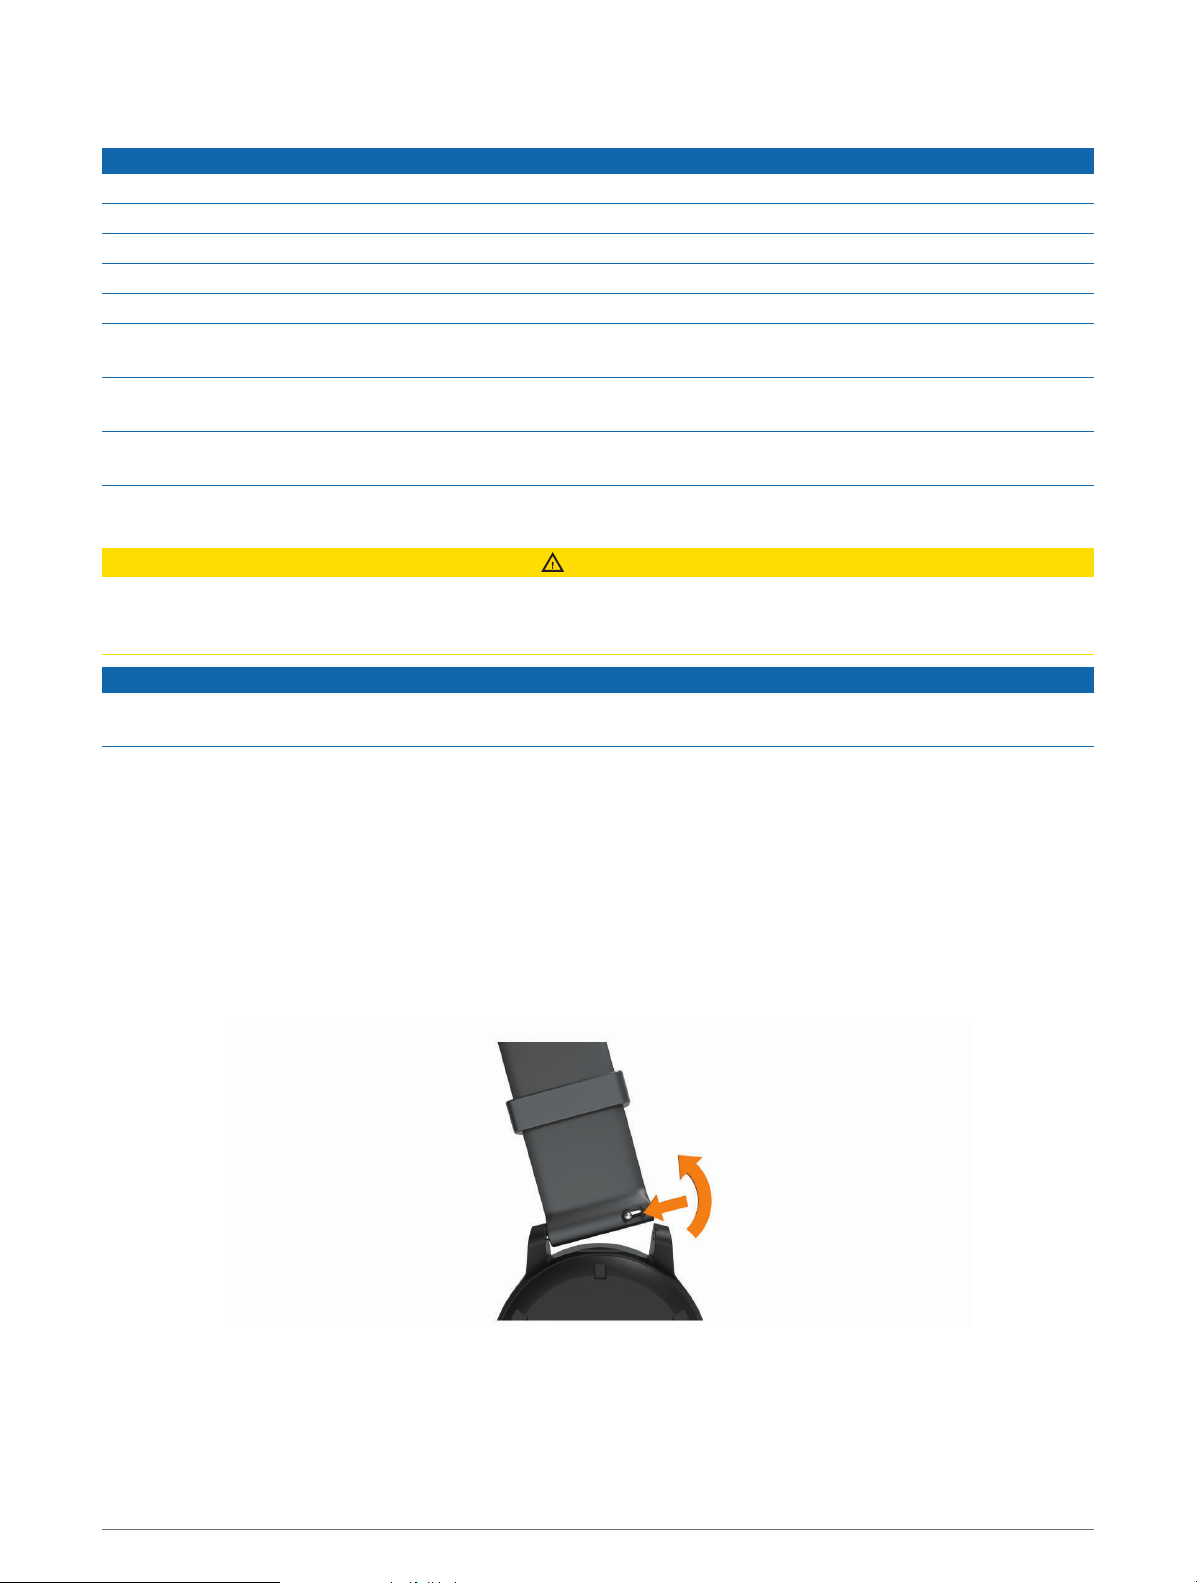
Changing the Bands
The watch is compatible with standard quick-release bands. Venu 2S has 18 mm wide bands, and Venu 2 has
22 mm wide bands.
1 Slide the quick-release pin on the spring bar to remove the band.
2 Insert one side of the spring bar for the new band into the watch.
3 Slide the quick-release pin, and align the spring bar with the opposite side of the watch.
4 Repeat steps 1 through 3 to change the other band.
Device Information 53
Loading ...
Loading ...
Loading ...