Loading ...
Loading ...
Loading ...
First Steps
(continued)
Figure 1
Copper water line from
household water supply.
Figure 2
u
Brass nut
!
Ferrule 0
0
0
0
0
0
Figure 3
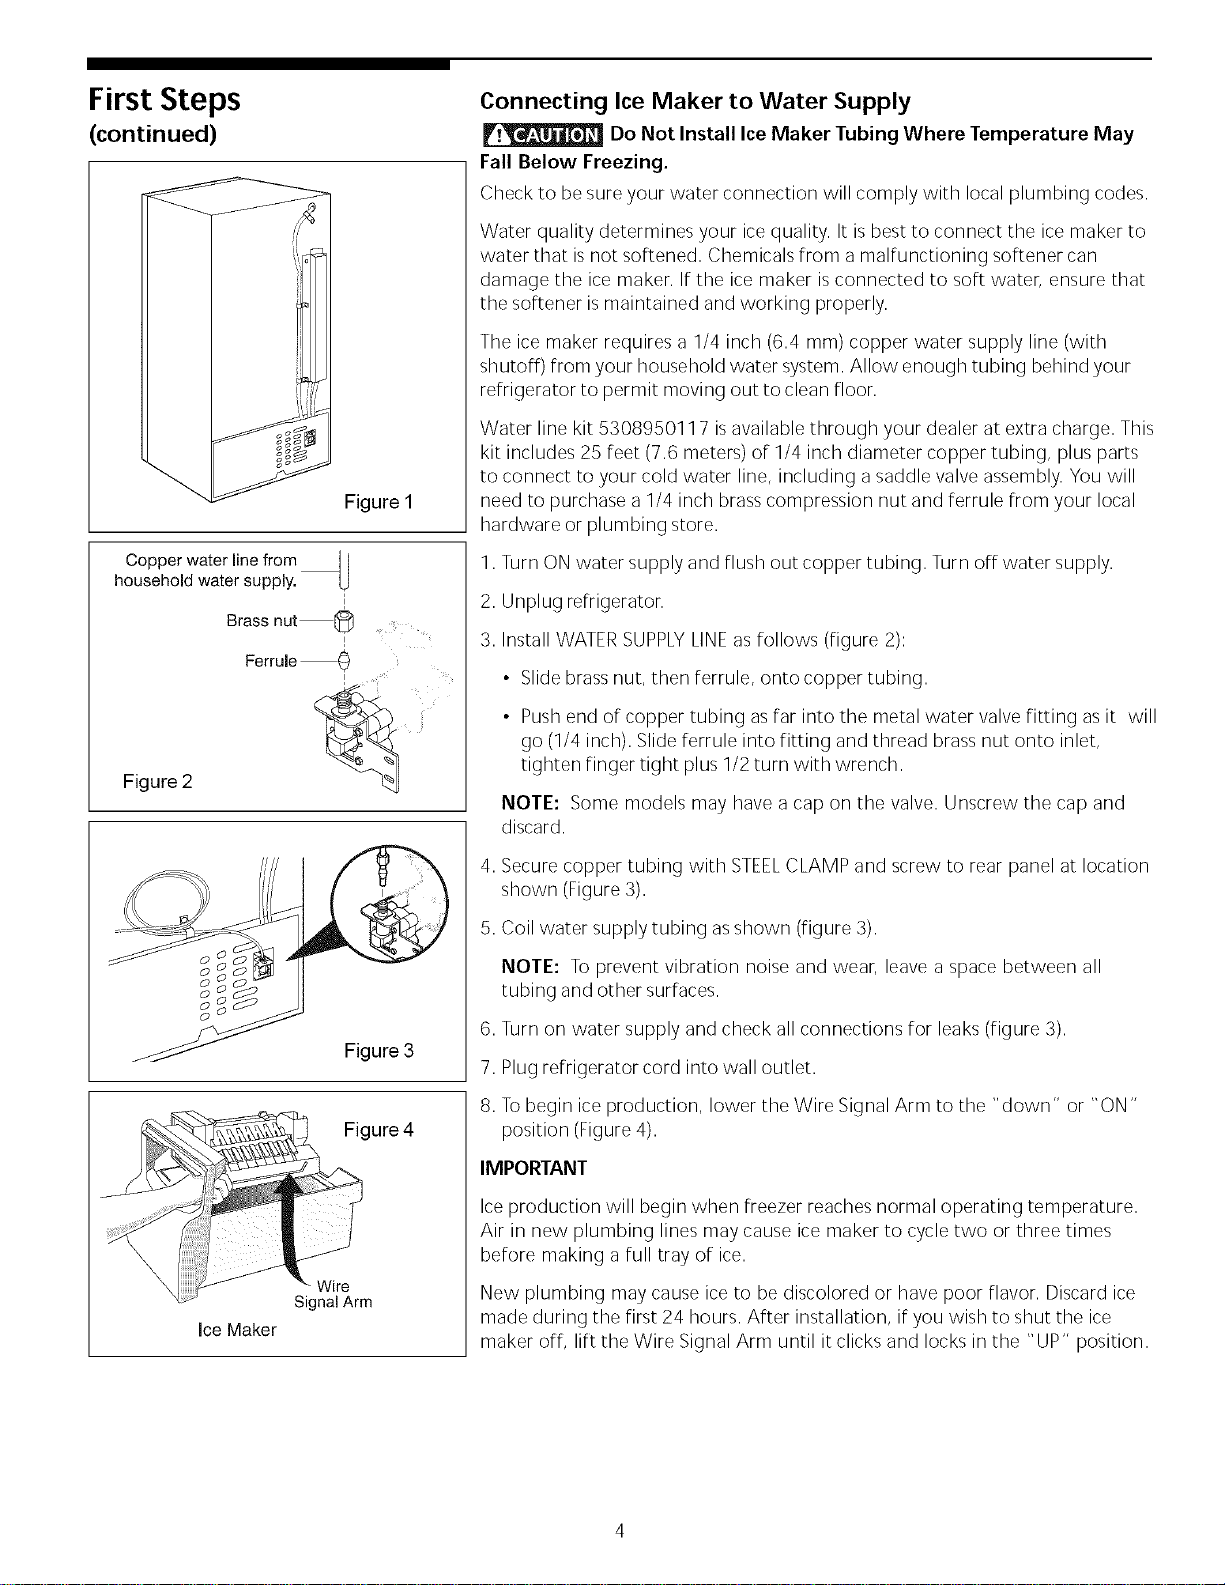
Figure 4
Wire
Signal Arm
Ice Maker
Connecting Ice Maker to Water Supply
Do Not Install Ice Maker Tubing Where Temperature May
Fall Below Freezing.
Check to be sure your water connection will comply with local plumbing codes.
Water quality determines your ice quality. It is best to connect the ice maker to
water that is not softened. Chemicals from amalfunctioning softener can
damage the ice maker. If the ice maker is connected to soft water, ensure that
the softener is maintained and working properly.
The ice maker requires a 1/4 inch (6.4 mm) copper water supply line (with
shutoff) from your household water system. Allow enough tubing behind your
refrigerator to permit moving out to clean floor.
Water line kit 530895011 7 isavailable through your dealer at extra charge. This
kit includes 25 feet (7.6 meters) of 1/4 inch diameter copper tubing, plus parts
to connect to your cold water line, including a saddle valve assembly. You will
need to purchase a 1/4 inch brass compression nut and ferrule from your local
hardware or plumbing store.
1. Turn ON water supply and flush out copper tubing. Turn off water supply.
2. Unplug refrigerator.
3. Install WATERSUPPLYLINEas follows (figure 2):
• Slide brass nut, then ferrule, onto copper tubing.
• Push end of copper tubing asfar into the metal water valve fitting asit will
go (1/4 inch). Slide ferrule into fitting and thread brassnut onto inlet,
tighten finger tight plus 1/2 turn with wrench.
NOTE: Some models may have a cap on the valve. Unscrew the cap and
discard.
4. Secure copper tubing with STEELCLAMP and screw to rear panel at location
shown (Figure 3).
5. Coil water supply tubing asshown (figure 3).
NOTE: To prevent vibration noise and wear, leave a space between all
tubing and other surfaces.
6. Turn on water supply and check all connections for leaks (figure 3).
7. Plug refrigerator cord into wall outlet.
8. Tobegin ice production, lower the Wire Signal Arm to the "down" or "ON"
position (Figure4).
IMPORTANT
Ice production will begin when freezer reaches normal operating temperature.
Air in new plumbing lines may cause ice maker to cycle two or three times
before making a full tray of ice.
New plumbing may cause ice to be discolored or have poor flavor. Discard ice
made during the first 24 hours. After installation, if you wish to shut the ice
maker off, lift the Wire Signal Arm until it clicks and locks in the "UP" position.
Loading ...
Loading ...
Loading ...