
Loading ...
Loading ...
Loading ...
19
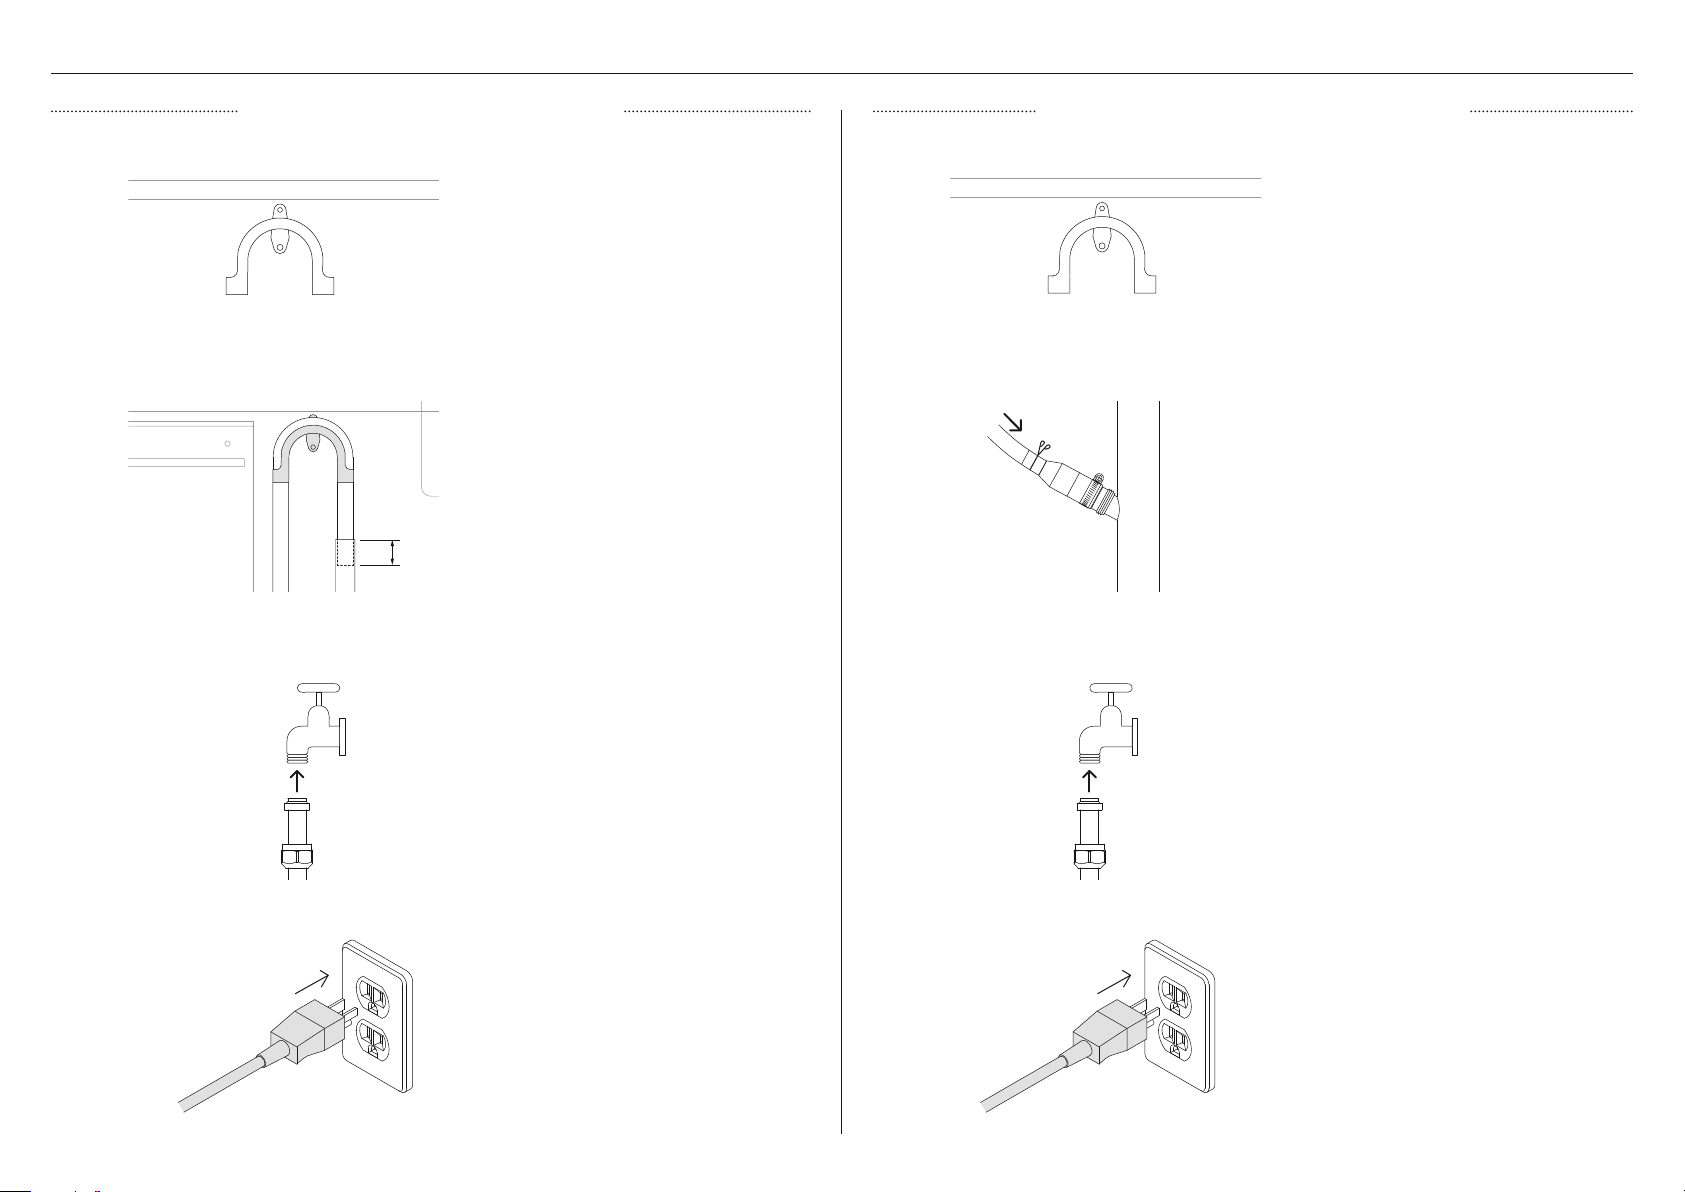
PLUMBING & ELECTRICAL CONNECTION
Install the drain hose support to the
back wall, as close to the underside
of the benchtop as possible. Refer to
'Plumbing & electrical considerations' for
minimum install heights.
Install the drain hose support to the
back wall, as close to the underside
of the benchtop as possible. Refer to
'Plumbing & electrical considerations' for
minimum install heights.
Pull both hoses through the support
guide and rest in standpipe.
Ensure the hoses do not extend any
further than 4 3/4" (120mm) into the
standpipe to prevent waste water from
siphoning back into the tub.
Thread wire clip on to the hose before
pulling the hose through the support
guide and fitting to the supplied hose
joiner. Secure using the wire clip.
Ensure hose is routed straight to the
joiner, removing excess drain hose if
necessary. Do not shorted the inlet hose.
Unplug or drill out the waste tee before
securing joiner to sink trap or waste tee.
Plug product in. Plug product in.
Ø38MM STANDPIPE INSTALLATION SINK TRAP/WASTE TEE INSTALLATION
1 1
2 2
3 3
4 4
Connect the inlet hose to tap and hand-
tighten into place.
Using a spanner or pliers, turn a further
180° to secure. Avoiding over-tightening.
Do not turn water supply on. The
DishDrawer™ Dishwasher must be
powered on for the flood protection
feature to be enabled.
Connect the inlet hose to tap and hand-
tighten into place.
Using a spanner or pliers, turn a further
180° to secure. Avoiding over-tightening.
Do not turn water supply on. The
DishDrawer™ Dishwasher must be
powered on for the flood protection
feature to be enabled.
4 3/4"
(120mm)
Loading ...
Loading ...
Loading ...