Loading ...
Loading ...
Loading ...
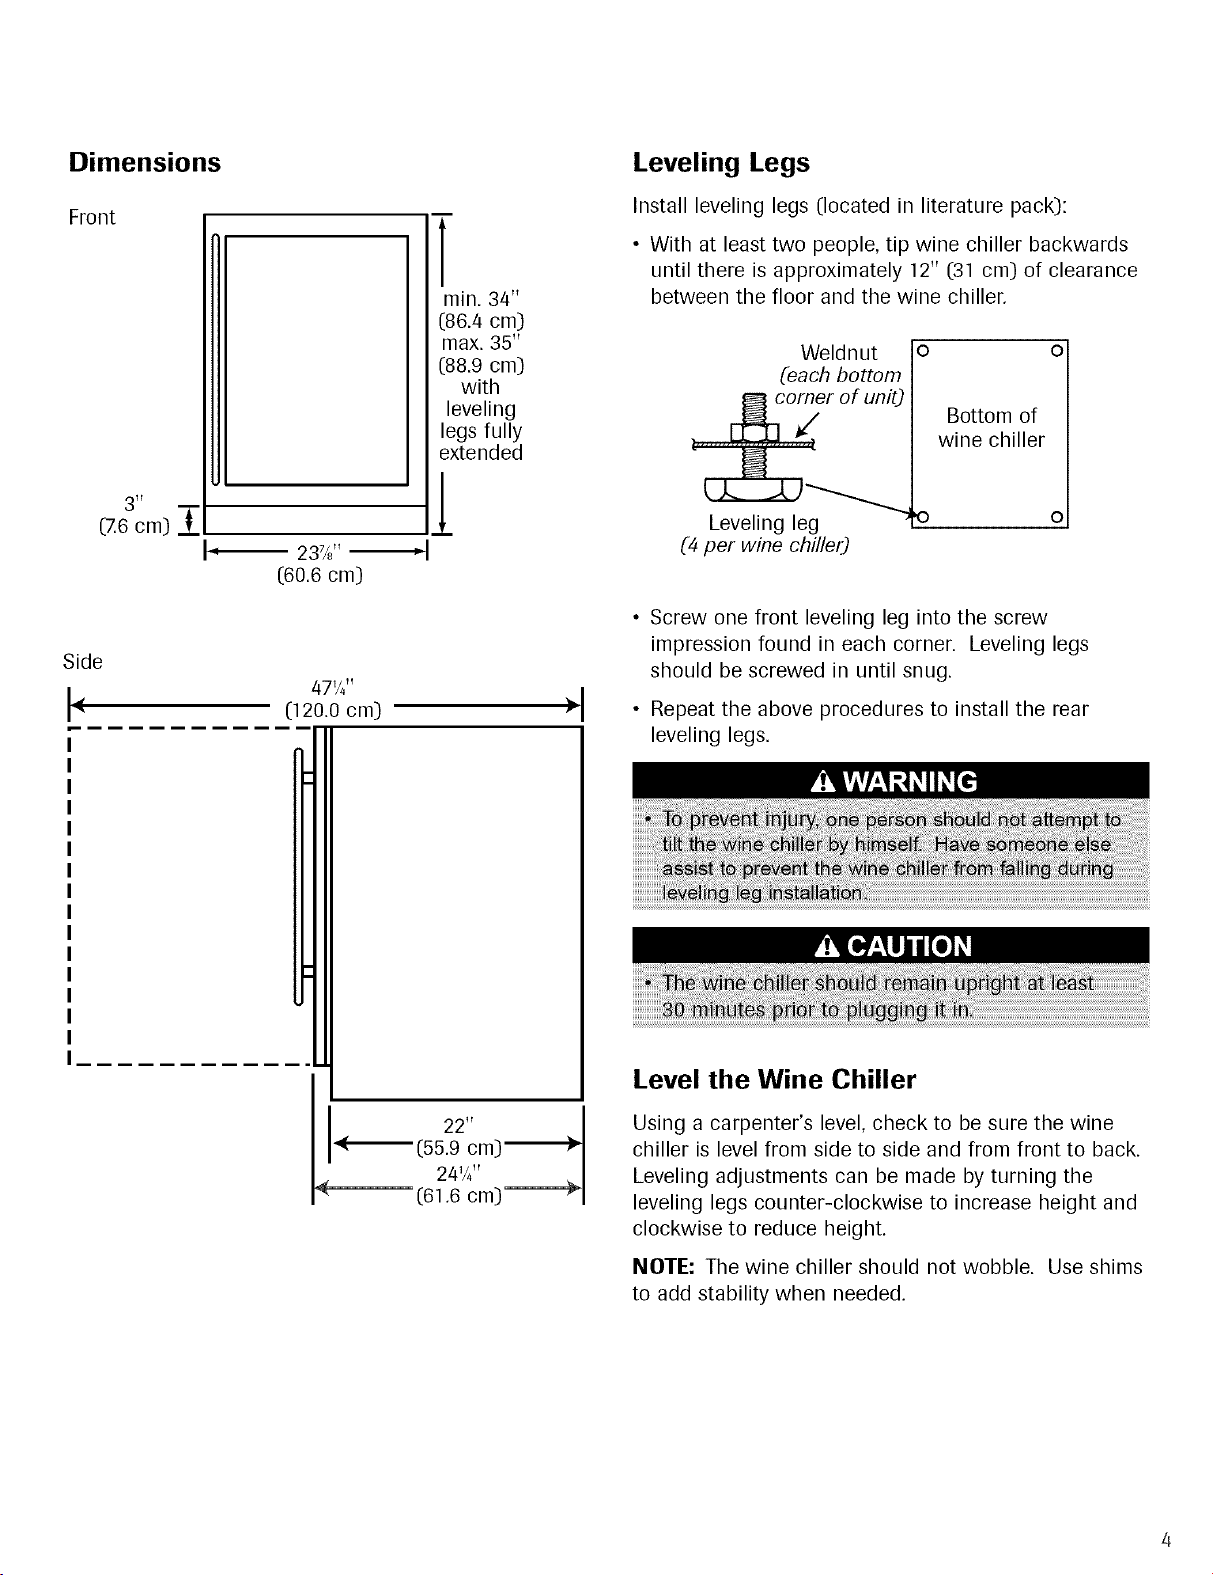
Dimensions
Front
H
(Z6 cm) i
237/8"---_
(60.6 cm)
T
min. 34"
(86.4 cm)
max. 35"
(88.9 cm)
with
leveling
legs fully
extended
1
Side
(
Leveling Legs
Install leveling legs (located in literature pack):
• With at least two people, tip wine chiller backwards
until there is approximately 12" (31 cm) of clearance
between the floor and the wine chiller.
Weldnut o
(each bottom
corner of unit)
0
Bottom of
wine chiller
Leveling leg
(4 per wine chiller)
0
• Screw one front leveling leg into the screw
impression found in each corner. Leveling legs
should be screwed in until snug.
• Repeat the above procedures to install the rear
leveling legs.
Level the Wine Chiller
Using a carpenter's level, check to be sure the wine
chiller is level from side to side and from front to back.
Leveling adjustments can be made by turning the
leveling legs counter-clockwise to increase height and
clockwise to reduce height.
NOTE: The wine chiller should not wobble. Use shims
to add stability when needed.
Loading ...
Loading ...
Loading ...